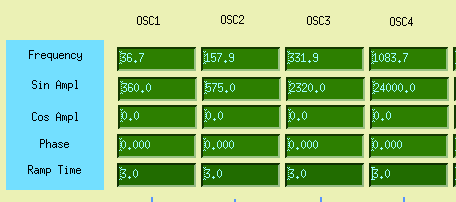
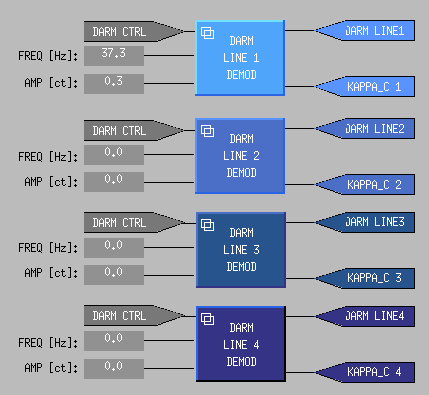
Search criteria
Section: H2
Task: PSL
This afternoon I went into the LVEA (HAM2 clean room area) and canned & stored the old unit of the ISS PD - s/n S1202971. This unit was uninstalled on May 13th, 2026 and replaced with a new unit (S1202965) - see LHO alog 90237 for details.
I have moved this old unit (s/n S1202971) to the vacuum prep area of the optics lab (OSB) and stored it in the blue cabinet.
Please see pictures attached below for reference.
Good news is that we're done with the alignment of the ISS path. Pictures and details are to follow.
Then I reinstalled the last IFO REFL baffle right in front of the HAM2-HAM1 septum window. (The baffle was removed after marking the exact position using three temporary dog clamps on the ISI on day 1 because it was in the way, I was supposed to record that in alog 90158 but forgot. I'm absolutely sure that the position of the baffle was restored within 0.1mm of the original position.)
Bad news is the IFO REFL was clipped on that baffle. 00 mode flash isn't clipped that much but horizontal modes certainly are. That was not THAT surprising because the IMC alignment was/is not great (see my comment 90224). This looks to me that the uncontrolled degree of freedom of the IMC is wrong regardless of the reason why a huge alignment change had to be made to center the MC2 TRANS QPD.
Good news is the ISS path alignment is not impacted by that, at least greatly, because we made sure that the beam hit the right location of IM4 TRANS as well as ISS array QPD before we did anything in the ISS path. Note that the baffle clipping the beam is not in the ISS path.
In other words,
However, since we don't want to revisit HAM2 once we close it, I'd like to understand what's going on for the IMC/IFO alignment.
For location of things, refer to HAM2layout_annotated.png. Blue line = IMC reflection. Red line = IMC transmission. Orange line = IFO REFL rejected by the IFI. Green things are baffles (two-hole baffle and the last IFO REFL baffle are circled in green).
The alignment status at the start of Thursday morning:
The beam was very high on the two-hole baffles but was OK on the input hole of the ISS array. See alog 90237, see this picture as well as this, and this video. This just meant that we were shooting down the beam from the 1" lens toward the center of the array QPD.
Work done on Thursday:
We moved the beam down using the two pico mirrors such that ultimately the beam goes through the center of the input hole of the array and reasonably centered on QPD.
Detailed procedure was:
We have found no unexpected behavior here, I was surprised that the process was easy and things made sense given the difficulty people had in the past to improve alignment of the array in vacuum with the old unit. That's probably because the beam was already clipping back then.
The only thing was that the YAW actuator of the second pico mirror didn't have much range to start with even before we moved anything. At some point it didn't hit its end of the range but was close (2nd_pico_position_before.jpg). Since we need a healthy headroom for adjustment both ways, I relieved the pico by mechanically rotating the pico mirror assy (2nd_pico_position_after.jpg).
IFO REFL beam was clipping on the baffle:
This is for FAMIS #39758.
Laser Status:
NPRO output power is 1.841W
AMP1 output power is 70.55W
AMP2 output power is 138.4W
NPRO watchdog is GREEN
AMP1 watchdog is GREEN
AMP2 watchdog is GREEN
PDWD watchdog is GREEN
PMC:
It has been locked 27 days, 19 hr 55 minutes
Reflected power = 27.29W
Transmitted power = 103.6W
PowerSum = 130.9W
FSS:
It has been locked for 0 days 2 hr and 22 min
TPD[V] = 0.484V
ISS:
The diffracted power is around 4.3%
Last saturation event was 0 days 21 hours and 25 minutes ago
Possible Issues:
PMC reflected power is high
F. Clara, J. Kissel, S. Koehlenbeck, J. Oberling, M. Pirello D2400110 Today we picked up where we left off with the install of SPI into H1. Where we last left things, we'd installed a new SPI pick-off of ALS/SQZ beam in Apr 2025 (see ECR E2400083 and results in LHO aLOGs 83989, 83996, 83978). Back then, we had ended the work with the input to the fiber collimator within the PSL dumped. With Jason and Sina in the PSL, we confirmed that the SPI path was still blocked. However, we also realized/remembered/confirmed that the entire ALS/SQZ/SPI path had 25% less power -- We've been running the PSL at lower power allocation downstream of the PMC since Sep 2025 to prevent issues we'd found with the currently installed EOM after a power outage triggered a dust monitor to spew out dust into the PSL (see that saga in e.g. LHO:87109 LHO:86966). They found the power at the SPI pick-off was 140 [mW] instead of the 188 [mW] we left in Apr 2025 (see LHO:83996). (Using labels in the half-up-to-date drawing D1300348) Jason and Sina rotated ALS-HWP2 upstream of ALSPBS01 to restore the nominal 50 [mW] into the ALS/SQZ pick-off and ~200 [mW] (190 [mW] measured). This means there's ~50 [mW] less out to ALS / ISCT1 than before today. Then with the SPI pickoff still dumped, we installed a 30 [m] patch cord*** from the PSL optical table, out the mouse hole between the +X wall of the PSL enclosure and HAM1, then up running along the upper racks to waterfall down at SUS-H2. The fiber sits within the typical orange tubing. Per D2400110, this is SPI_PSL_001, and it's labeled as such on both ends. After install, I connected the SUS-R2 end to a Thorlabs S121C power meter with S120-APC2 fiber adapter. With this installed (making the system laser safe at SUS-R2 end), Jason/Sina unblocked the SPI pickoff input. With 190 [mW] in, we measure 187 [mW] out on the other end. 98% transmission, pretty excellent. Almost unbelievably excellent but we weren't rigorous with our uncertainty and systematics. Happy with this result, we then blocked the SPI path again, and re-capped the SUS-R2 end for final dressing in the racks. We'll unblock again when we're read to connect it to the Laser Prep Chassis. ***Patch cord details: Manufacturer DIAMOND DIAMOND Part Number: ENS/1094388 Customer Part Number: 9711228 Patchcord SM L=30 PM 2xFC 2mm APC (i.e. 2mm narrow key FC/APC on both ends) tran 6,6/125/245 PAND 980nm
J. Oberling, S. Koehlenbeck 2026-03-27 #BelatedaLOG During this power measurement, I made the rookie mistake of overlooking the PM100D power meter console's laser wavelength setting -- and not taking a picture of the display during the measurement. Today, we both (a) retook the measurement at 1064 [nm] with 189.3 [mW] input, and found 173 [mW] output. (b) confirmed that at 532 [nm] the output read as 188 [mW]. For now we set the nominal power into the laser prep chassis as 173 [mW]. After this measurement, we took this same power meter (S121C) and fiber adapter (S120-APC2) into the optics lab and instead used the fiber-coupled NPRO we'd been using to test ISIK in there. We measured the power out of the fiber (i) with it fiber-coupled in the same way as the SPI_PSL_001 measurement, and (ii) using an addition PAF2-5C collimator to project the beam into free space on to the power meter. We set the FC-NPRO's power to 177 [mW] in the (i) configuration, but then measured 140 [mW] in the (ii) configuration. This leads us to suspect that the S120-APC2 + S121C system -- a reflective Si diode, with a shiny metal adapter -- is errantly reporting more power than there really is. We'll repeat the measurement of SPI_PSL_001 another day with a thermal power meter to arrive at our final number.
J. Kissel, R. Short, J. Oberling This is the first installment of aLOGs documenting the setup of a new stand-alone 1064 nm NPRO laser system whose current "end game" intent is to provide ~100 [mW] of fiber-coupled p-pol light to the SPI laser prep chassis. Step 1: Gathering materials, find what optics / mounts we had vs. what would be need, and physically layout the plan. Jason lets Ryan and I know that there are three NPROs in the optics lab, two of which are PSL spares that cannot be used. The remaining laser is S/N 1661, the laser used in the PSL during O3 which is *functional* but was briefly installed during O4 circa Fall/Winter 2024 then removed from use in the PSL because of reported glitching / incompatibility with the frequency stabilization servo (FSS) issues -- see the bottom of LHO:81391 for a nice summary, and LHO:81409 for record of its removal. Inspired by the setup at Stanford Sina shared with us, we're looking to build up the following system to accomplish the goal: - NPRO (presumed to be elliptically polarized with Is / Ip = 5:1) - QWP (to linearize the polarization) - HWP1 (to rotate the polarization into horizontal) - FI (accepts horizontal linear polarization, to ensure back-reflections from down-stream components don't seed the NPRO causing glitches/mode hopes/frequency noise) - HWP2 (to rotate the FI output polarization into the desired amount of vertical polarization -- aka the desired amount p-polarization) - PBS (to filter out and dump the unneeded horizontal / s-pol light, and transmit the desired power of p-pol) - SM1 (one of two steering mirrors to align the beam into the fiber collimator) - L1 (the single-lens mode-matching solution to convert the NPRO beam into what the fiber collimator needs) - SM2 (two of two steering mirrors for alignment into the fiber collimator) - 50:50 PWR BS (45 [deg] AOI, optimized for p-pol; to provide a pick-off port for live power measurement) - Fiber Collimator Ryan started with a 24" by 12" breadboard that was lying around in the optics lab. He build up a makeshift stand from three posts and dogs in the lower left corner such that the S/N 1661 NPRO projects the beam at 4" height. The 0.5" thick breadboard has a 1 inch hole pattern offset by 0.5" from the edges. I'll refer to this grid as having axes "m" and "n" where the m-axis are the "row" holes running from 0 to 23, and the "column" n-axis holes run from 0 to 11. I chose (m,n) breadboard coordinates so as to not confuse them with traditional beam profile coordinates of (z [propagation distance], x (transverse horizontal), y (transverse vertical)). Thus, the NPRO being in the "lower left" means it projects the beam along the m = 3 row, and the front face of the NPRO is sitting at n = 8. We'll call this beam position z = 0. We then proceeded to gather as much as we could of optical components from the optics lab drawers, and ended up with this pictured preliminary version of the setup. Step 2. Power up the NPRO. Here's were we ran into our first snag. Normally, NPROs are paired/tuned with specific controller boxes. However, when Ryan turned on the S/N 1661 laser with the S/N 1661 control box, the crystal temperature readback reported the temperature was quickly, linearly rising well beyond the desired temperature of 24.7 [deg C]. At ~42 [deg C], (but still below the internal automatic watchdog threshold of 50 [deg C]), Ryan knew something was wrong and turned it all off. He repeated the turn on just in case, and it did the same. After conversing with Jason, we figure it's good enough to run with one of the other controllers for now, and in the mean time figure out how what's wrong and repair the S/N 1661 controller. So, we're running with the S/N 7974, and things seem fine. Laser Diode Temp Setup: Diode 1 33.7 [deg C] Diode 2: 33.1 [deg C] Laser diode injection current readback 2.08 [A] (for both diodes) Crystal Temp setting is 24.7 [deg C] We measured the output power*** with no optical elements at all as 1.820 +/- 0.005 W (not noisey, but a slow drift around). Good enough! Onward and upward! *** Power measured by ThorLabs power meter Model S302C SN 111149 Sensing factor of 316.25 [mV/W] (last calibrated Feb 3 2012).
We replaced the failed +/-12V Kepco supplies in VDD-C6 U34 which power the PSL dome cameras
U34_LHS: +12V supply S1201947 removed due to failed fan, replaced with upgraded supply S1202017
U34_RHS: -12V supply S1201992 removed due to failed fan, replaced with upgraded supply S1300289
F. Clara, M. Pirello
This is for FAMIS #39750.
Laser Status:
NPRO output power is 1.841W
AMP1 output power is 70.43W
AMP2 output power is 139.4W
NPRO watchdog is GREEN
AMP1 watchdog is GREEN
AMP2 watchdog is GREEN
PDWD watchdog is GREEN
PMC:
It has been locked 0 days, 21 hr 23 minutes
Reflected power = 27.19W
Transmitted power = 103.9W
PowerSum = 131.1W
FSS:
It has been locked for 0 days 18 hr and 54 min
TPD[V] = 0.4791V
ISS:
The diffracted power is around 4.0%
Last saturation event was 0 days 0 hours and 0 minutes ago
Possible Issues:
PMC reflected power is high
Jennie W, Jason O, Masayuki N, Keita K, Jim W,
Summary: To check the function of the new EOM in chamber we made a measurement of the modulation indexes by locking the IMC and aligning the beam to AS_C with SR2. We couldn't get a good measurement of the sideband heights but this is probably due to the RF power being down by a factor of 100 from nominal. Will check with EE/Daniel on Monday.
First order of business was checking for stray beams at 100mW input power. Jason moved the BD we already placed for JM2 as we had moced this mirror position yesterday. We also put a new beam dump right after unused JAC port (output side there is tranismission through the curced mirror).
After this we turned the power up to 1W.
Lastly we found a stray beam exiting the table in the -Y direction, this was traced to the JAC REFL path. The REFL beam was hitting the side of a beam dump (near the -X side/PSL of the table) which is meant to cath a beam reflecting off the SEPTUM plate. This beam reflected off the beam dump causing a stray beam. We re-aligned the REFL path so the beam does not do this and instead bounces off the three REFL path steering mirrors and heads into a previously placed beam dump for this purpose on the -Y side of the table. This path will have to be re-aligned in order for the beam to get onto the IOT1 table.
No further stray beams were found so Jason de-energised the waveplate.
Photos to come.
After realising that the beam did not reach the AS_C,A and B QPDs yet we came to the control room to re-align to the output port. This is with the ITMY, PRM and SRM mirrors mis-aligned to allow us to mode scan the OMC in the 'single bounce' IFO configuration.
After Jim re-isolated HAM4,5 and 6 and BSC2 for us we were able to use SR2 to bring back the alignment to AS_C and then turn on the DC centering loops for AS_A and AS_B.
The OMC ASC did not work at first as the suspensions were railed. I cleared the ASC history, this did not help. We cleared the locking filter banks for OM1-3 and this unrailed the outputs and allowed us to turn on the OMC ASC.
We took an OMC scan at 1W input power, shown here. Roughly calibrated into MHz with the known FSR.
We cannot identify the 45MHz or 9MHz peaks, but after checking we realied that these RF driver powers were lowered 15 days ago. See image.
We will come back to this Monday.
Jason put back the rotation stage, locked it out and closed the light pipe.
[Jason, Jennie, Masayuki]
Tagging for EPO
TITLE: 12/26 Day Shift: 1530-0030 UTC (0730-1630 PST), all times posted in UTC
STATE of H1: Planned Engineering
OUTGOING OPERATOR: None
CURRENT ENVIRONMENT:
SEI_ENV state: MAINTENANCE
Wind: 25mph Gusts, 16mph 3min avg
Primary useism: 0.05 μm/s
Secondary useism: 0.90 μm/s
QUICK SUMMARY:
Cameras:
Everything looks fine currently.
Lights were left on in the Woodshop & OSB 163, ifsomeone is heading to site.
SEI: Looks as I'd expect it to look. HAM7 is red because it's had people in and out of it since before the break. I imagine leaving that watchdog tripped is fine.
SUS: Seems to be looking reasonable as well considering the OPO and Jack work that was being done before break.
PSL Status:
Laser Status:
NPRO output power is 1.84W
AMP1 output power is 70.51W
AMP2 output power is 139.4W
NPRO watchdog is GREEN
AMP1 watchdog is GREEN
AMP2 watchdog is GREEN
PDWD watchdog is GREEN
PMC:
It has been locked 16 days, 17 hr 48 minutes
Reflected power = 25.41W
Transmitted power = 106.2W
PowerSum = 131.6W
FSS:
It has been locked for 2 days 23 hr and 15 min
TPD[V] = 0.5254V
ISS:
The diffracted power is around 3.7%
Last saturation event was 2 days 22 hours and 25 minutes ago
Possible Issues:
PMC reflected power is high
VEA Temps:
Betsy, Rahul
We found that SUS JM1 had a faulty quadrupus cable, which we replaced it today. Next, I took OLC for both JM1 and JM3 in HAM1 chamber. I applied the offsets, gains and then centered the BOSEMs - and they look good. Next, I will start checking the health of the electronics chain and the suspension itself (i.e. by taking the transfer function measurements).
The offsets and gain for JM1 is recorded in this screenshot - accepted in the SDF (safe).
The offsets and gain for JM3 is recorded in this screenshot - accepted in the SDF (safe).
Oli, Rahul
We started damping both the suspensions - found that the voltmons were not working (Dave found that their gains were set to zero).
With voltmons ON, both the suspensions were damping fine - no overflows on this 28bit DAC.
Adding pictures of JM1 and JM3 I took today.
Tagging EPO for JM photos
For the upcoming ISS array swap, we plan to bypass the IMC, which is known to be a pain, but we need a stable beam for the array alignment.
Once the corner volume is vent, we use the QPD on the old array and IMC-IM4_TRANS as the initial reference for bypassing the IMC. Once IMC is bypassed, we will center REFL WFS BEFORE removing the old array and record the RM1/RM2 PIT and YAW. This way, even if we somehow suspect e.g. the pointing of the beam going to the IM4 moved after removing the old array, we can still restore the pointing by looking at the REFL WFSs in addition to IM4.
We measured the beam positions on these QPDs today even though we'll repeat this later.
IFO configuration:
Arrow ("->") means before and after the REFL centering servo (DC1 and DC2) was turned ON:
| PSL-ISS_SECONDLOOP_QPD | IMC-IM4_TRANS | ASC-REFL_A_DC | ASC-REFL_B_DC | SUS-RM1-M1_DAMP INMON | SUS-RM1-M1_DAMP INMON | |
| PIT | -0.814 | 0.366 | -0.884 -> 0 | -0.995 -> 0 | 293 -> 168 | -363 -> 68 |
| YAW | 0.655 | -0.146 | 0.590 -> 0 | 0.220 -> 0 | -176 -> -214 | 277 -> -70 |
Septum cover is left OFF but the PSL light pipe was closed after this. REFL centering was turned off but I didn't bother to offload the ASC output to RM sliders.
REFL WFS nubmers as of now are not super meaningful as we'll still have to lock HAM2 down, which potentially change the relative alignment between HAM1 and HAM2. (But it's good that the beam is still hitting REFL WFSs after HAM1 was locked down even though Jim noted that the ISI position of HAM1 is not good. )
I'll open the light pipe tomorrow and quickly repeat the measurement after Jim locks down HAM2 HEPI.
Jim locked HAM2 HEPI today. I opened the PSL light pipe and locked IMC, and the beam was already reasonable on REFL WFSs without centering servo.
I'm convinced at this point that Jim does a good job that the angle change won't be large enough to lose the beam in HAM1 even after Jim locks down HAM2 in air. We will very likely find the beam on REFL WFSs after bypassing the IMC using ISS array QPD and IM4 trans.
As before, "->" means before and after the refl centering was turned ON.
| ASC-REFL_A_DC | ASC-REFL_B_DC | SUS-RM1_M1_DAMP INMON | SUS-RM2_M1_DAMP INMON | |
| PIT | 0 -> 0 | -0.39 -> 0 | 190 -> 174 | 108 -> 14 |
| YAW | 0 -> 0 | 0.07 -> 0 | -210 -> -214 | -69 -> -59 |
After this,
Betsy, Fil, Rahul
Today we kicked started the installation activities in HAM1 chamber for the Jitter Attenuation Cavity (JAC). Given below are the things we placed on the ISI table - they are all roughly positioned and dog clamped.
1. Tip Tilt JM1 - now connected to electronics chain, having some issues with the bosem adc counts etc, will continue looking into it.
2. Tip Tilt JM3 - now connected to the electronics chain, bosem centered, will proceed for health checks once the chassis and electronics chain looks okay.
3. The two periscopes for the JAC, Type 121 and 132 - assembly report posted by Jennie - 88574.
4. Some optics on Siskiyou mount were also added to the table.
I am attaching pictures which shows the above mentioned things added to the table - and for comparison a picture showing before any addition was (here) made.
Fil also performed group loop checks on JM1 and JM3 and did not find any issues with them.
EPO-Tagging for JAC installation
[Jason, Betsy, Masayuki]
Two arises are installed into HAM1 chamber. They will be used as the alignment reference for new PSL modematching lens installation.
Next step: move to the PSL and install the new mode-matching lens, likely tomorrow. This will break the IMC mode matching; IMC relocking will not be possible until the JAC installation is completed.
Closes FAMIS 27622, last checked in alog 88380
Laser Status:
NPRO output power is 1.86W
AMP1 output power is 70.35W
AMP2 output power is 139.5W
NPRO watchdog is GREEN
AMP1 watchdog is GREEN
AMP2 watchdog is GREEN
PDWD watchdog is GREEN
PMC:
It has been locked 6 days, 14 hr 45 minutes
Reflected power = 24.87W
Transmitted power = 105.8W
PowerSum = 130.7W
FSS:
It has been locked for 0 days 16 hr and 45 min
TPD[V] = 0.5086V
ISS:
The diffracted power is around 4.5%
Last saturation event was 0 days 18 hours and 22 minutes ago
Possible Issues:
PMC reflected power is high
[Joan-Rene Merou, Alicia Calafat, Sheila Dwyer, Anamaria Effler, Robert Schofield] This is a continuation of the work performed to mitigate the set of near-30 Hz and near-100 Hz combs as described is Detchar issue 340 and lho-mallorcan-fellowship/-/issues/3. As well as the work in alogs 88089, 87889 and 87414. In this search, we have been moving around two magnetometers provided to us by Robert. Given our previous analyses, we thought the possible source of the combs would be around either the electronics room or the LVEA close to input optics. We have moved around these two magnetometers to have a total of more than 70 positions. In each position, we left the magnetometers alone and still for at least 2 minutes, enough to produce ASDs using 60 seconds of data and recording the Z direction (parallel to the cylinder). For each one of the positions, we recorded the data shown in the following plotThat is, we compute the ASD using 60s FT and check the amplitude of the ASD at the frequency of the first harmonic of the largest of the near-30 Hz combs, the fundamental at 29.9695 Hz. Then, we compute the median of the +- 5 surrounding Hz and save the ASD value at 29.9695 Hz "peak amplitude" and the ratio of the peak against the median to have a sort of "SNR" or "Peak to Noise ratio". Note that we also check the permanent magnetometer channels. However, in order to compare them to the rest, we multiplied the ASD of the magnetometers that Robert gave us times a hundred so that all of them had units of Tesla. After saving the data for all the positions, we have produced the following two plots. The first one shows the peak to noise ratio of all positions we have checked around the LVEA and the electronics room:
Where the X and Y axis are simply the image pixels. The color scale indicates the peak to noise ratio of the magnetometer in each position. The background LVEA has been taken from LIGO-D1002704. Note that some points slightly overlap with other ones, this is because in some cases we have check different directions or positions in the same rack. It can be seen how from this SNR plot the source of the comb appears to be around the PSL/ISC Racks. Things become more clear if we also look at the peak amplitude (not ratio) as shown in the following figure:
Note that in this figure, the color scale is logarithmic. It can be seen how, looking at the peak amplitudes, there is one particular position in the H1-PSL-R2 rack whose amplitude is around 2 orders of magnitude larger than the other positions. Note that this position also had the largest peak to noise ratio. This position, that we have tagged as "Coil", is putting the magnetometer into a coil of white cables behind the H1-PSL-R2 rack, as shown in this image:
The reason that led us to put the magnetometer there is that we also found the peak amplitude to be around 1 order of magnitude larger than on any other magnetometer on top of one set of white cables that go from inside the room towards the rack and up towards we are not sure where:
This image shows the magnetometer on top of the cables on the ground behind the H1-PSL-R2 rack, the white ones on the top of the image appear to show the peak at its highest. It could be that the peak is louder in the coil because there being so many cables in a coil distribution will generate a stronger magnetic field. This is the actual status of the hunt. These white cables might indicate that the source of these combs is the different interlocking system in L1 and H1, which has a chassis in the H1-PSL-R2 rack. However, we still need to track down exactly these white cables and try turning things on and off based on what we find in order to see if the combs dissapear.
The white cables in question are mostly for the PSL enclosure environmental monitoring system, see D1201172 for a wiring diagram (page 1 is the LVEA, page 2 is the Diode Room). After talking with Alicia and Joan-Rene there are 11 total cables in question: 3 cables that route down from the roof of the PSL enclosure and 8 cables bundled together that route out of the northern-most wall penetration on the western side of the enclosure (these are the 8 pointed out in the last picture of the main alog). The 3 that route from the roof and 5 of those from the enclosure bundle are all routed to the PSL Environmental Sensor Concentrator chassis shown on page 1 of D1201172, which lives near the top of PSL-R2. This leaves 3 of the white cables that route out of the enclosure unaccounted for. I was able to trace one of them to a coiled up cable that sits beneath PSL-R2; this particular cable is not wired to anything and the end isn't even terminated, it's been cleanly cut and left exposed to air. I haven't had a chance to fully trace the other 2 unaccounted cables yet, so I'm not sure where they go. They do go up to the set of coiled cables that sits about half-way up the rack, in between PSL-R1 and PSL-R2 (shown in the next-to-last picture in the main alog), but their path from there hasn't been traced yet.
I've added a PSL tag to this alog, since evidence points to this involving the PSL.
[Joan-Rene, Alicia] We tried yesterday disconnecting the PSL Environmental Sensor Concentrator where some of the suspicious white cables were going, but no change was seen in the comb amplitude. Continuing our search with the magnetometer in the same rack, we found out that the comb is quite strong when the magnetometer is put besides the power supply that is close to the top of the rack:So it may be that these lines may be transmitted elsewhere through this power supply. We connected a voltage divider and connected it to the same channel we were using for the magnetometer (H1:PEM-CS_ADC_5_23_2K_OUT_DQ):
![]()
Out of this power supply, two dark green cables come out, the first one goes to the H1-PSL-R1 rack:
However, the comb did not appear as strong when we put the magnetometer besides the chassis where the cable leads. On the other hand, the comb does appear strong if we follow the other dark green cable, that goes to this object
Which Jason told us it may be related to the interlock system. Following the white cables that go from this object, it would appear that they go into the coil, where we saw that the comb was very strong. We think it would be interesting to see what here can be turned off and see if the comb does disappear.
Closes FAMIS 27538, last checked in alog 87902
Laser Status:
NPRO output power is 1.85W
AMP1 output power is 70.63W
AMP2 output power is 139.9W
NPRO watchdog is GREEN
AMP1 watchdog is GREEN
AMP2 watchdog is GREEN
PDWD watchdog is GREEN
PMC:
It has been locked 9 days, 23 hr 29 minutes
Reflected power = 24.68W
Transmitted power = 106.3W
PowerSum = 131.0W
FSS:
It has been locked for 0 days 8 hr and 51 min
TPD[V] = 0.5364V
ISS:
The diffracted power is around 4.2%
Last saturation event was 0 days 8 hours and 53 minutes ago
Possible Issues:
PMC reflected power is high
Related: https://alog.ligo-wa.caltech.edu/aLOG/index.php?callRep=87729
We disconnected everything from the ISS array installation spare unit S1202965 and stored it in the ISS array cabinet in the vac prep area next to the OSB optics lab. See the first 8 pictures.
The incomplete spare ISS array assy originally removed from LLO HAM2 (S1202966) was moved to a shelf under the work table right next to the clean loom in the optics lab (see the 9th picture). Note that one PD was pulled from that and was transplanted to our installation spare S1202965.
Metadata for both 2965 and 2966 were updated.
ISS second array parts inventory https://dcc.ligo.org/E2500191 is being updated.
Rahul and I cleared the optics table so Josh and Jeff can do their SPI work.
Optics mounts and things were put in the blue cabinet. Mirrors, PBS and lenses were put back into labeled containers and in the cabinet in front of the door to the change area.
Butterfly module laser, the LD driver and TEC controller were put back in the gray plastic bin. There was no space in the cabinets/shelves so it's put under the optics table closer to the flow bench area.
Single channel PZT drivers were put back in the cabinet on the northwest wall in the optics lab. Two channel PZT driver, oscilloscopes, a function generator and DC supplies went back to the EE shop.
OnTrack QPD preamp, its dedicated power transformer, LIGO's LCD interface for QPD and its power supply were put in a corner of one of the bottom shelf of the cabinet on the southwest wall.
Thorlabs M2 profiler and a special lens kit for that were given to Tony who stored them in the Pcal lab.
aLIGO PSL ISS PD array spare parts inventory E2500191 was updated.
I was baffled to find that I haven't made an alog about it, so here it is. These as well as other alogs written by Jennie, Rahul or myself in since May-ish 2025 will be added to https://dcc.ligo.org/LIGO-T2500077.
Multiple PDs were moved so that there's no huge outlier in the position of the PDs relative to the beam. When Mayank and Siva were here, we used to do this using an IR camera to see the beam spot position. However, since then we have found that the PD output itself to search for the edge of the active area is easier.
After the adjustments were made, the beam going into the ISS array was scanned vertically as well as horizontally while the PD outputs were recorded. See the first attachment. There are two noteworthy points.
1. PDs "look" much narrower in YAW than in PIT due to 45 degrees AOI only in YAW.
Relative alignment matters more for YAW because of this.
2. YAW scan shows the second peak for most of PDs but only in one direction.
This was observed in Mayank/Siva data too but it wasn't understood back then. This is the design feature. The PDs are behind an array plate like in the second attachment (the plate itself is https://dcc.ligo.org/D1300322). Red lines show the nominal beam lines and they're pretty close to one side of the conical bores on the plate. Pink and blue arrows represent the shifted beam in YAW.
If the beam is shifted too much "to the right" on the figure (i.e. pink), the beam is blocked by the plate, but if the shift is "to the left" (i.e. blue) the beam is not blocked. It turns out that it's possible that the beam grazes along the bore, and when that happens, a part of the broad specular reflection hits the diode.
See the third attachment, this was shot when PD1 (the rightmost in the picture) was showing the second peak while PD2 didn't.
(Note that the v2 plate which we use is an improvement over the v1 that actually blocked the beam when the beam is correctly aligned. However, there's no reason things are designed this way.)
We used a PZT-driven mirror to modulate the beam position, which was measured by the array QPD connected to ON-TRAK OT-301 preamp as explained in this document in T2500077 (though it is misidentified as OT-310).
See the fourth attachment where relatively good (small/acceptable) coupling was obtained. The numbers measured this time VS April 2025 (Mayank/Siva numbers) VS February 2016 (T1600063-V2) are listed below. All in all, horizontal coupling was better in April but vertical is better now. Both now and Apr/2025 are better than Feb/2016.
| PD number |
Horizontal [RIN/m] |
Vertical [RIN/m] |
||||
| Now |
Apr/2025 (phase NA) |
Feb/2016 (phase NA) |
Now |
Apr/2025 (phase NA) |
Feb/2016 (phase NA) |
|
|
1 |
6.9 | 0.8 | 20 | -0.77 | 34.1 | 11 |
| 2 | 7.1 | 2.7 | 83 | 5.1 | 2 | 25 |
| 3 | 8.2 | 5.5 | 59 | 2.2 | 4.4 | 80 |
| 4 | 8.8 | 2.3 | 33 | 0.30 | 1.1 | 21 |
| 5 | -19 | 5.1 | 22 | 11 | 12.3 | 56 |
| 6 | -14 | 12.9 | 67 | 16 | 30.4 | 44 |
| 7 | -18 | 10.2 | 27 | 2.9 | 42.7 | 51 |
| 8 | -19 | 5.3 | 11 | 12 | 52.1 | 54 |
Phase of the jitter coupling: You can mix and match to potentially lower jitter coupling further.
Only in "Now" column, the coupling is expressed as signed numbers as we measured the phase of the array PD output relative to the QPD output. Absolute phase is not that important but relative phase between the array PDs is important. The phase is not uniform across all diodes when the beam is well aligned. This means that you can potentially mix and match PDs to further minimize the jitter coupling.
Using the example of this particular measurement, if you choose PD1/2/3/4 as the in-loop PD, the jitter coupling of the combined signal is roughly mean(6.9,7.1,8.2,8.8)=7.8 RIN/m horizontally and mean(-0.77, 5.1, 2.2, 0.3) = 1.7.
However, if you choose PD1/3/4/7 (in analog land), the coupling is reduced to mean(6.9, 8.2, 8.8, -18)=1.5 horizontally and mean(-0.77, 2.2, 0.3, 2.9)=1.2.
You don't pre-determine the combination now, you should tune the alignment and measure the coupling in chamber to decide if you want a different combination than 1/2/3/4.
Note, when monotonically scanning the beam position in YAW (or PIT) edge to edge of PDs, some PDs showed more than one phase flips. When the beam is apparently clipped at the edge (thus the coupling is huge), all diodes show the same phase as expected. But that's not necessarily the case when the beam is well aligned as you saw above.The reason of the sign flips when the beam is far from the edge of the PD is unknown but there should be something like particulates on the PD surface.
The QPD was physically moved so the beam is very close to the center of the QPD. This can be used as a reference in chamber when aligning the beam to the ISS array.
After this, we manually scanned the beam horizontally and measured the QPD output. See the 5th attachment, vertical axis is directly comparable to the normalized PIT/YAW of the CDS QPD module, assuming that the beam size on the QPD in the lab is close enough to the real beam in chamber (which it should be).
EPO-tagging for ISS Array work
Summary:
We aligned everything such that none of 8 PDs was excellent but all were OK (we were also able to set up such that 4 pds were excellent but a few were terrible but decided not to take that), we were preparing for putting the array in storage until the installation, only to find that something is wrong with the design of the asymmetric QPD clamp D1300963-V2. It's unusable as is.
QPD clamp doesn't constrain the position of the QPD laterally, and there's a gross mismatch between the position of properly aligned QPD and that of the center hole of the QPD clamp. Because of that, when QPD is properly positioned, one of the QPD pins will touch the QPD clamp and be grounded unless the QPD connector is fixed such a way to pull the QPD pins sideways. Fortunately but sadly, the old non-tilt QPD clamp D1300963-V1 works better, so we'll use that.
Another minor issue, is that there seems to be a confusion as to the direction of the QPD tilt in terms of the word "pitch" and "yaw". The way the QPD is tilted in D1101059-v5 (this is how things are set up in the lab as of now) doesn't seem to follow the design intent of ECR E1400231 though it follows the word of it. After confirming that this is the case with systems, we'll change the QPD tilt direction (or not). This means that we're not ready to put everything in storage quite yet.
None of these affect the PD array alignment we've done, this is just a problem of the QPD.
Pin grounding issue due to the QPD clamp design.
I loosened the screws for the QPD connector clamps (circled in blue in the first attachment) and the output of the QPD preamp got crazy with super large 60Hz noise and large DC SUM even though there was no laser light.
I disconnected the QPD connector, removed the connector clamps too, and found that one pin of the QPD was short circuited to the ground via the QPD clamp (not to be confused with the QPC connector clamps, see 2nd attachment).
Turns out, the offending pin was isolated during our adjustments all the time because the QPD connector clamps were putting enough lateral pressure as well as down such that the pins were slightly bent from the offending side. I was able to reattach the connector, push it laterally while tightening the clamp screws, and confirm that the QPD functioned fine. But this is not really where we wanted to be.
I rotated the QPD clamp 180 degrees (which turns out to make more sense judging from the drawings in the first attachment), which moved the QPD. Since the beam radius is about 0.2mm, if the QPD moves by 0.2mm it's not useful as a reference of the in-lab beam position. I turned the laser on, repositioned the QPD back to where it should be, but the pin on the opposite side started touching. (Sorry no picture.)
I put the old non-tilt version clamp and it was much, much better (attachment 3). It's annoying because the screw holes don't have an angled recess. The screw head is tilted relative to the mating surface on the clamp, contacting at a single point, and tightening/loosening the screw tend to move the QPD. But it's possible to carefully tighten one screw a bit, then the other one a bit, repeat that dozen times or so until nothing moves even when pushed firmly by finger. After that, you can still move the QPD by tiny amounts by tapping the QPD assy by bigger Allen key. Then tighten again.
What's going on here?
In the 4th attachment, you can see that the "center" hole of the QPD clamp is offset by 0.55" (1.4mm) in the direction orthogonal to A-A, and about 0.07" (even though this number is not specified anywhere in the drawing) or 1.8mm in A-A direction. So the total lateral offset is sqrt(1.4^2+1.8^2)~2.3mm. OTOH, the QPD assy is only 0.5" thick, so the lateral shift arising from the 1.41deg tilt at the back of the QPD assy is just 1.41/180*pi*0.5=0.0123" or 0.3mm.
Given that the beam position relative to the array structure is determined by the array itself and not by how the QPD is mounted, 2.3mm lateral shift is impossibly large, something must be wrong in the design. The 5th attachment is a visual aid for you.
Anyway, we'll use the old clamp, it's not worth designing and manufacturing new ones at this point.
QPD tilt direction.
If you go back to the first attachment, the QPD is tilted in a direction indicated by a red "tilt" arrow in the lab as we just followed the drawing.
The ECR E1400231 says "We have to tilt the QPD 1 deg in tip (pitch) and 1 deg in tilt (yaw)" and it sounds as if it colloborates with the drawing.
However, I suspect that "pitch" and "yaw" in the above sentence might have been misused. In the right figure of the 6th attachment (screeshot of ECR unedited), it seems that the QPD reflection hits the elevator (the red 45 degree thing in the figure) at around 6 O'clock position around the eliptic exit hole, which means that the QPD is tilted in its optical PIT. If it's really tilted 1 degree in optical PIT and 1 degree in optical YAW, the reflection will hit something like 7:30 position instead of 6:00.
That makes sense as the design intent of the ECR is to make sure that the QPD reflection will not go back into the exit hole. The 7th attachment is a side view I made, red lines represent the IR beams, yellow lines the internal hole(s) in the elevator, and green lines the aperture of the two eliptical exit holes. Nothing is to scale, but hopefully you agree that, in order to steer the QPD reflection outside of the exit hole aperture, PIT UP requires the largest tilt and PIT DOWN requires the least tilt. We have a fixed tilt of QPD, so it's best to PIT DOWN, that's what I read from the ECR. If you don't know which angle is bigger or smaller, see attachment 8.
Anyway, I'll ask Callum if my interpretation is correct, and will act accordingly.
A followup summary:
Callum and Betsy say that I'm in the best position to judge, so I decided to tilt the QPD in its optical PIT.
Turns out that the QPD was already tilted in QPD's optical PIT so everything is fine(-ish). We'll put the unit in storage tomorrow.
Seems like we were tricked by the part drawing of the tilt washer D1400146, not the assembly drawing D1101059.
Details:
Before rotating anything, I wanted to see if the reflection from QPD could be seen on the aluminum part using the IR viewer, and indeed we could see something. The first attachment shows that some kind of diffraction pattern is hitting the barrel of the 1" 99:1 sampler in PIT. The second attachment shows that the bright spots are gone when Rahul blocked the beam going to QPD, so it's clearly due to the reflection of the QPD. The pattern might come from the gaps at the QPD center. It wasn't clear if the reflection was directly hitting the barrel through AR, or if it hits 99% coating and reflected towards the barrel.
(There was also some IR visible in the input aperture but the beam is much smaller than this aperture, I believe we're seeing the scattered light coming back to this aperture from inside the array structure.)
We pulled the spare tilt washer D1400146-V1 (drawing with my red lines in the 3rd attachment) and measured the depth of the recess at 12 O'clock position (red E in the drawing), 3:00 (B), 6:00 (C) and 9:00 (D) using a caliper. It's a rough measurement, but anyway we repeated the measurement twice and got the following:
| A | B (registration mark) | C | D | |
| Meas 1 | 1.45 mm | 1.21 | 1.45 | 1.70 |
| Meas 2 | 1.41 | 1.21 | 1.49 | 1.71 |
| Average | 1.43 | 1.21 | 1.47 | 1.705 |
Clearly B at the registration mark is the shallowest position and the opposite position D is the deepest. The recess diameter was measured to be 23.0mm (specified as between .906 and .911" or 23.01 to 23.14mm), so the tilt of the recess as measured is (1.705-1.21)/23 ~ 21.5mrad or 1.2 deg, which reasonably agrees with 1.41deg specification and, more importantly, these measurements cannot be explained if the part was manufactured as specified in the drawing.
It seems that the drawing of the tilt washer D1400146 is incorrect or at least doesn't agree with reality, and the assembly drawing D1101059 was correct in that following that will give us the QPD tilt along optical PIT.
Seeing how the QPD reflection hits the barrel of the 99:1 sampler, the ghost beam dumping doesn't look well thought out but that's what it is.
4th picture shows the registration mark of the tilt ring as was set in the lab for future reference.
We've done the last QPD scan (turns out that I happened to set the PIT-YAW angle really well). Data will be posted later. Now we're ready to pack things up.
We "measured" the dimension of the new (non-functional) QPD clamp D1300963-V2 by taking a picture with a ruler.
The offset of the center bore along the line connecting the two screw holes was measured to be about 1.9mm, which agrees pretty well with the above alog where I wrote "(even though this number is not specified anywhere in the drawing) or 1.8mm".