REMOVE SEARCH FILTER
SEARCH AGAIN
Search criteria
Section: LHO
Task: VE
(Travis, Gerardo)
Both valves were opened today, and both of them were set to 55 psi to keep them open, both started going up around 45 psi. No issues noted, aside from the usual hissing at GV6 thru the side opening. Gate annulus was dumped into the ion pump without problems. Turbo pumps were isolated before opening valves, OMC tube, YBM and XBM, all turbo pumps remain on and they will remain on until pressure normalize/settles at the corner. I isolated HAM6 turbo pump yesterday afternoon, and today I shut it off, aux-cart (SS-500) remains connected and on.
Note to all, HAM6-HAM5-HAM7 area remains a "clean" area, relay tube still out, installation is TBD.
(Travis, Gerardo)
The ion pump for HAM1 was incorporated to the HAM volume yesterday, and today the SS-500 pump cart was isolated from the chamber (turbo pump and SS-500 remain on), and as expected the pressure went up and now we are waiting for the ion pump to take over and maintain the vacuum pressure for HAM1. We will be monitoring the progress of the ion pump.
(Travis, Gerardo)
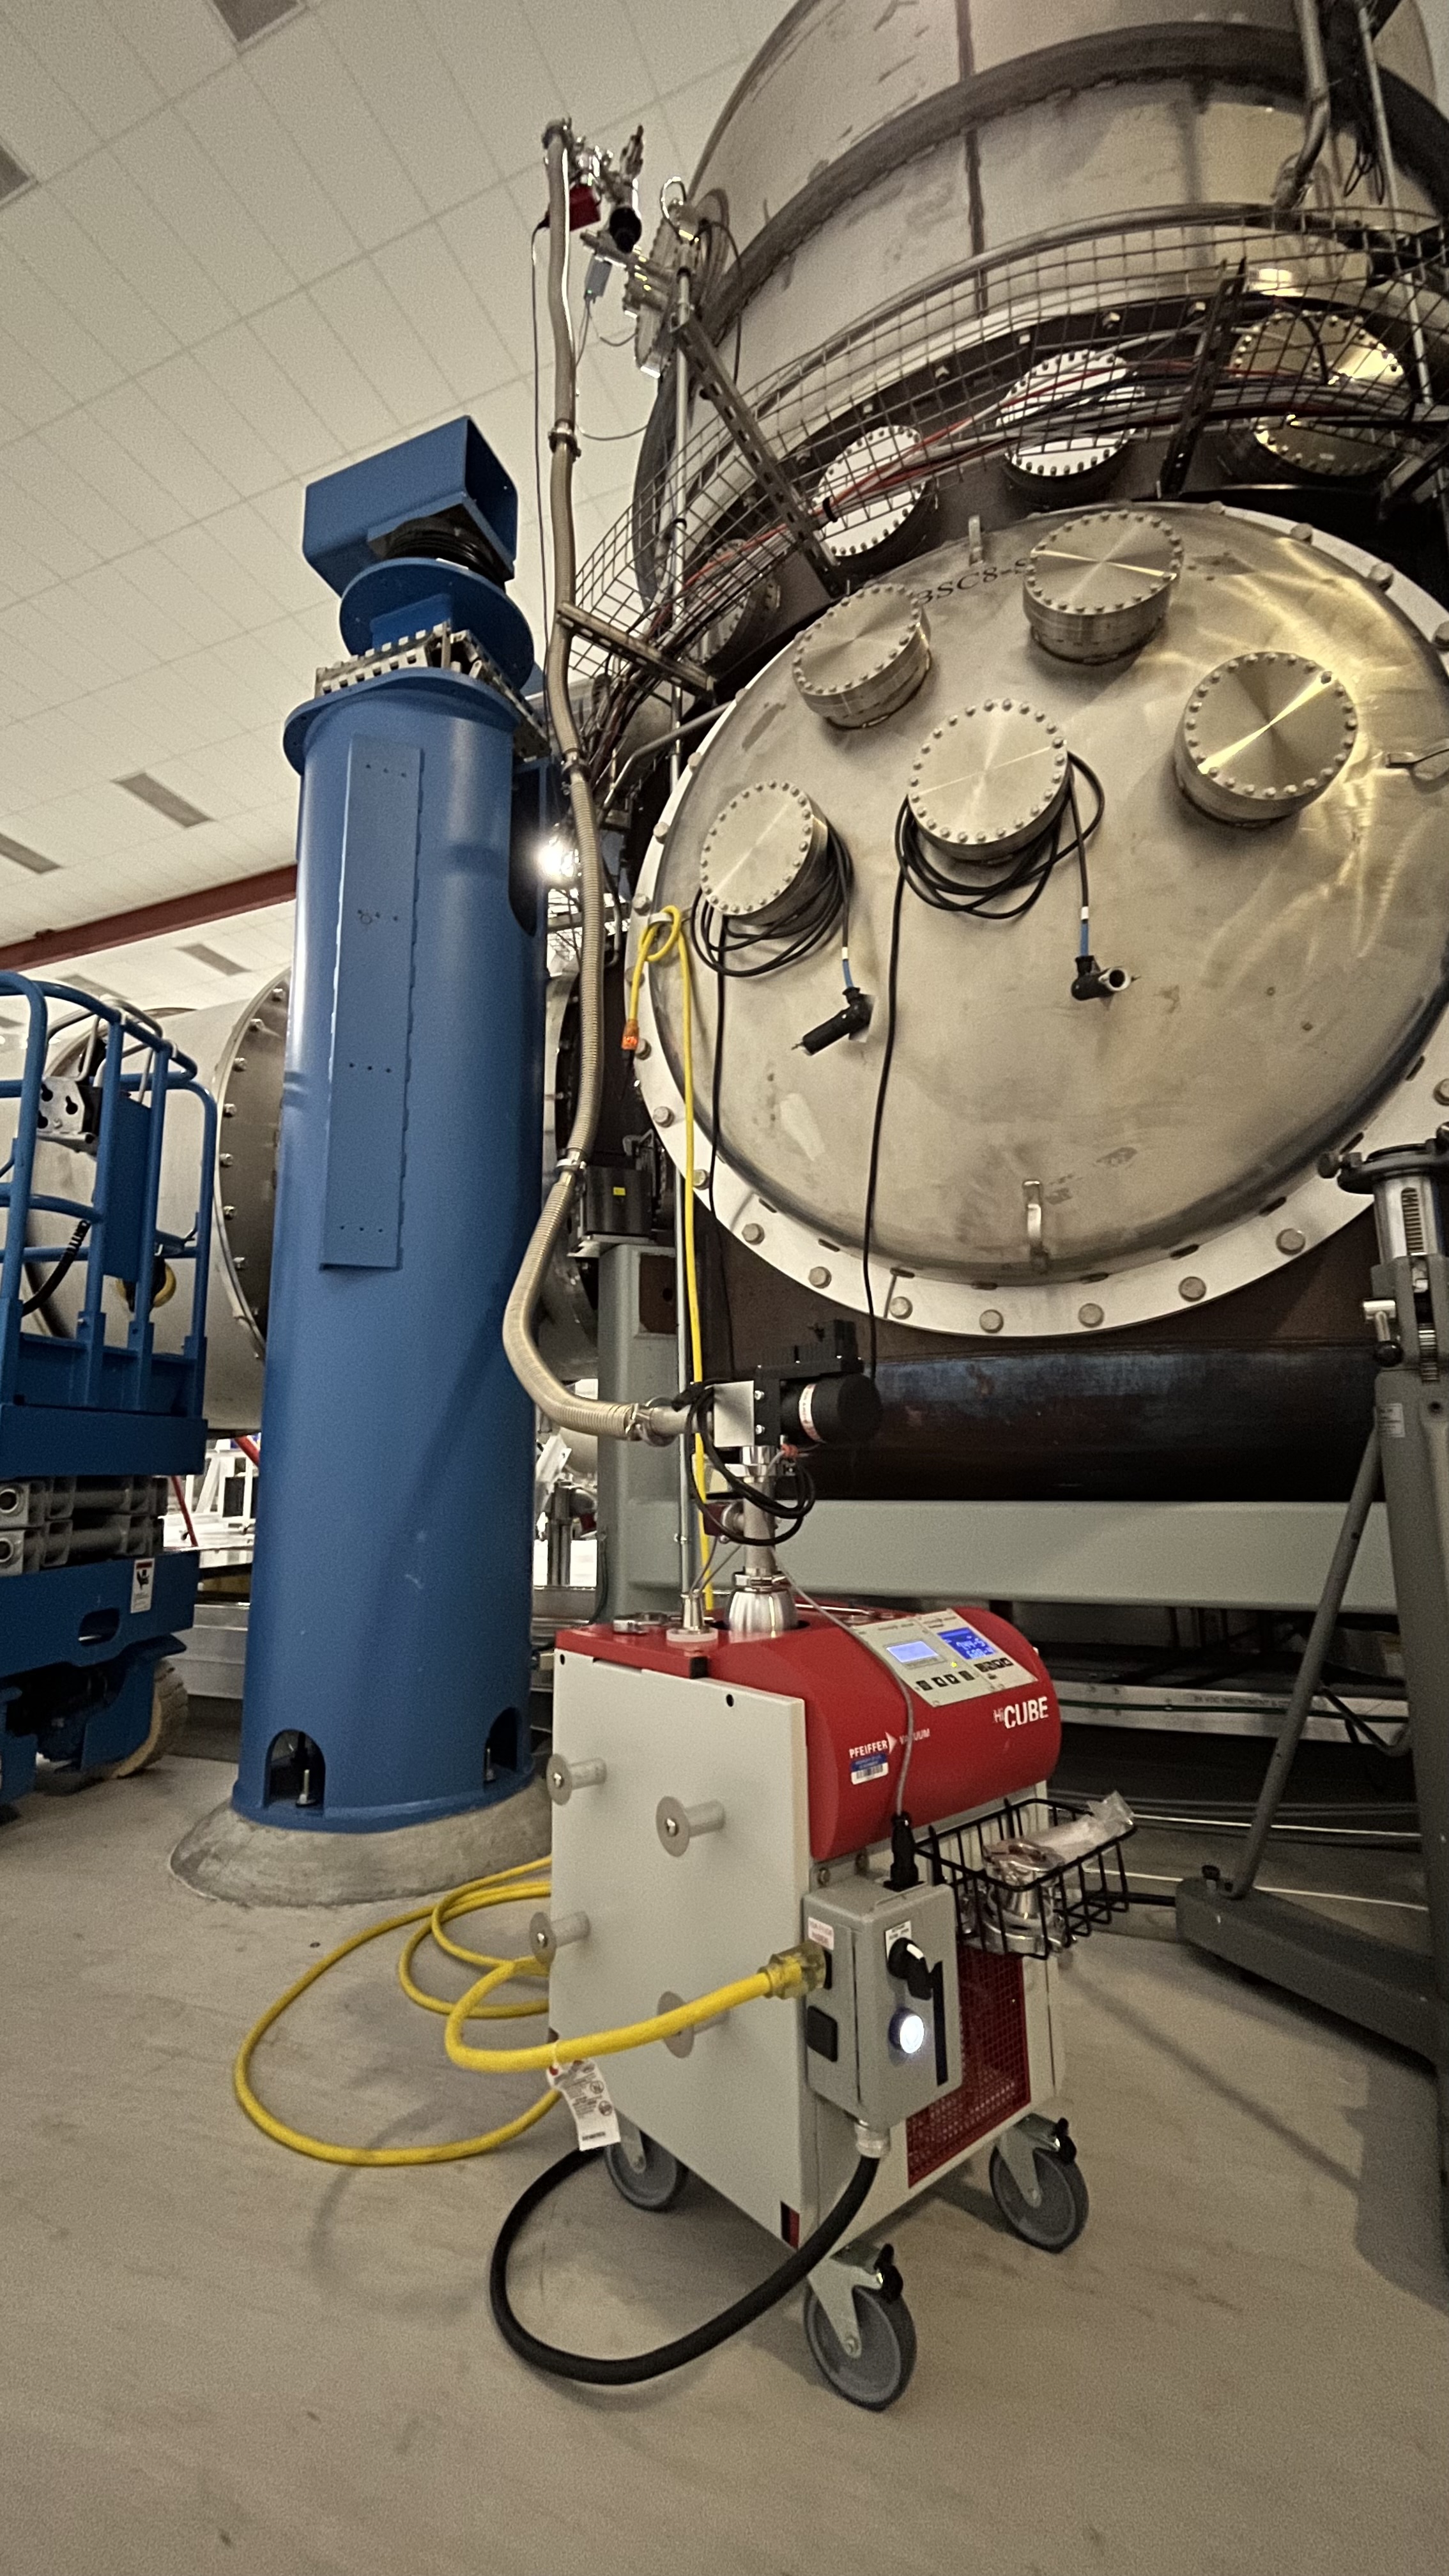
We stopped pumping against the isolation valve for HAM1 turbo, now the turbo needs to spin down before we can disconect the cable from the magnetically levitated turbo pump. The flex hose was removed and the scroll pump was stopped, but needs to remain on until the turbo stops spinning.
Travis removed the aux-cart, SS-500, decoupled cables. Flex hose was removed the previous day. The SS-500 cart then got moved and now is installed on HAM6 turbo.
(Travis, Gerardo)
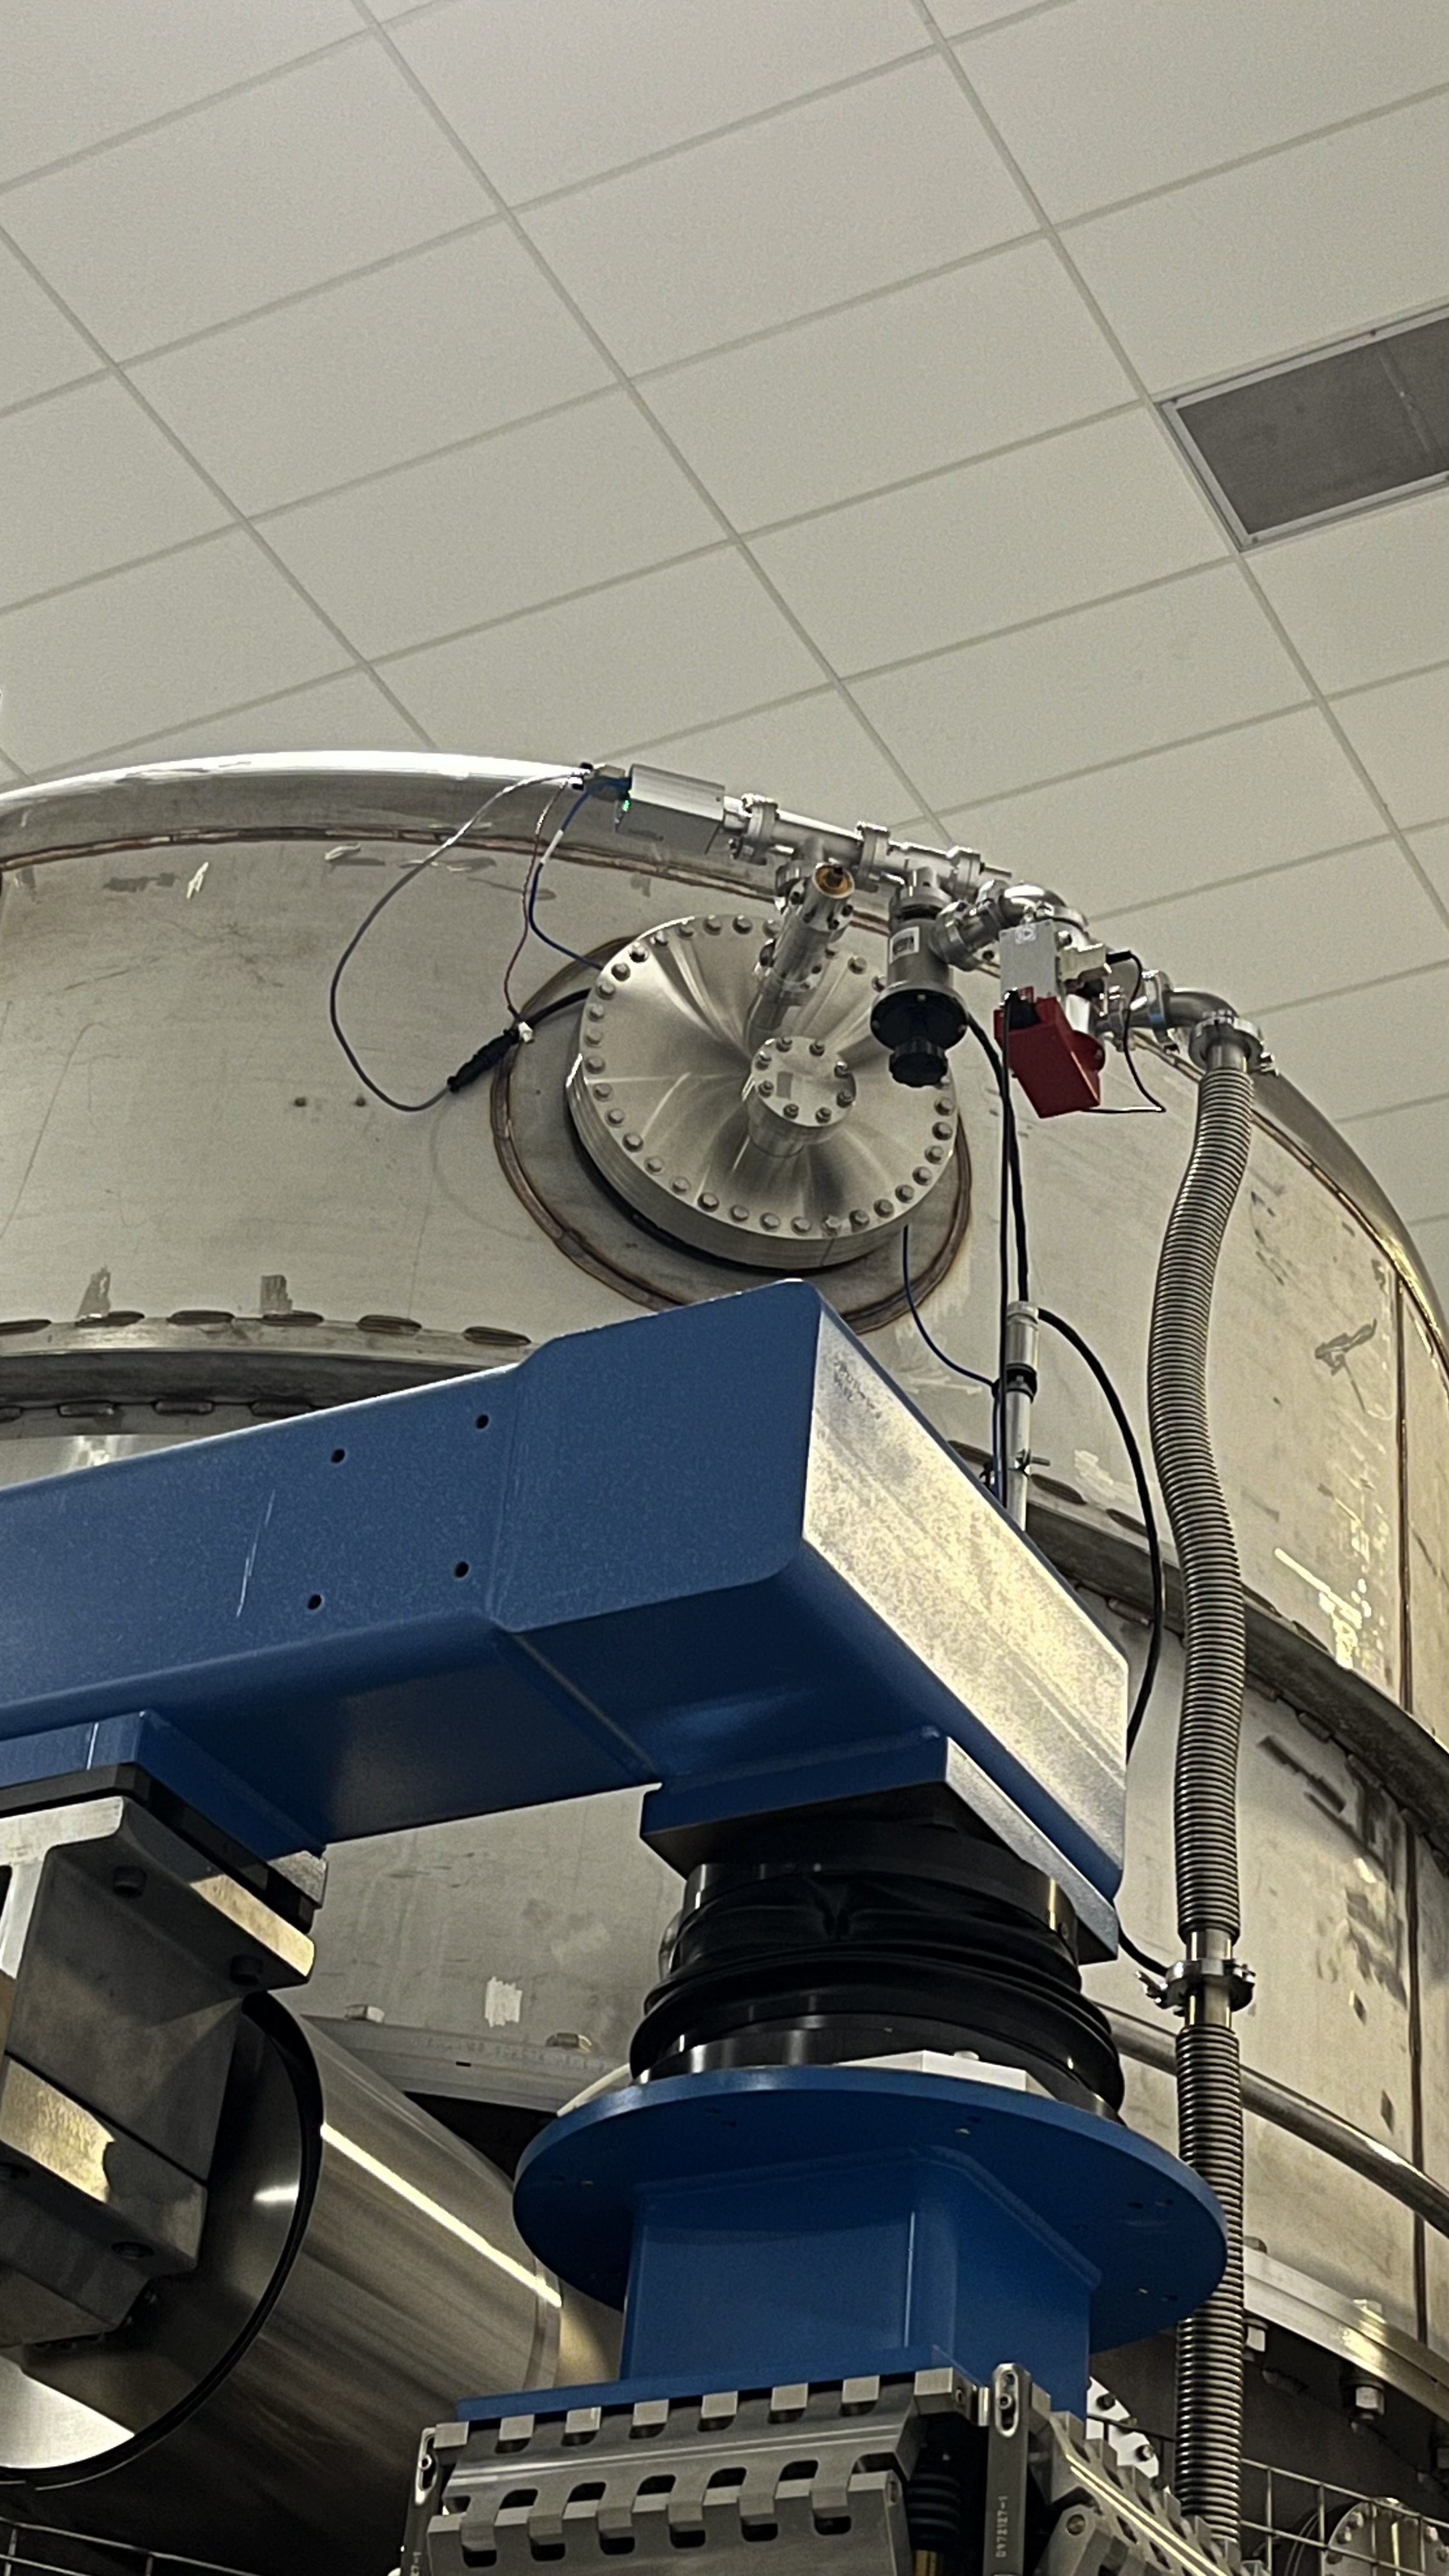
We removed the old gauge a BCG-450 and installed a new one a BPG-552. Since the gauge at this location does not play role with relays and such, the old pigtail did just fine, provided the power to the new gauge. The new gauge is powered on and connected to the same EtherCAT cable as the one that that we removed. Dead volume of this assembly is getting pumped down with a small can turbo pump and an aux-cart, and a very long flex hose, and probably will continue to pump over the weekend.
No issues were encountered while replacing the gauge.
(Travis, Gerardo)
Aux-cart and all other accessories have been removed from this gauge.
We need to leak check the conflat on this new gauge.
(Travis, Gerardo)
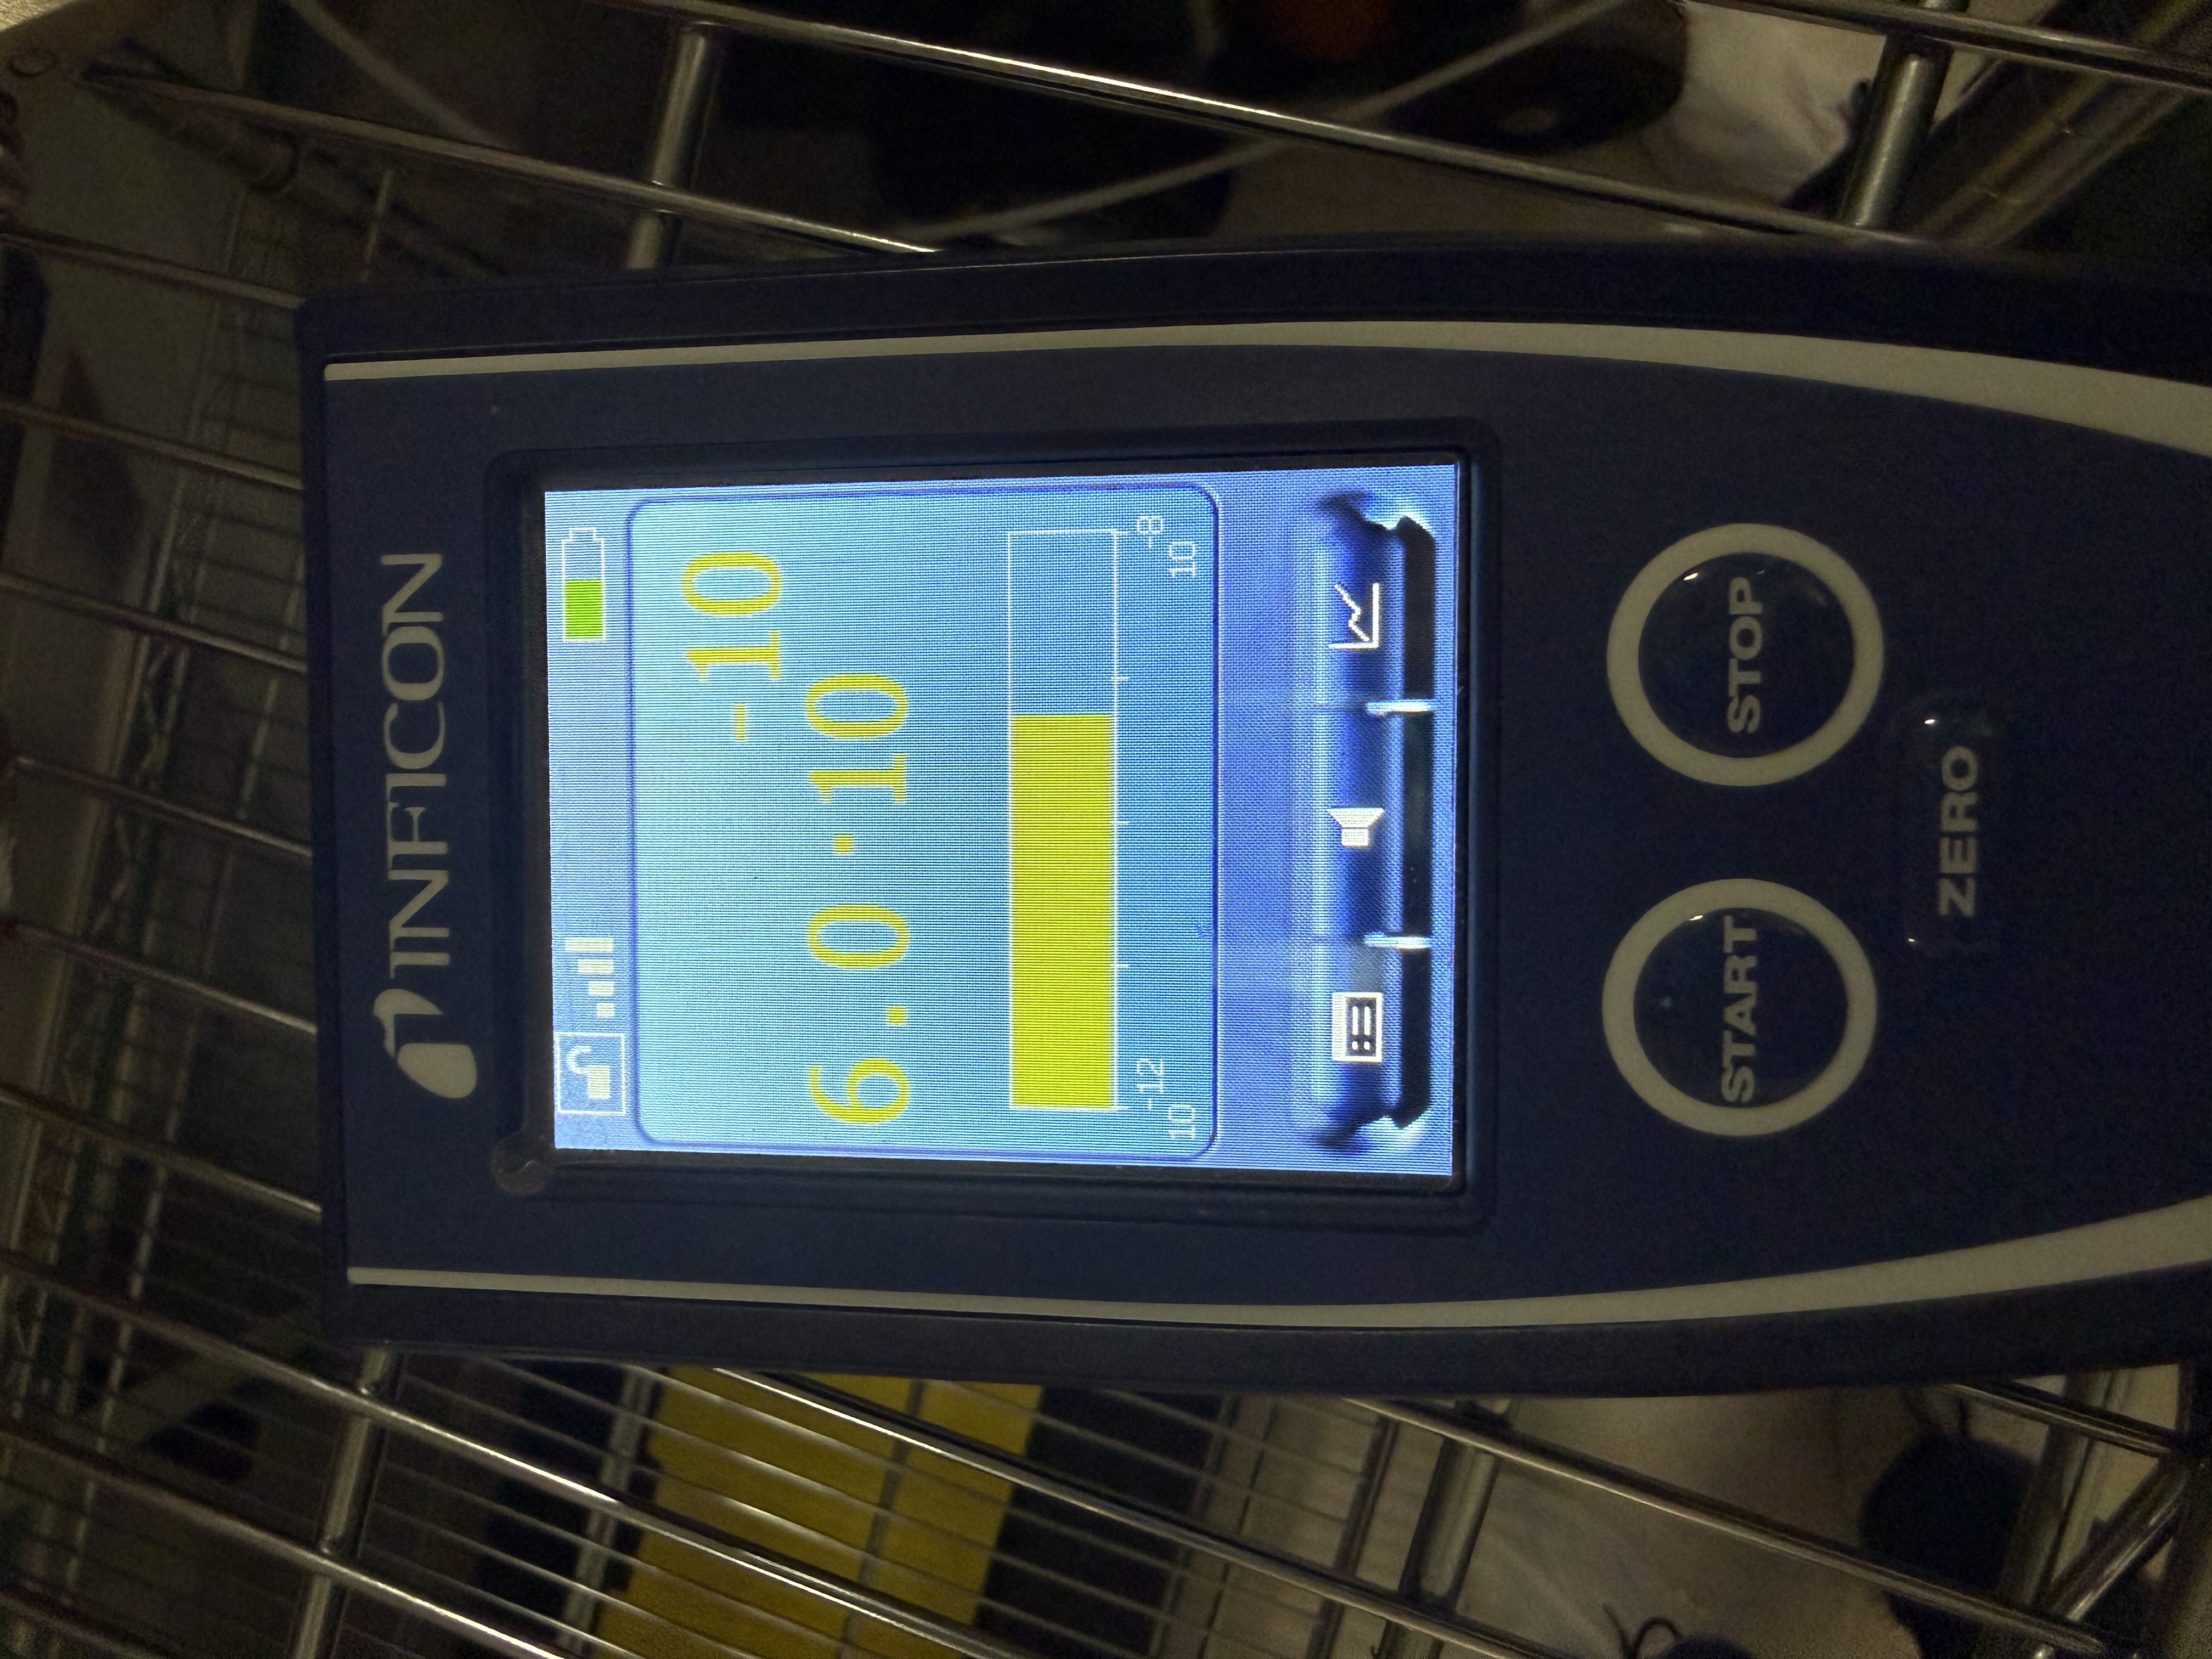
Today we leak checked the 2 3/4" CF joint for the new gauge at PT-180. The leak detector did not detect a leak above the background, we connected the leak detector at the XBM main turbo pump and we sprayed the joint with copious amounts of helium. Helium background of 6.0X10⁻¹⁰ Torr*l/sec.
(Travis, Gerardo)
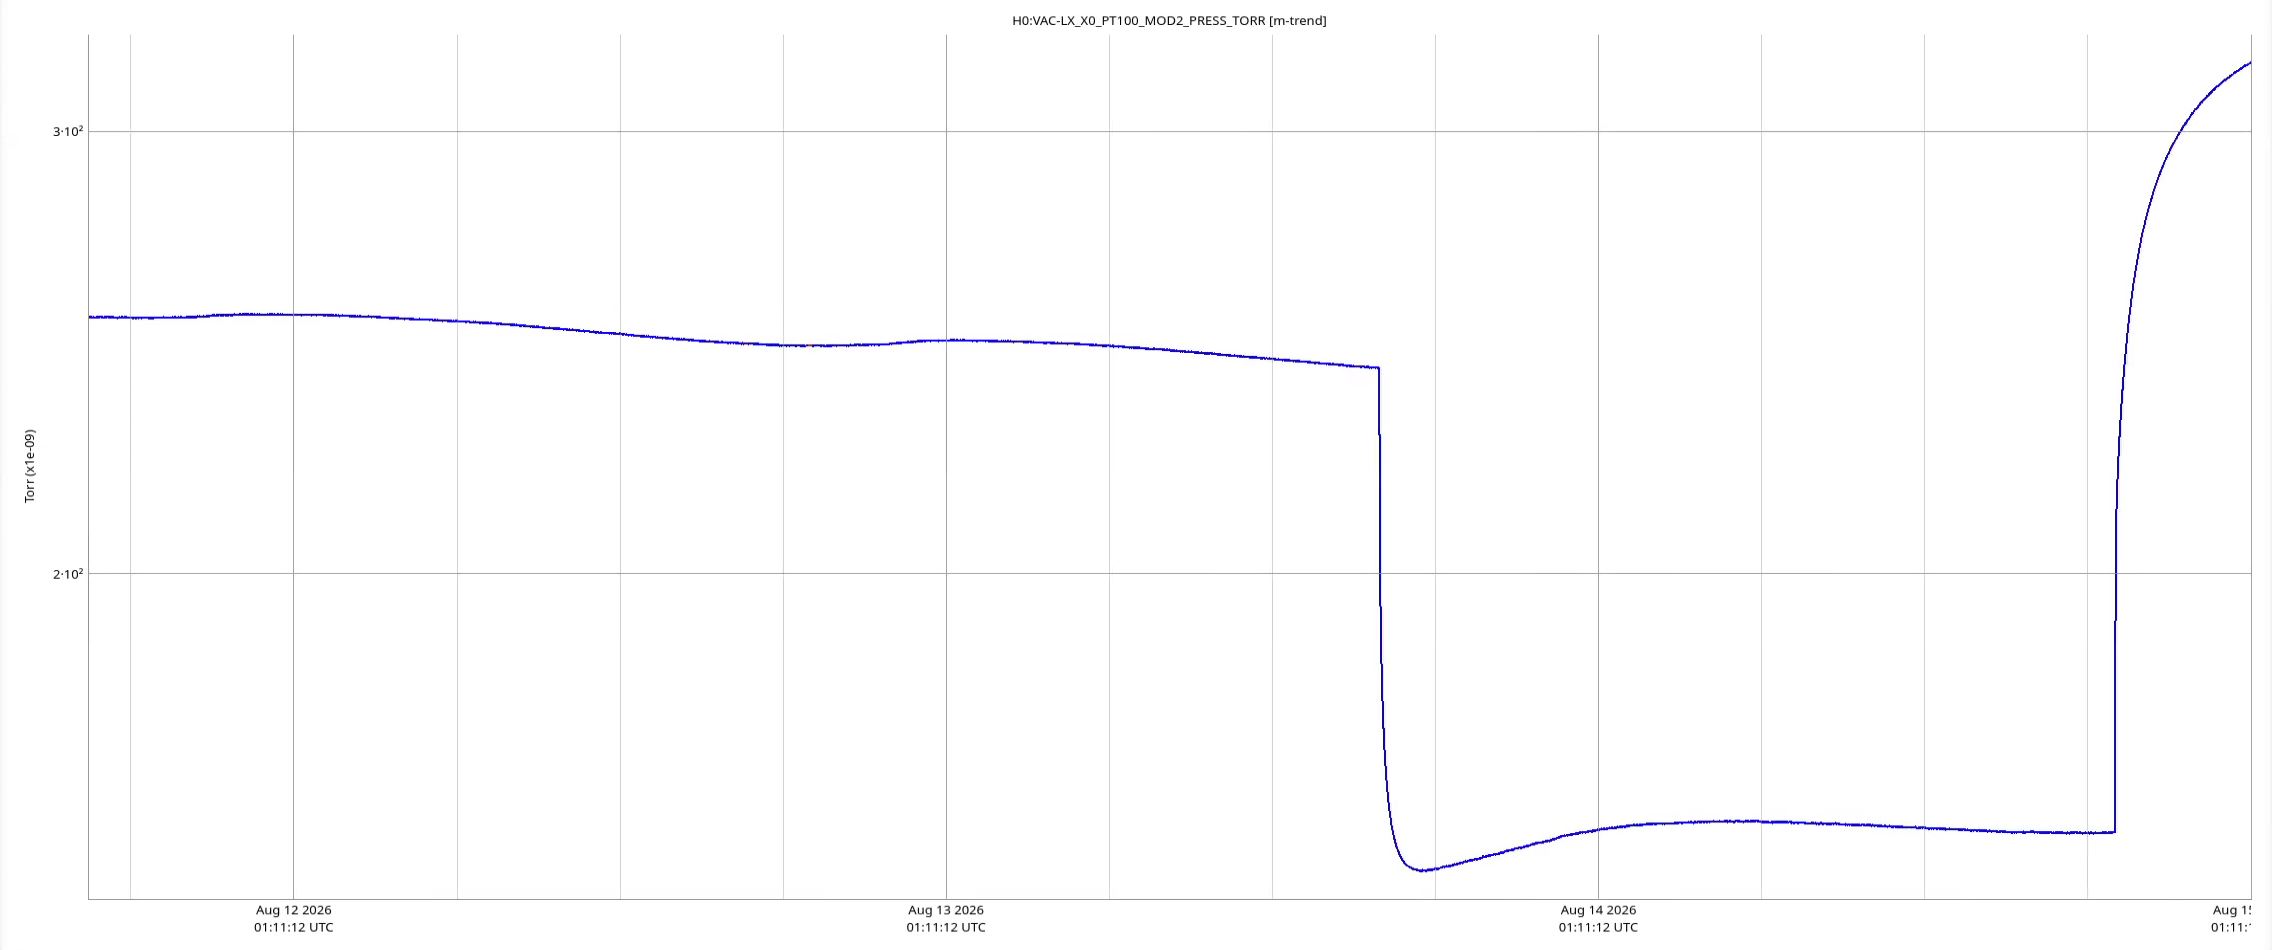
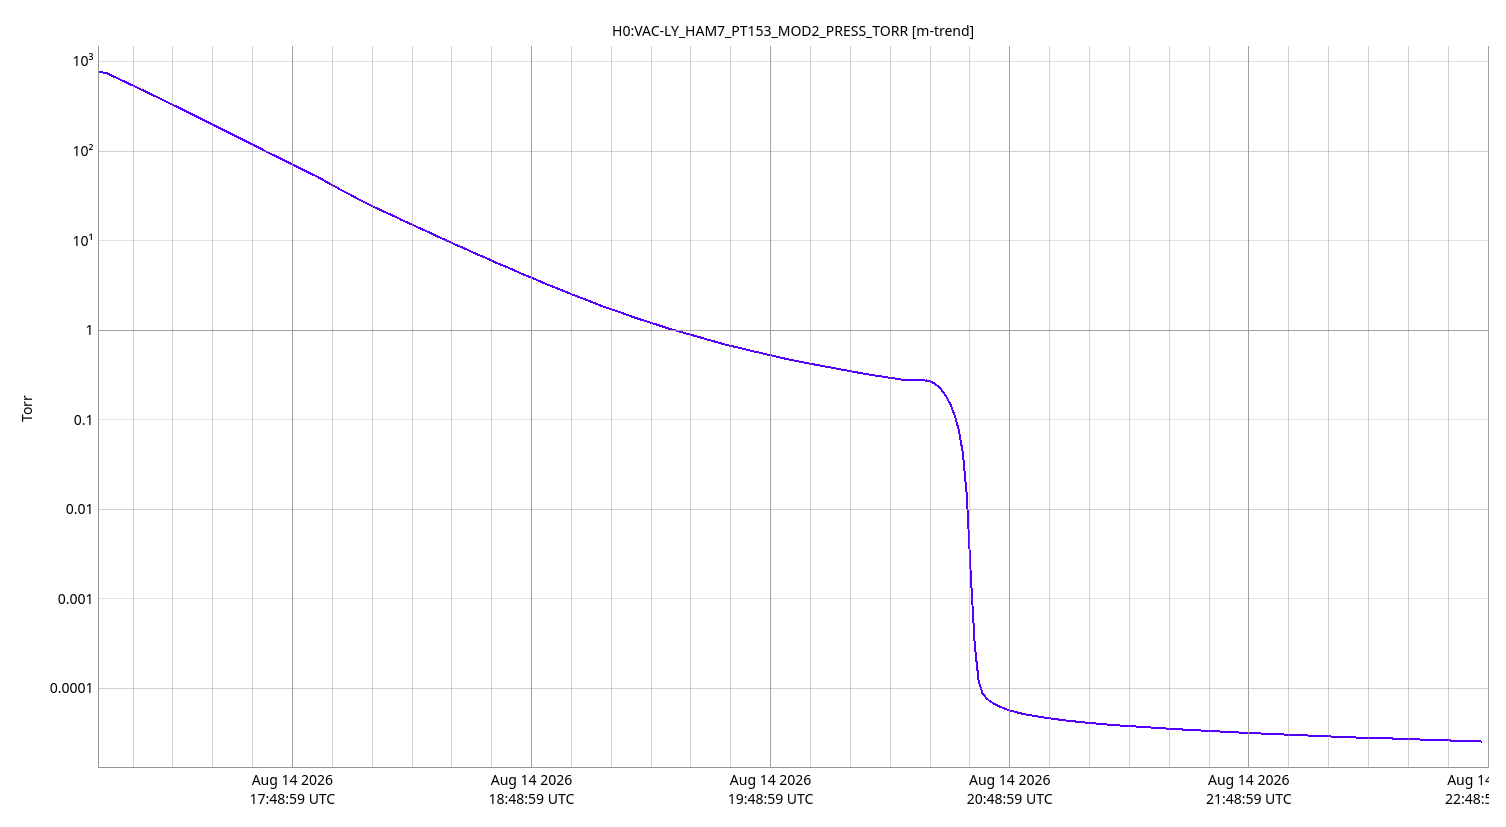
This morning we checked HAM7 annulus system pumpdown and the aux-cart displayed 2.6X10-05 Torr, good progress so it appears to be doing good. We disconnected the SS-500 cart from HAM6 turbo and connected it to HAM7. We checked all ports were "nominal", detached the active purge hose and no blowdown was done, since we had the relay tube valve (RV-2) open, took advantage of this and we let the purge air purge HAM7 overnight out RV-2. After closing RV-2 we started the pumpdown of HAM7. The purge valve (all metal valve) and the roughing valve at the turbo assembly were closed at 3.0X10-05 Torr.
Attached is a plot of the pumpdown thus far.
(Travis, Gerardo)
Update.
HAM7 chamber pumpdown continues to progress, see attached plot for pumpdown trend.
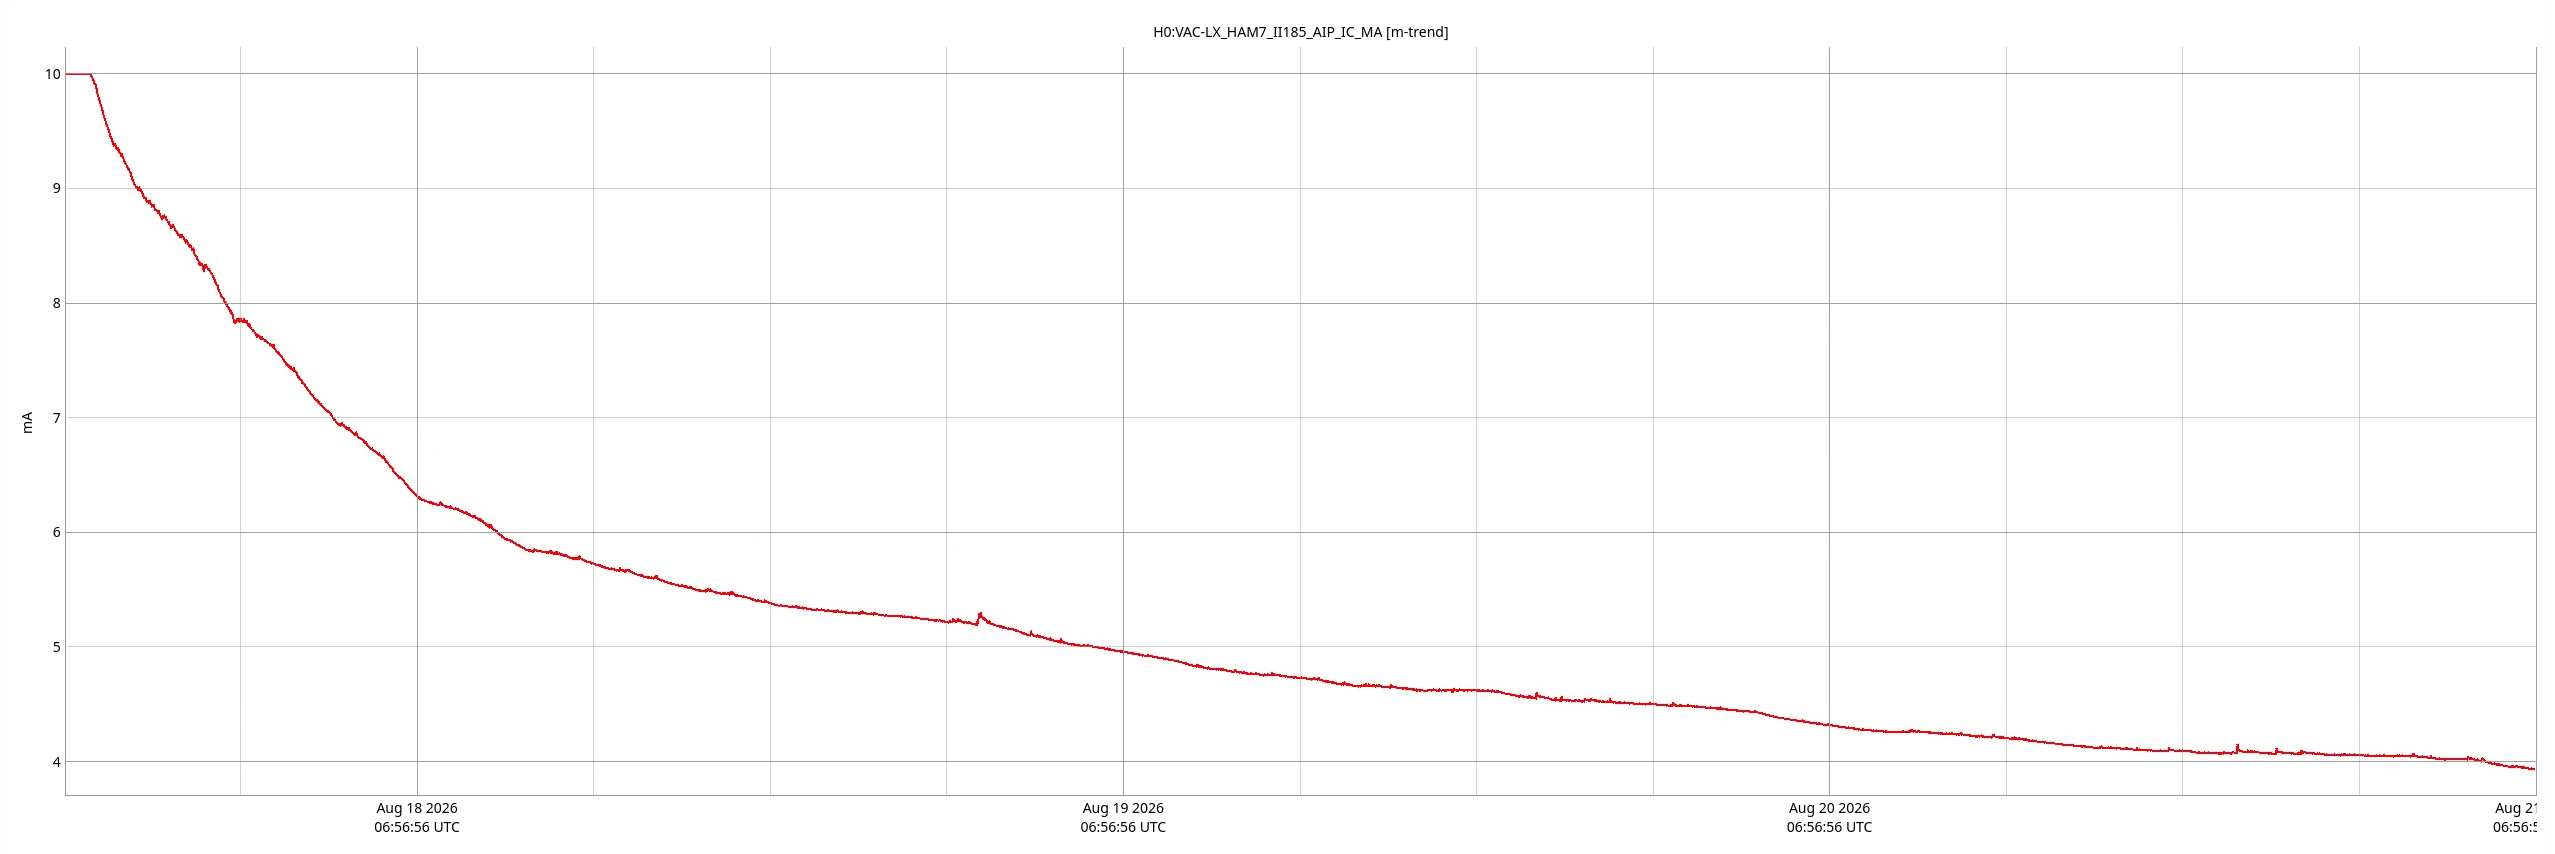
AIP, the annulus system continues to pumpdown also, small can turbo attached at the annulus and a small cube aux-cart backing the can turbo, with a pressure of 7.8X10-06 Torr reported by the aux-cart, we turned the ion pump on a few days ago, and the system has made some progress, see attached plot for progress.

(Randy, Travis, Gerardo)
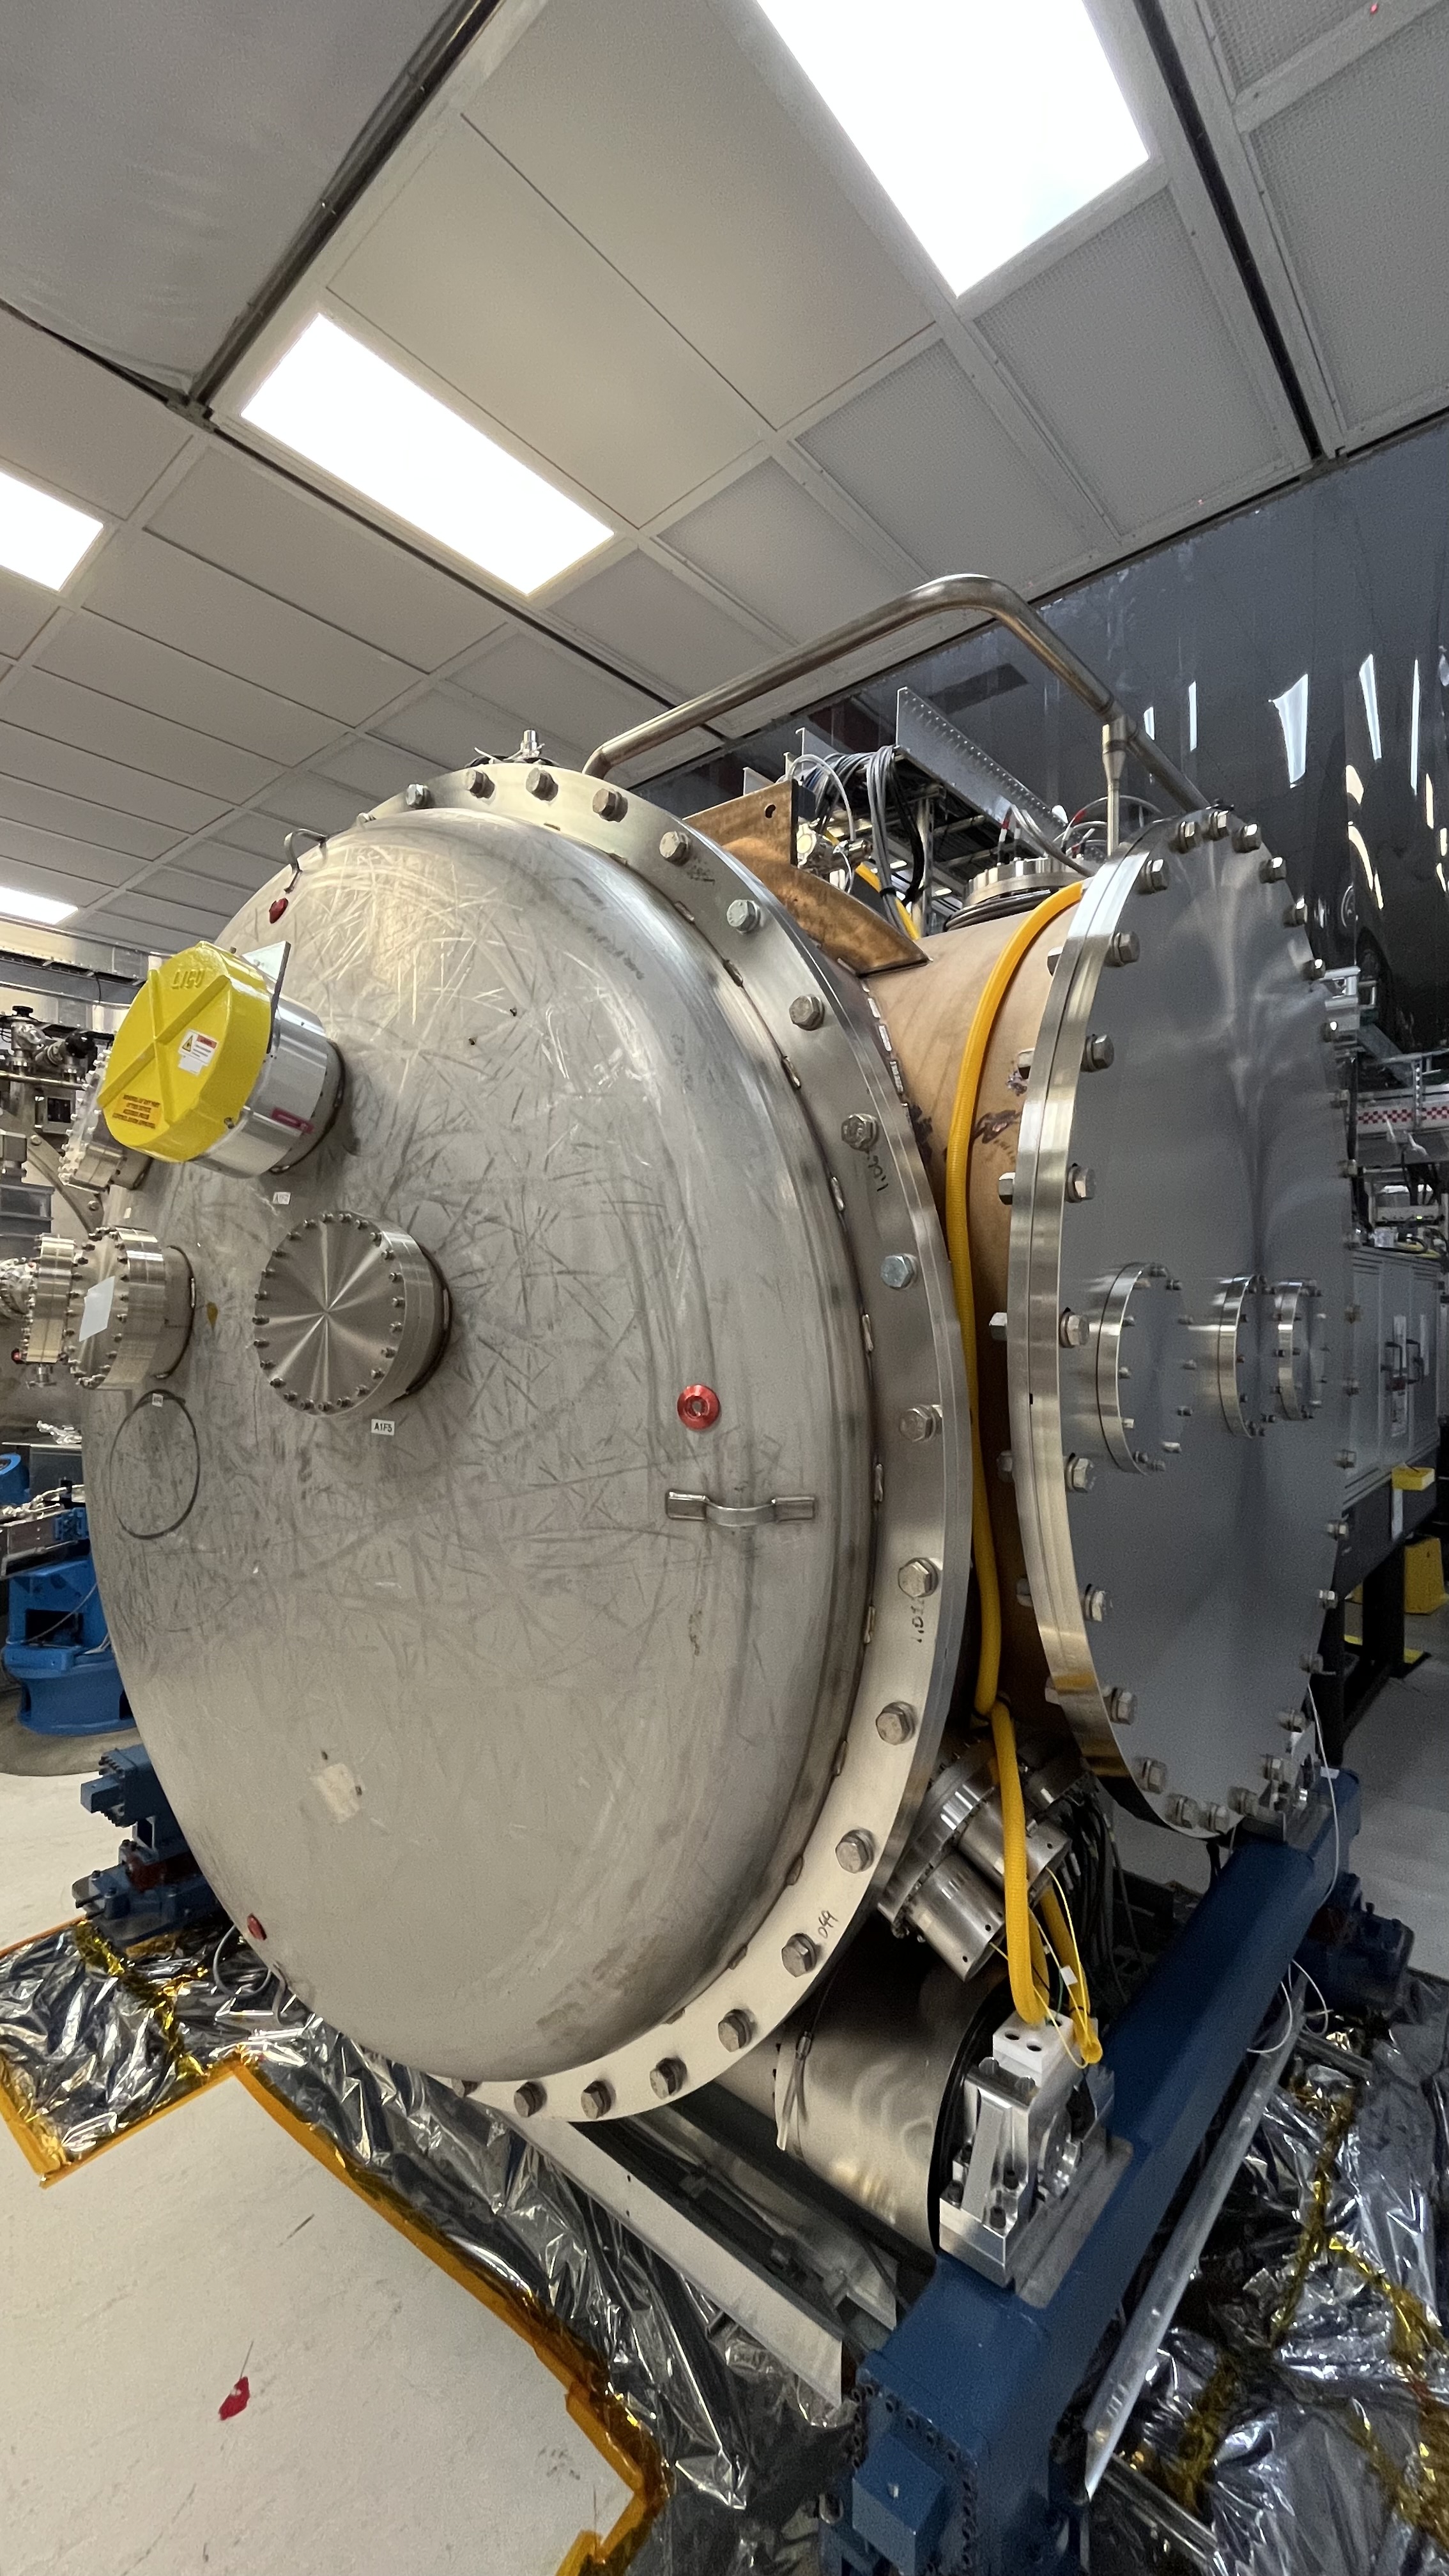
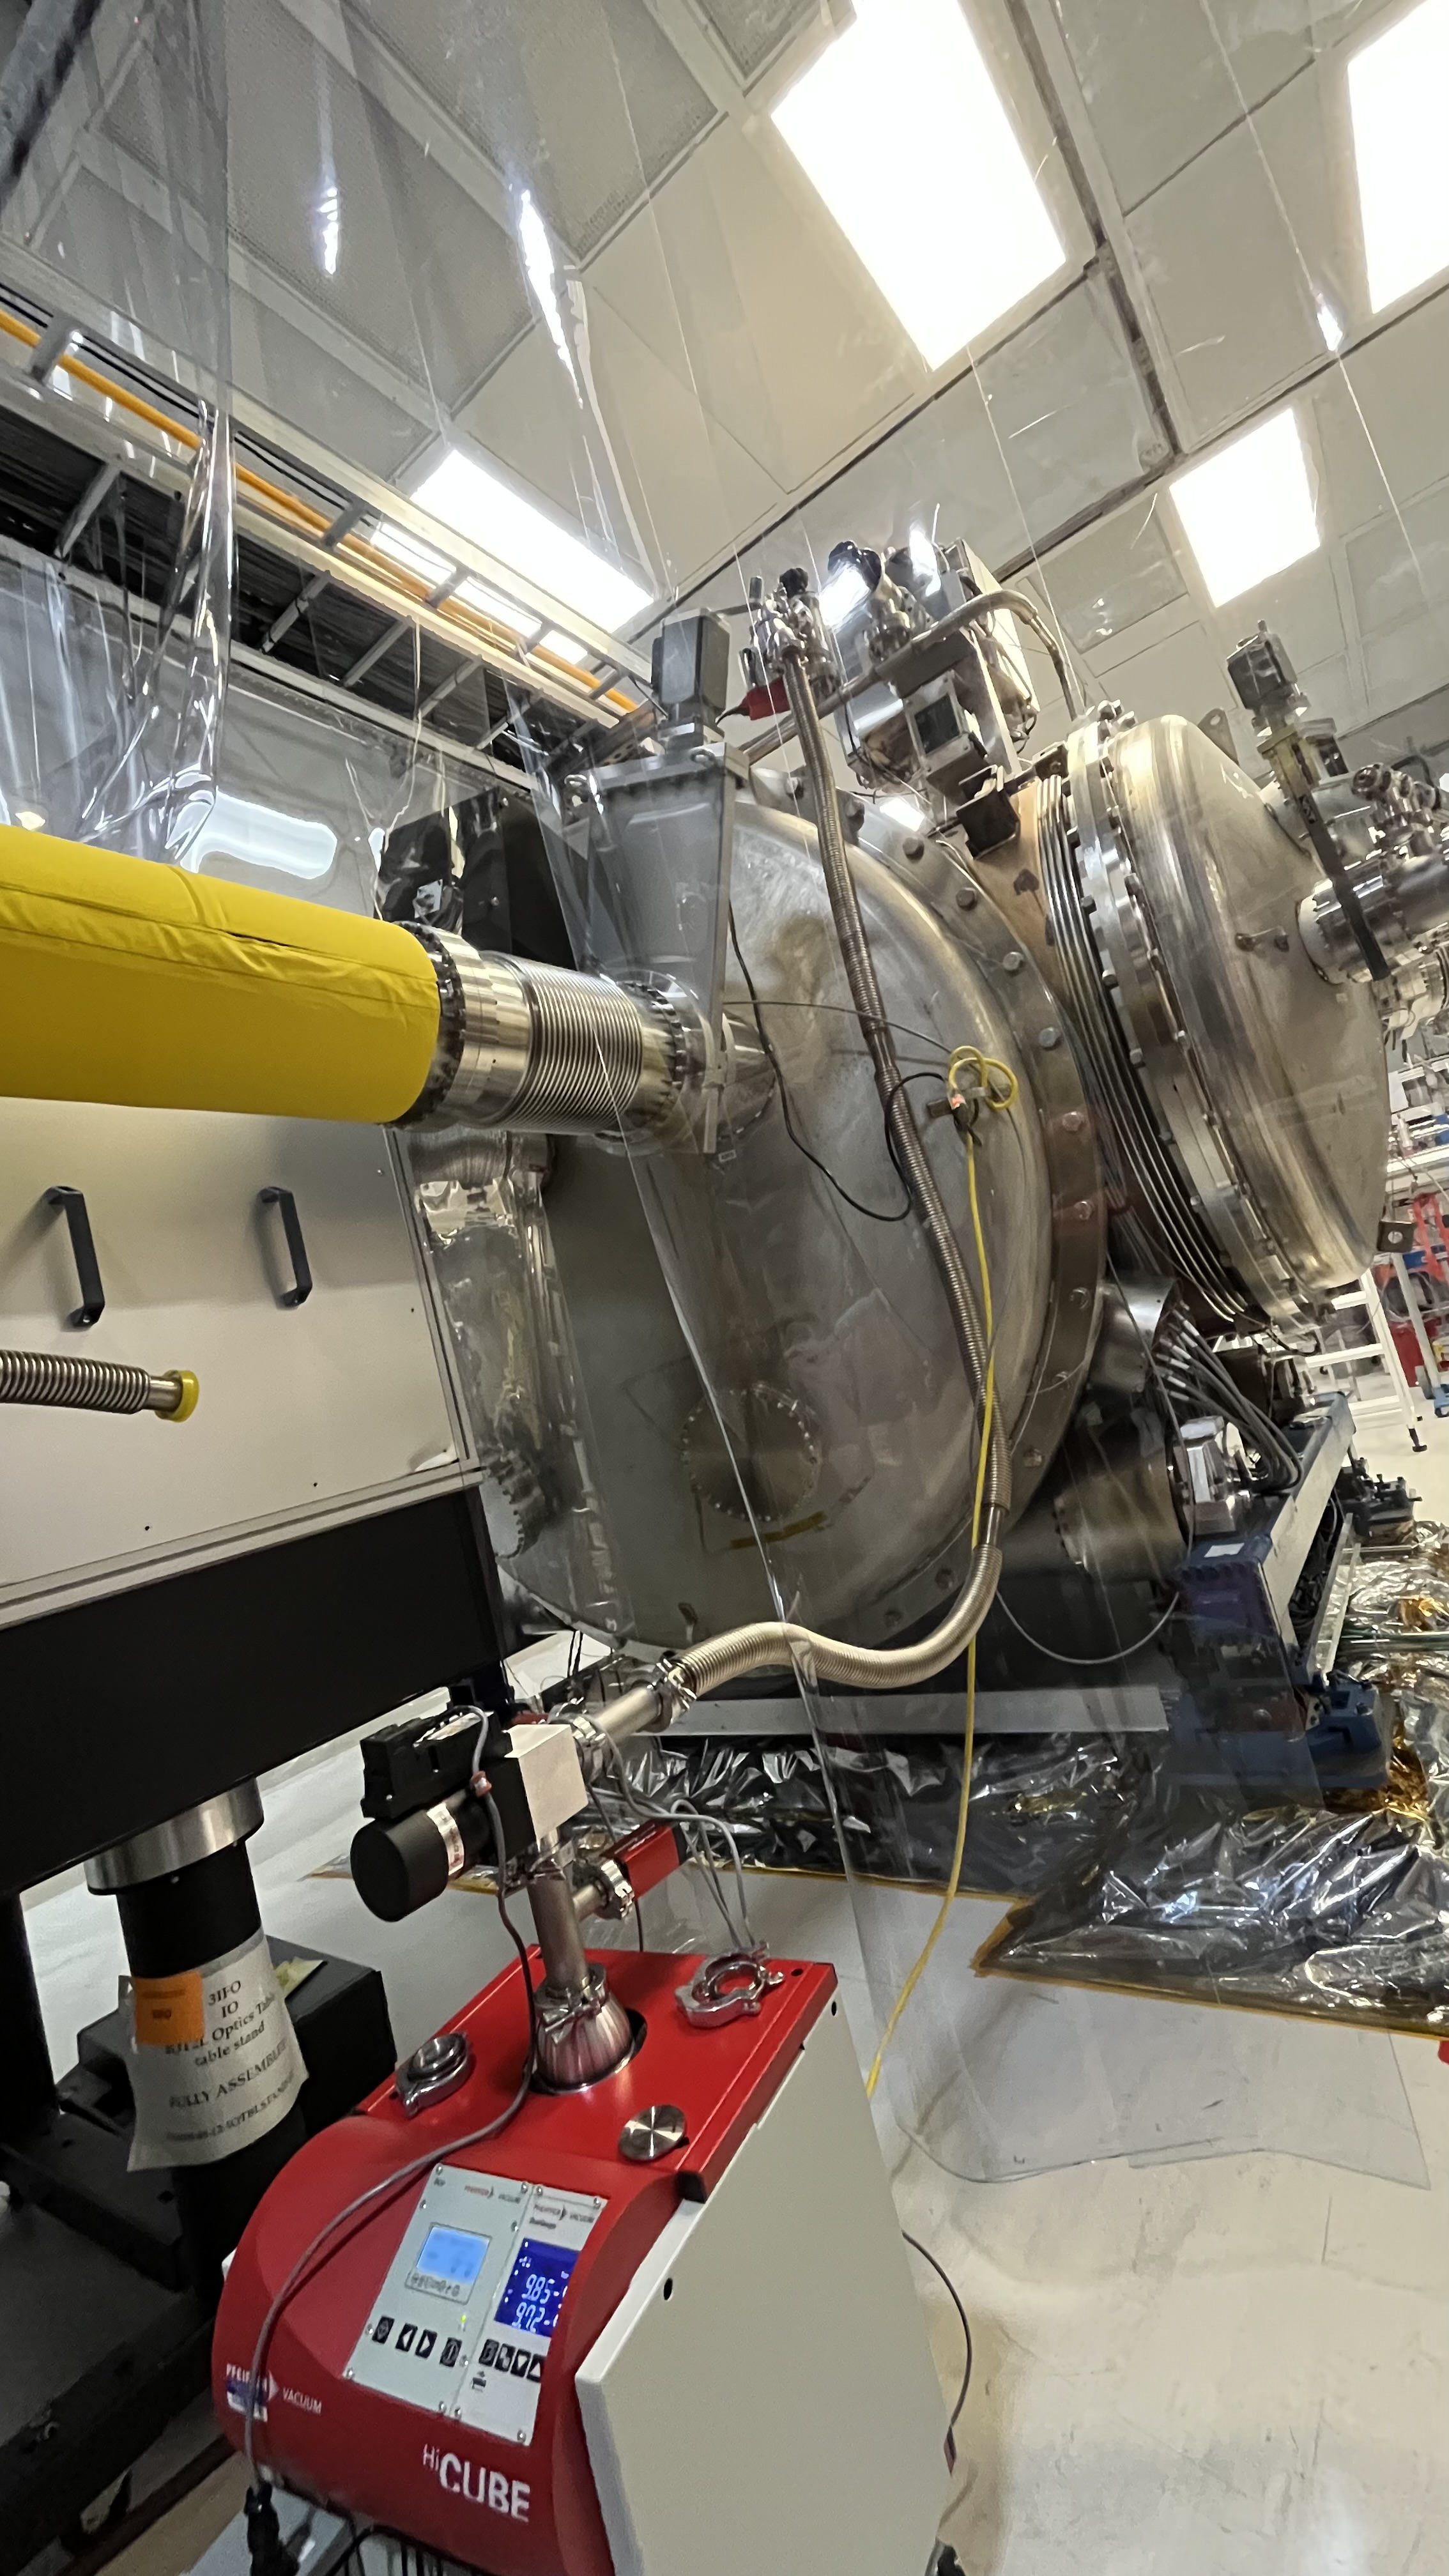
Today we installed two doors on HAM7, -Y door and +X door (flat door). Nothing to report with respect to the installation since no issues were encountered during the process. Both doors were torqued. Currently the annulus system is being pumped down with an aux-cart and a small can turbo, at end of the day the pressure at the aux-cart was reading 8.8X10-05 Torr. A very "wet" system and it shows on the pumpdown.
A side note for future +X door installation, use a bigger shackle on the -Y pick point, since the door needs a little rotation.
(Travis S., Gerardo M.)
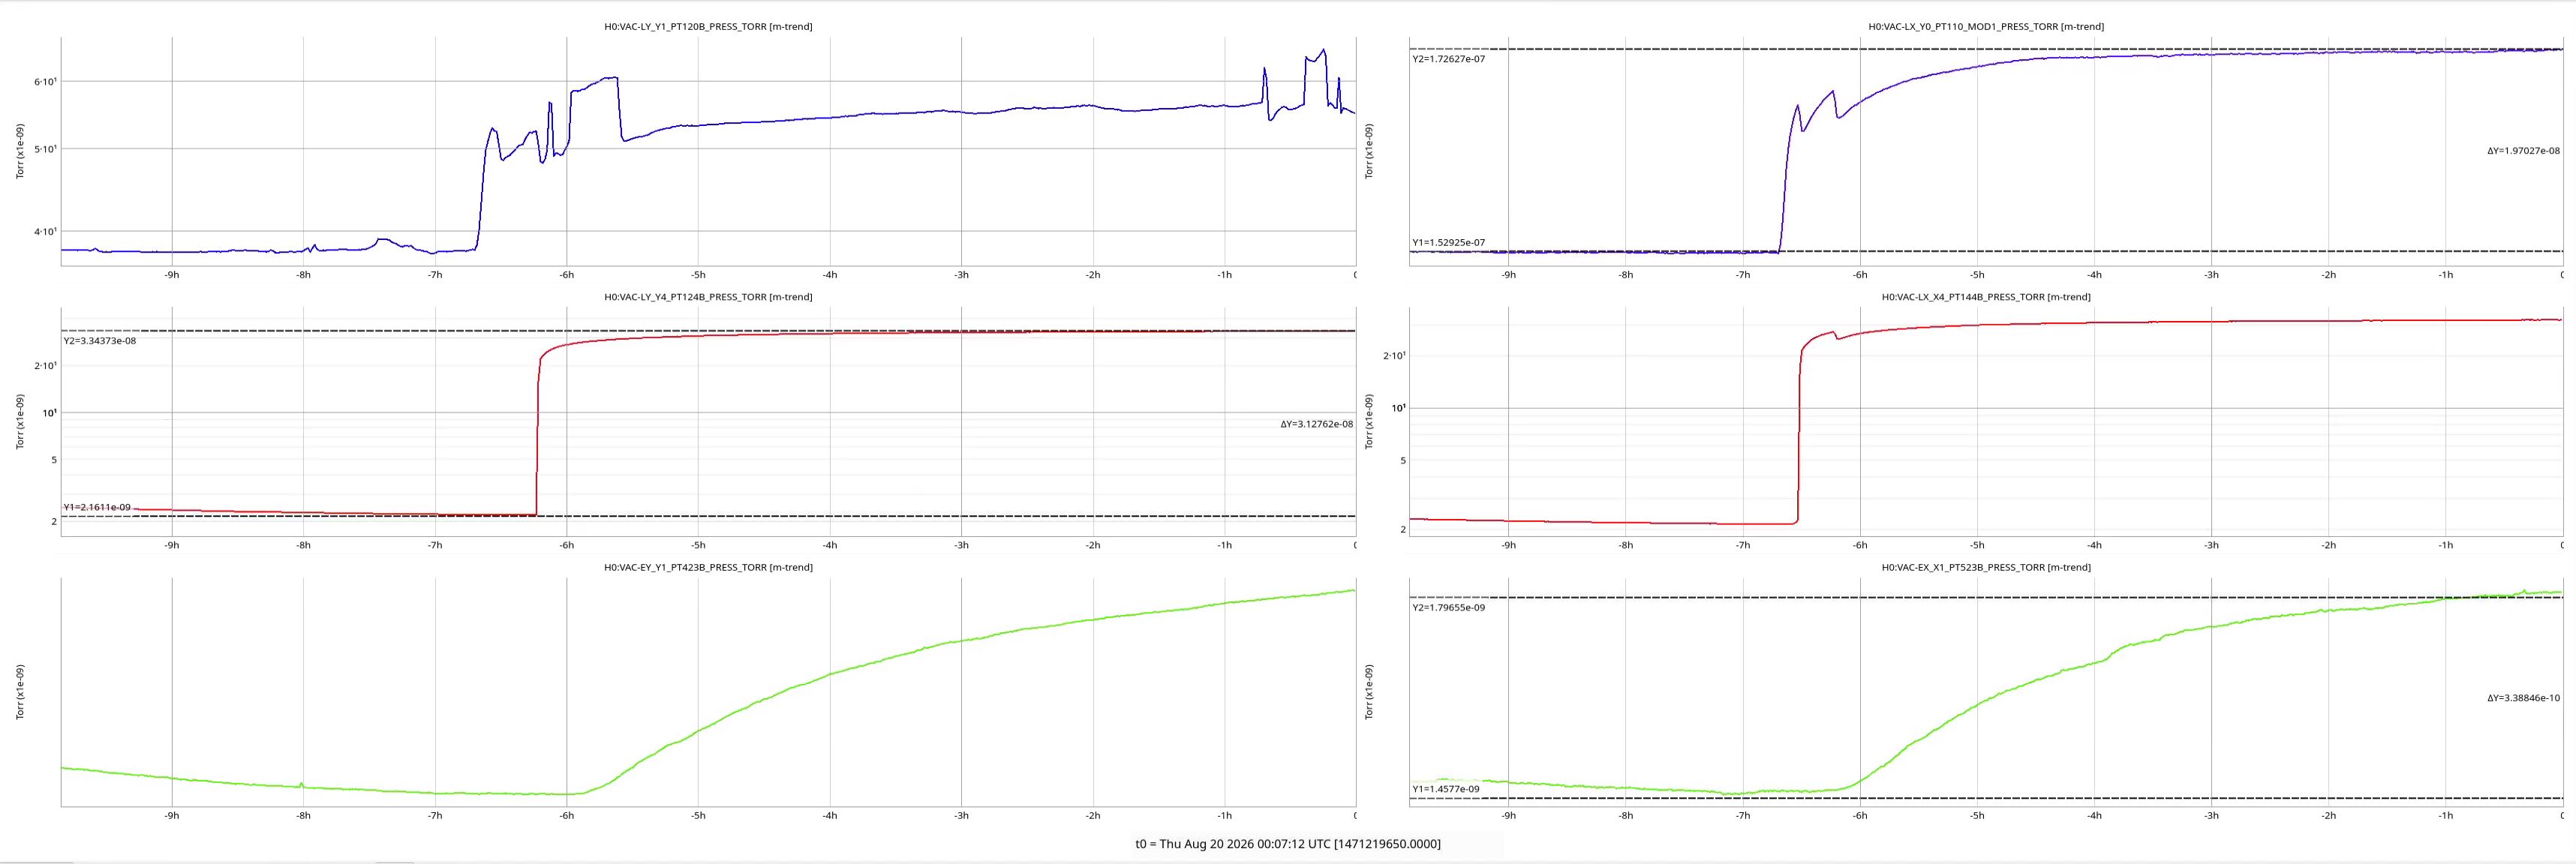
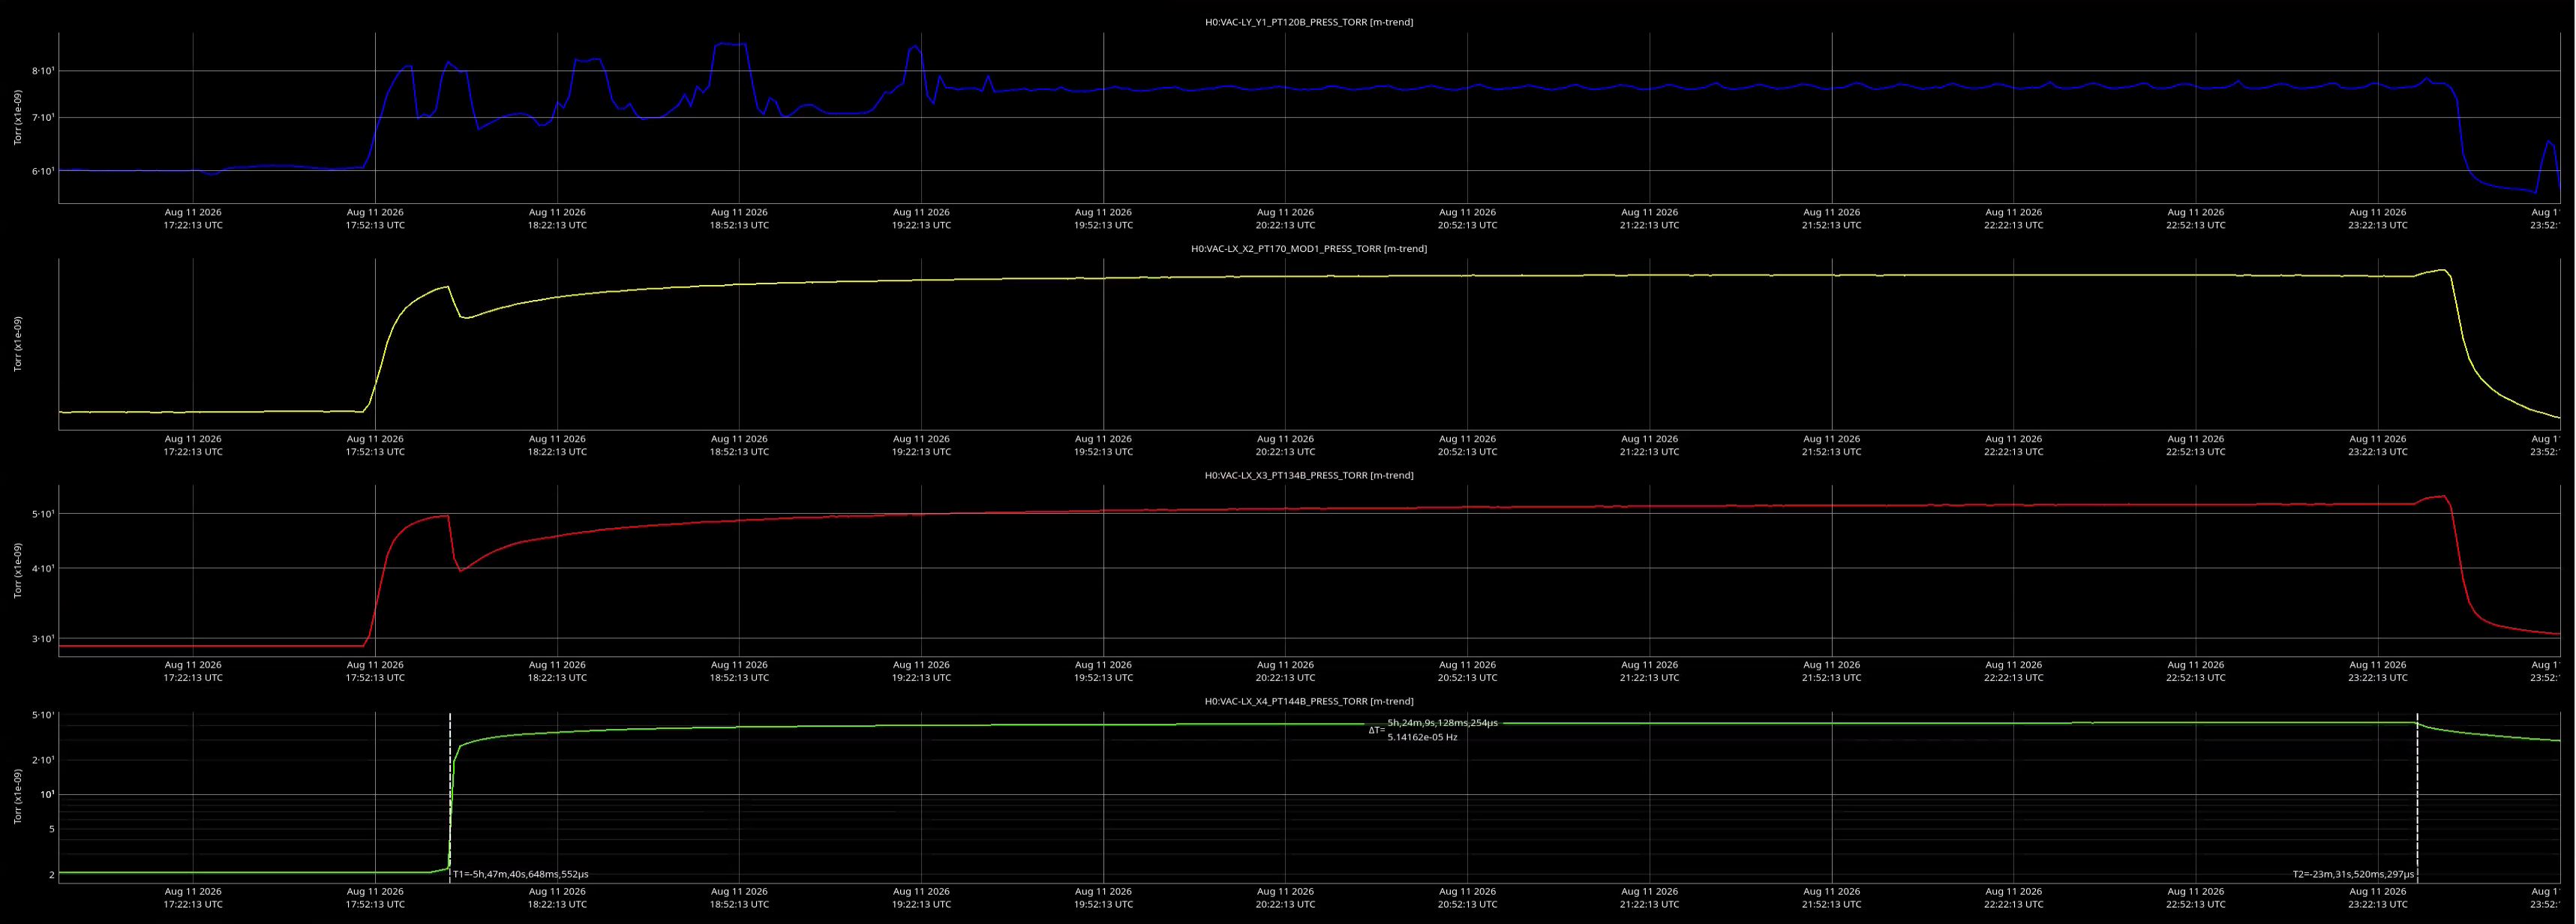
Around 11:00 am today we opened GV8 from soft close to allow for commissioners to peek down x-arm. The gate annulus for GV8 was burped into the annulus ion pump, almost no response. The 4 turbo pumps were isolated from the main vacuum envelope, the 4 large ion pumps are valved in, along with HAM6 ion pump (500 l/s), and we still have a filter cavity section valved into the main corner volume, the section from FCV-3 to FCV-4, and includes ion pump B-1 (150 l/s).
GV8 remained open for about 5 1/2 hours.
We closed GV8 around 16:30 local time.
Attached is a pressure response from gauges along the X-arm at the corner station.
Per WP 13497
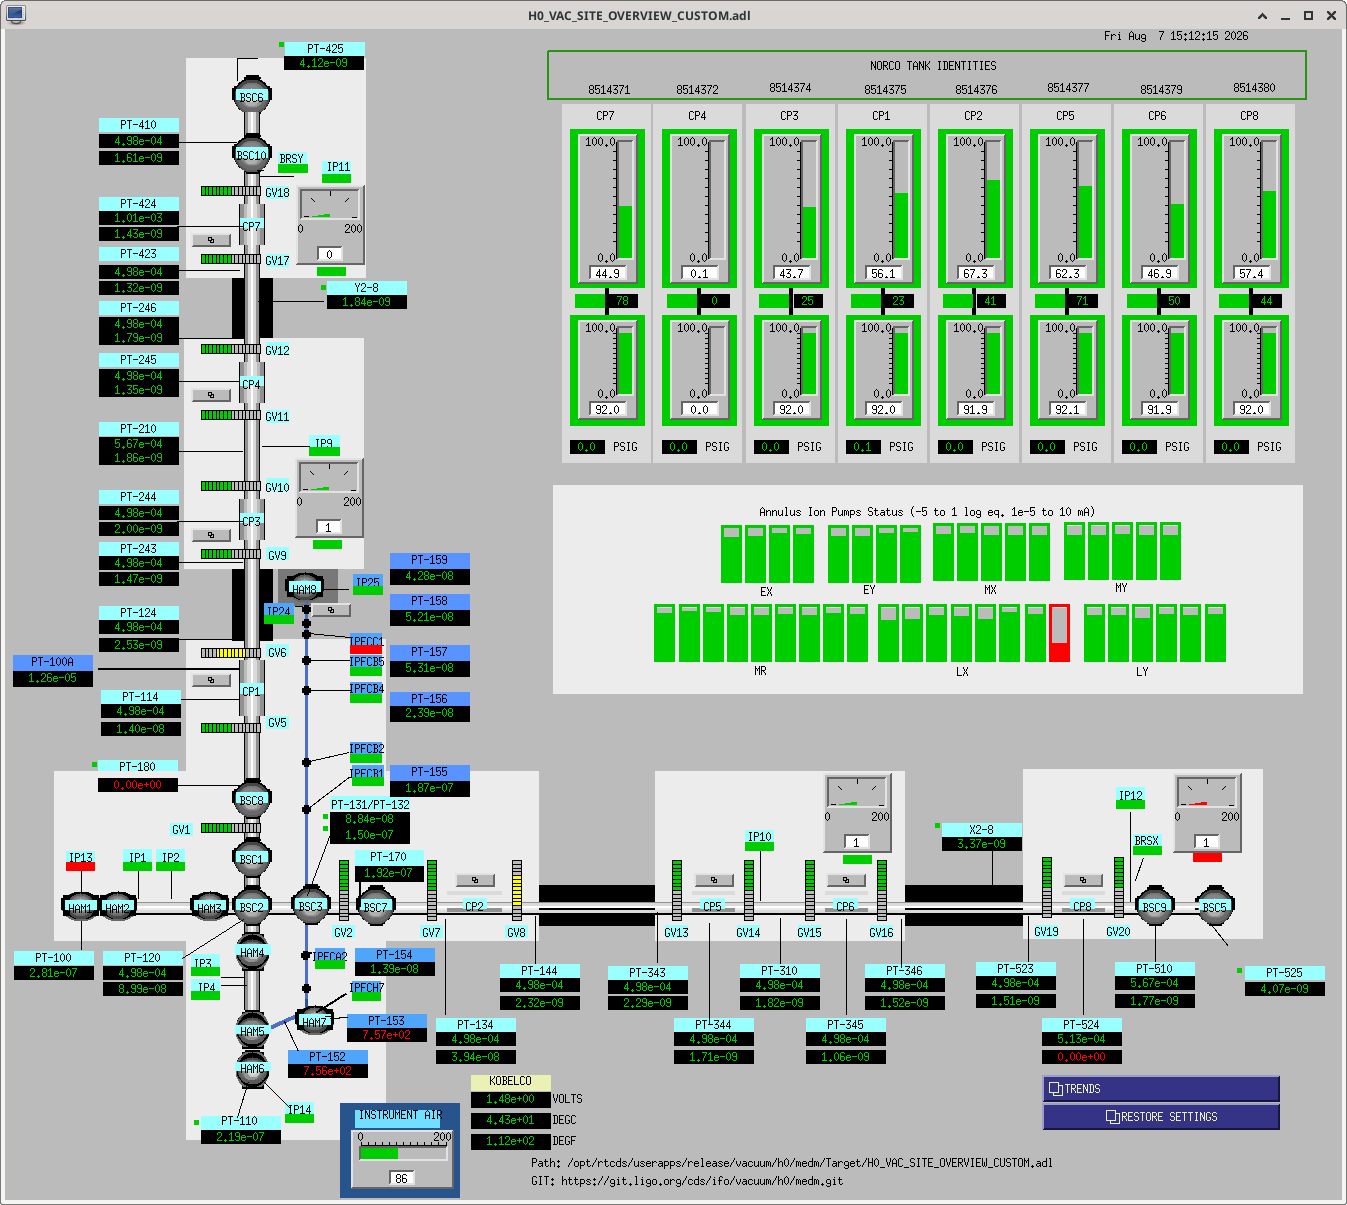
I opened IP1/2/3/4 to the corner volume at 18:38 UTC / 11:38 PDT
GV8 Soft closed at 20:47 UTC / 13:47 PDT
GV7 opened at 21:20 UTC / 14:20 PDT
GV5 opened at 21:48 UTC / 14:48 PDT
Both GV5 & GV7 opened between 45-50 psi, and the holding pressure is set to 55 psi.
GV6 and GV8 will remain soft closed to isolate the beamtubes. CP1 and CP2 are now open to the corner volume to assist with the water pumping, water is still the dominant gas after ~22 days of pumping, see corner RGA scans in alog 91446
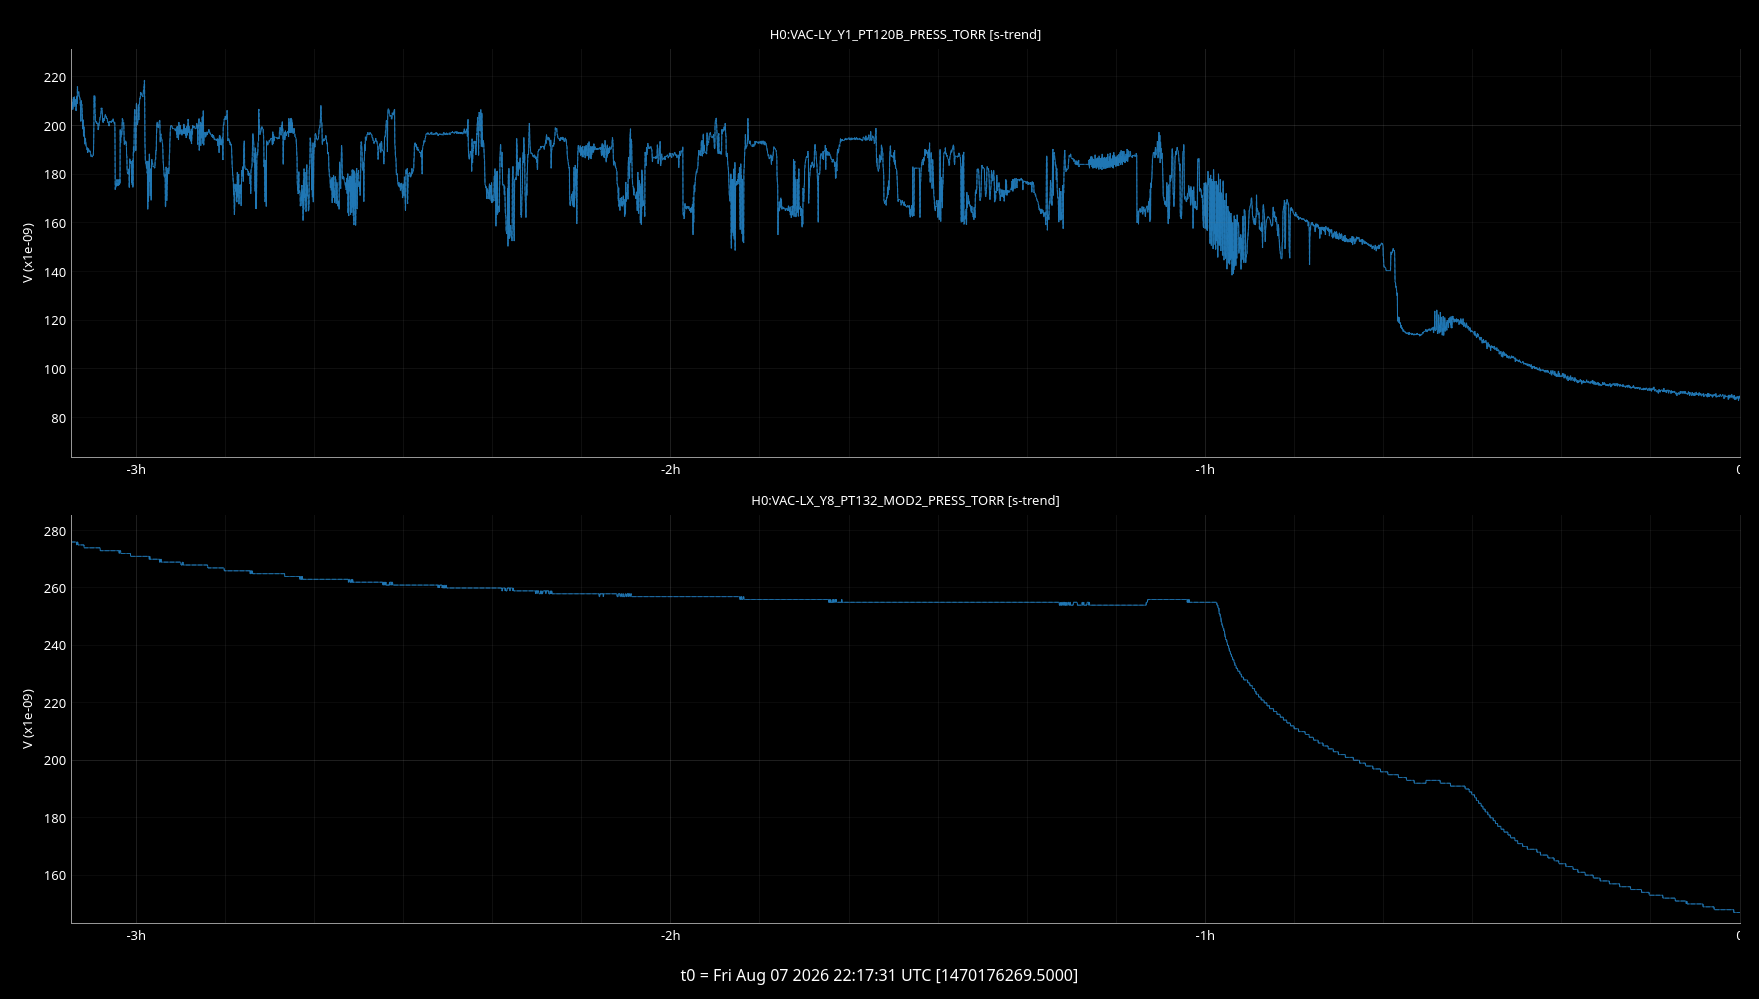
Corner pressure is decreasing as expected.
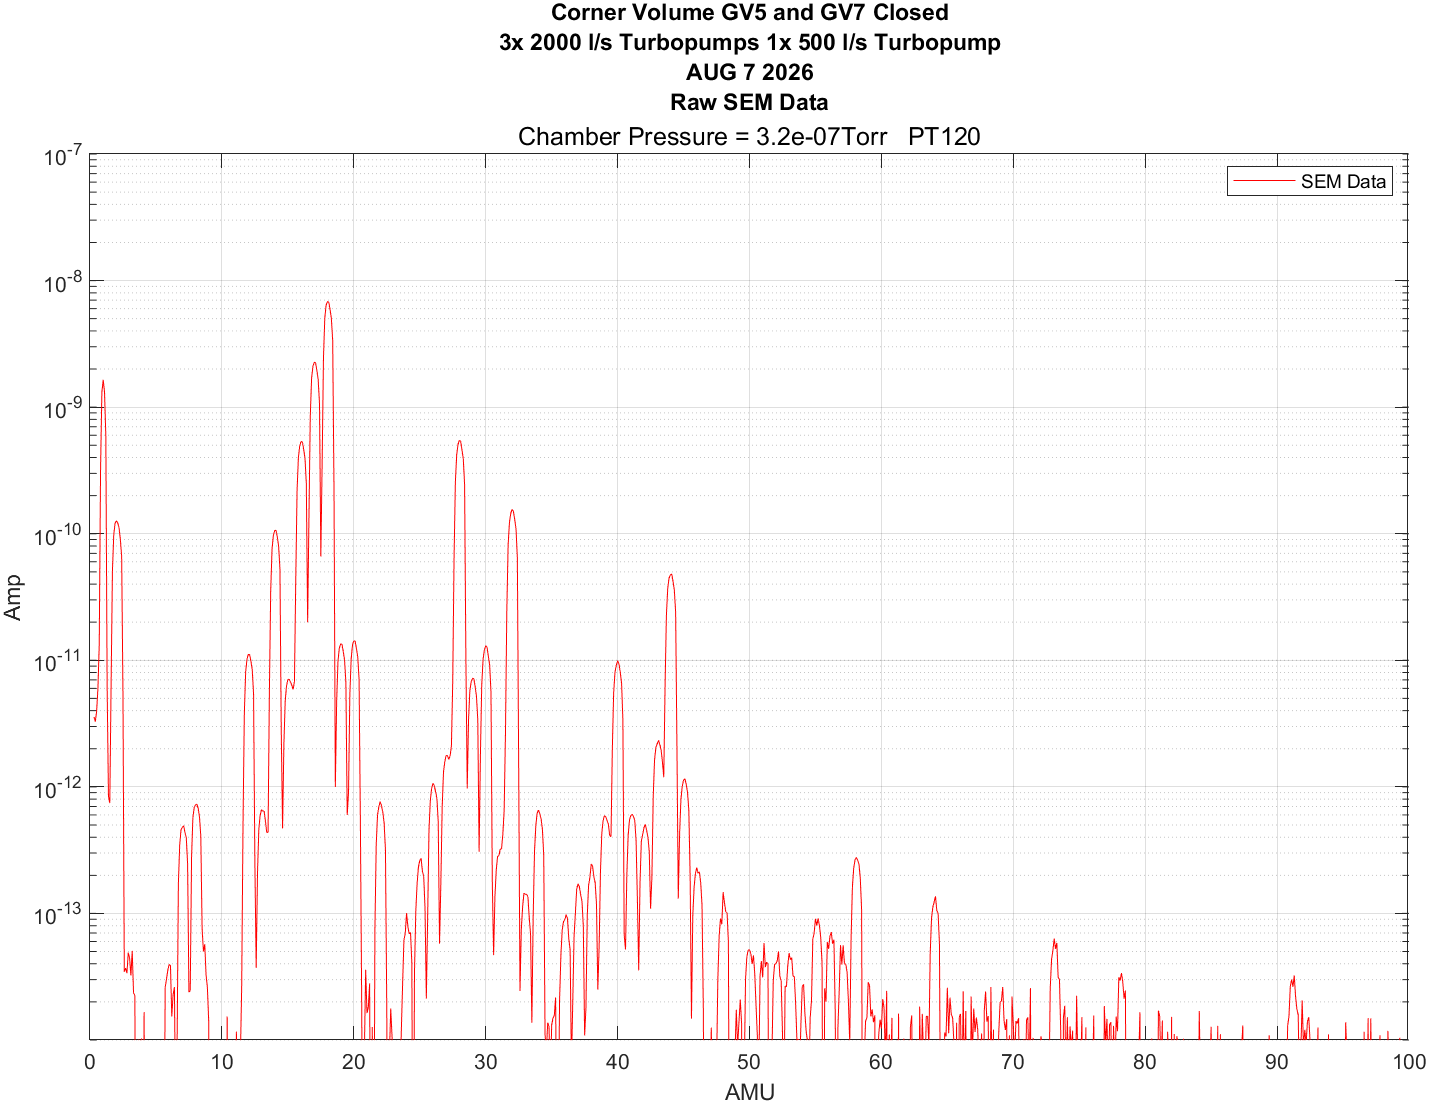
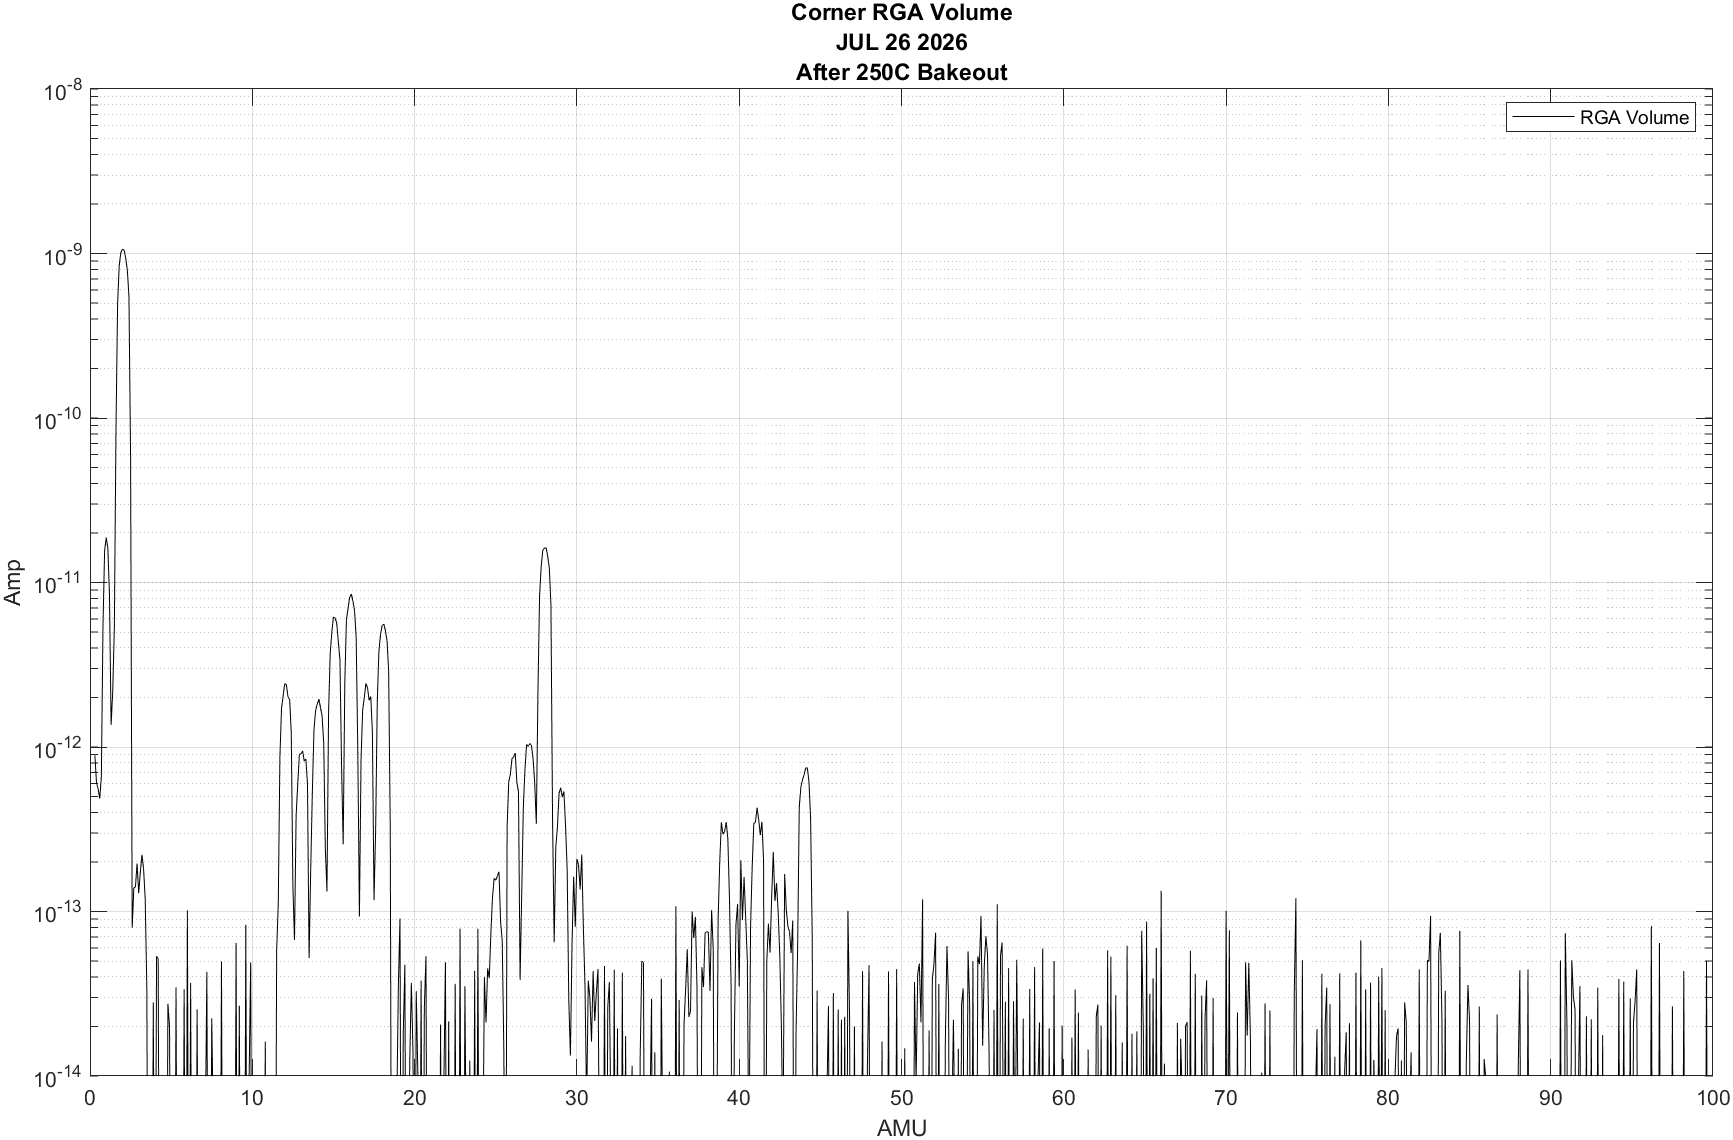
RGA scans were collected for the corner volume using the new PrismaPro RGA. This RGA tree had been rebuilt and baked at high temp for 2+ weeks. Scan info below, raw data files will be posted to the DCC at T2600329.
RGA Model: Pfeiffer Prisma Pro
EM Voltage: 1200V
Dwell Time: 1s, 0-100 AMU, 10 pts/AMU
Valve States: GV5 & GV7 closed, FC2 & FC4 closed (Relay Tube removed & FCB-1 section common with corner)
Pumping: 3x 2000 l/s Turbo pumps, 1x 500 l/s turbopump (HAM6)
RGA filament has been on since 7/22 after RGA tree bakeout
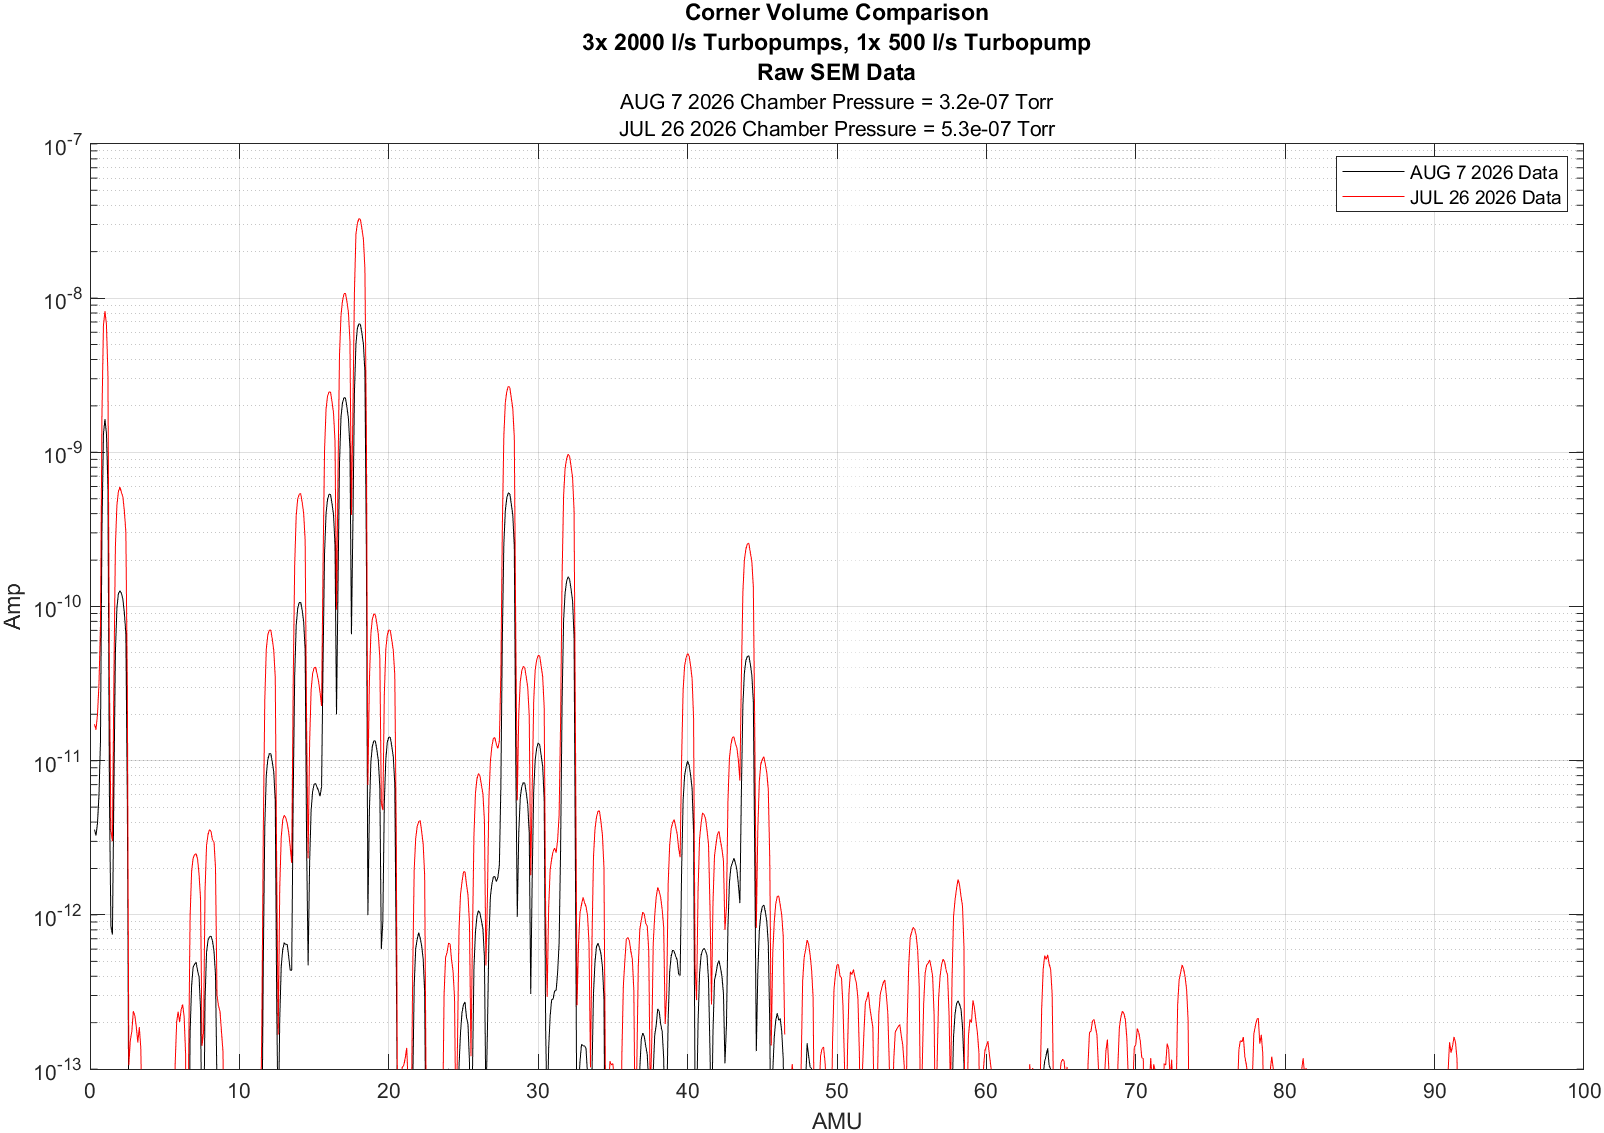
Corner Pressure (8/7/26): 3.2E-7 Torr (PT120B)
Corner Pressure (7/27/26): 5.3E-7 Torr (PT120B)
Comparison plot showing partial pressure decrease after an additional ~10 days of pumping with turbo. Corner started high vacuum pumping on July 16th 2026 (22 days of pumping with turbopumps only)
Found PT524B cold cathode gauge tripped/off, turned it back on, now we wait for it to comeback. Gauge was tripped yesterday around 23:49 utc.
Travis, Gerardo, Jordan
During the closing of GV6 back in May, we noticed that there was some blow-by in the pneumatic system when trying to hard close the valve, see alog 90093.
We were able to hard close the valve eventually but as preventative maintenance we wanted to replace the air cylinder seals, similar to GV7.
Prior to disassembly we measured the locations of the reed switches from the top surface of the bottom plate to the bottom surface of the reed switches:
Bottom Switch: 1 1/8"
Top Switch: 49 1/4"
We then disassembled the air cylinder and replaced the seals following procedure/notes collected during the GV7 repair. During cleaning of the old grease on the piston head, we noticed there were two burrs on the top of the piston, we did not notice any damage to the inside of the cylinder, but as a precaution we used a small flat file to remove the burrs. We also chased the threads on the four threaded rods with a die to aid with reinstallation. After cleaning and inspection of the cylinder tube, we found no issues or damage so we decided to continue to use that cylinder and keep the new one as a spare.
No other issues encountered, we removed the old seals, cleaned the grooves, added copious amounts of the supplied grease to the o-rings, seals and the inside of the air cylinder, and then re-assembled the cylinder tube. Pictures posted below and a final procedure is in progress and will be posted to the DCC.
We did not get a chance to cycle the valve after the seal replacement, so we will continue tomorrow with cycling the valve.
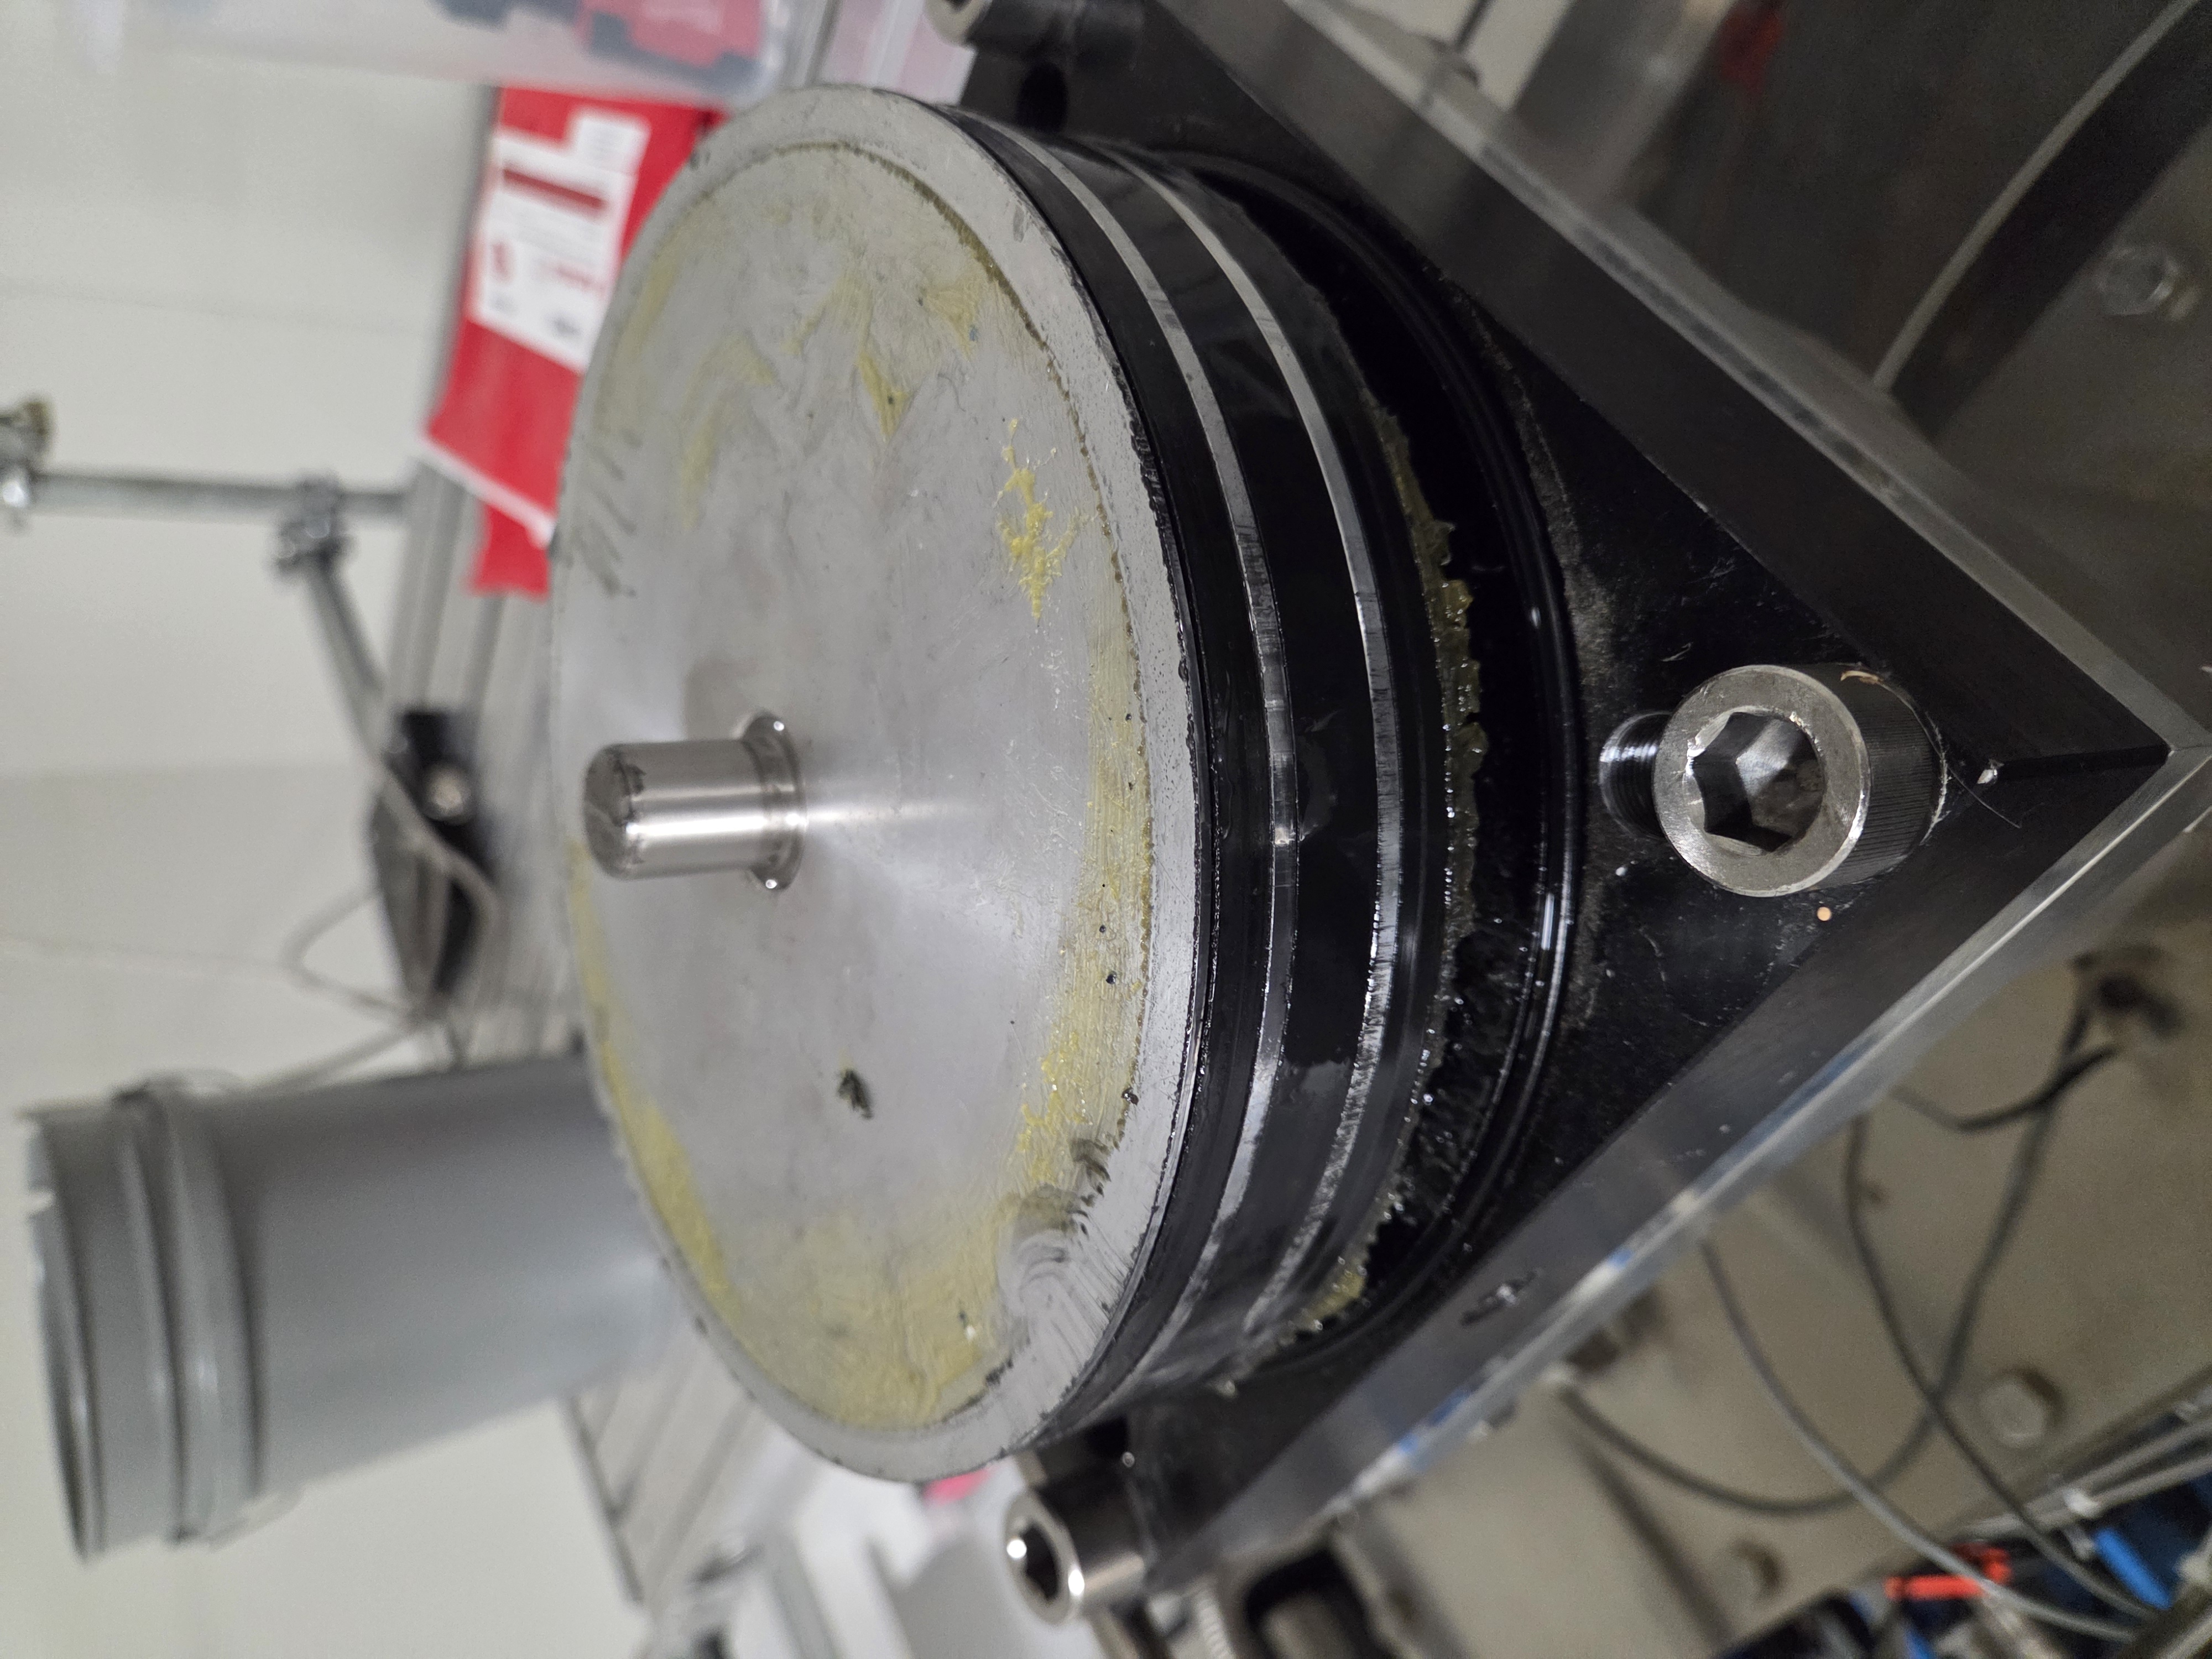
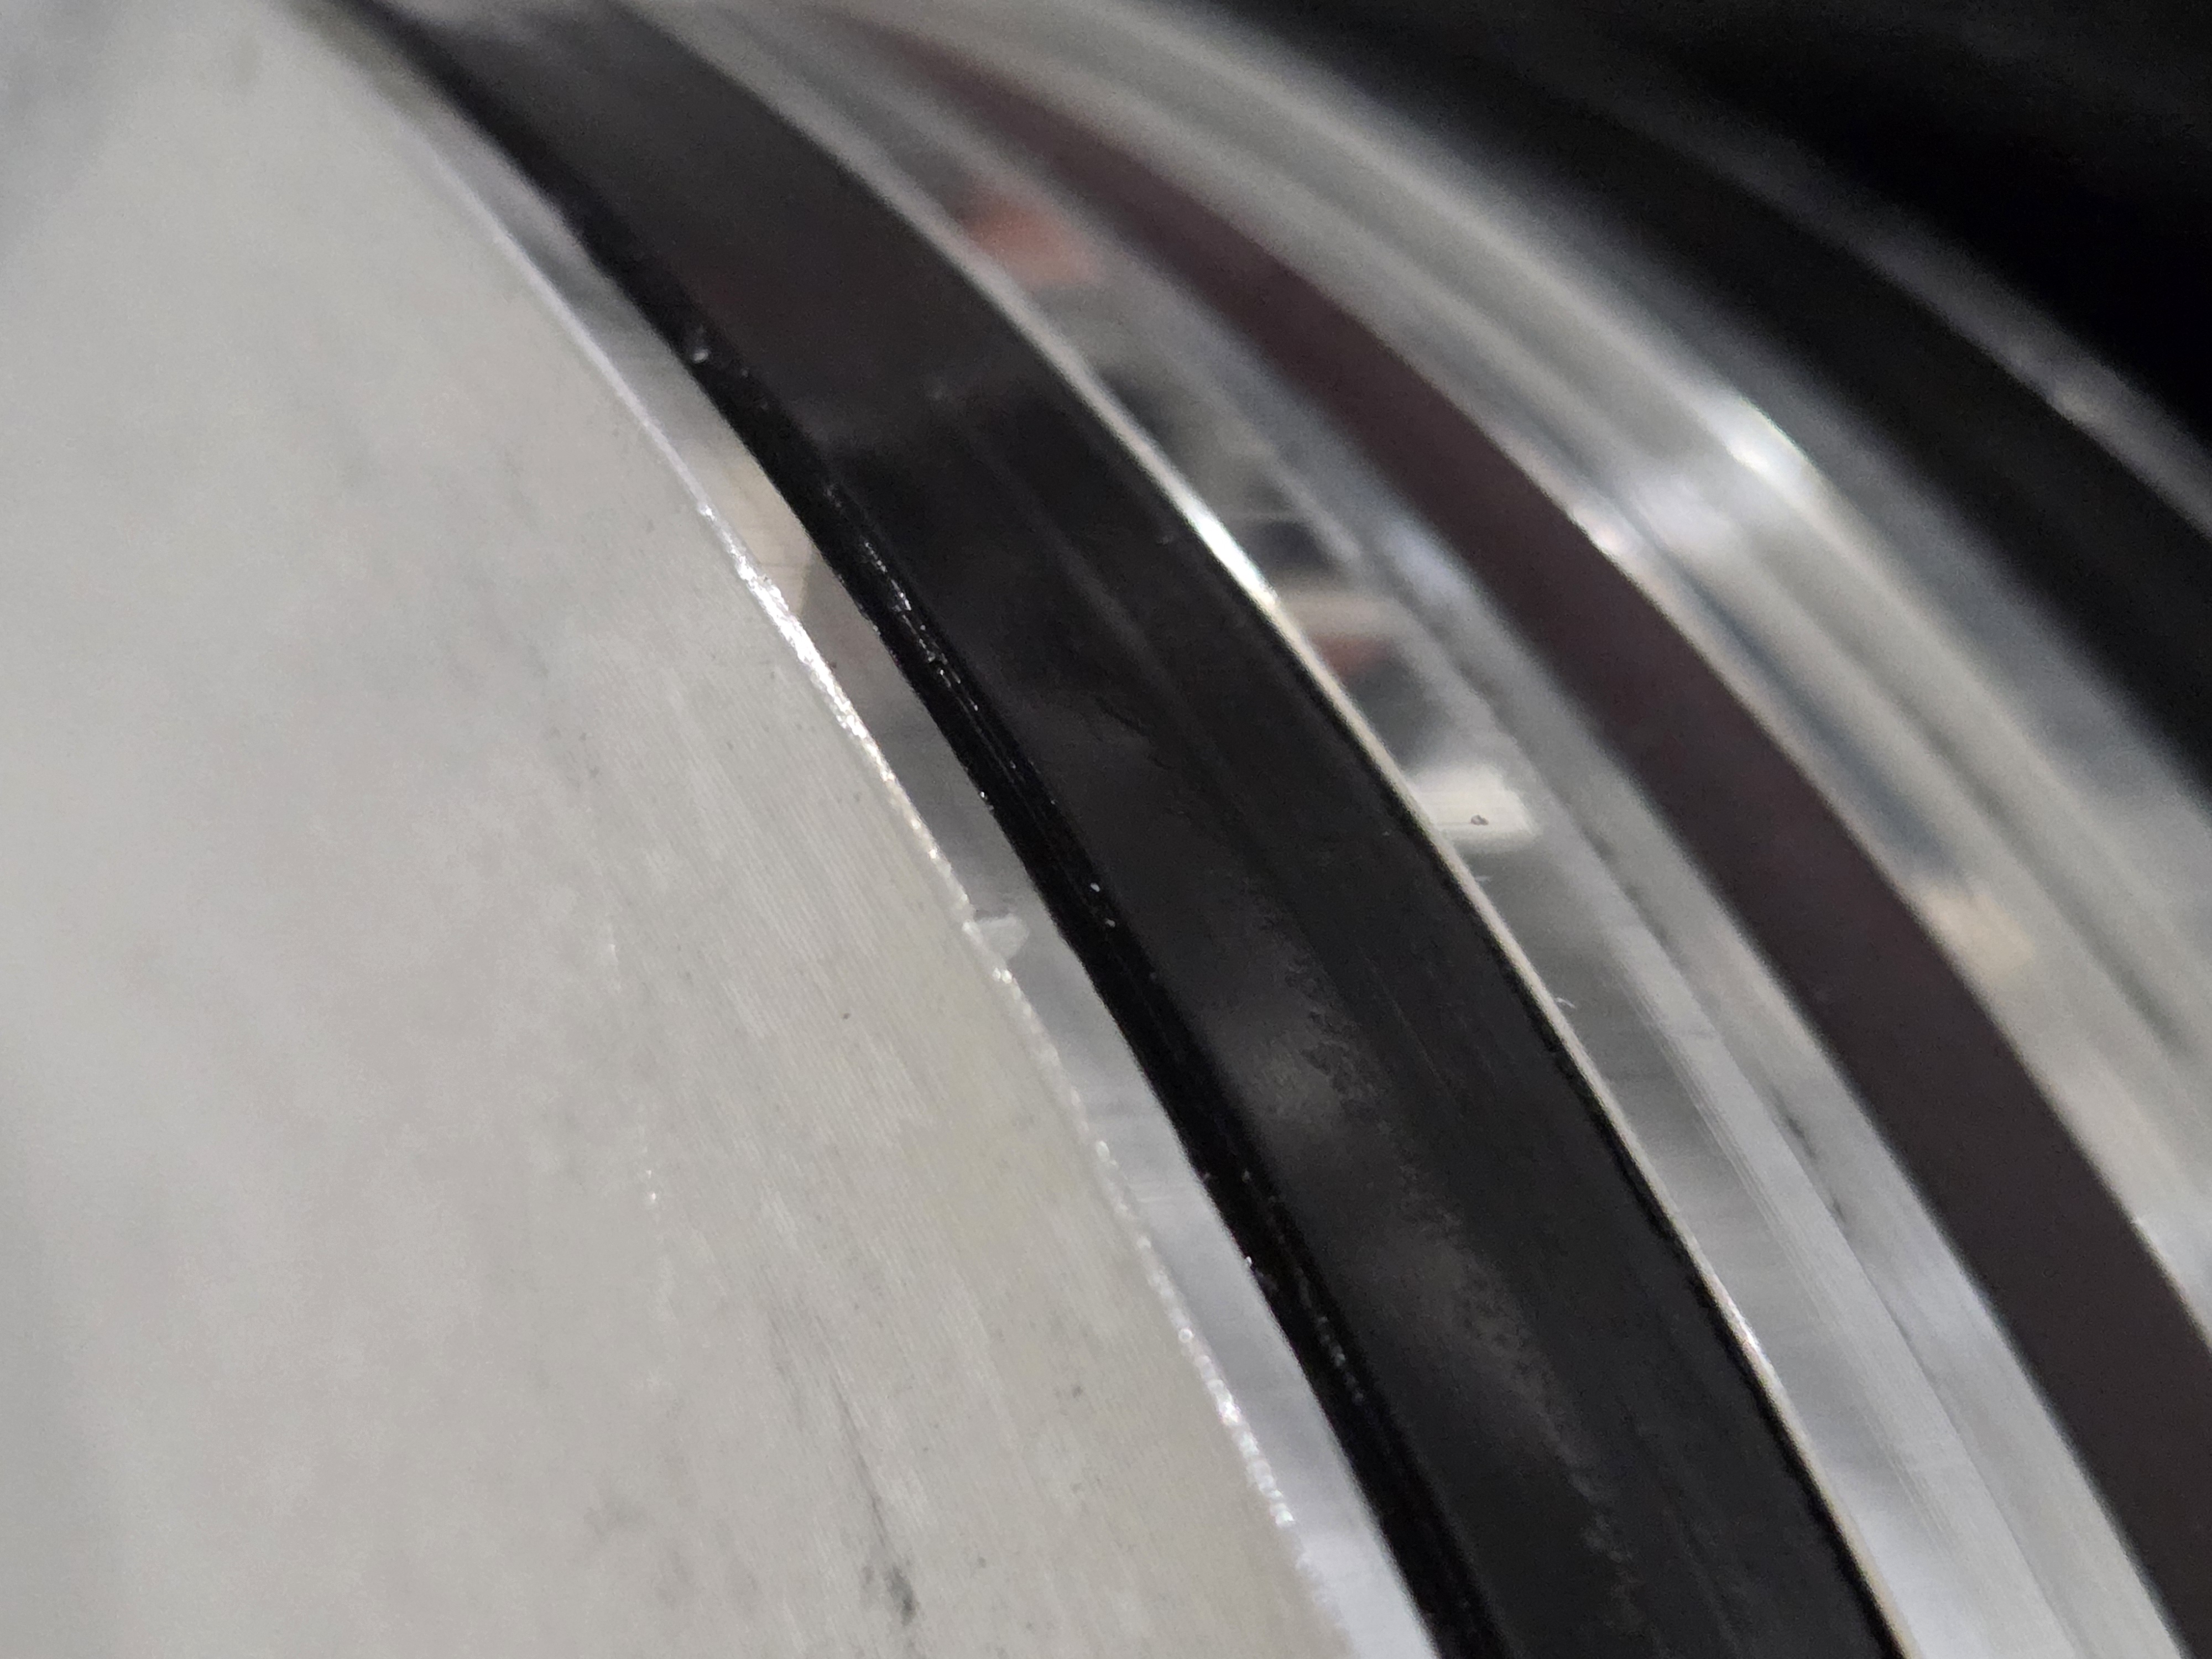


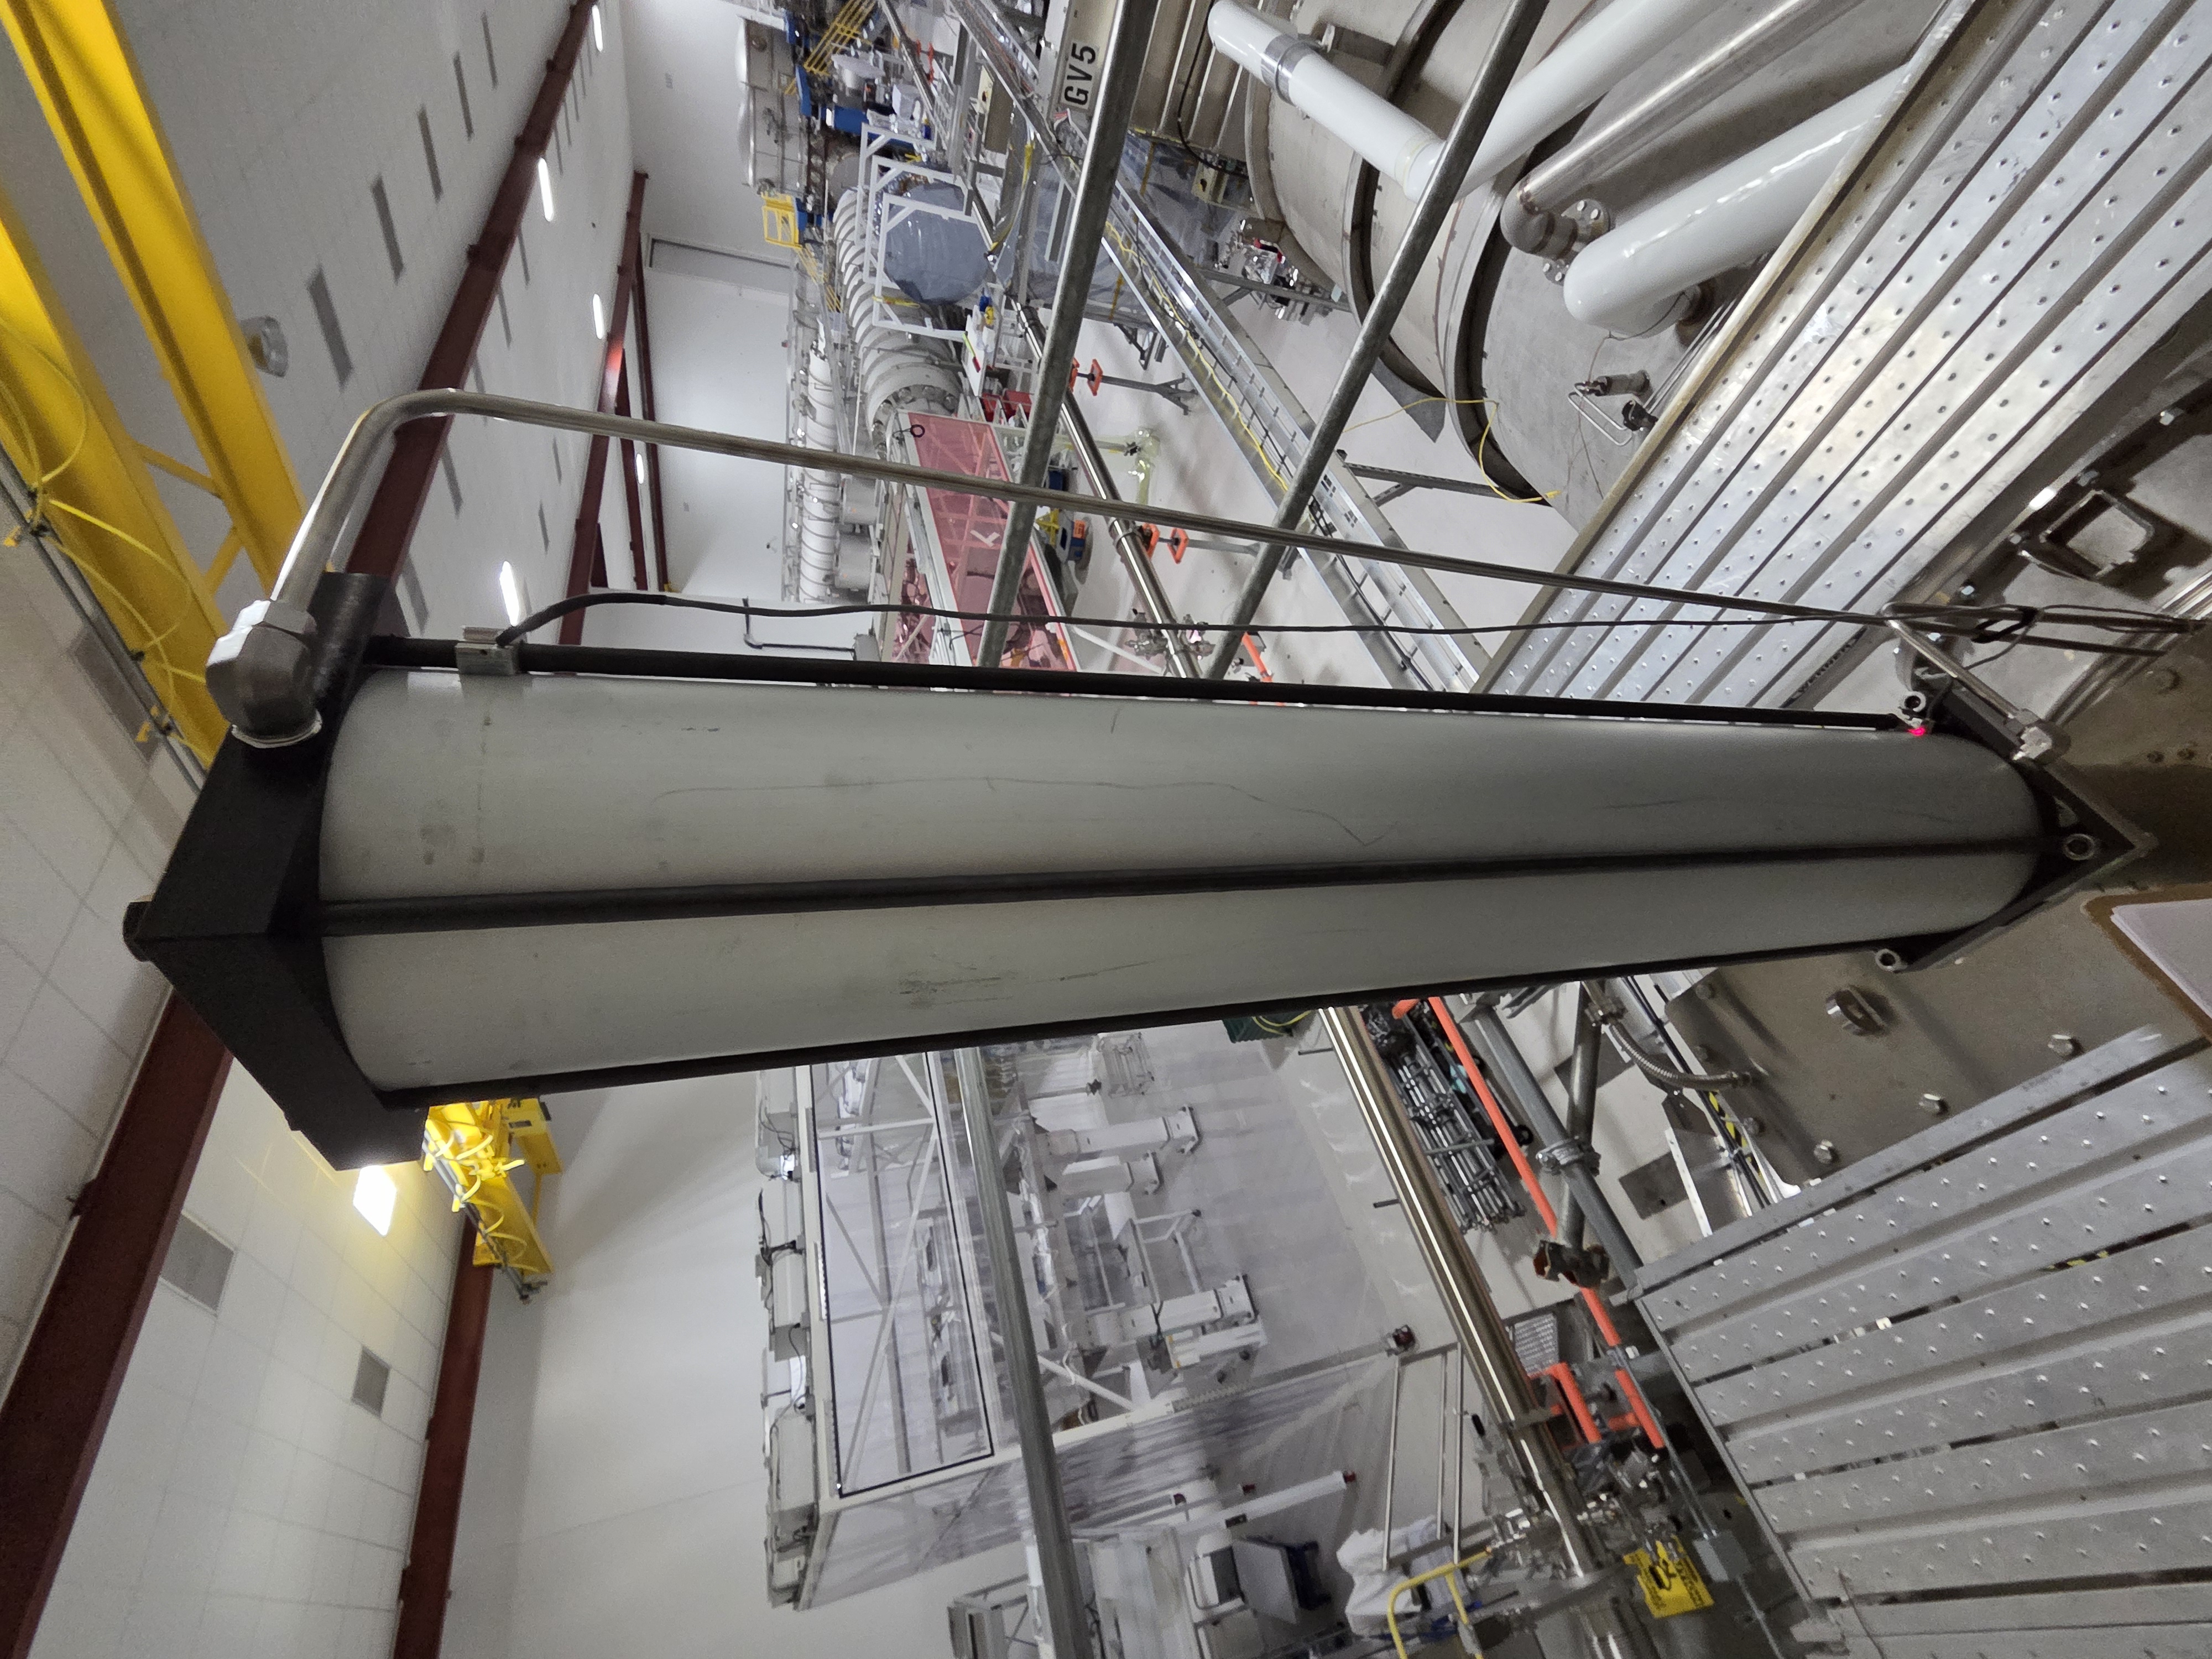
We were unable to fully open GV6 today after the cylinder repair. We heard the clunk of the gate camming over at 45 psi, but it did not start to raise until 55 psi, at which point we could hear air blow-by at the solenoid manifold, and up at the cylinder itself.
So we stopped trying to open the valve any further and slowly reduced the regulator output in order to bleed out the accumulated pressure on the bottom side of the piston. This lowered the gate back down and we heard the gate touch down indicating it is soft closed.
We will have to disassemble to air cylinder again and see what may be the issue. We still have 4 sets of replacement seals and one brand new air cylinder on hand if needed.
The valve remains soft closed until we are able to troubleshoot and repair the cylinder.
8/3/2026
Travis, Gerardo, Jordan
Today we again disassembled the GV6 air cylinder with the valve soft closed to try and see what may have been causing the air blow-by which prevented us from fully opening the valve last week.
We did not find anything immediately obvious such as a seal that had jumped out of the groove, so we measured the ID of the original air cylinder, which was re-used, and found that it was ~0.01" larger than the ID of the spare cylinder (original ID ~8.015", spare ID ~8.005"). We then elected to use the spare cylinder instead to make sure there is good sealing contact with the cylinder wall, so we re-distributed the grease on the new cylinder and attempted to install over the piston, but the tube seemed to be slightly out of round and would not fit over the piston. So we flipped the tube 180 degrees and measured that side of the tube and found it was better. We again added grease to that side of the cylinder and installed it over the piston, ensuring the seals and wear band stayed in place, Then we re-installed the threaded rods, torqued the nuts, installed the reed switches and installed the air lines.
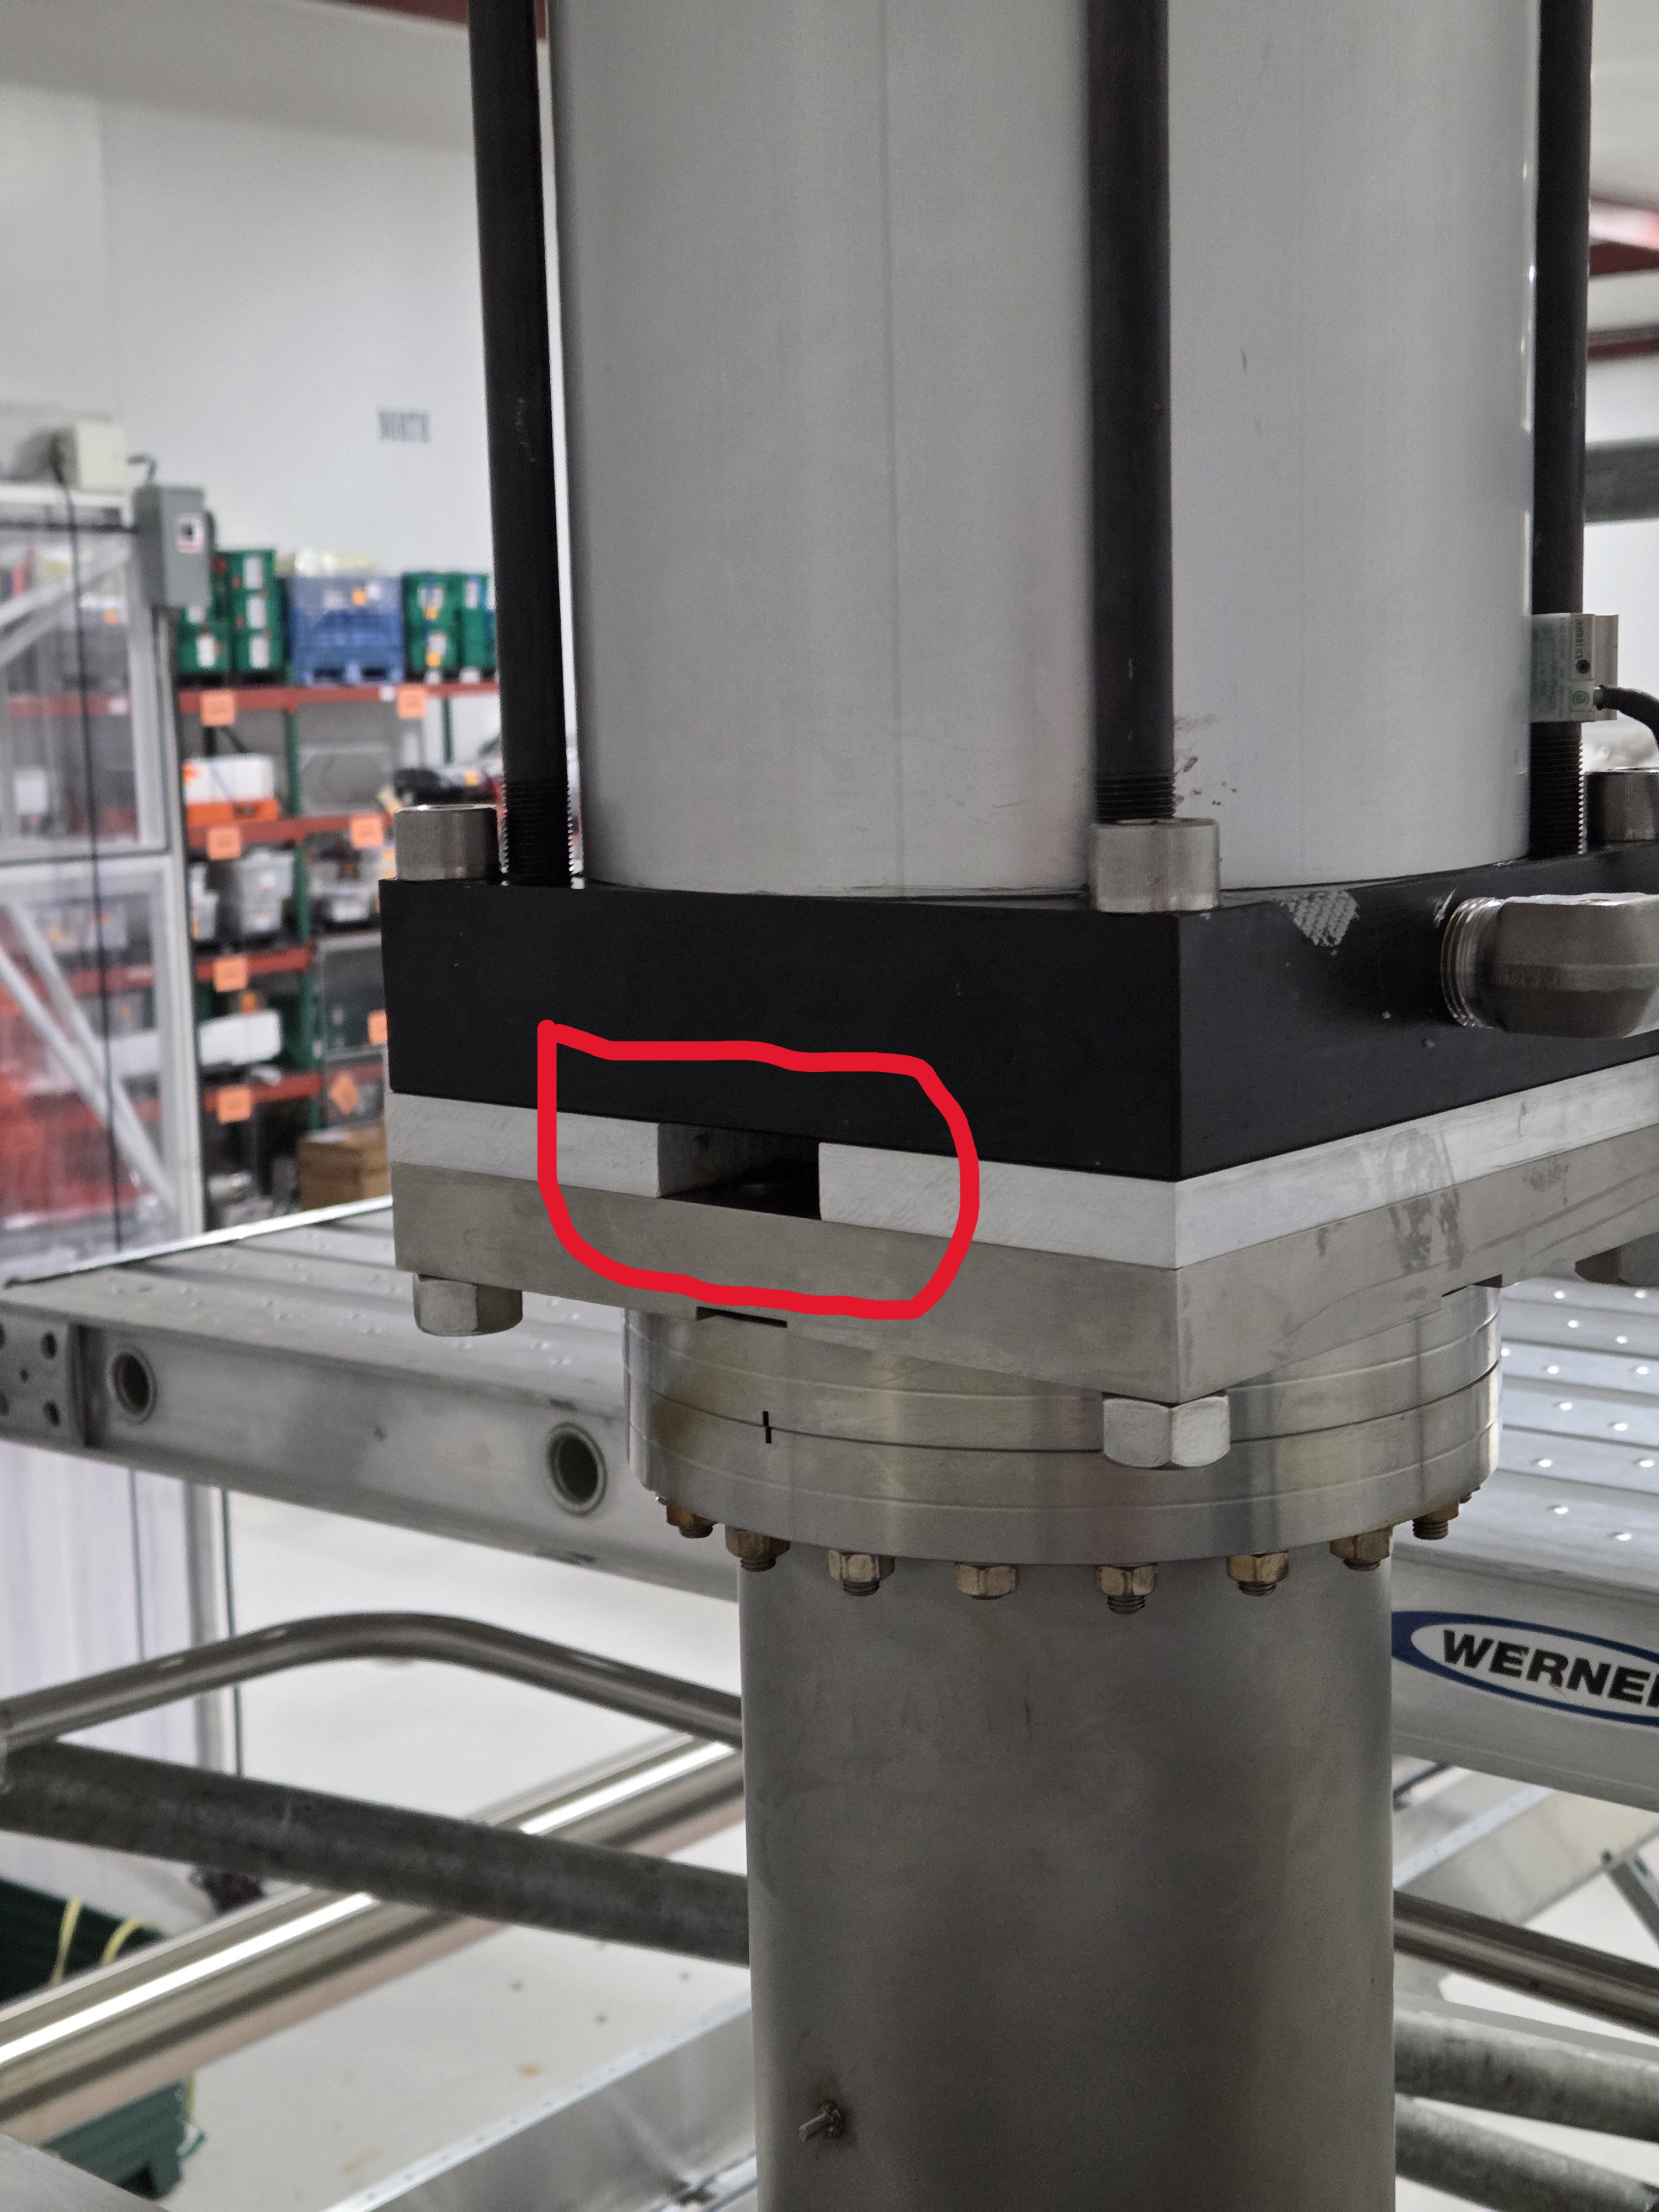
To verify all the new joints/connections were ok, we put ~10 psi to the top of the cylinder and then to the bottom to see if there were any leaks. There were none so we started to open the valve by increasing air pressure at the regulator, once we got to ~25 psi we could hear and feel air coming out of the bottom plate/adapter flange below the cylinder assembly, see picture below the area where air is coming out of is circled in red, at which point we stopped trying to open the valve and closed the quarter turn isolation valve to the air line.
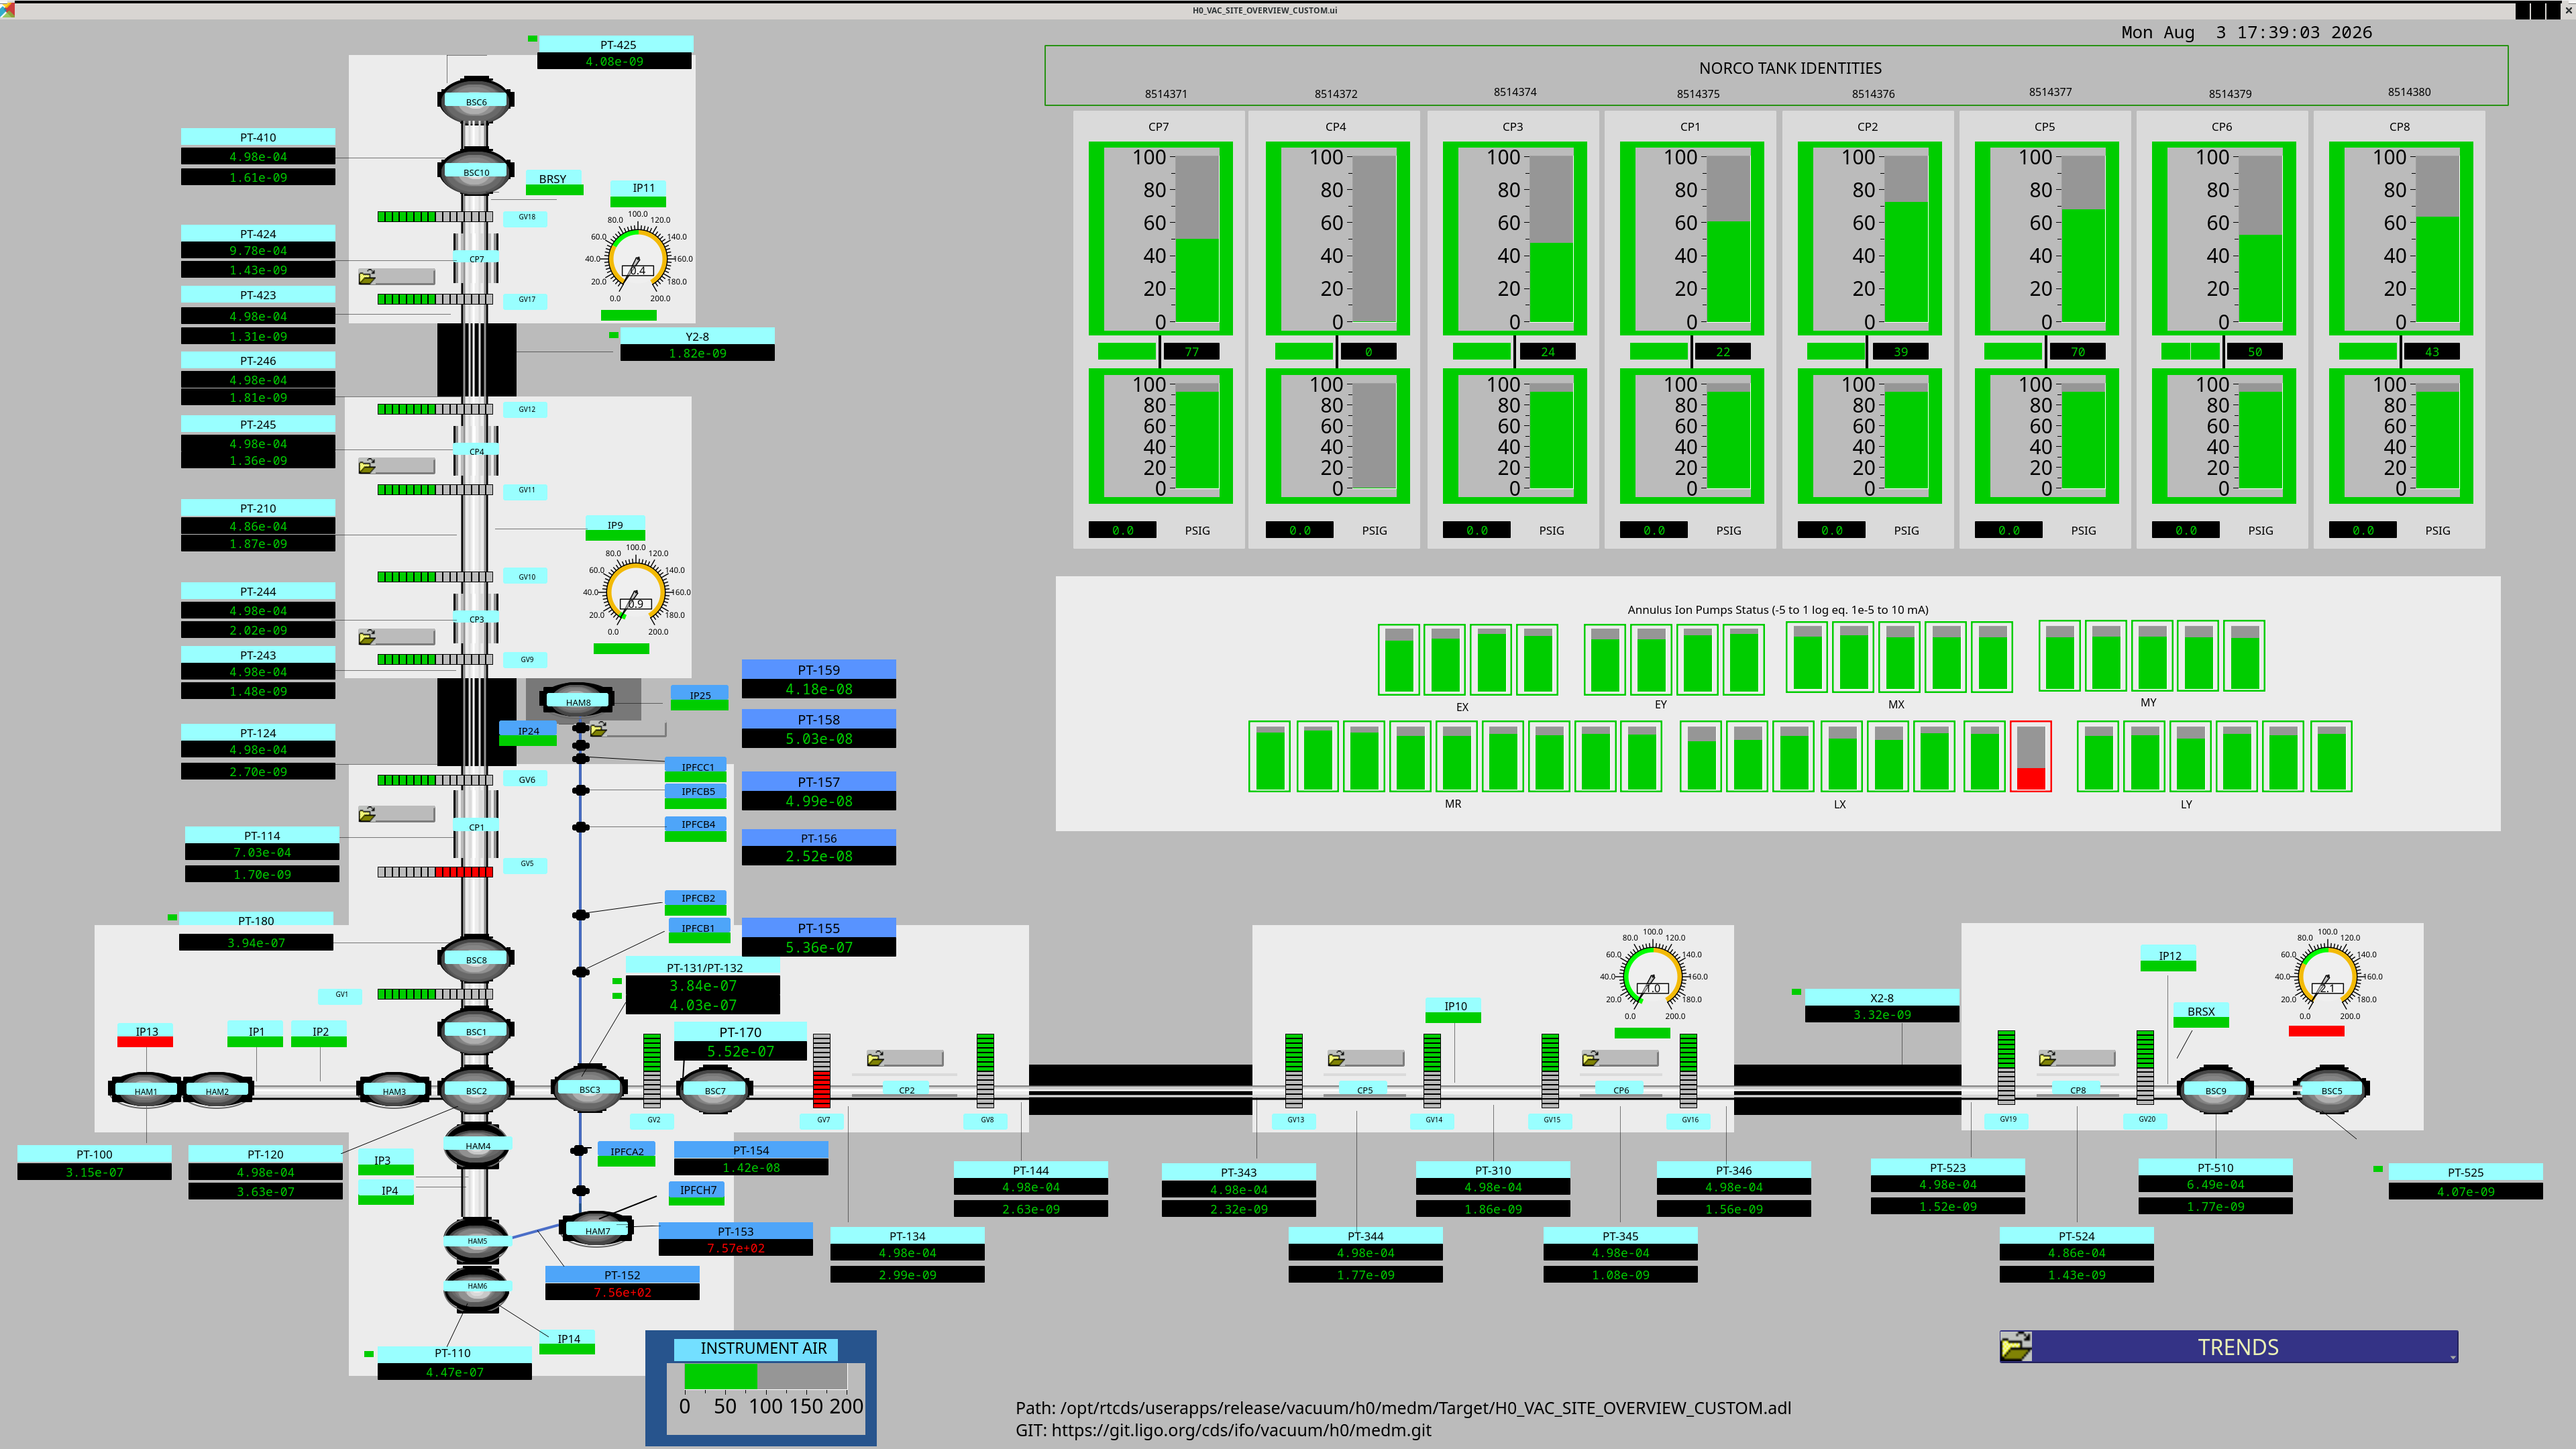
We spoke with a GNB rep who advised we try to to open at a higher pressure and see if the bottom seals, so we then tried to open the valve again. This time we started at 20 psi and followed our normal opening procedure with the exception of increasing by 5 psi instead of 10 and waiting 3 minutes between increases. At ~35 psi, air stopped leaking out of the bottom flange, there was no air blow-by in the cylinder and we could hear the carriage starting to move. The gate fully opened at ~48 psi and Gerardo was able to take a video where you can hear the piston incrementally move up the cylinder. We increased the holding pressure to 58 psi and verified the MEDM screen showed the valve status as green.
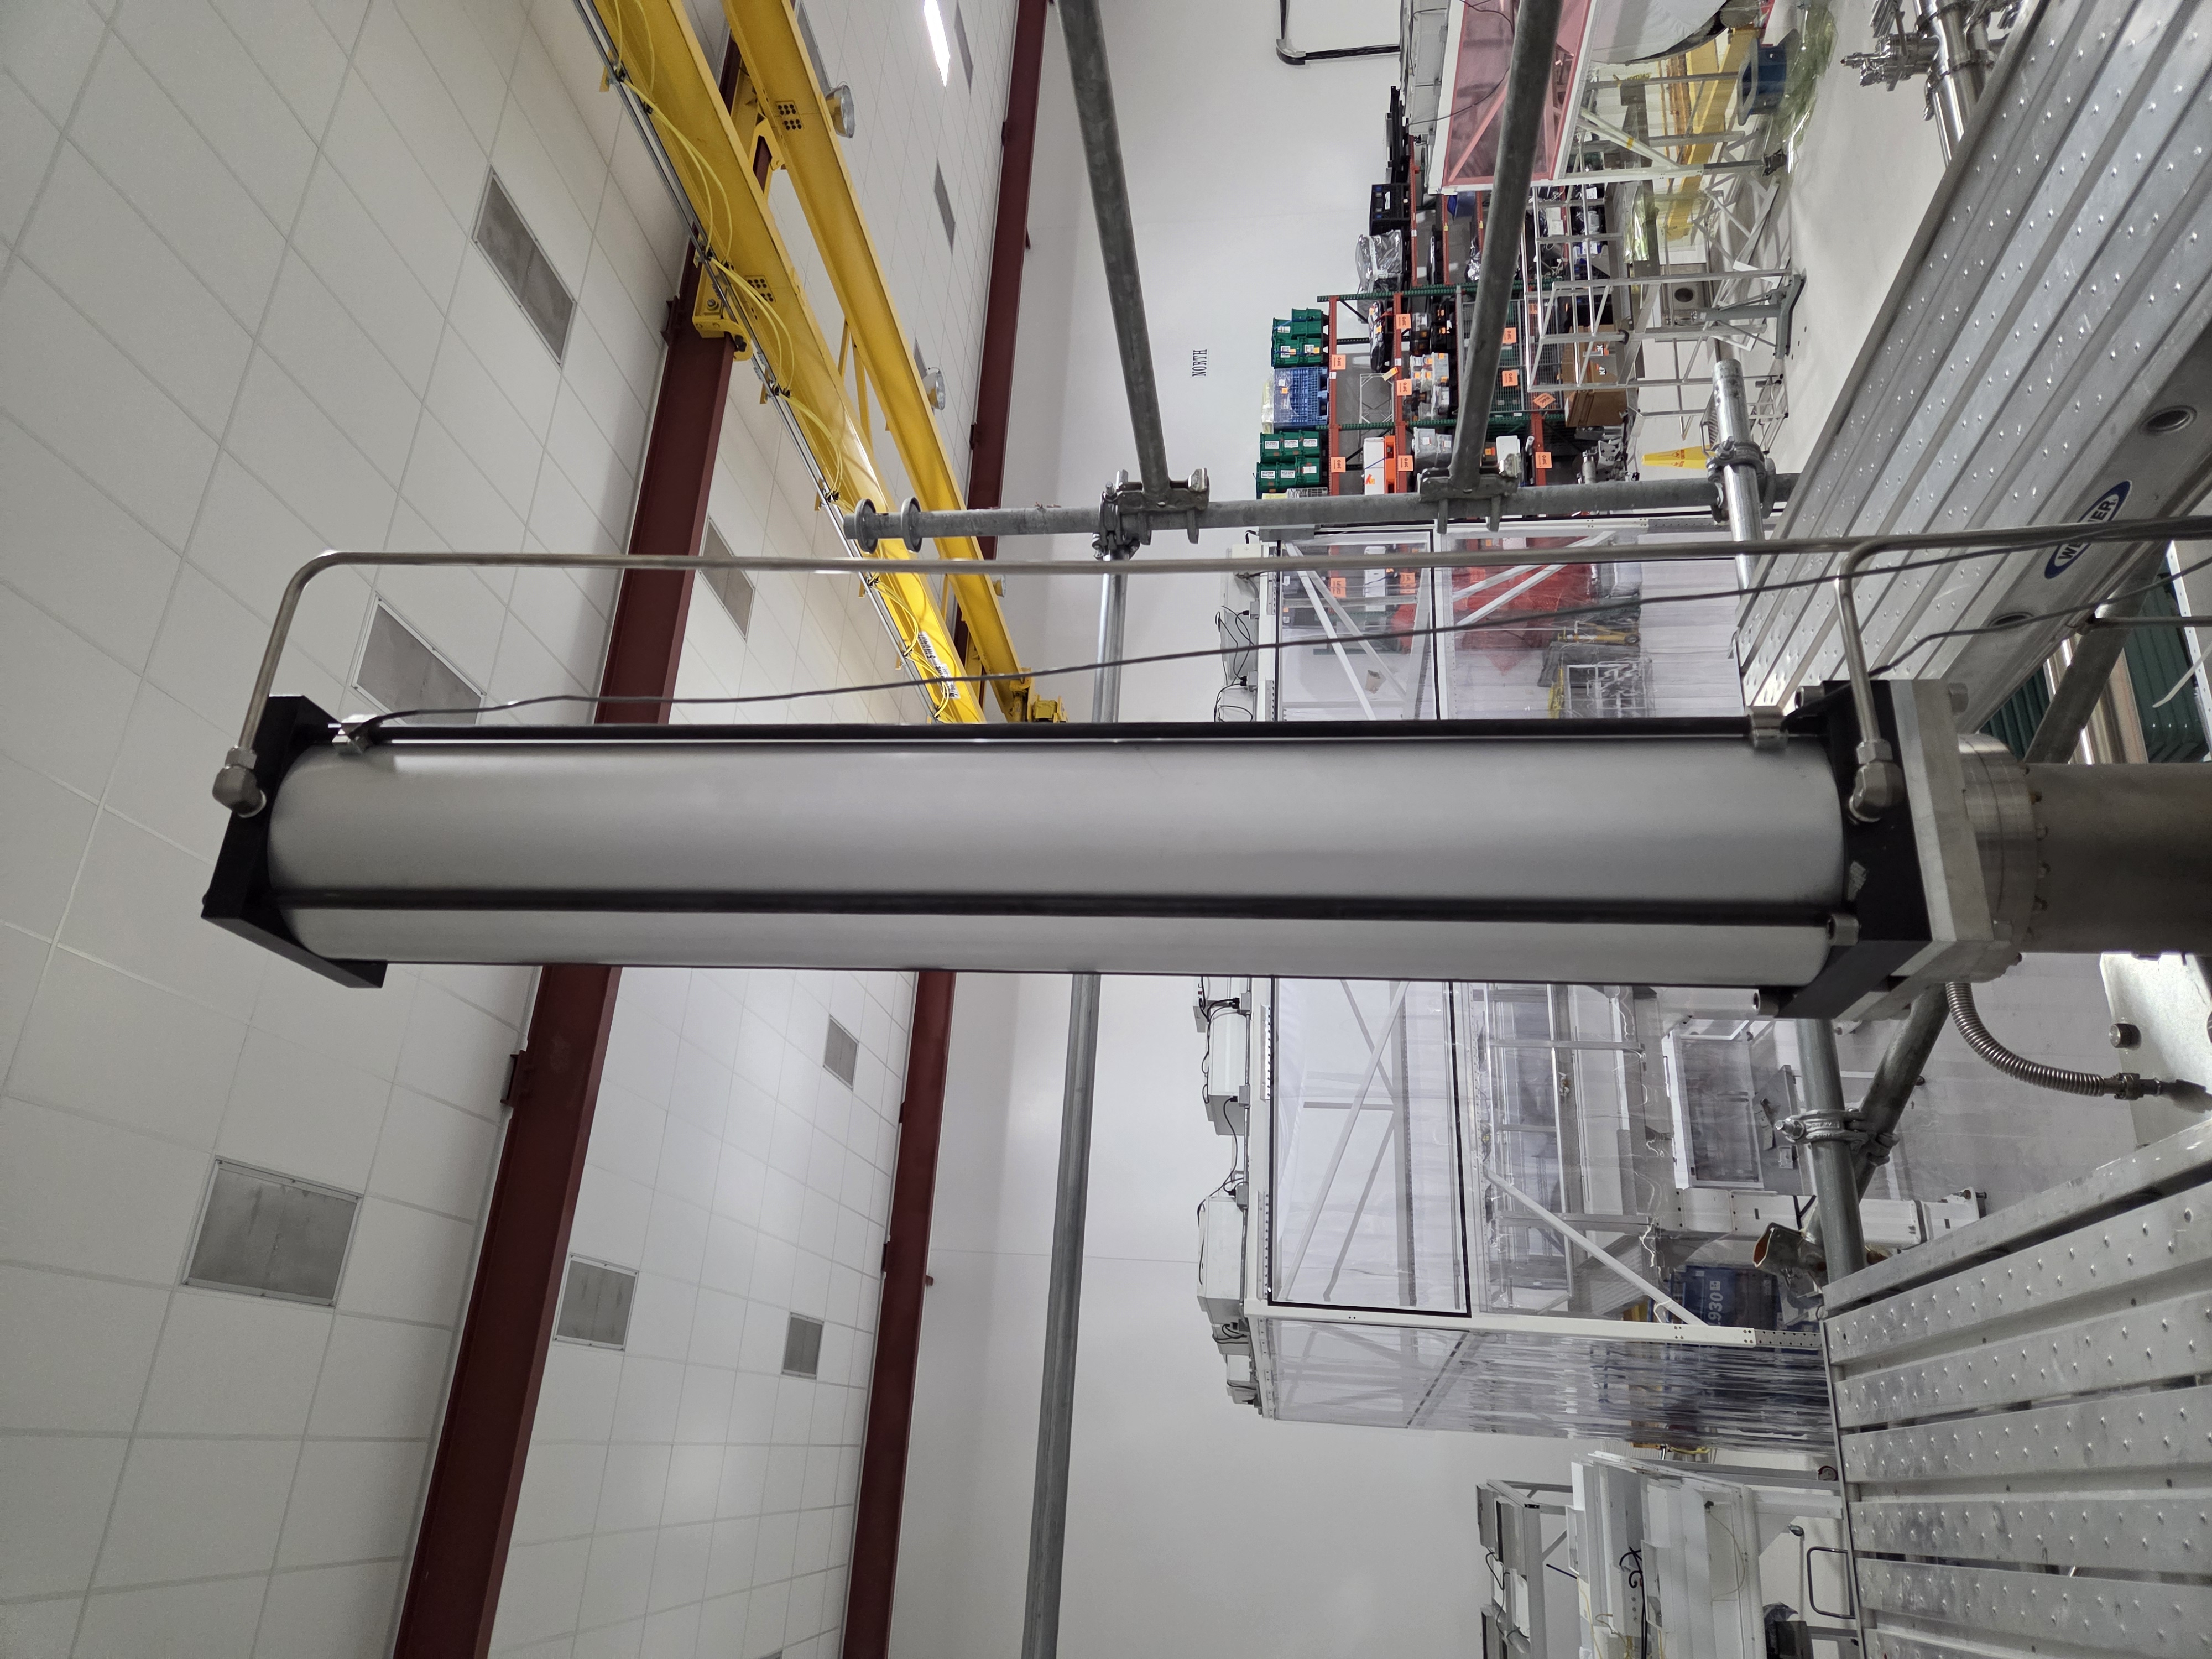
8/6/2026
This morning we wanted to soft close GV6 to see if the scraping/squeaking sound continued, or if grease just need to be distributed in the cylinder. Following our normal soft close procedure,we still heard the same noise as the piston moved down.
We decide to swap the cylinder one last time to the spare cylinder which removed from GV7 back in May. This cylinder had an ID of 8.004" on both ends.
During the removal of the "sticky" cylinder, we saw there were some small metal shavings on top of the piston, so we decided to remove the seals and install new ones to make sure there is no damage or debris that could cause sealing issues. We added grease to the new seals/o-rings, and the inside of the cylinder, then re-assembled the cylinder/threaded rods/nuts.
An updated cylinder repair procedure in the works at E2600176.
Once we were done with the cylinder assembly we opened the gate valve to test functionality, and see if there were any leaks in the cylinder. We again heard air coming out of the bottom flange, same as the entry above, but once we got to 35-40 psi the leak stopped and we could hear the carriage moving up. This time there was no excess noise or dragging, and the valve fully opened at 48 psi. After of ~10 minutes with the valve open, and we confirmed there were no leaks in any of the newly assembled joints, we soft closed the valve, again there was no excess noise or dragging of the piston. This is what we typically see/hear when actuating the pneumatic valves.
GV6 remains soft closed for now, closing WP 13471
Videos related to alog 91378 above (original .mov files compressed to be able to upload in alog)
(Travis S., Jordan V., Gerardo M.)
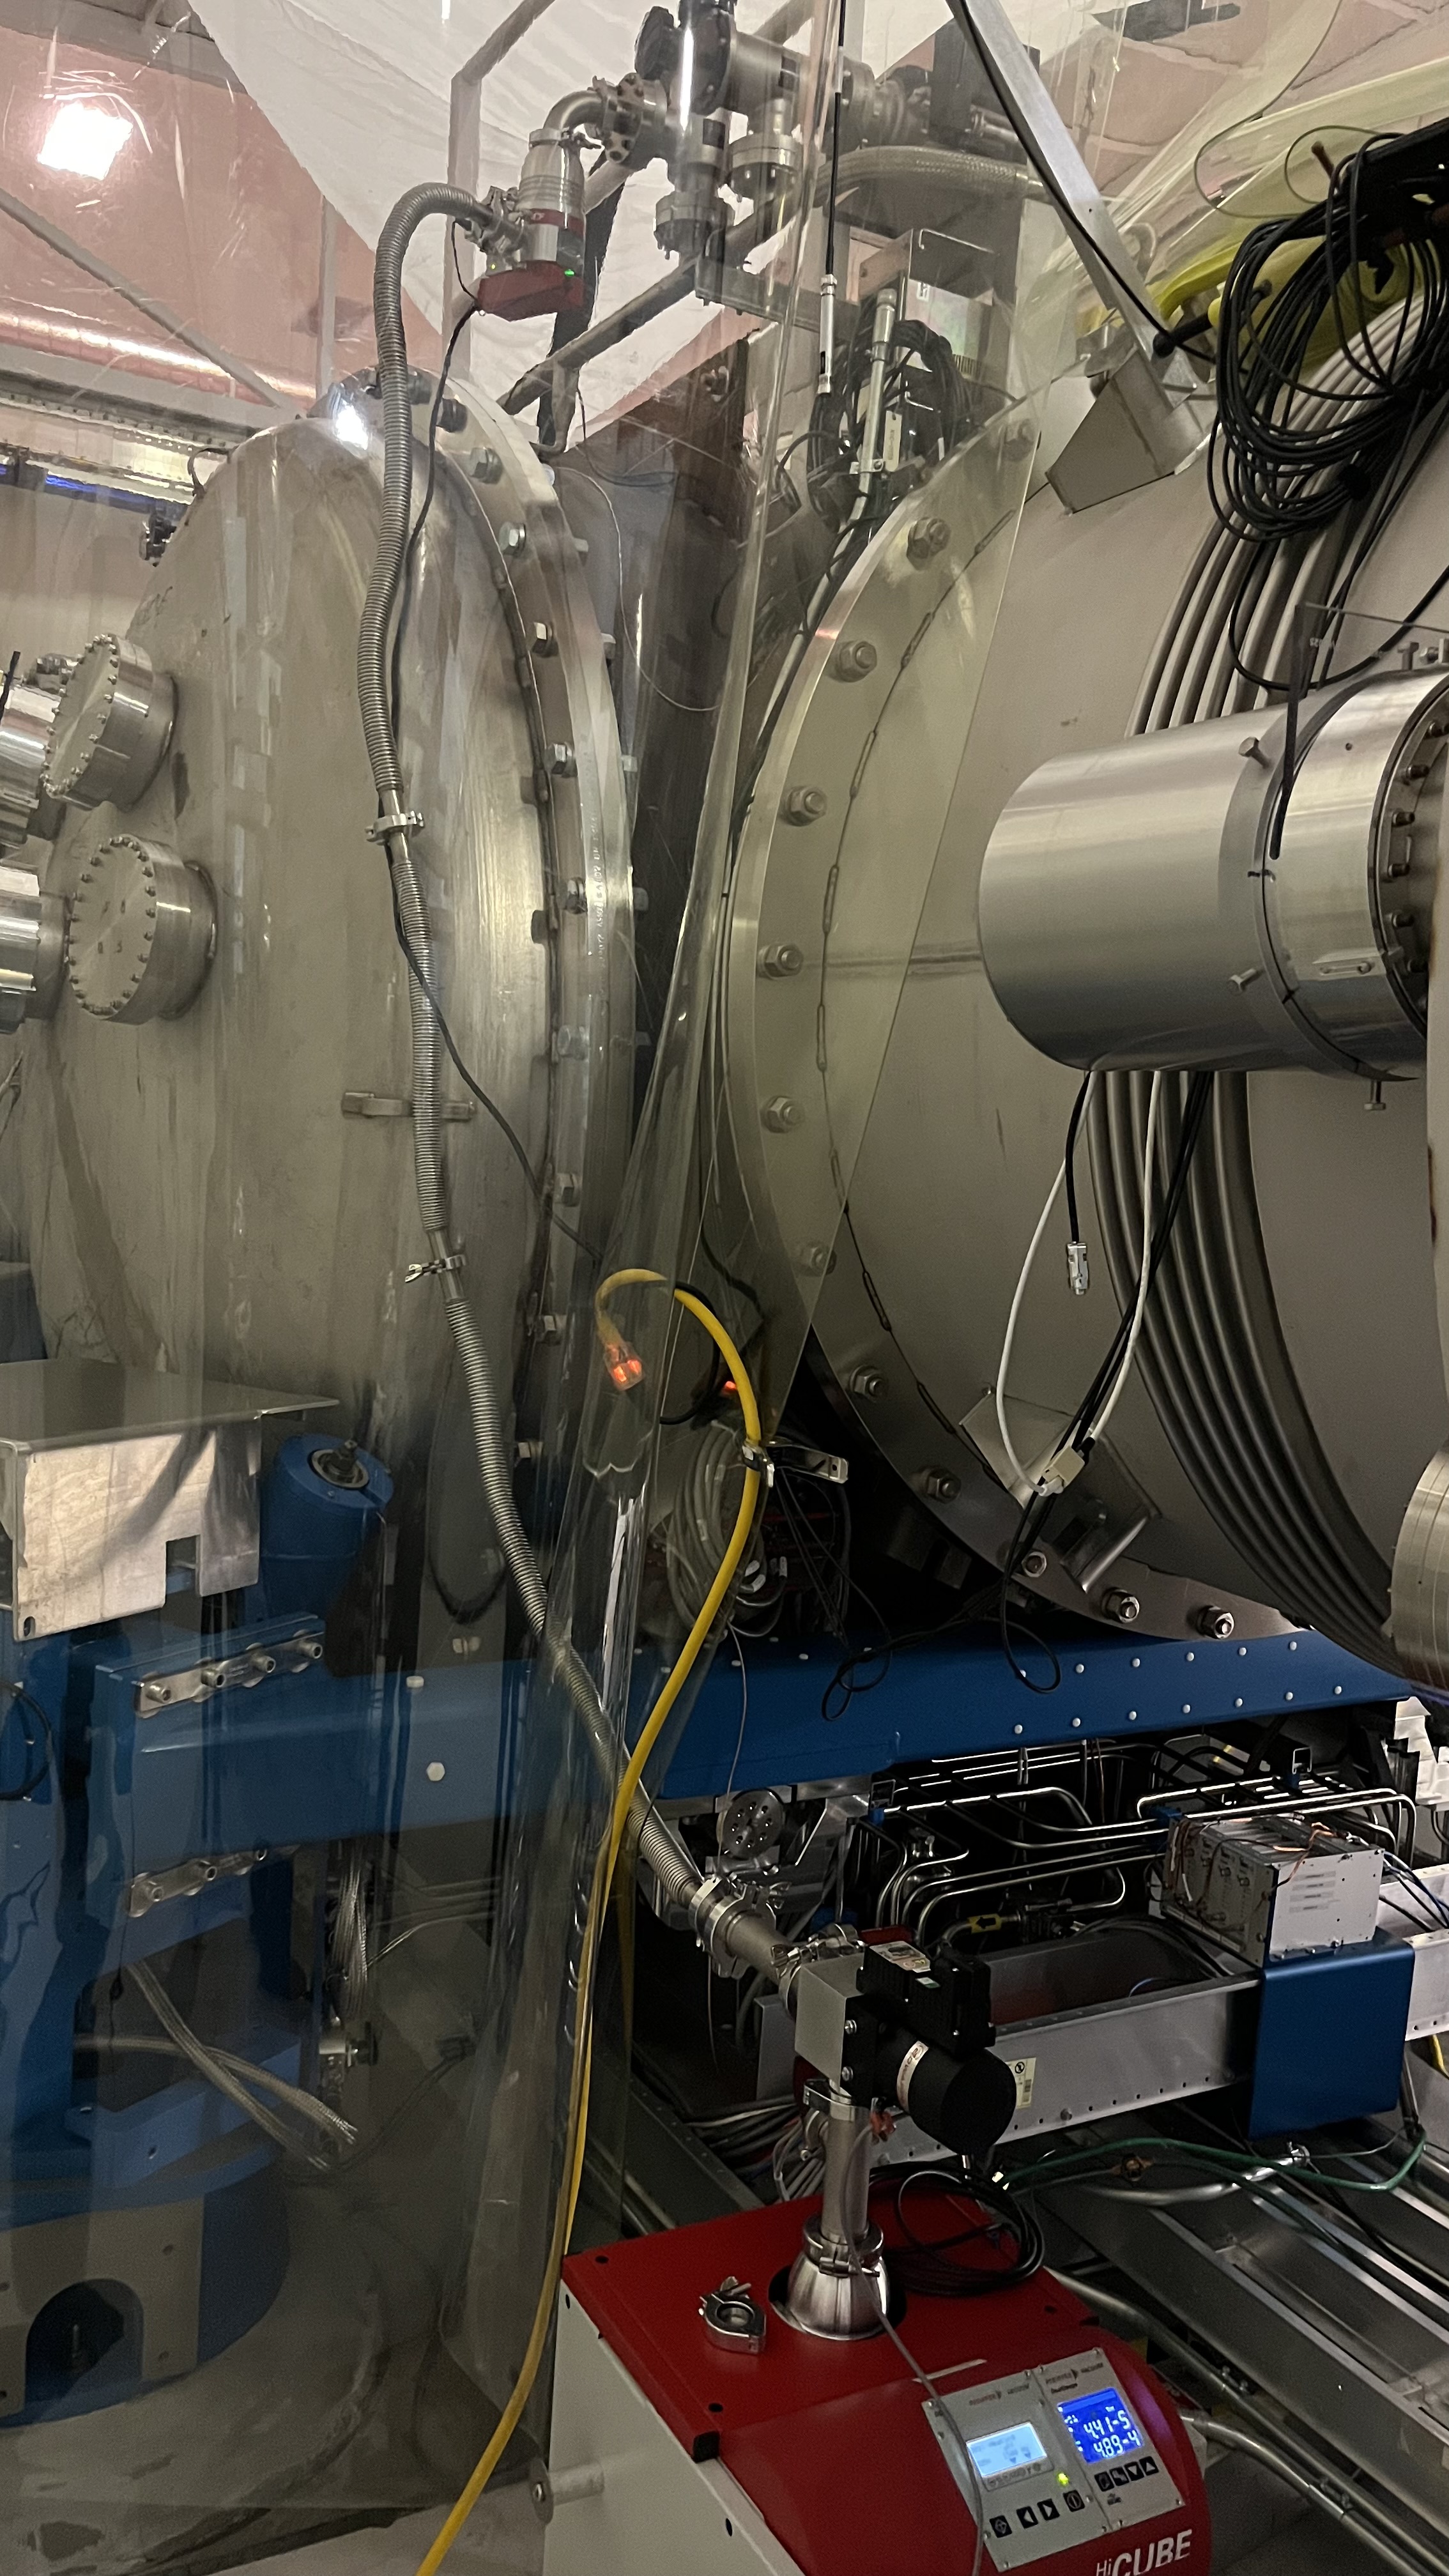
Today we replaced the ion pump for HAM2, but since the annulus system is shared with HAM1, both annulus ion pumps were powered off (HAM1 and HAM2), and the entire annulus system was vented with nitrogen gas. The AIP for HAM2 was removed, along with an elbow, the elbow was replaced with an isolation valve, we used a second hand O-ring valve because the new valve turned out to be short by 1". After torquing all bolts on the ion pump and on the "new valve", the system was pumped down by a can turbo at the isolation valve and backed by an aux-cart, no issues pumping the annulus system down, since the aux-cart gauge already reports a vacuum pressure of 4.5X10-05 Torr. BTW, the can turbo at the top, flex hose and aux-cart will remain pumping on the annulus system until good vacuum pressure is achieved, and they will be a noise source.
Note for future work here: The pipes that make up this annulus system does not allow for an easy installation, during installation a person has to lift up on the pipes, while a second person pulls outward on the pipe to give space at the conflats to insert the copper gasket. The tension on the pipes is something that we noted during the removal of the old ion pump, when the conflats were being unbolted, the gap between both increased on its own, showing us how much the pipes were flexed upward.
(Travis S., Jordan V., Gerardo M.)
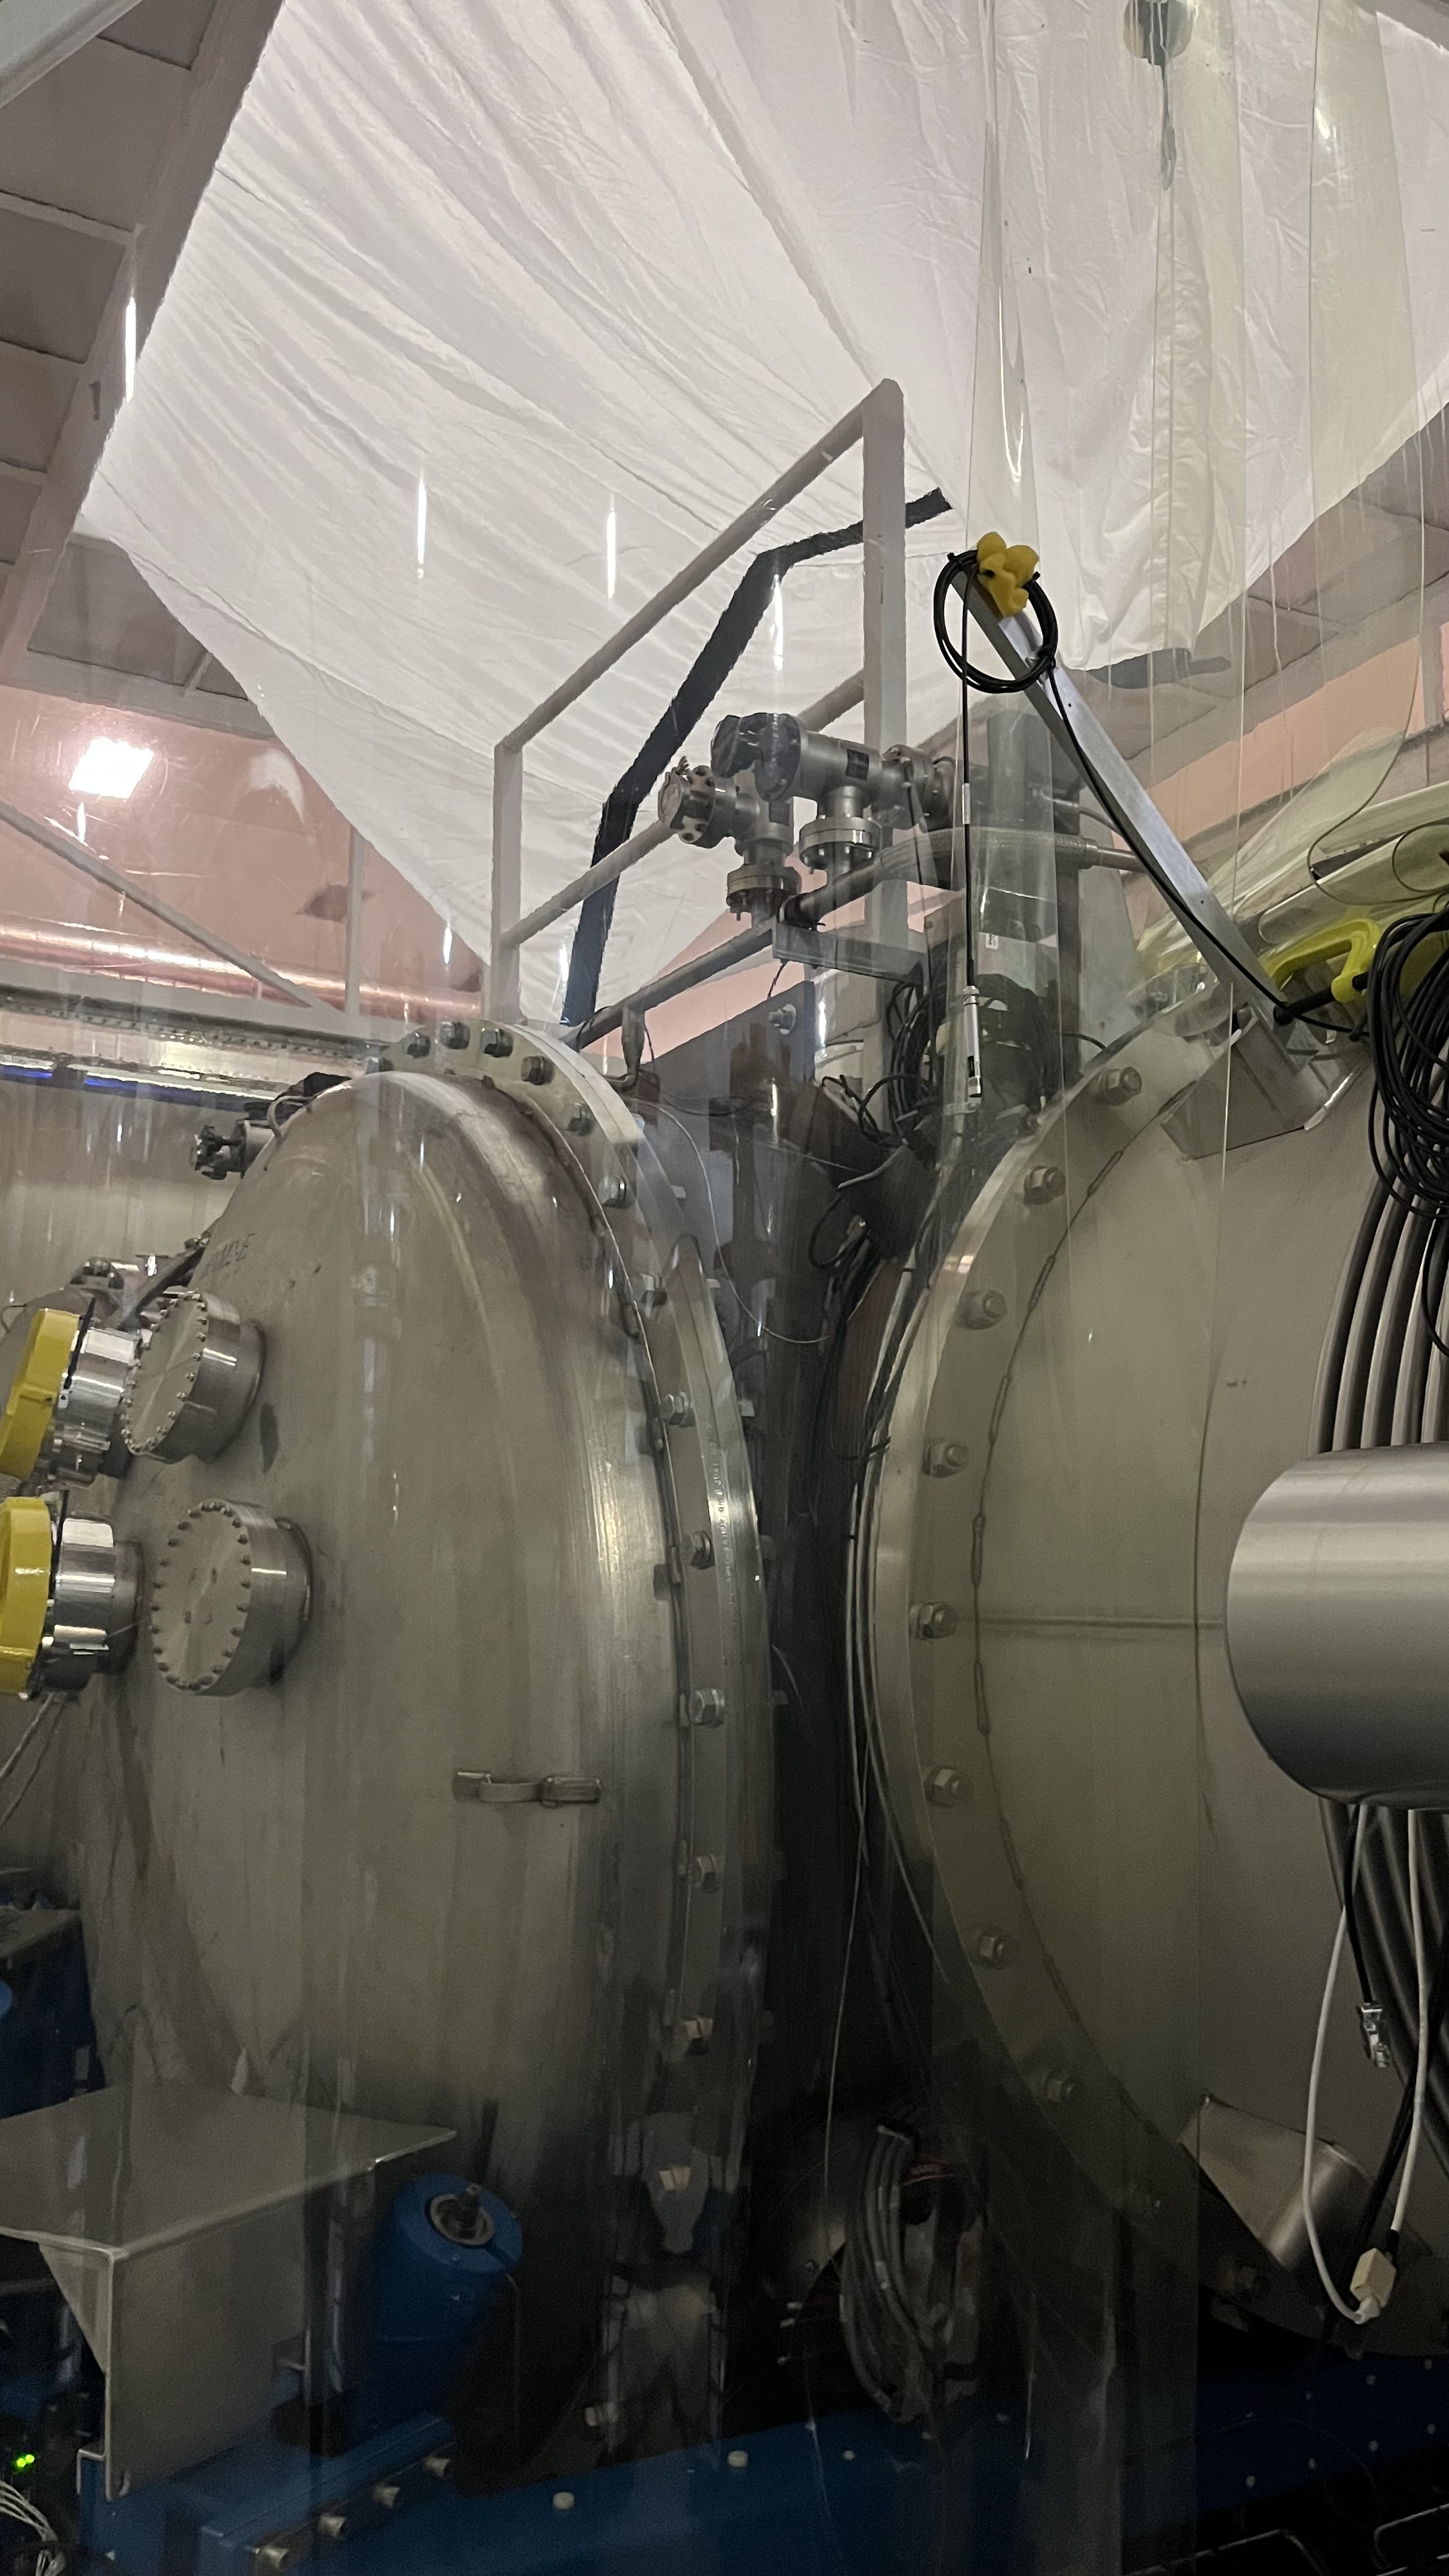
HAM2 annulus system pumpdown is done, Jordan Isolated the system earlier on the week from the aux-cart, ion pump took over the pumping with no issues. Today, taking advantage of a computer reboot, Travis and I removed the flex hoses and can turbo from the annulus system. Aux-cart and components were moved away and stored away from the chambers. BTW, this time we only used one aux-cart for the pumpdown process. HAM2 annulus system is back to nominal.
(Jordan, Travis, Gerardo)
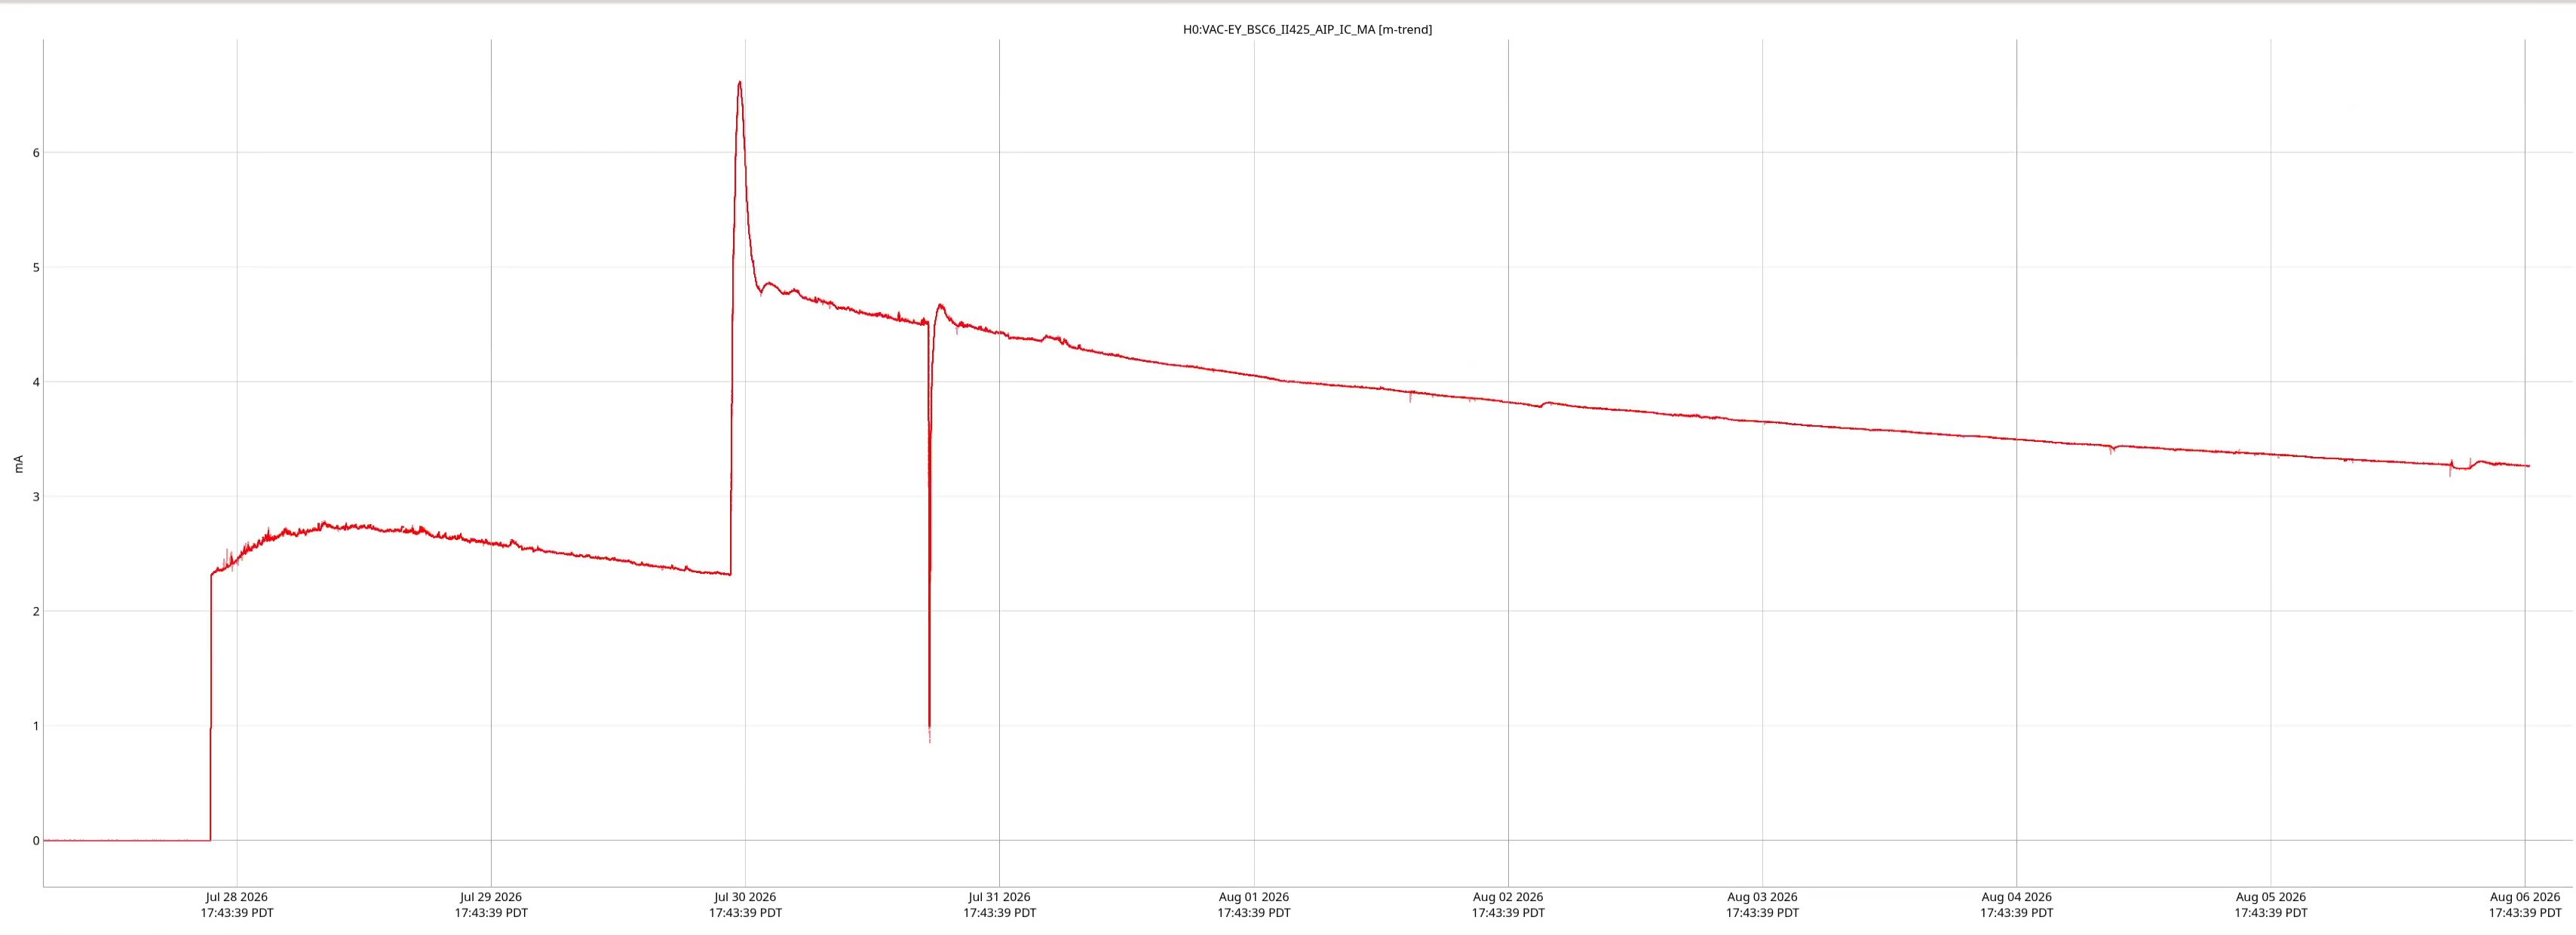
We removed and replaced the AIP for BSC6, no real complications while doing the work. However the joint at the AIP and the isolation valve has a tiny gap towards the bottom, we started pumping down on the system and it appears to be a solid union, we will go and visit tomorrow and see how the pressure is doing. On a side note we did find a flex metal hose that has a leak, it has been removed from circulation.
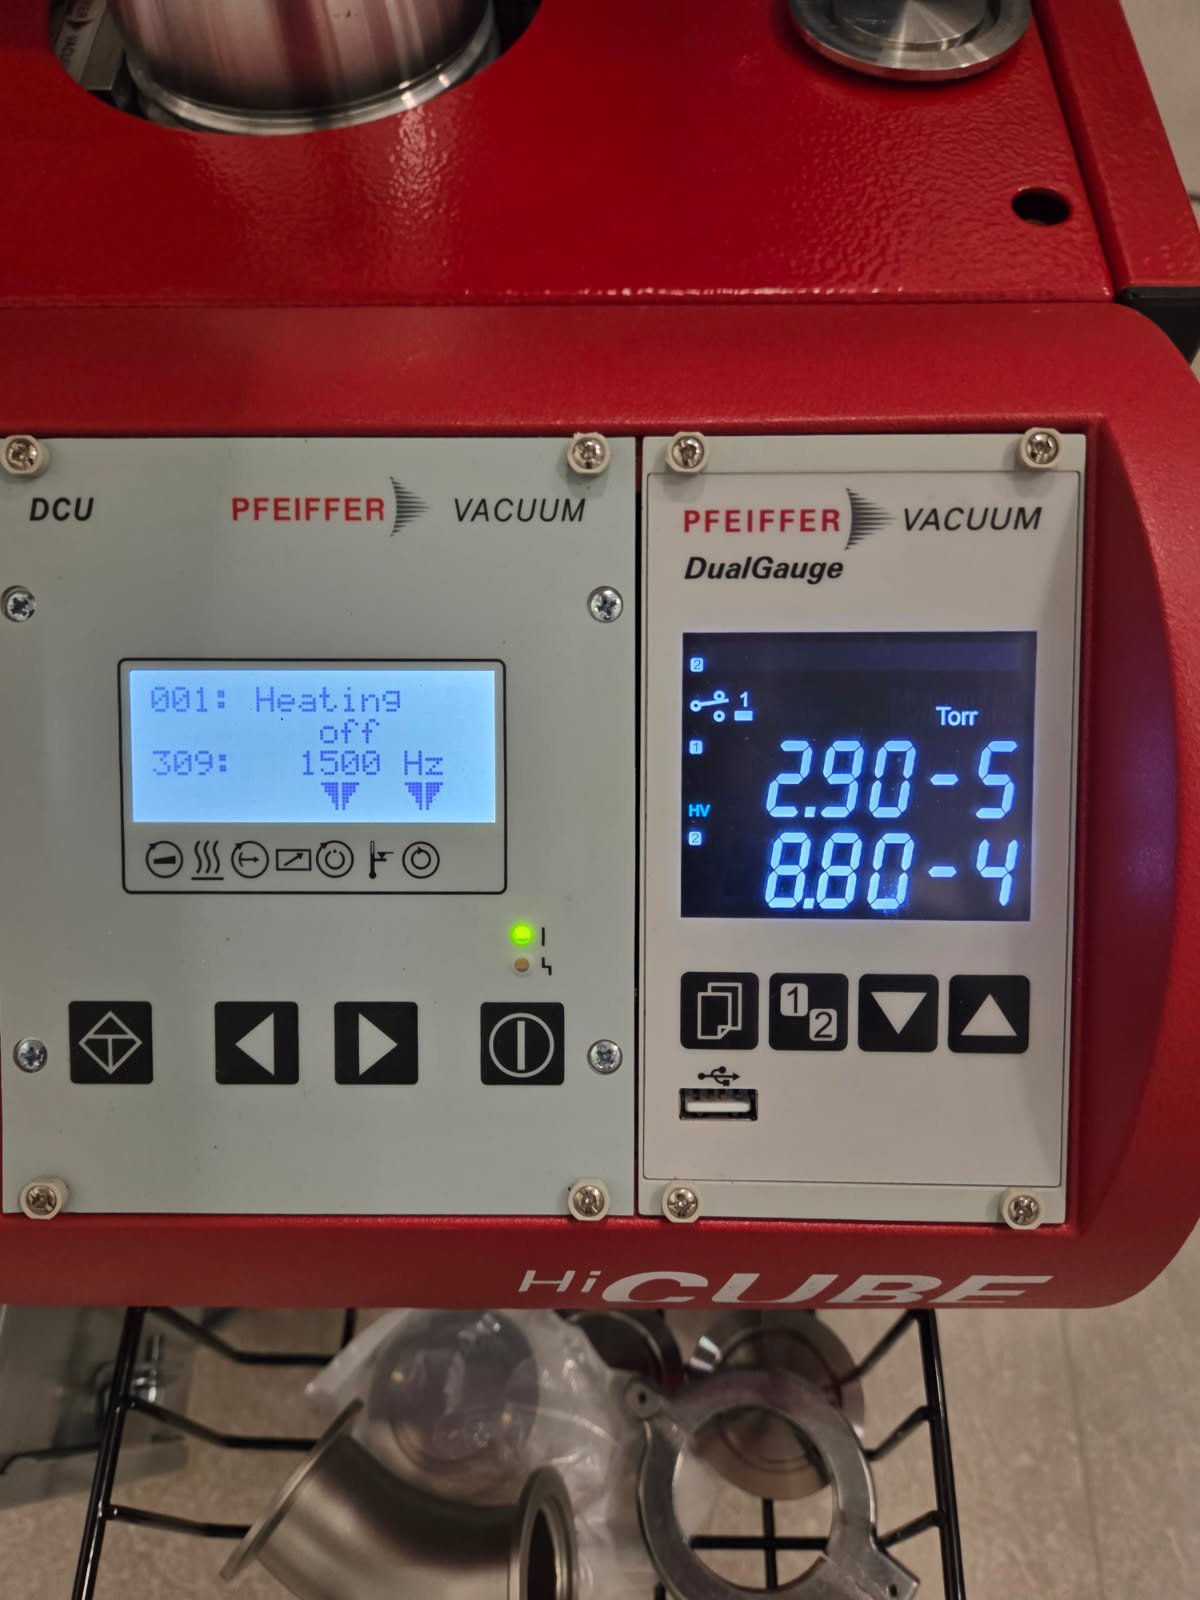
After checking on the pumpdown progress at BSC6 annulus system, the rest of the components were put back, controller was reinstalled, cables were connected (power supply, high voltage, and comms cable) and the annulus ion pump was powered on, it did not take long to reach good vacuum pressure. Aux-cart and can turbo will continue to pump the annulus sytem until it reaches an acceptable vacuum pressure.
(Travis S., Jordan V., Gerardo M.)
Late entry.
After a few days of pumping down the annulus system, on Monday 8/3/26, the can turbo and the aux-cart were removed from the annulus system at BSC6, the ion pump and annulus system are back to nominal.