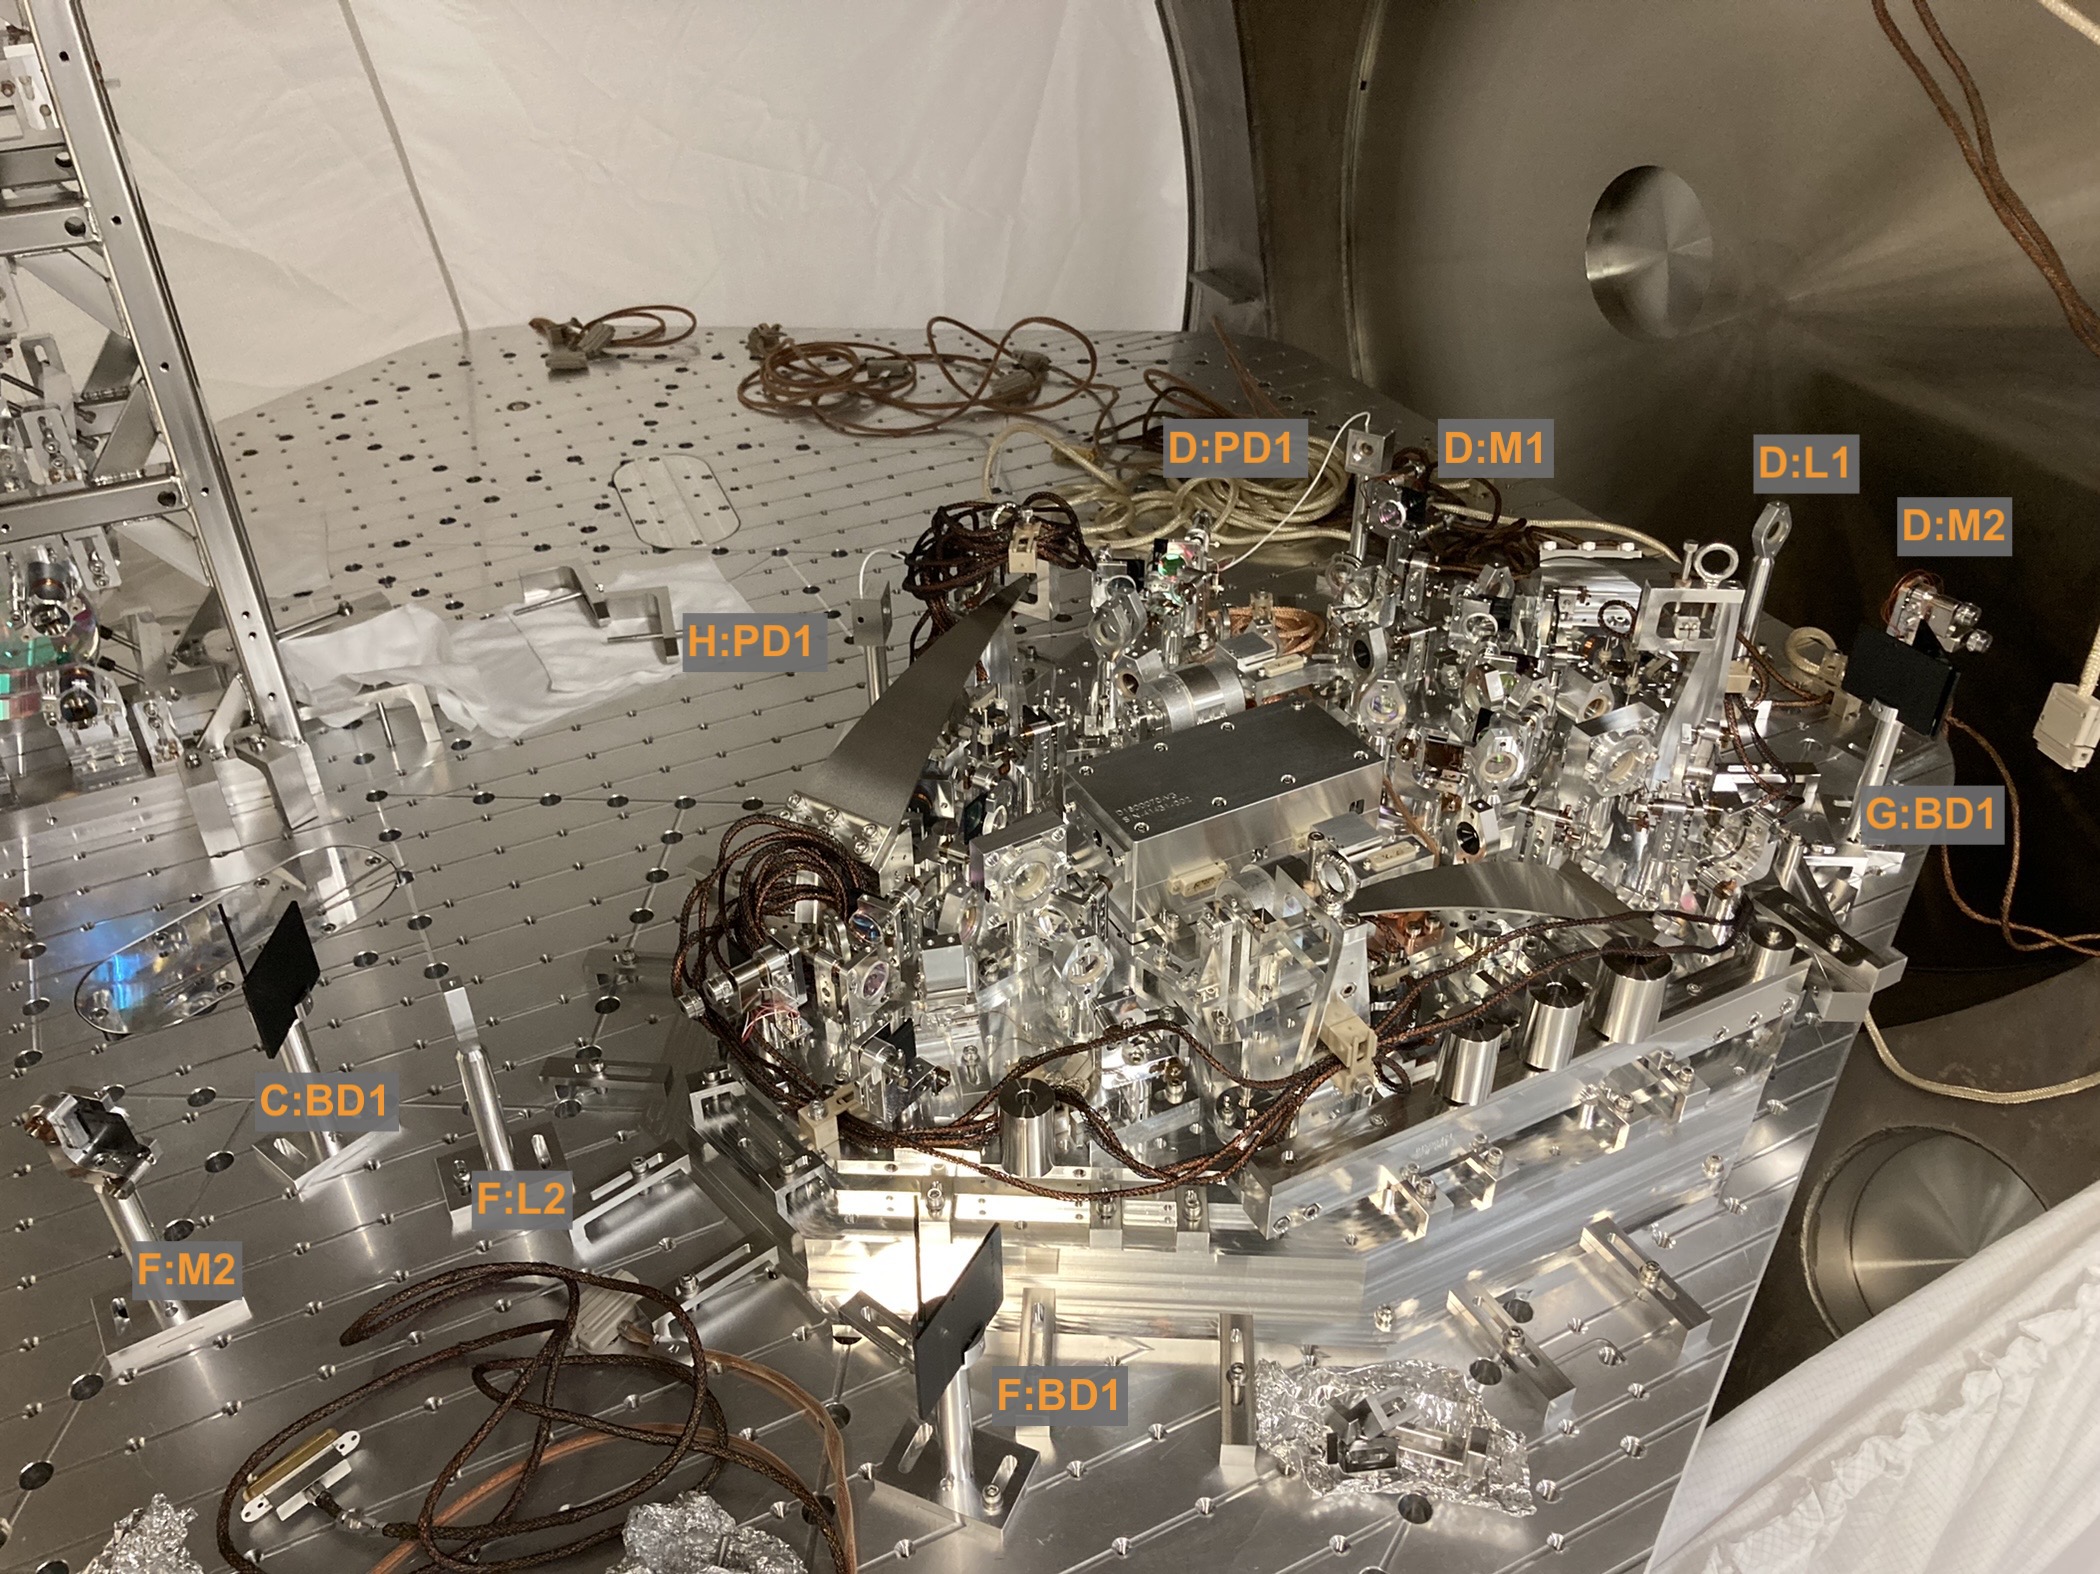
WP9900 Yesterday Gerogia and I started placing the SQZ optics on HAM7 with Keita's help. We are recording which have been installed on the D2000021 googledoc. We are avoiding adding anything on the right of the QPDs incase SEI needs access to these bolt holes.
- So far installed: C:BD1, D:M1, D:M2, D:L1, D:PD1, F:L2, F:BD1, F:M2, H:PD1, G:BD1, photo attached.
- We have swapped the optics initially planned for D:M1 and D:M2. Now D:M1 = E1900392-V1-Aplus-1-0059 AIO 35-45°; D:M2= E1900393-V1-Aplus-1-0056 AIO 0-25°. Spreadsheet up to date, will update ICS when it's back online.
- We are concerned D:M1 needs to be a wider angle AIO as this is the same optic we replaced for B:M4 (alog 59676).
- D:M1 is on a double base rather than single base as is positioned close to the platform, it is less stable so be careful when moving.
We are getting class-B labels made but until they are installed (later this week), if anyone needs to move optics out of their way please don't move them far and record where they have been moved until labels are installed- tagging SUS and SEI.
Later this week we will continue to add optics from the other door and torque the VOPO dog clamps.
This afternoon I attached the class-B identification tags that Chris made to the optics already in HAM7. I installed SK:BS2 (although not yet in correct location). The other SK optics could do with another clean or blow-off before installation, the mounts are in HAM7 for safe keeping. I will work on this tomorrow.
I torqued all dog clamps between spacer and ISI and all accessible dog clamps between OPOS and spacer to 8ft lbs (100 inch lb) as stated in E1100411.
Dust counts (using handheld monitor): 0 before opening E soft cover; 20 @ 0.3um before opening W; 10 @ 1.0um before opening E 2nd time.
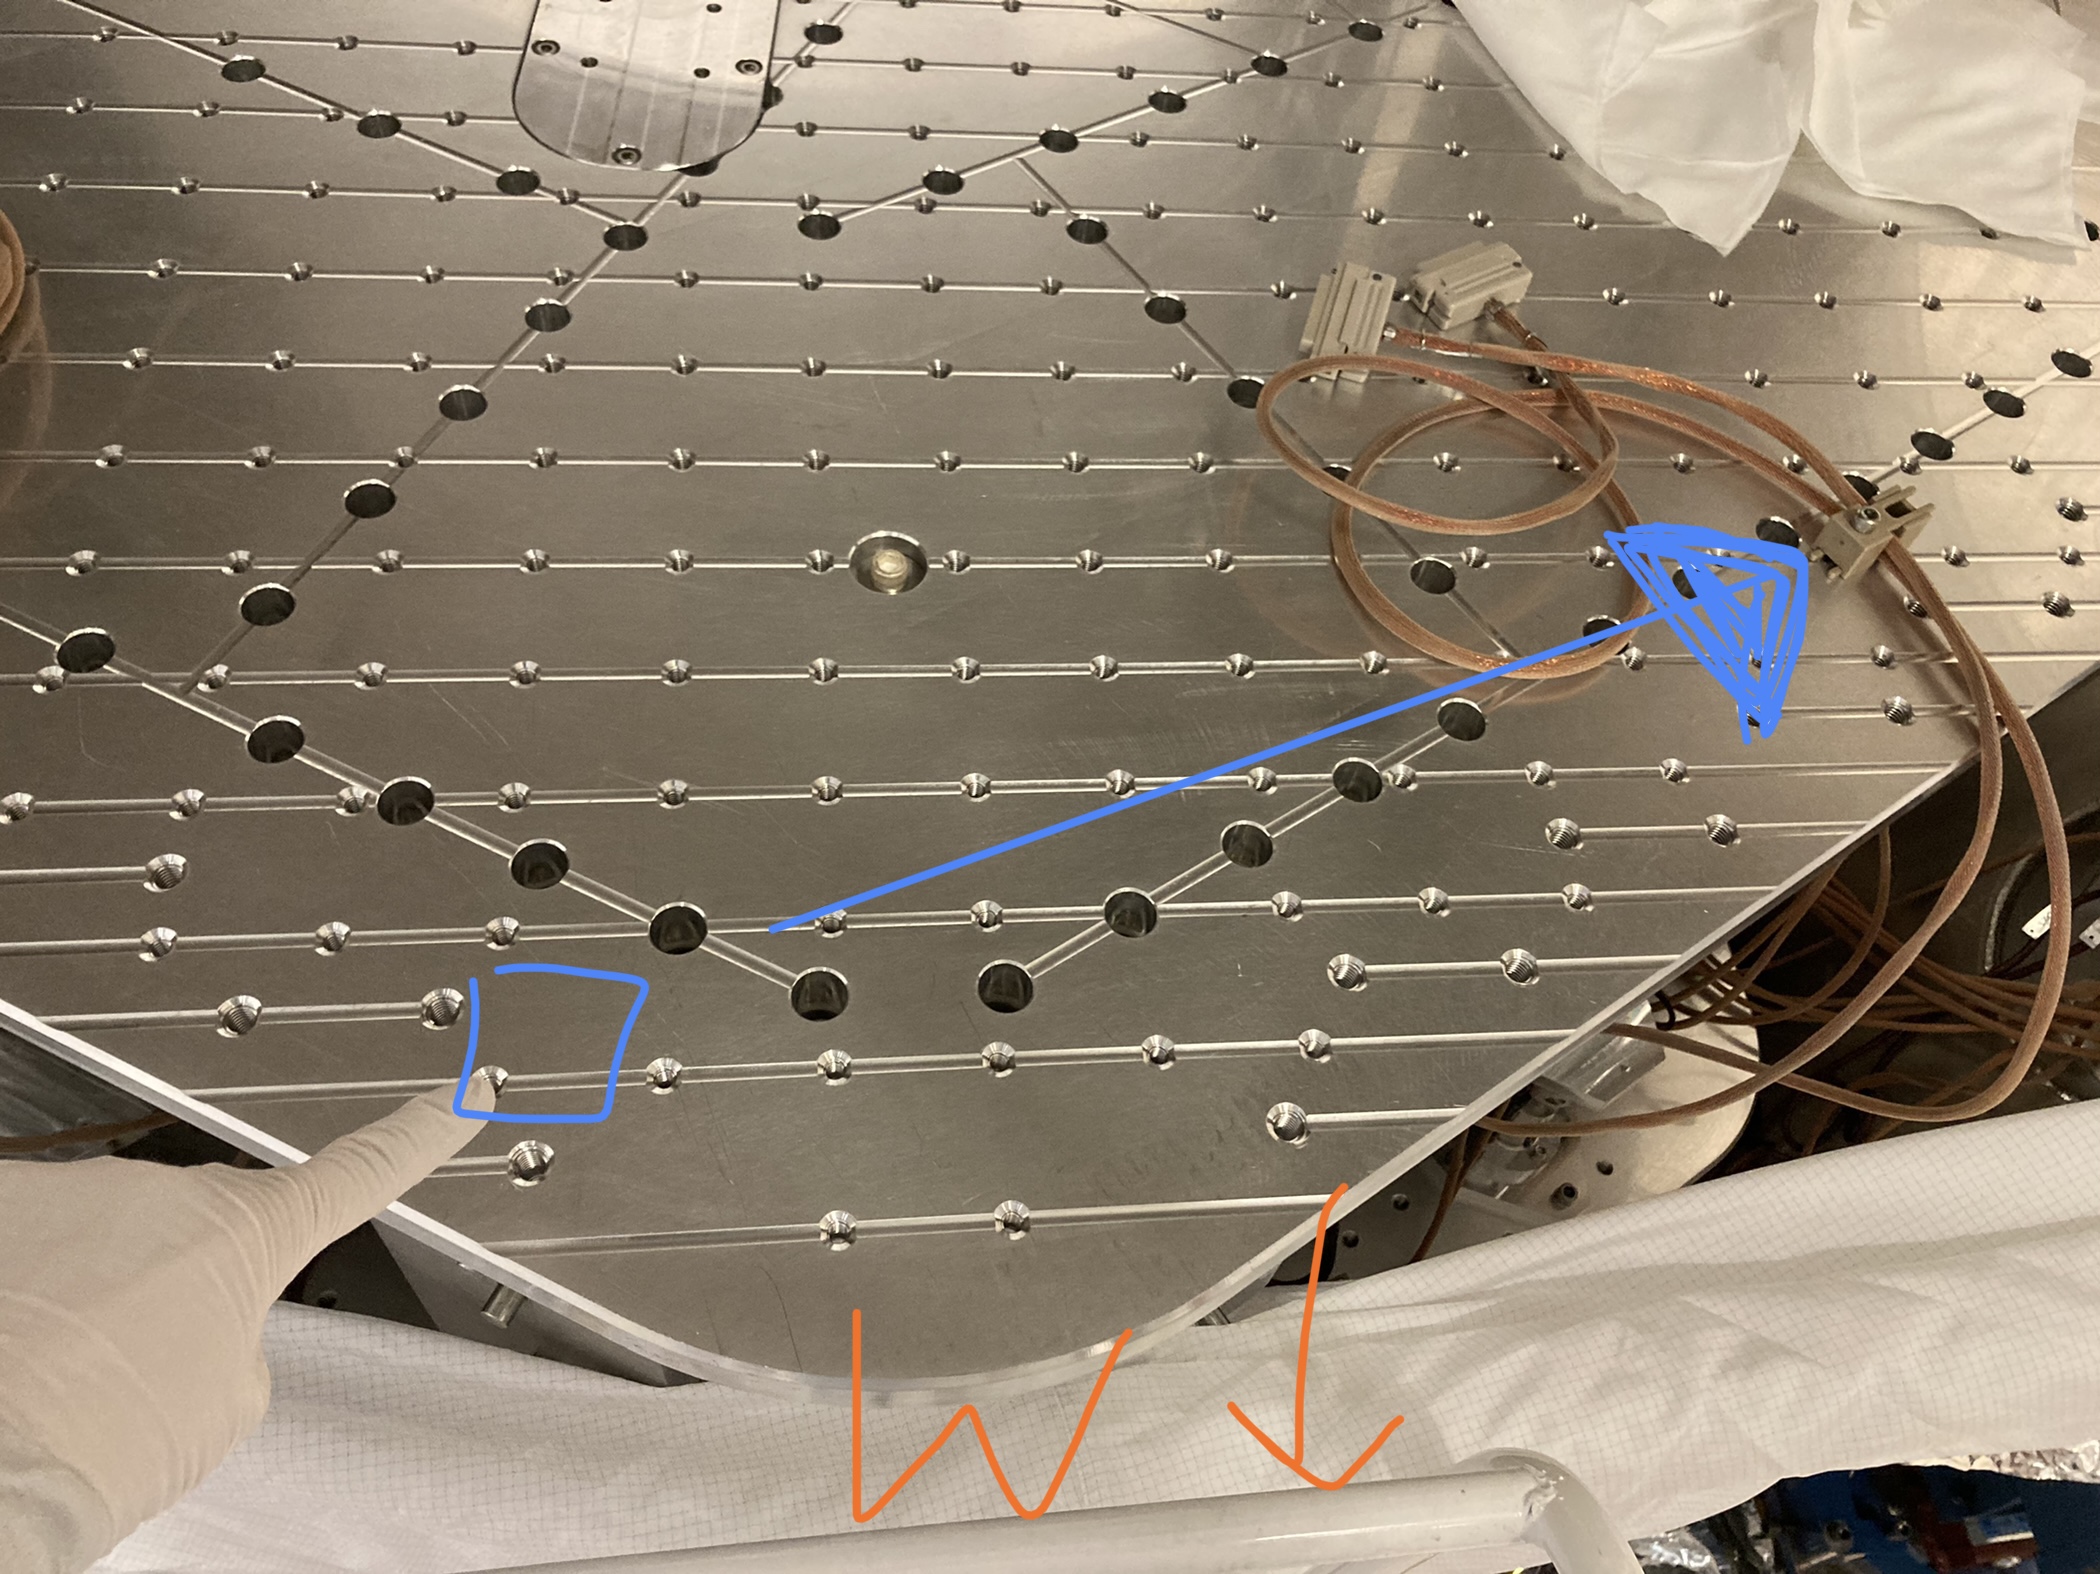
I moved a cable holder from the W-side out of my way so I could get onto the ISI safety. See photo attached. Tagging SEI.
Yesterday Travis locked the bottom two masses of FC1 so that I could saftey get on the ISI. Rahul was nearby and consulted.
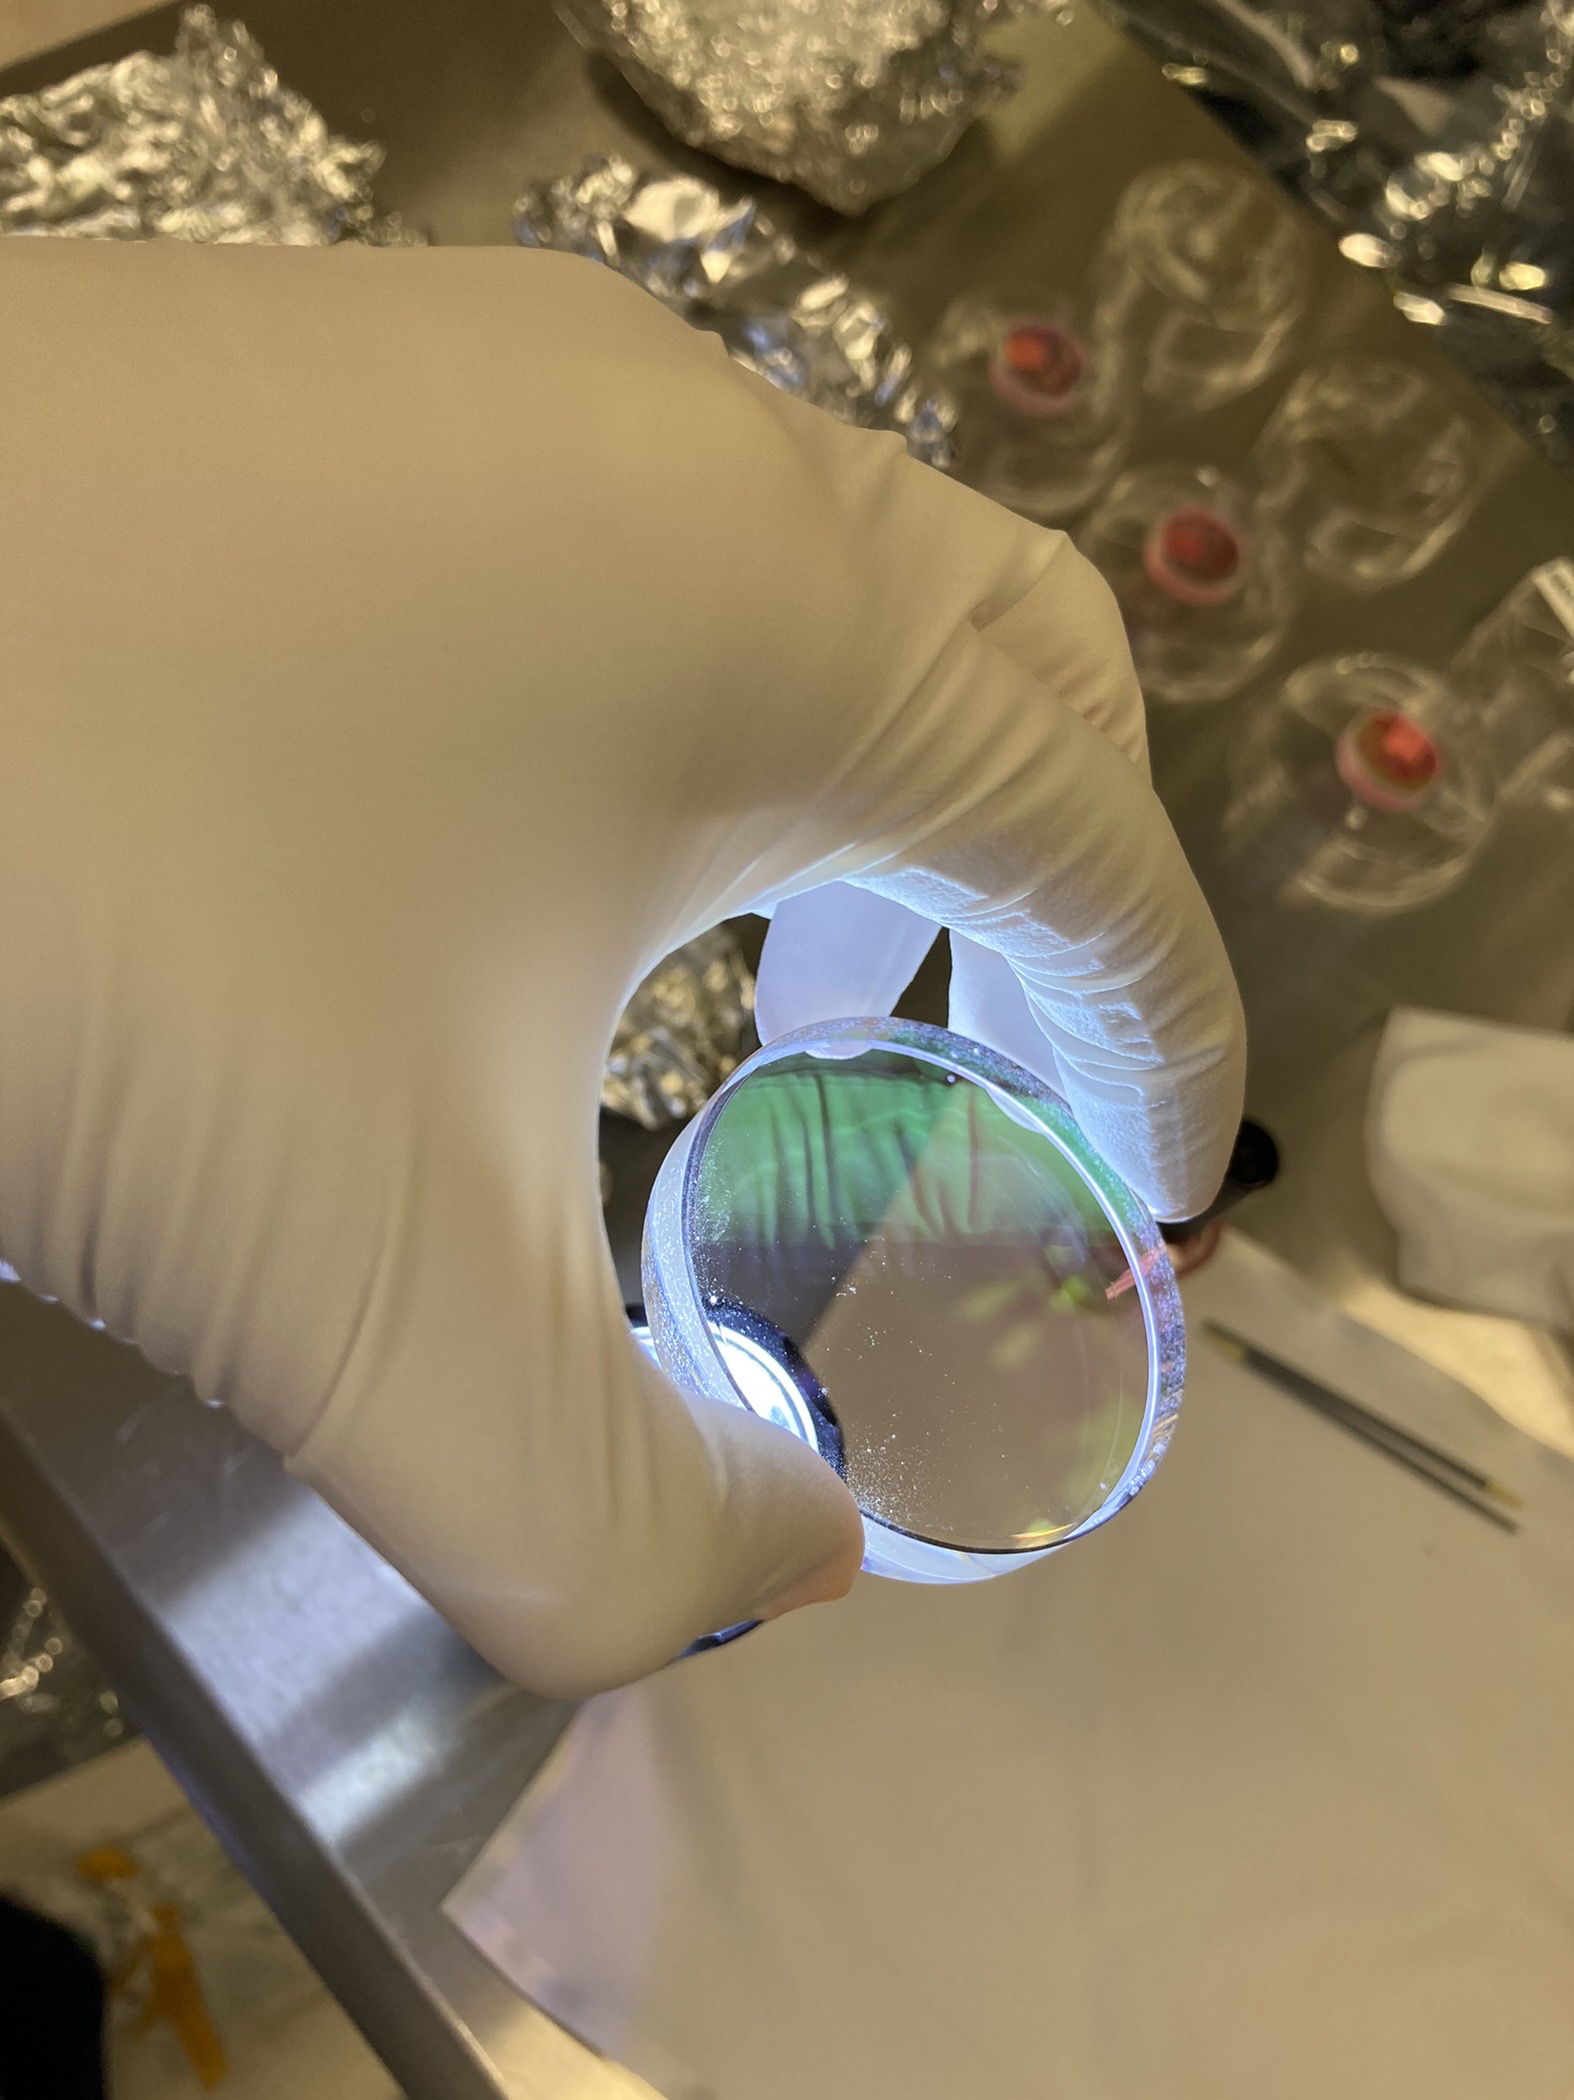
Today I re-first contacted SK:M1, SK:M2, SK:BS1 (both sides), D:M3, D:BS1 (one side), 2" HR for beam diverter (S/N seems to say 9 .p1) that was removed Nov.2020. 2" optic looked particularly dirty as hadn't been touched since removal, see photo attached. Will remove first contact and inspect/install all next week.
OPO mounting hardware for cables is clean so started getting component cables into HAM7. Will do majority of cable routing and SUS balancing while before laying optics on W side of HAM7 so access to VOPO is easier.

Yesterday I re-first contacted the optics as they still didn't look great.
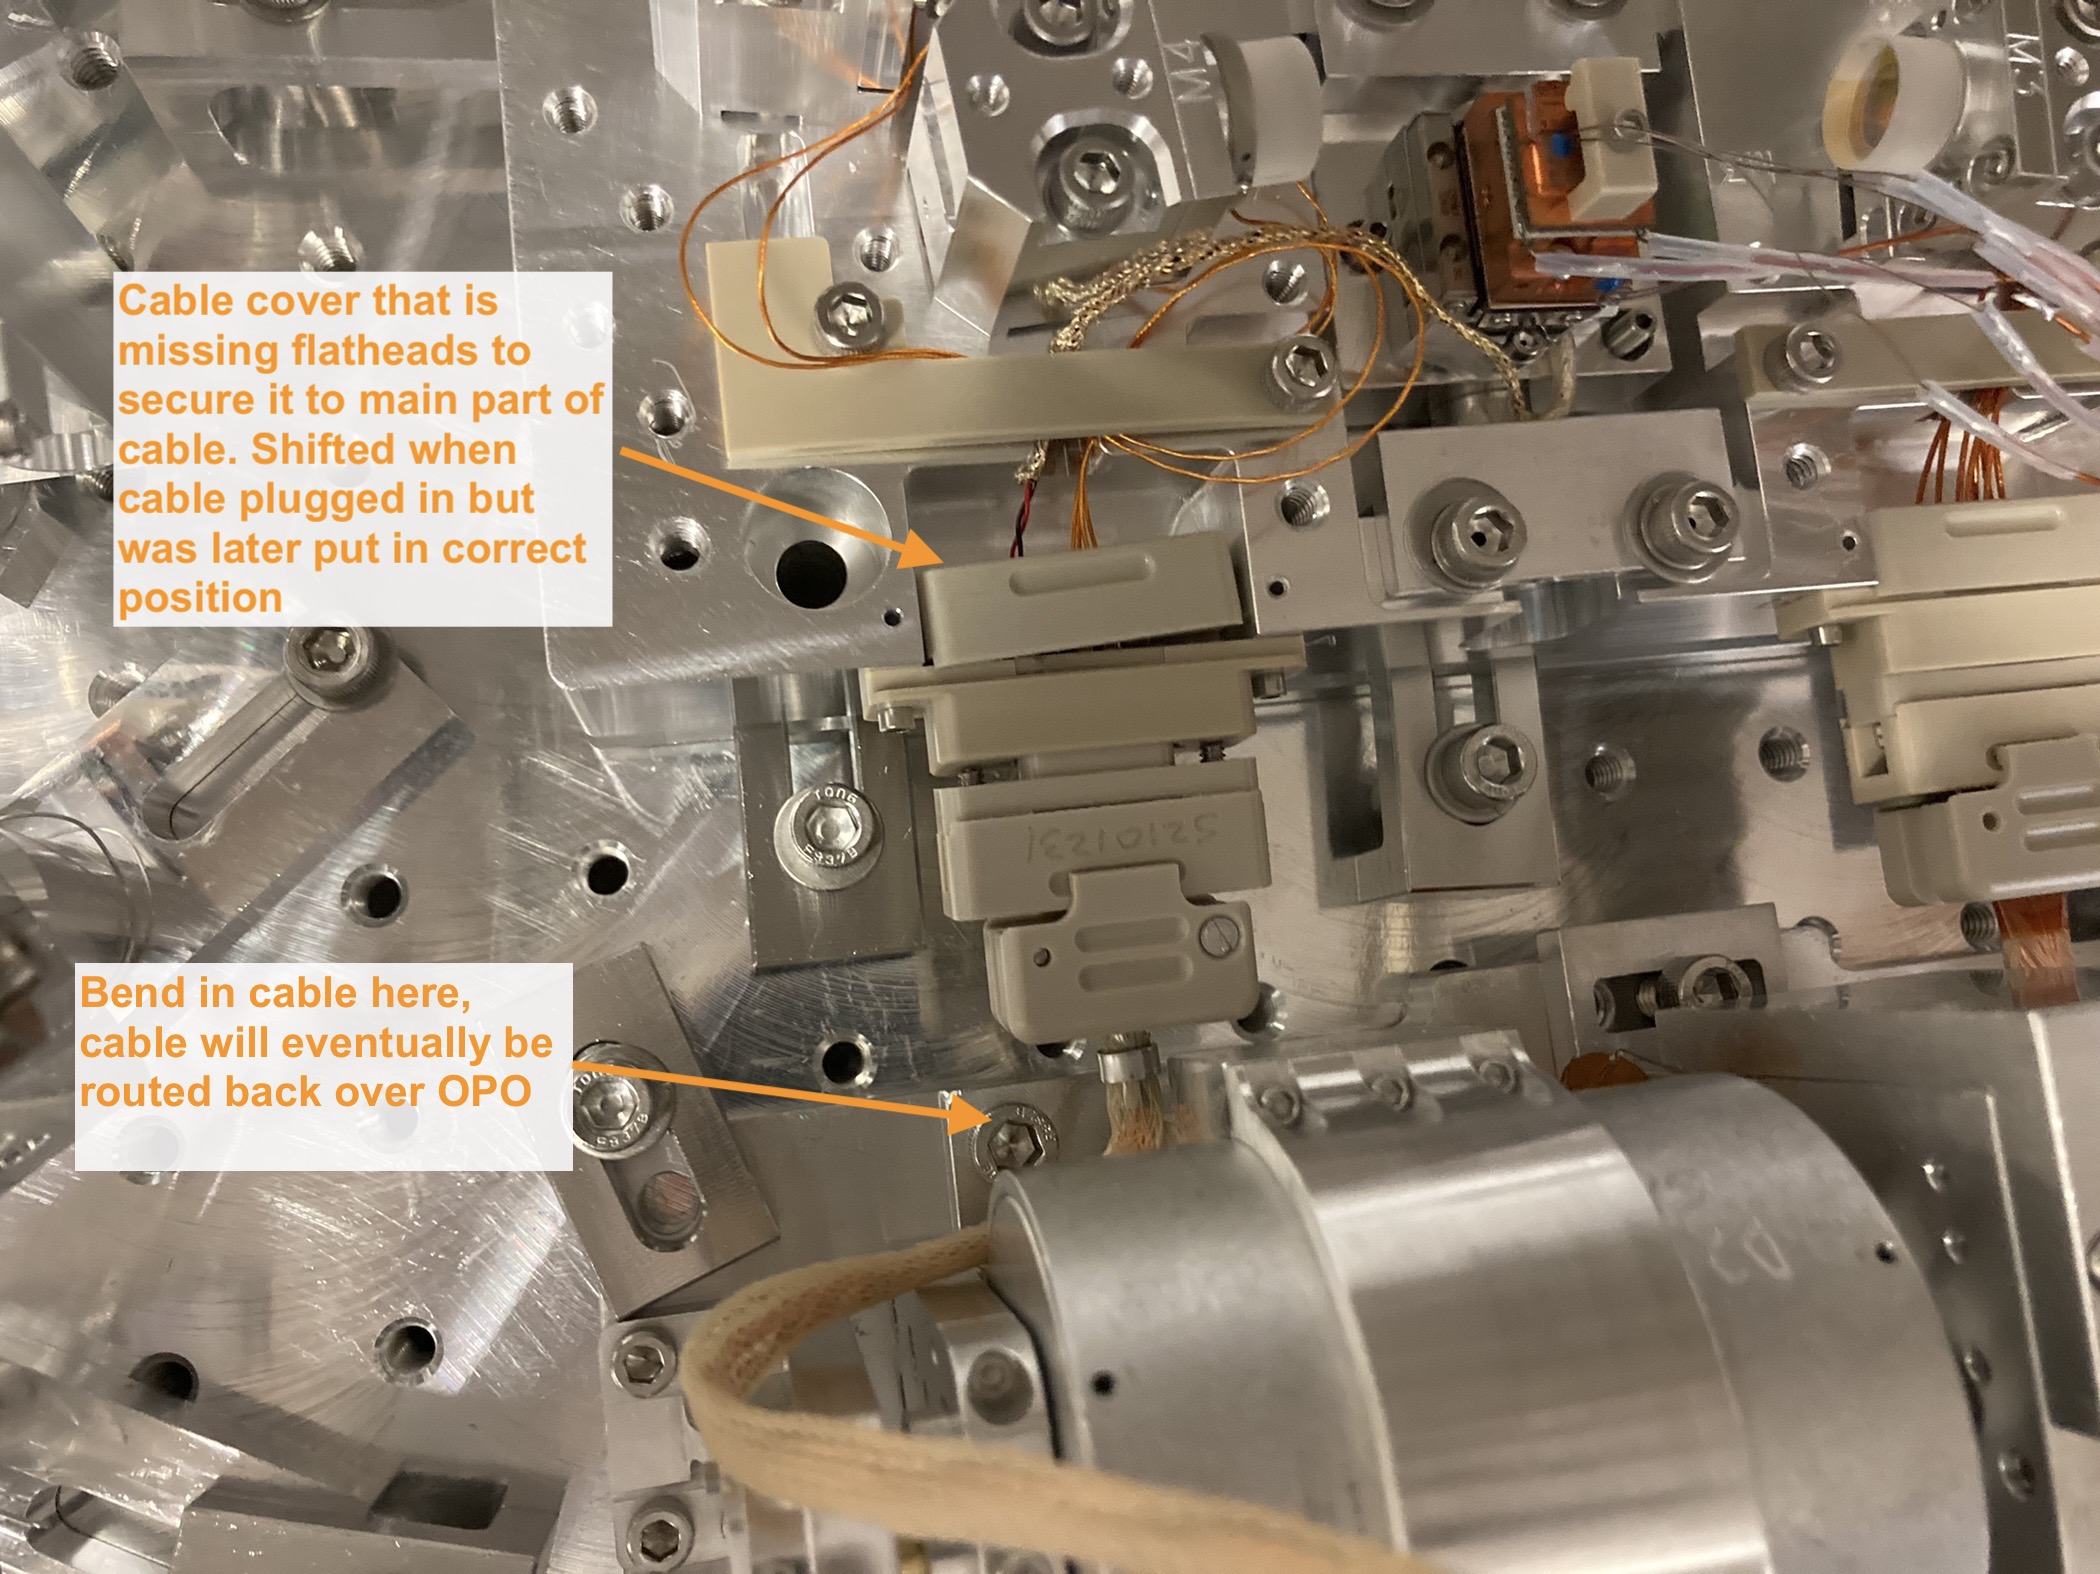
I attached cables #4, 8, 9 (D1900278) and still need to attach them to the OPO lid. Cable #4 which is the VOPO OPO Oven translation stage/cavity piezo was a little tricky as is a tight fit next to SFI1. Hopefully the bend in the cable is not too large, see photo.
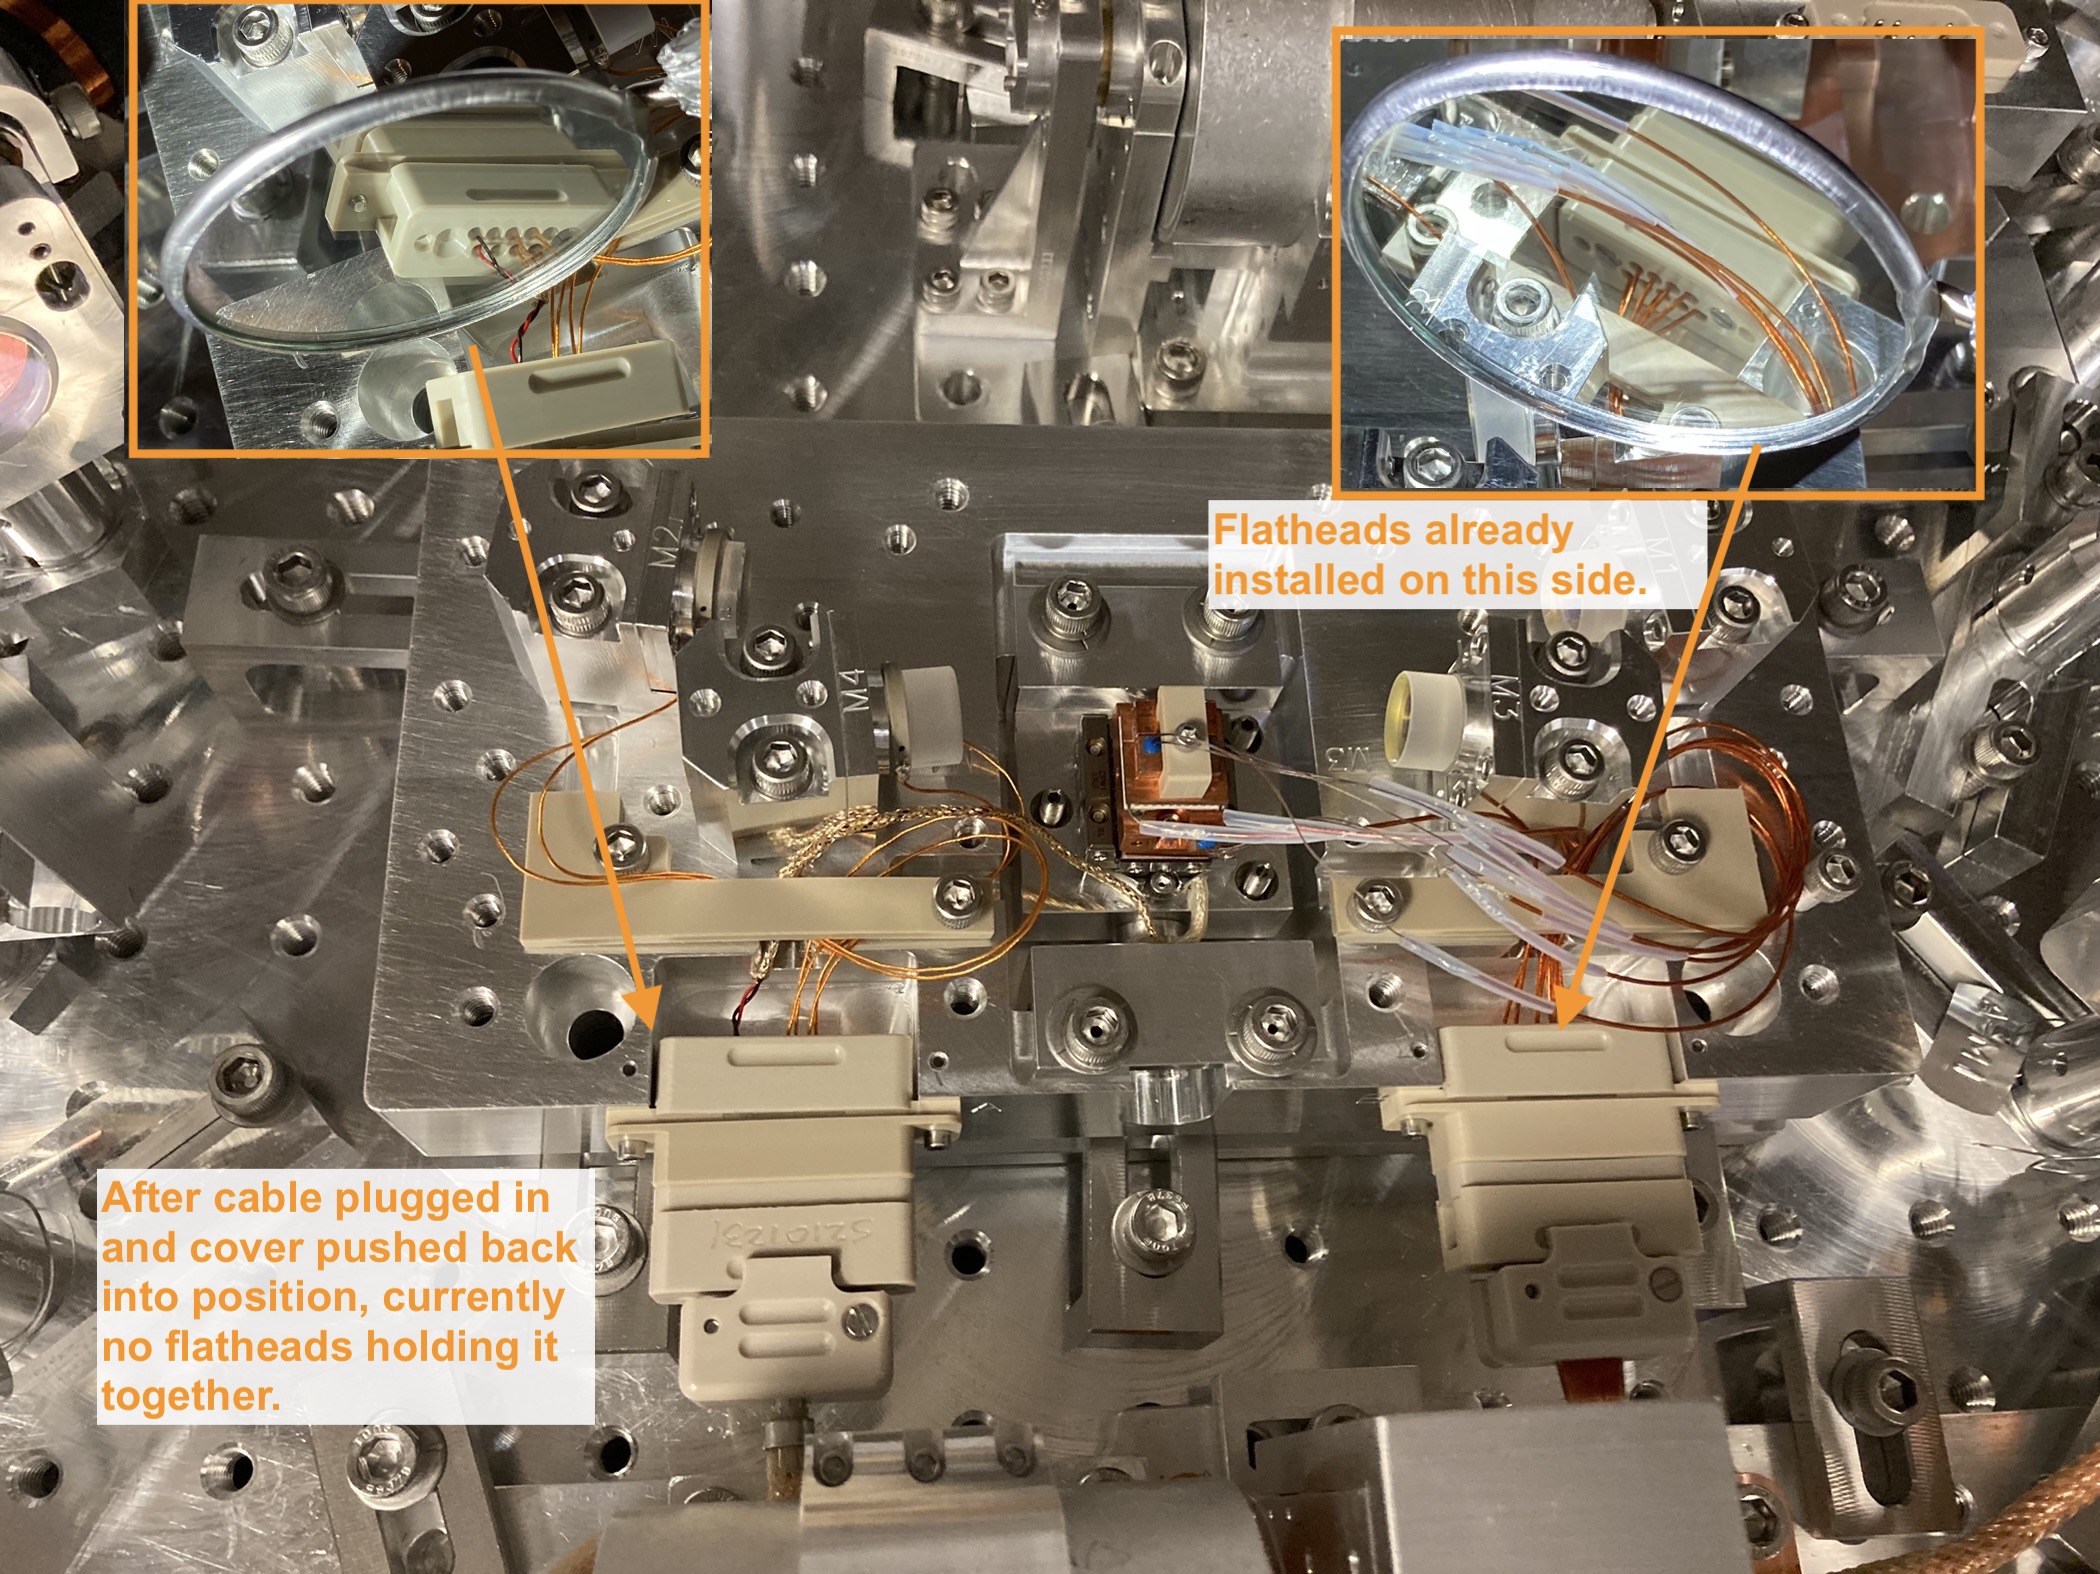
This connector's cover was also missing flathead screws to keep the cover together and it shifted when plugging in cable, see photo. I have not installed the flatheads I just pushed the cover back into place once cable plugged in. I can take the OPO cover off again and add flatheads if we think it is necessary but it is fiddly and I didn't want to strain the cables inside the OPO too much.
Yesterday Keita and I routed cables #3,4,8,9 over the OPO and plugged in the ones we could (we don't quite have all the flange to CB cables yet). #5, 10, 11 are also plugged into their next cable or attached to CBs. Photos to follow. We also need to check that I used the correct tentacle of #3 D2000361 for the lens translation stage.
Keita, Camilla. We checked the tentacles of D2000361 are going to the correct components using D2000361 and D1700308. All cabling is documented in alog 59866. We also decided it was risky to add the missing flatheads to the cable #4 OPO connector so it's being left without but is snuggly in place.
Things to do before fiber installation and alignment:
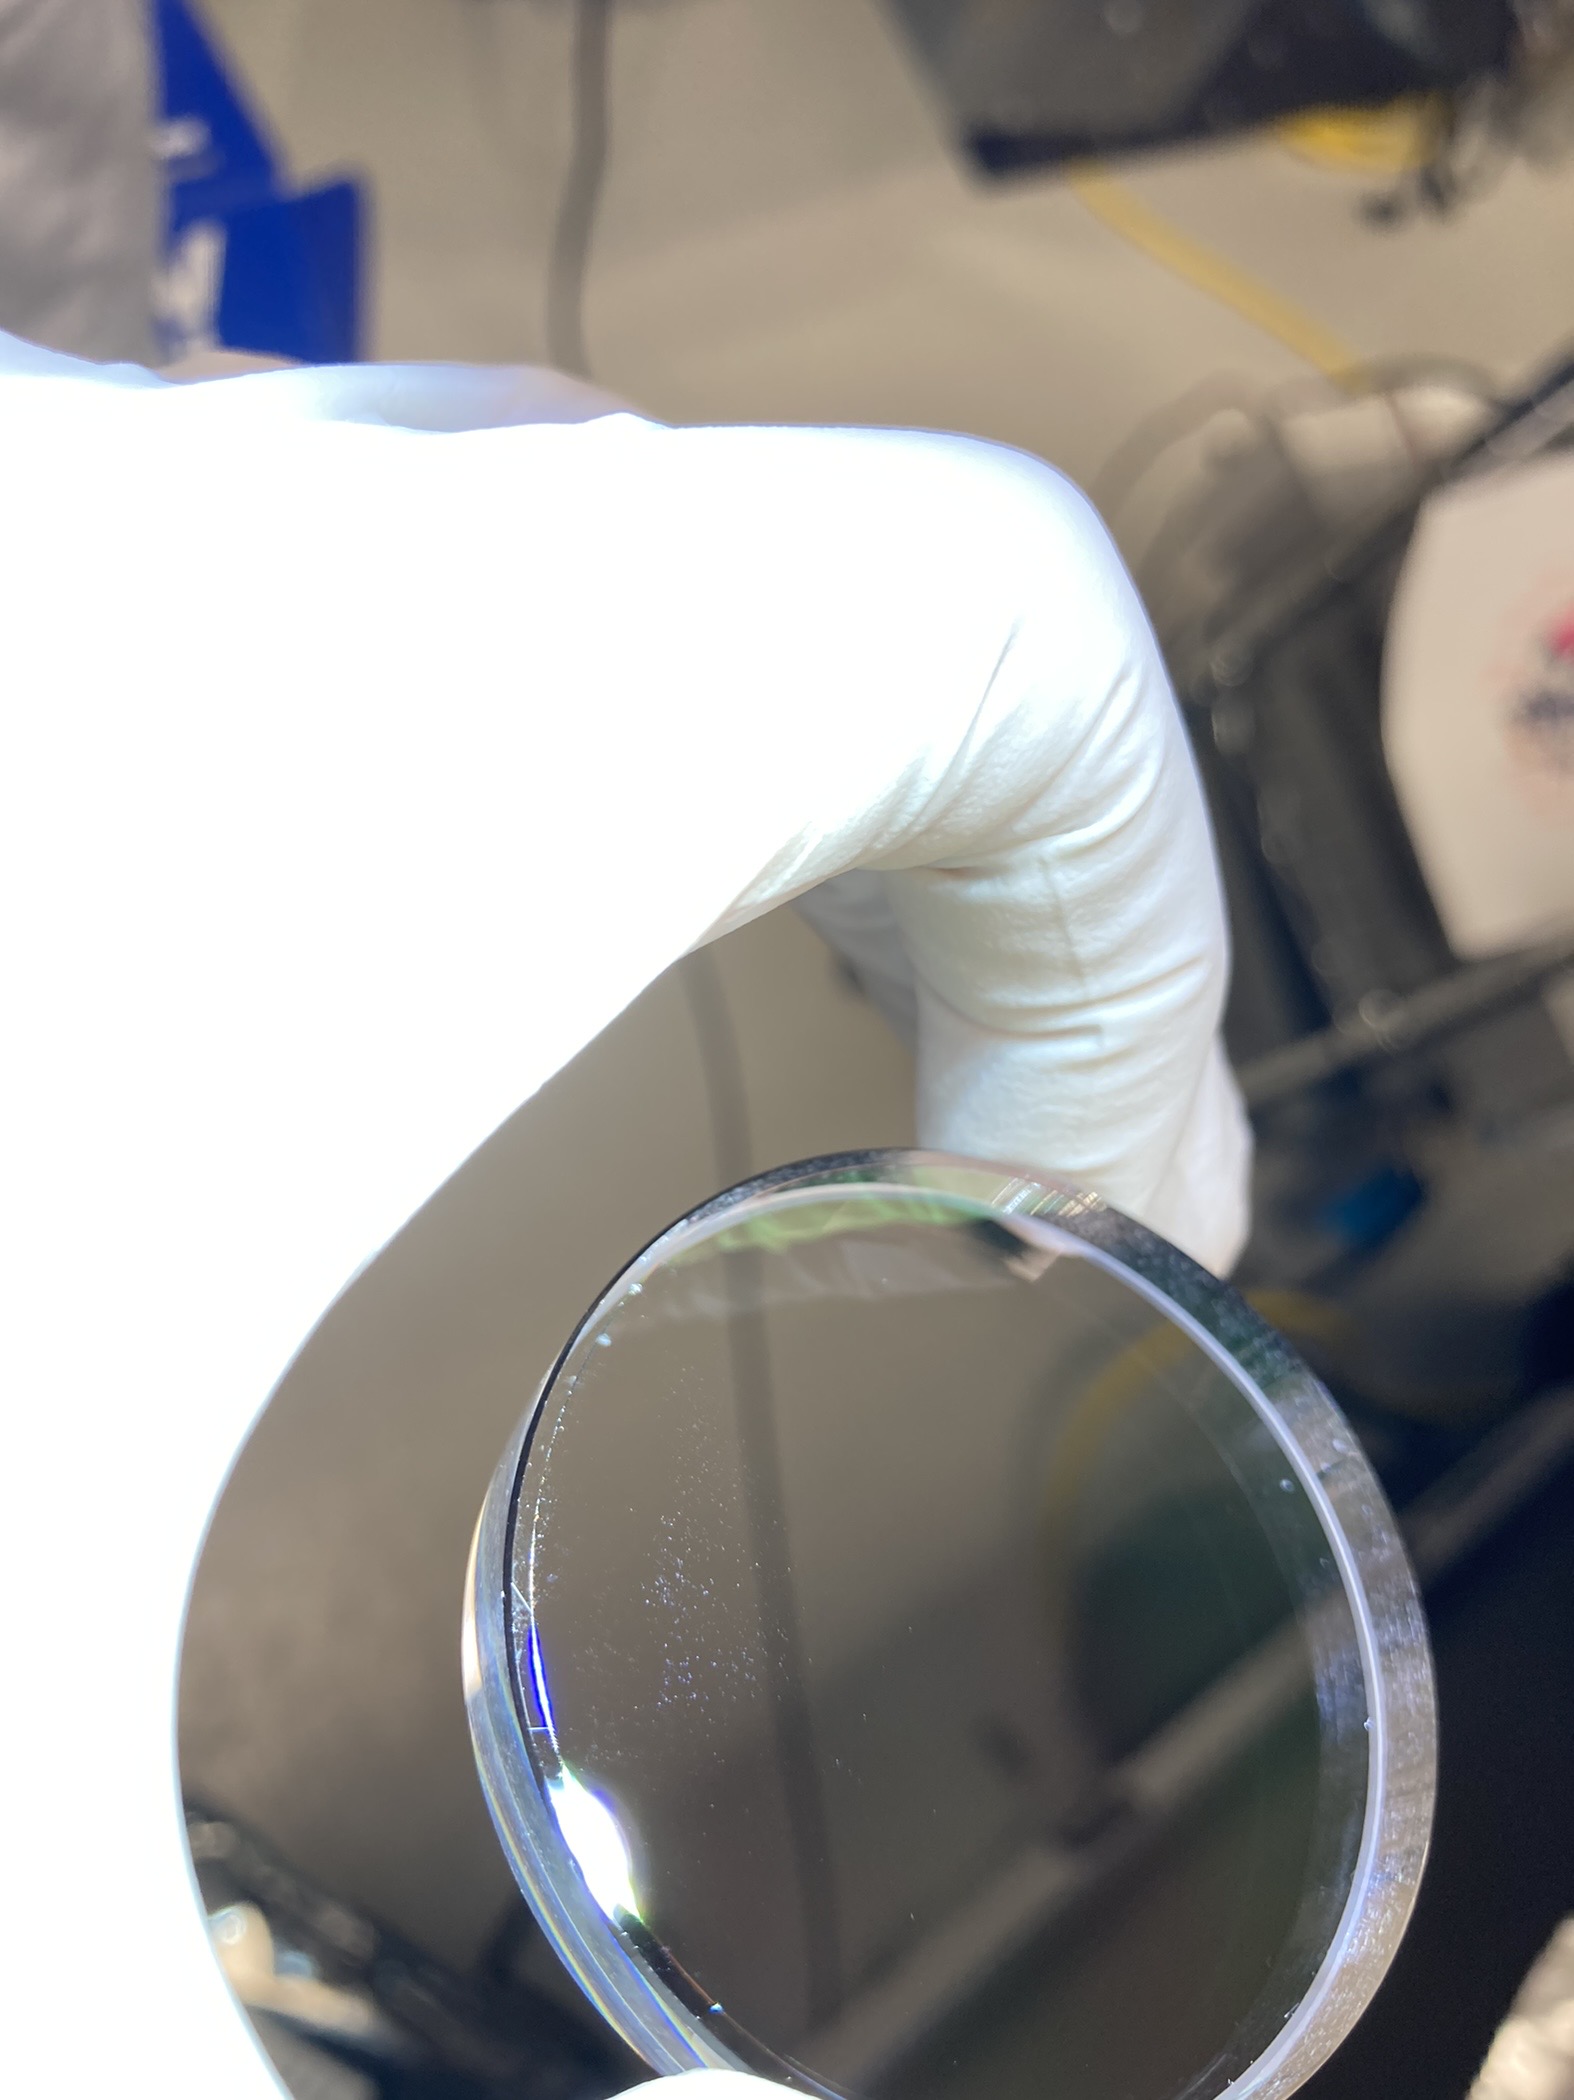
- Place all HAM7 optics into their mounts and onto HAM7. The optic removed from HAM6 for the beam diverter C:M1 (2" HR 1064) still has a dusty mark on after 3x FC rounds (see photo). The mark isn't very close to center and this beam will just be used for diagnostics so we will still use the optic. All other optics were inspected all optics and look okay.
- Locate and install to HRs use in place of ZMs.
- Install picomotor cable #7 (expected Tuesday)
- Balance Suspension
- Place HAM7 optics in rough aligned placed (wait until OPOS balanced easier ISI access)
- Fibers in + the real fun starts!
Today Keita and I inspected and installed all remaining optics into HAM7: SK:M1, SK:M2, SK:BS1, E:M1, E:M2, E:L1, C:M1, C:L1, D:M3, D:BS1. The spreadsheet D2000021 and ICS is up to date. We still have to place the optics in correct positions (will wait until OPOS is balanced) and install 2x HR and 1x 50:50 beamsplitter for use during alignment.