J. Oberling, J. Driggers, R. Savage, F. Clara
With the HAM6 crew done with the PSL beam, we have begun to work through our final install items. Today we added the corrosion inhibitor to the cooling water and performed the necessary Control Box mod to get our water-cooled power meters working properly.
OptiShield Addition
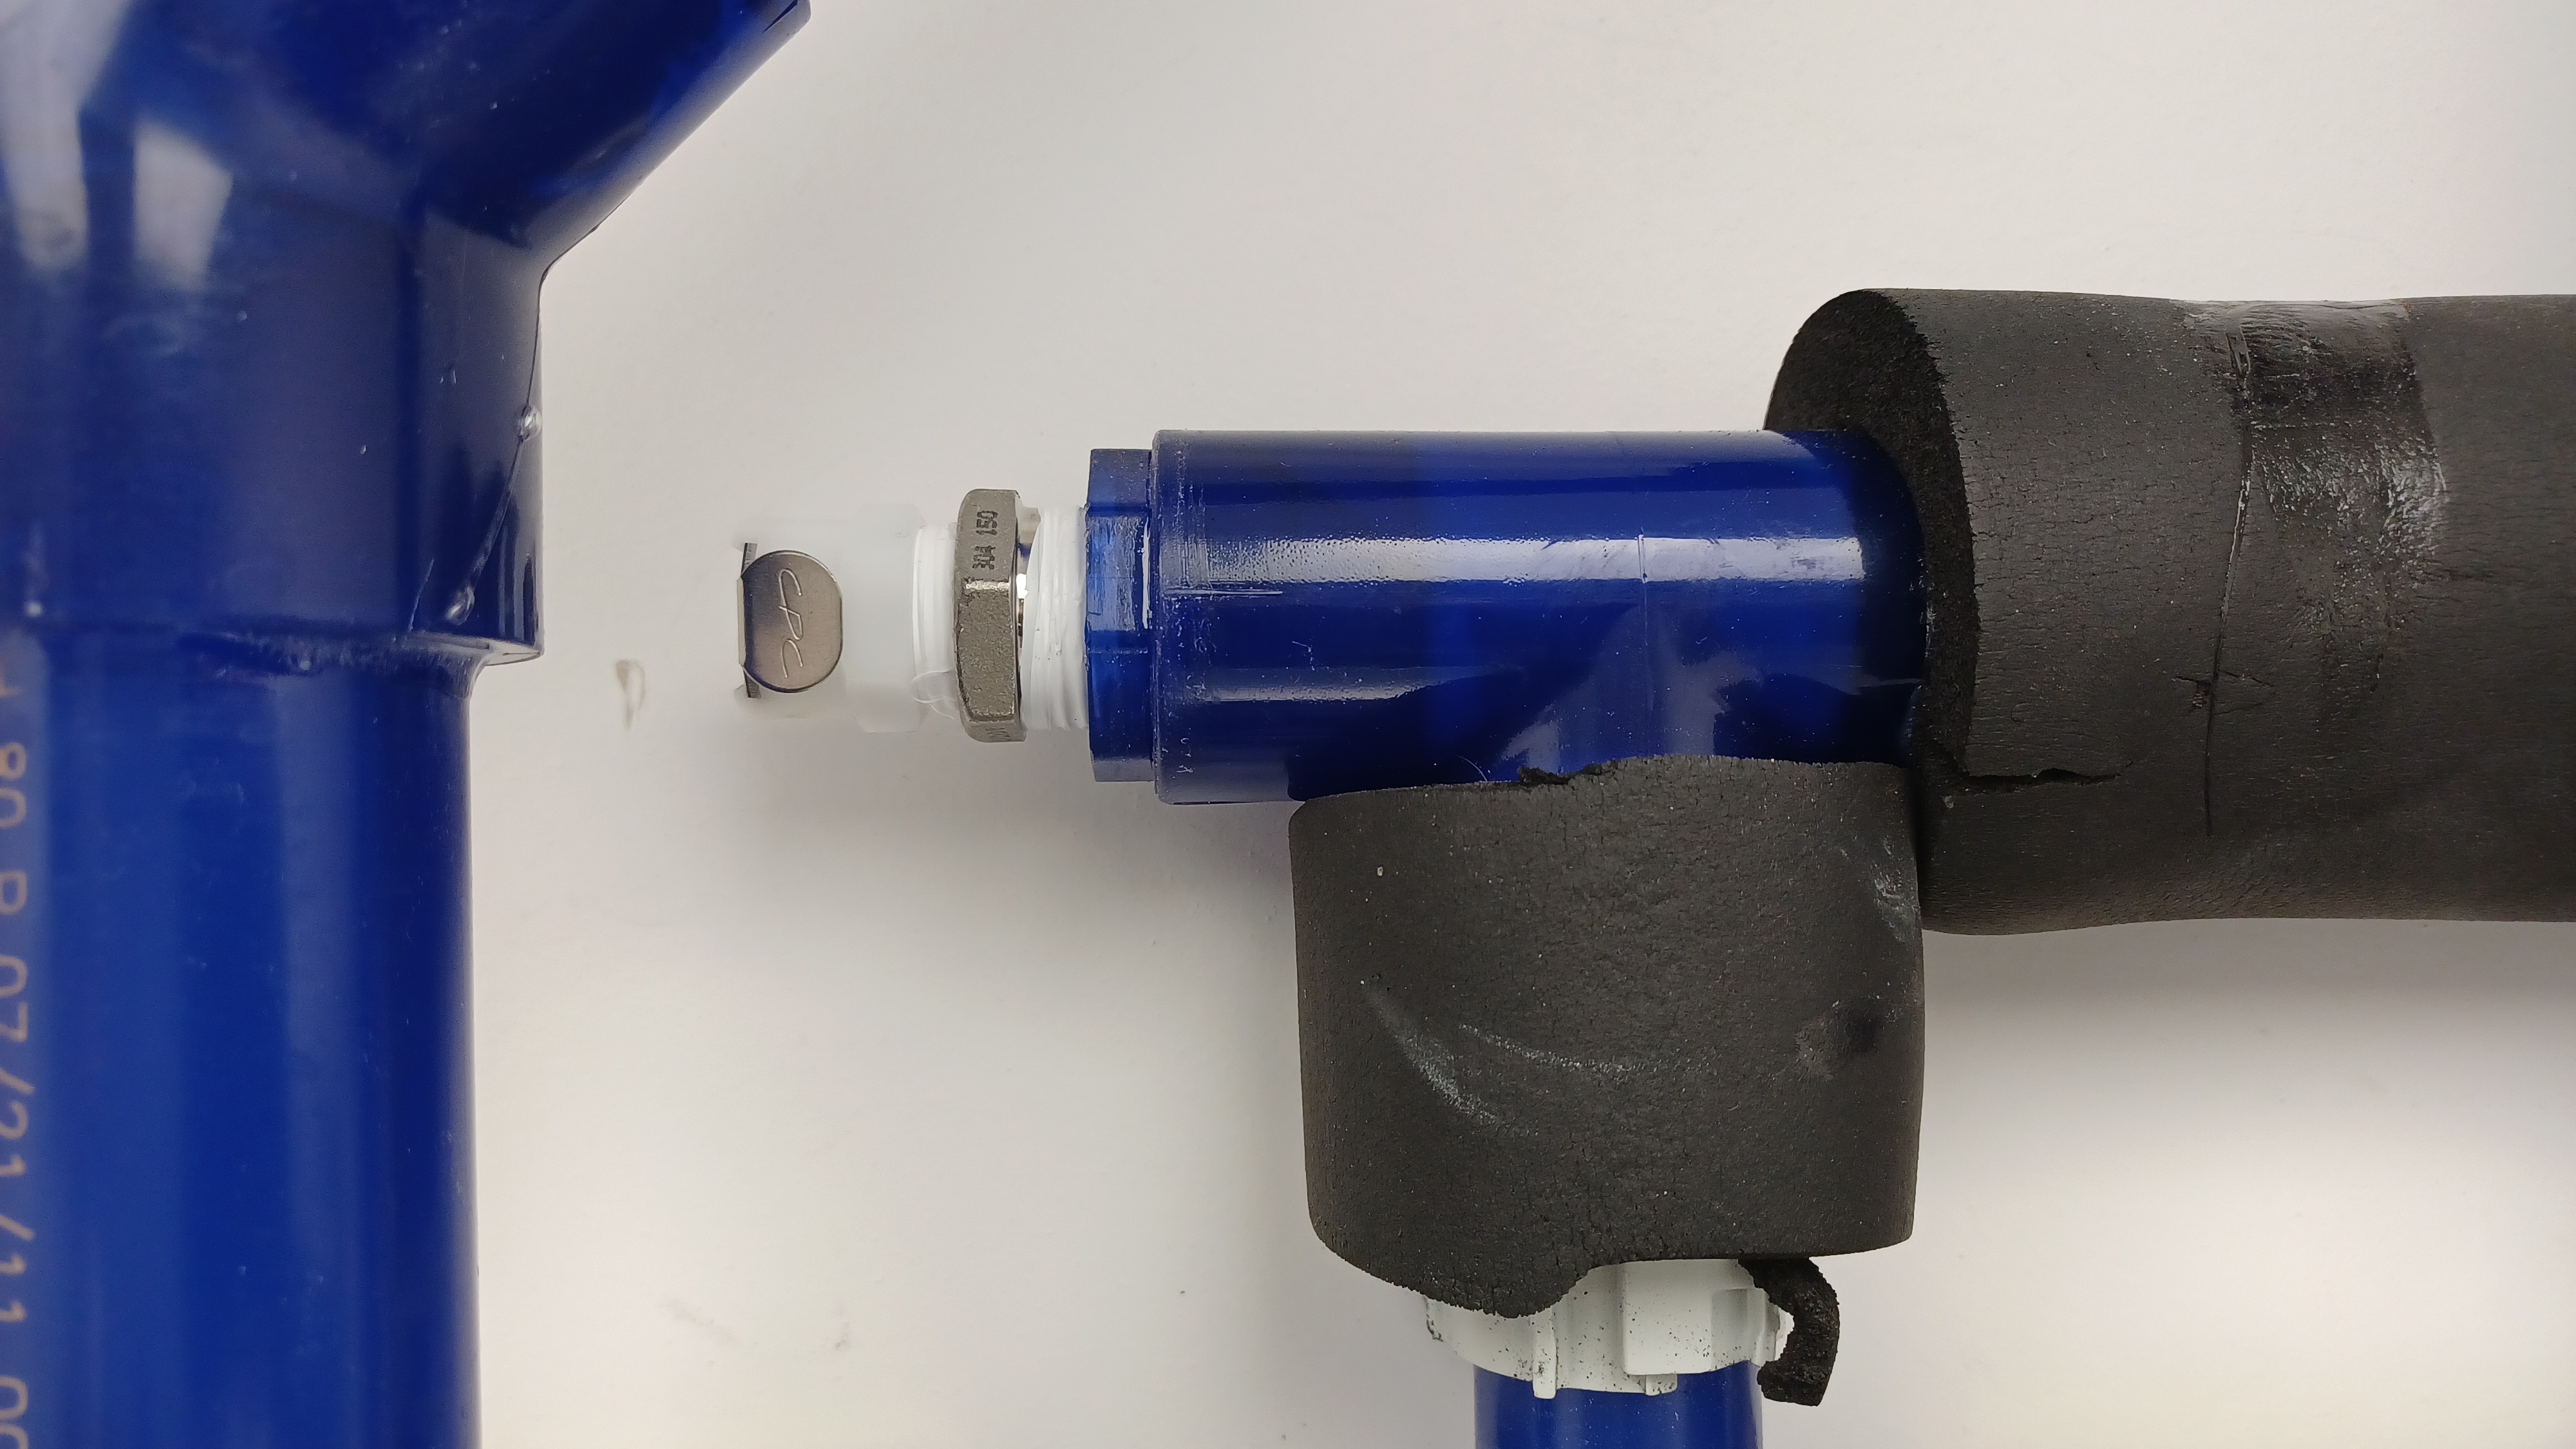
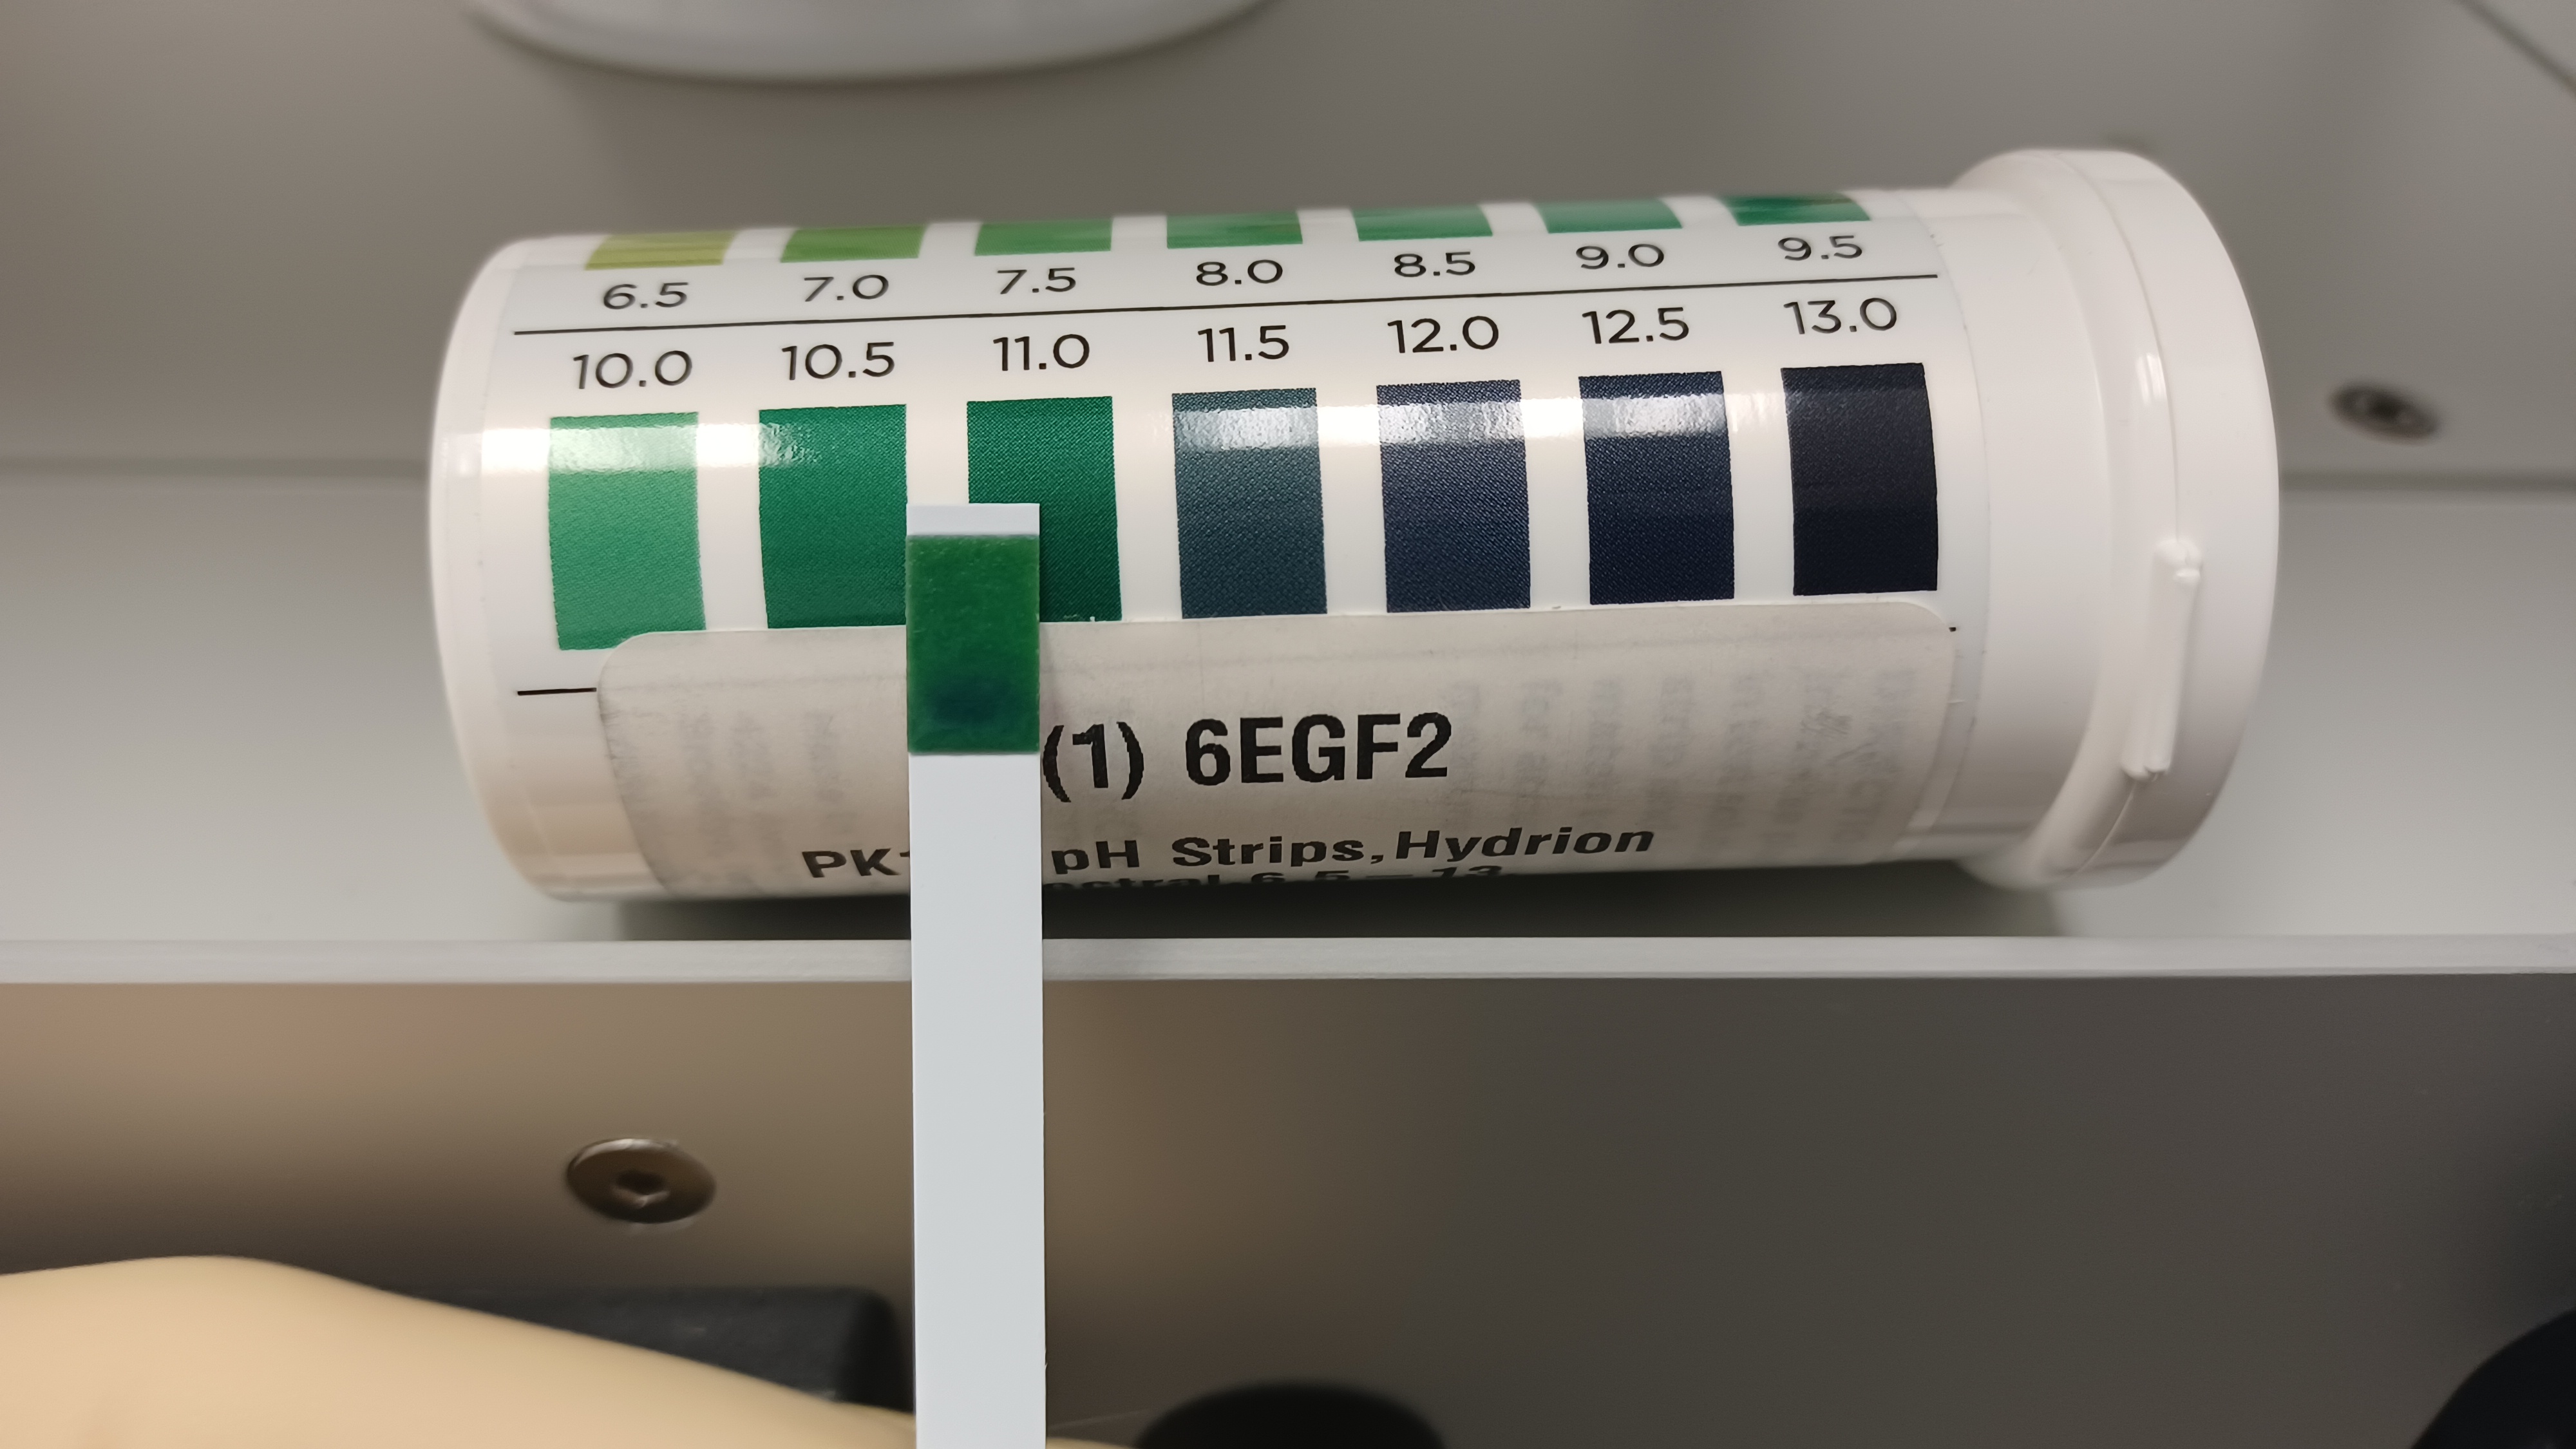
We added the OptiShield corrosion inhibitor today. It runs at a 10% solution, and we have ~10 gallons or so in our plumbing, so the math is easy: remove 1 gallon of water and add 1 gallon of OptiShield. We removed 1 gallon of water from the system which had the side effect of allowing some more air into our lines. After adding the requisite 1 gallon of OptiShield, we had to start and restart the chiller several times to clear enough air from the lines to get it to stay running; there was enough air in the system that every time a large air bubble passed it caused the chiller to drop out, as the air bubble caused the chiller's internal vortex flow meter to read zero flow, which then triggered the chiller's internal interlocks. Once we cleared enough air so the chiller wasn't constantly dropping out, we noticed that in the last vertical column on the return line was a very large air bubble, ~18 inches in length; essentially, the water isn't flowing fast enough to completely fill the vertical column and push out all of the air, and increasing the flow was not enough to clear the bubble. To fix this we installed a dry-break quick connect fitting near at the top of this vertical column to act as an air bleed (see first attachment), and used an empty hose with the other end of the quick connect fitting installed on it. We were able to use this setup to clear all of the air from that last vertical pipe run. Once that was done we let the system run for a couple hours. Rick and I checked it around 2pm and bled a little more air using our new air bleed. We will periodically check this and bleed more air as necessary as the system continues to pass air bubbles. To finish, I measured the ph of the water/OptiShield combo to give us a starting point, see 2nd attachment. The initial ph is between 10.5 and 11.0, as seen on the test strip; if the ph gets to less than 9.0, that's an indication that it's time to change the cooling water (drain and add new).
Control Box Mod
Once the cooling system had had a few hours to circulate the new cooling water mixture, Jenne and I pulled the LVEA Control Box to perform a necessary mod the get our water-cooled power meters to read correctly; we waited in case pulling the control box turned the chiller off, which it did, so we wanted to make sure the cooling system had a few hours of runtime. Background for this, there are 3 pins on these power meters, power, signal, and ground. Both power and signal need to be tied to ground, but that wasn't the case so the power meters haven't been reading anything. neoLASE provided us with a quick guide so we would know which connections on which terminals to tie together. For future reference, we tied connection 2 of Terminal 25 (Terminal 25 reads in our power meter signals) to connection 3 on Terminal 16 (Terminal 16 provides +24V for the power meters), thereby connecting both power and signal to ground as required. The connection was verified with a multimeter. This single connection was sufficient for all of the power meters, as the internal ground connections in the terminals are common (but common within the terminal only). Thank you Fil for your assistance!
The control box is now re-installed and the chiller is once again running. Tomorrow we will turn the laser on and test the power meter mod, then proceed with measuring the PMC, FSS, and ISS control loops and start wiring/aligning the ALS path on the IO side of the PSL table.