I'll be at Y-mid checking in on the CP4 bake. I'll also "pop" in and look at the X-end and LVEA purge-air supplies. Gerardo M. has been notified. I expect to be hear less than 90 minutes and will make a comment to this entry when I leave.
Kyle has requested the high alarm level for PT243 (Y1 beam tube, adjacent to MY) be increased as it is now reading above 5.0e-08 Torr. He requests it be increased to 1.0e-07. I have done this and restarted the alarm system.
H0:VAC-MY_Y1_PT243B_PRESS_TORR (VE gauge, MY Y1-beamtube, CC )
current value = 5.419e-08 Torr
low alarm level = 1.000e-10 Torr
high alarm level = 1.000e-07 Torr
(Regarding camera view of CP4's bake-out control PLC display) I noticed that TC1 has acquired an offset as of this morning. This TC is the closest to the heat source and, until this morning, has consistently been the "hottest" of the four displayed TCs on the PLC display. Now, it is consistently below TC2 which is the next TC downstream in the heated air flow. I am sure that this is the result of its extension wire connector being disturbed during the installation of the second duct heater this morning. This extension wire connector is located very near where the work was being done and would have been in the way. As the TC is what the PLC is using to determine the heater output, it is important that it represent the actual temperature of the air exiting the heater. If this TC's value differs too much from TC2 or becomes "bogus" we could have a problem of the PLC overheating or underheating. I'll keep a close eye on it over the weekend.
Verbal alarms just reported high vacuum alarms at BSC2, BSC7, HAM6 and PT245. I can understand the ones at HAM6 and PT245 (CP4), but I'm not certain about the ones at BSC2 and BSC7. Is this due to the change in verbal alarms code [alog 41046]?
Minute trends for last 30 days.
I don't see any reason why we should be getting any alarms from the Corner Station. PT110, PT120 and PT170 shouldn't be alarming at current pressures. I don't know what the alarm levels are currently set at for the Y-mid station (PT210, PT245 and PT246) but we are monitoring regularly from home due to the fact that we are currently baking out CP4. I think that Chandra's intention was for Dave B. to have recently increased PT210's alarm threshold from 5 x 10⁻⁸ Torr to 1 x 10⁻⁷ Torr. This was so as to reduce potential nuisance alarms resulting from the Y-mid pressure rising as CP4's temperature slowly increased to its eventual maximum of 130C (Sunday? Monday?).
The threshold in Verbal for all vacuum chambers, except for HAM1 & HAM6, is set at 7e-8Torr. We are definitely above that for all of the alarmed chambers so the alarms make sense. I currently have the vacuum alarms to repeat every two hours if they are still in their alarm condition. This seems to be a bit much, but I erred on the cautious side with data taking operations in mind.
Since this is creating alarm noise while we are venting, and the vac crew has their own alarm systems in place, I will drop the threshold until we are back under normal operations.
J. Oberling, E. Merilh
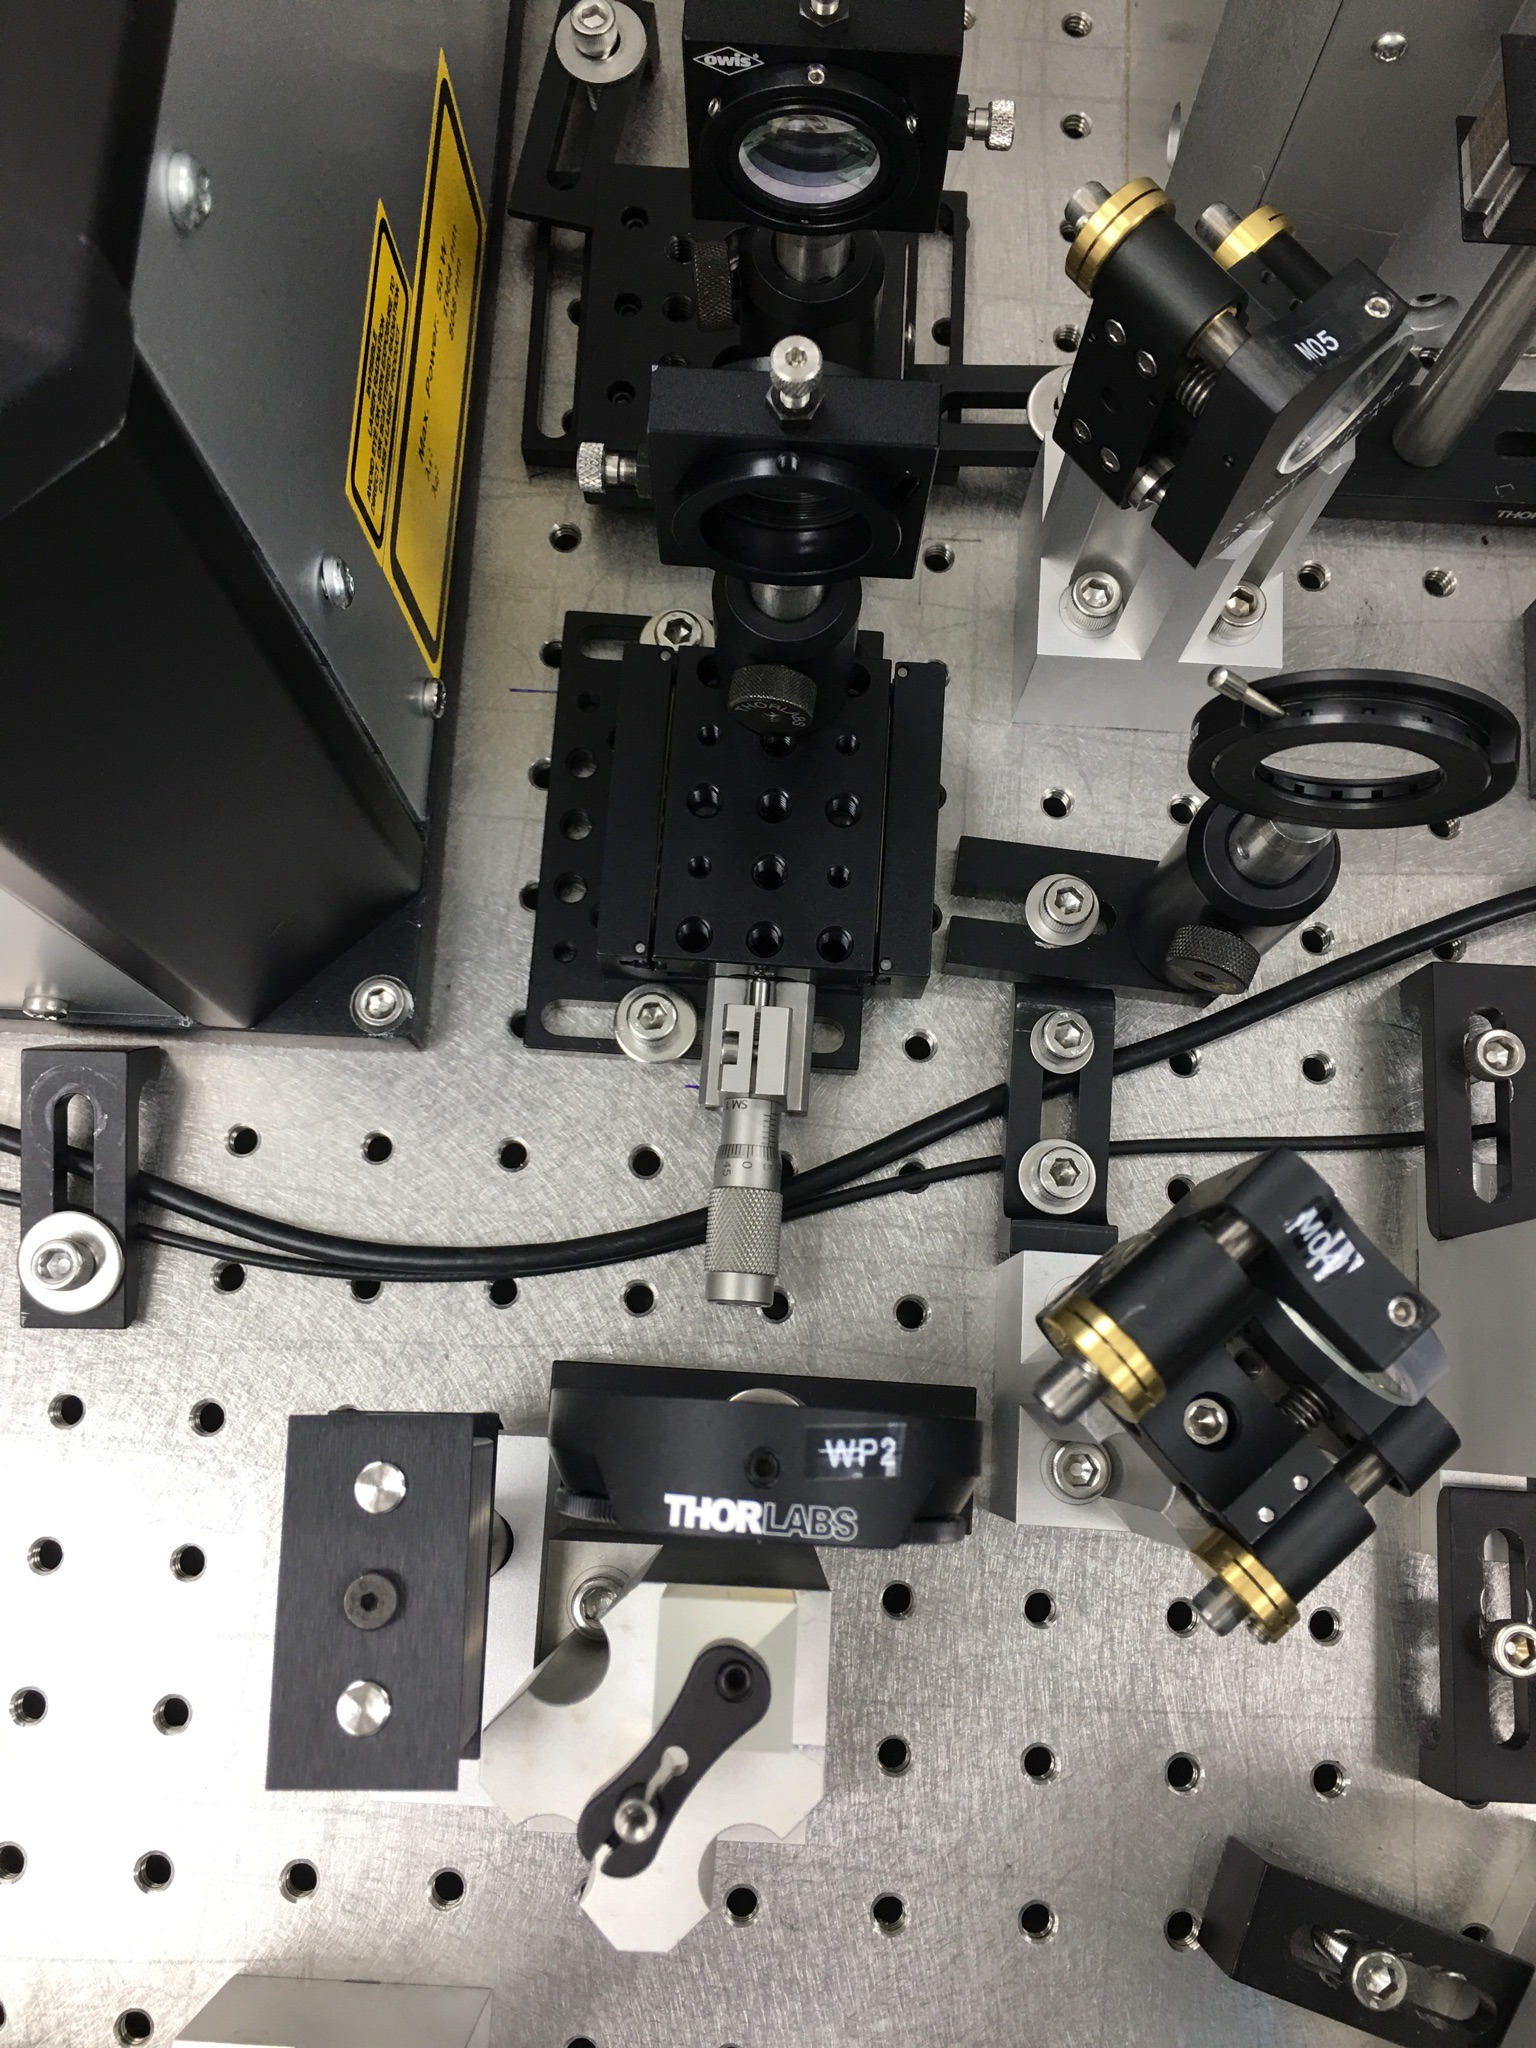
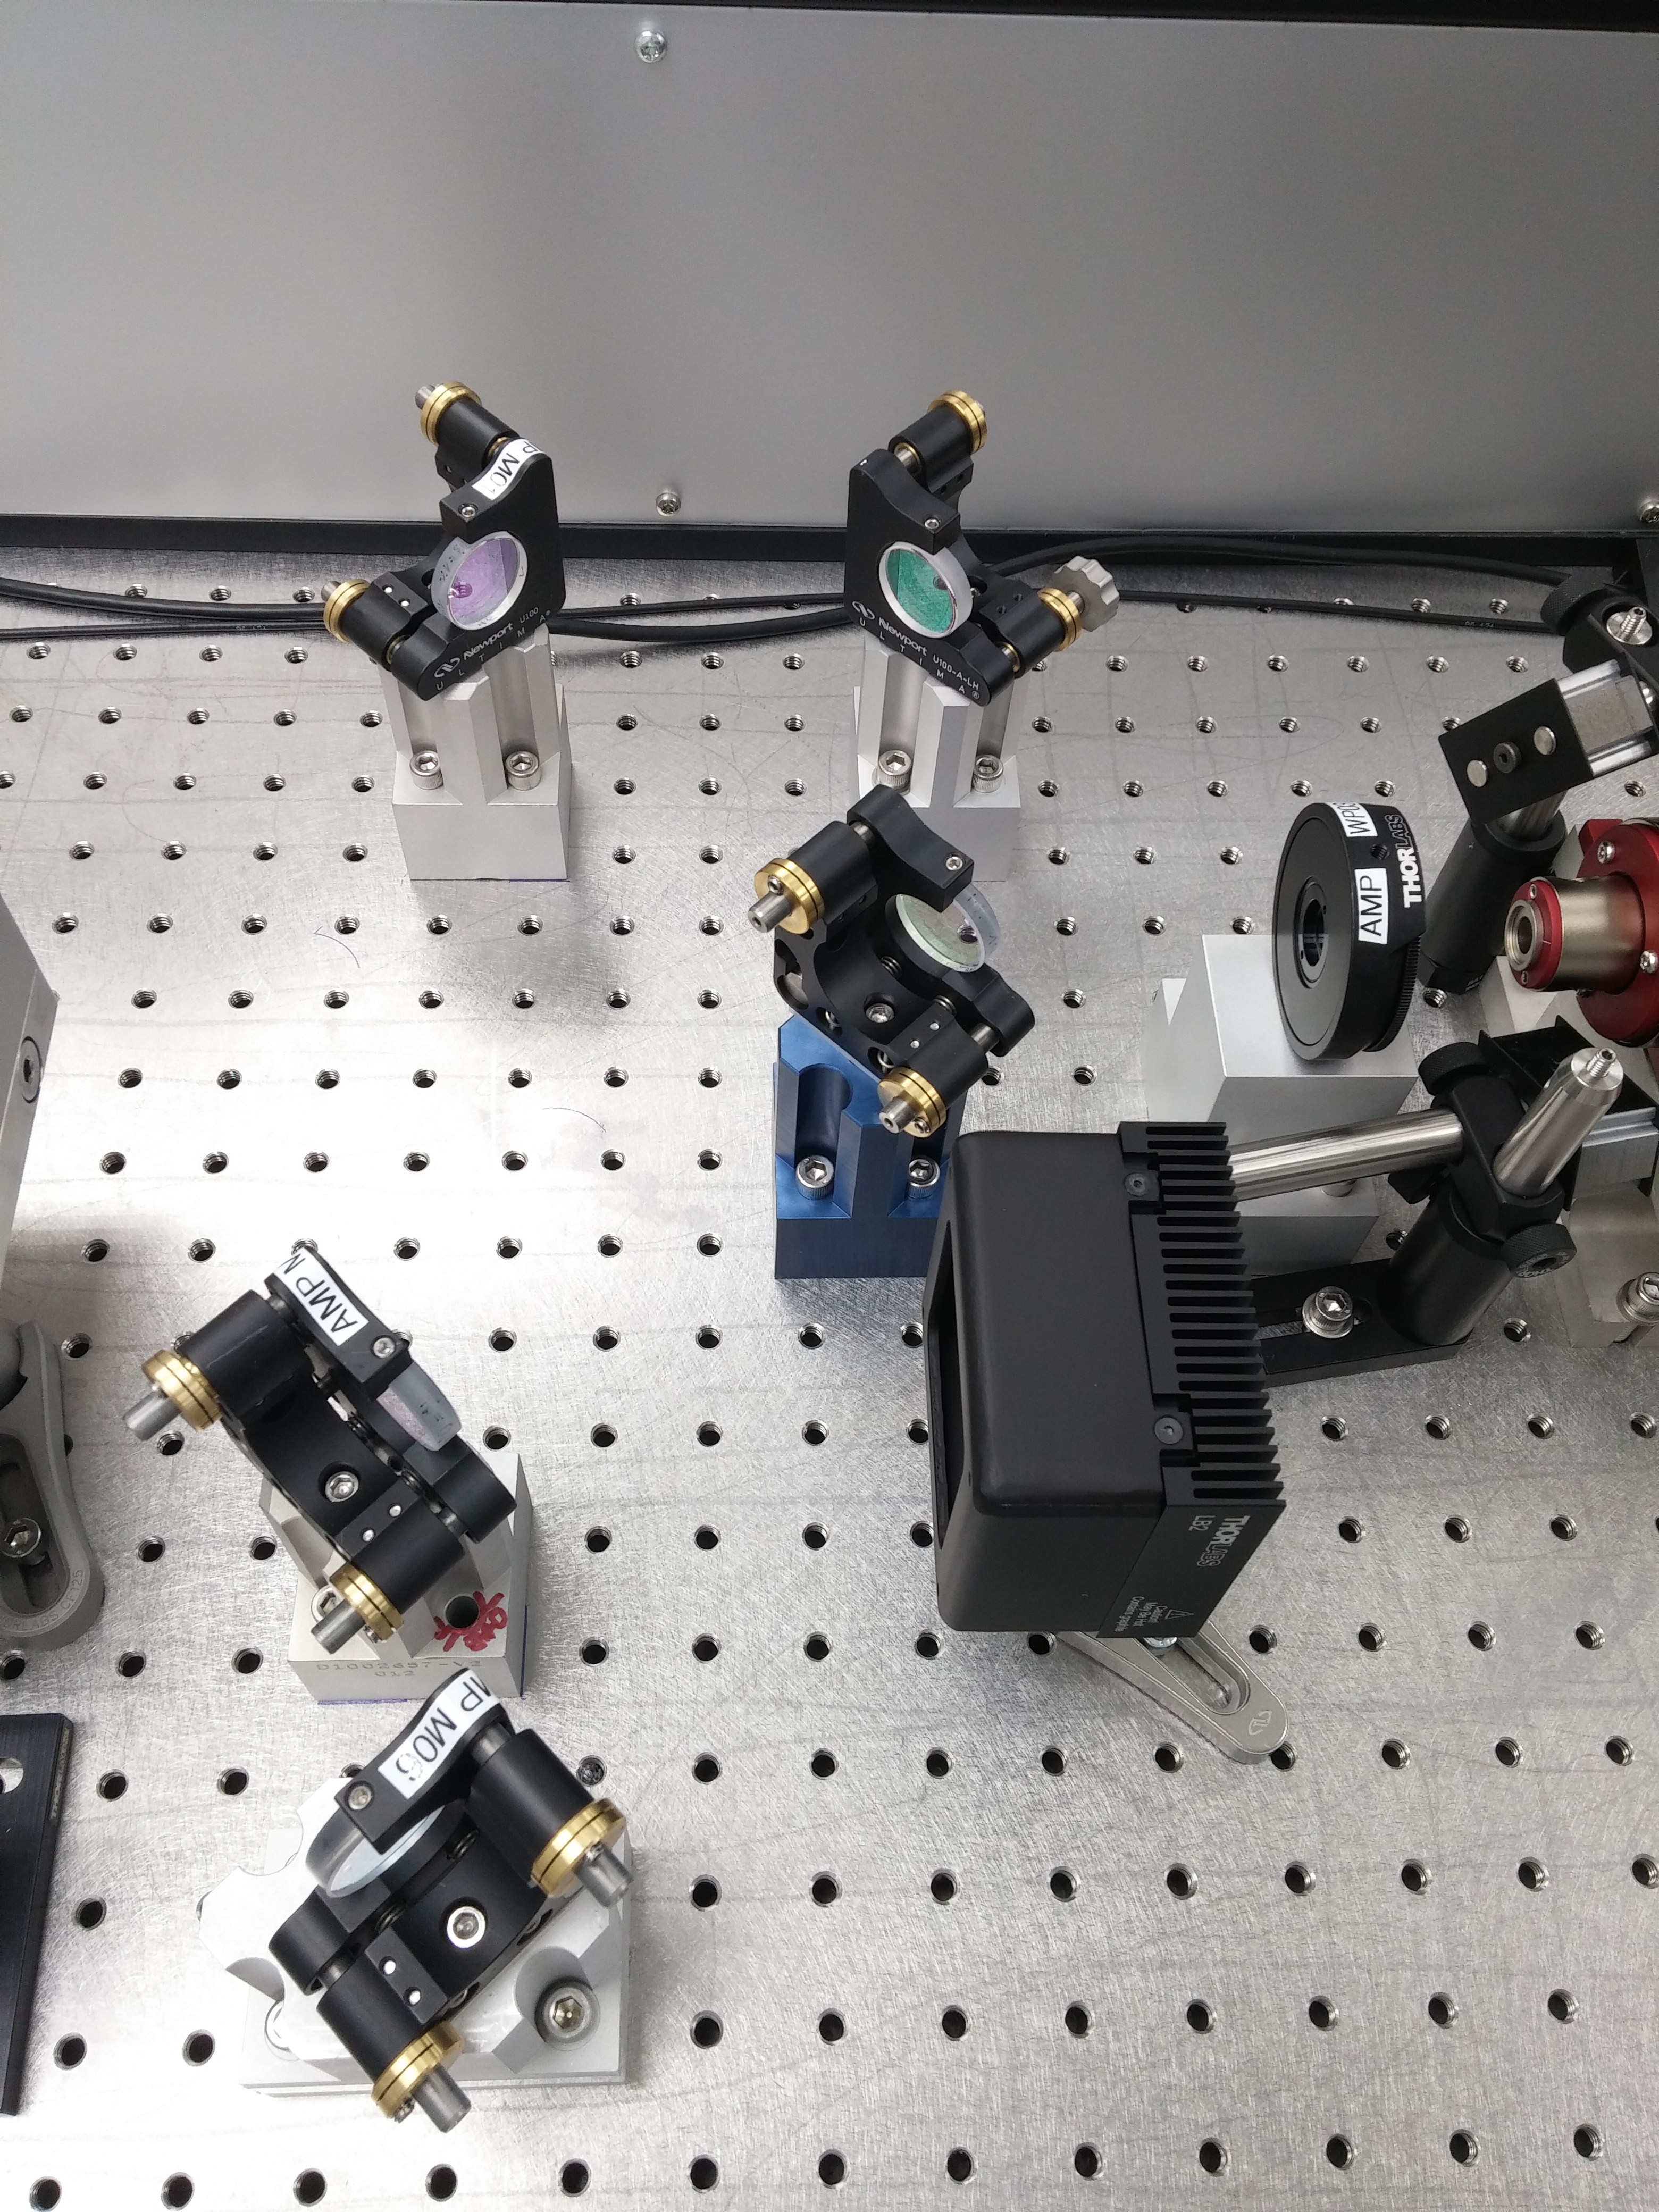
We began today by searching for a smaller micrometer to replace the rather large one on the 2nd mode matching lens mount. We found one in the PSL enclosure and Ed installed it, see 1st picture. We were then able to move the dog leg up by 1 row of holes, which cleared the interference with 70W amplifier output beam path.
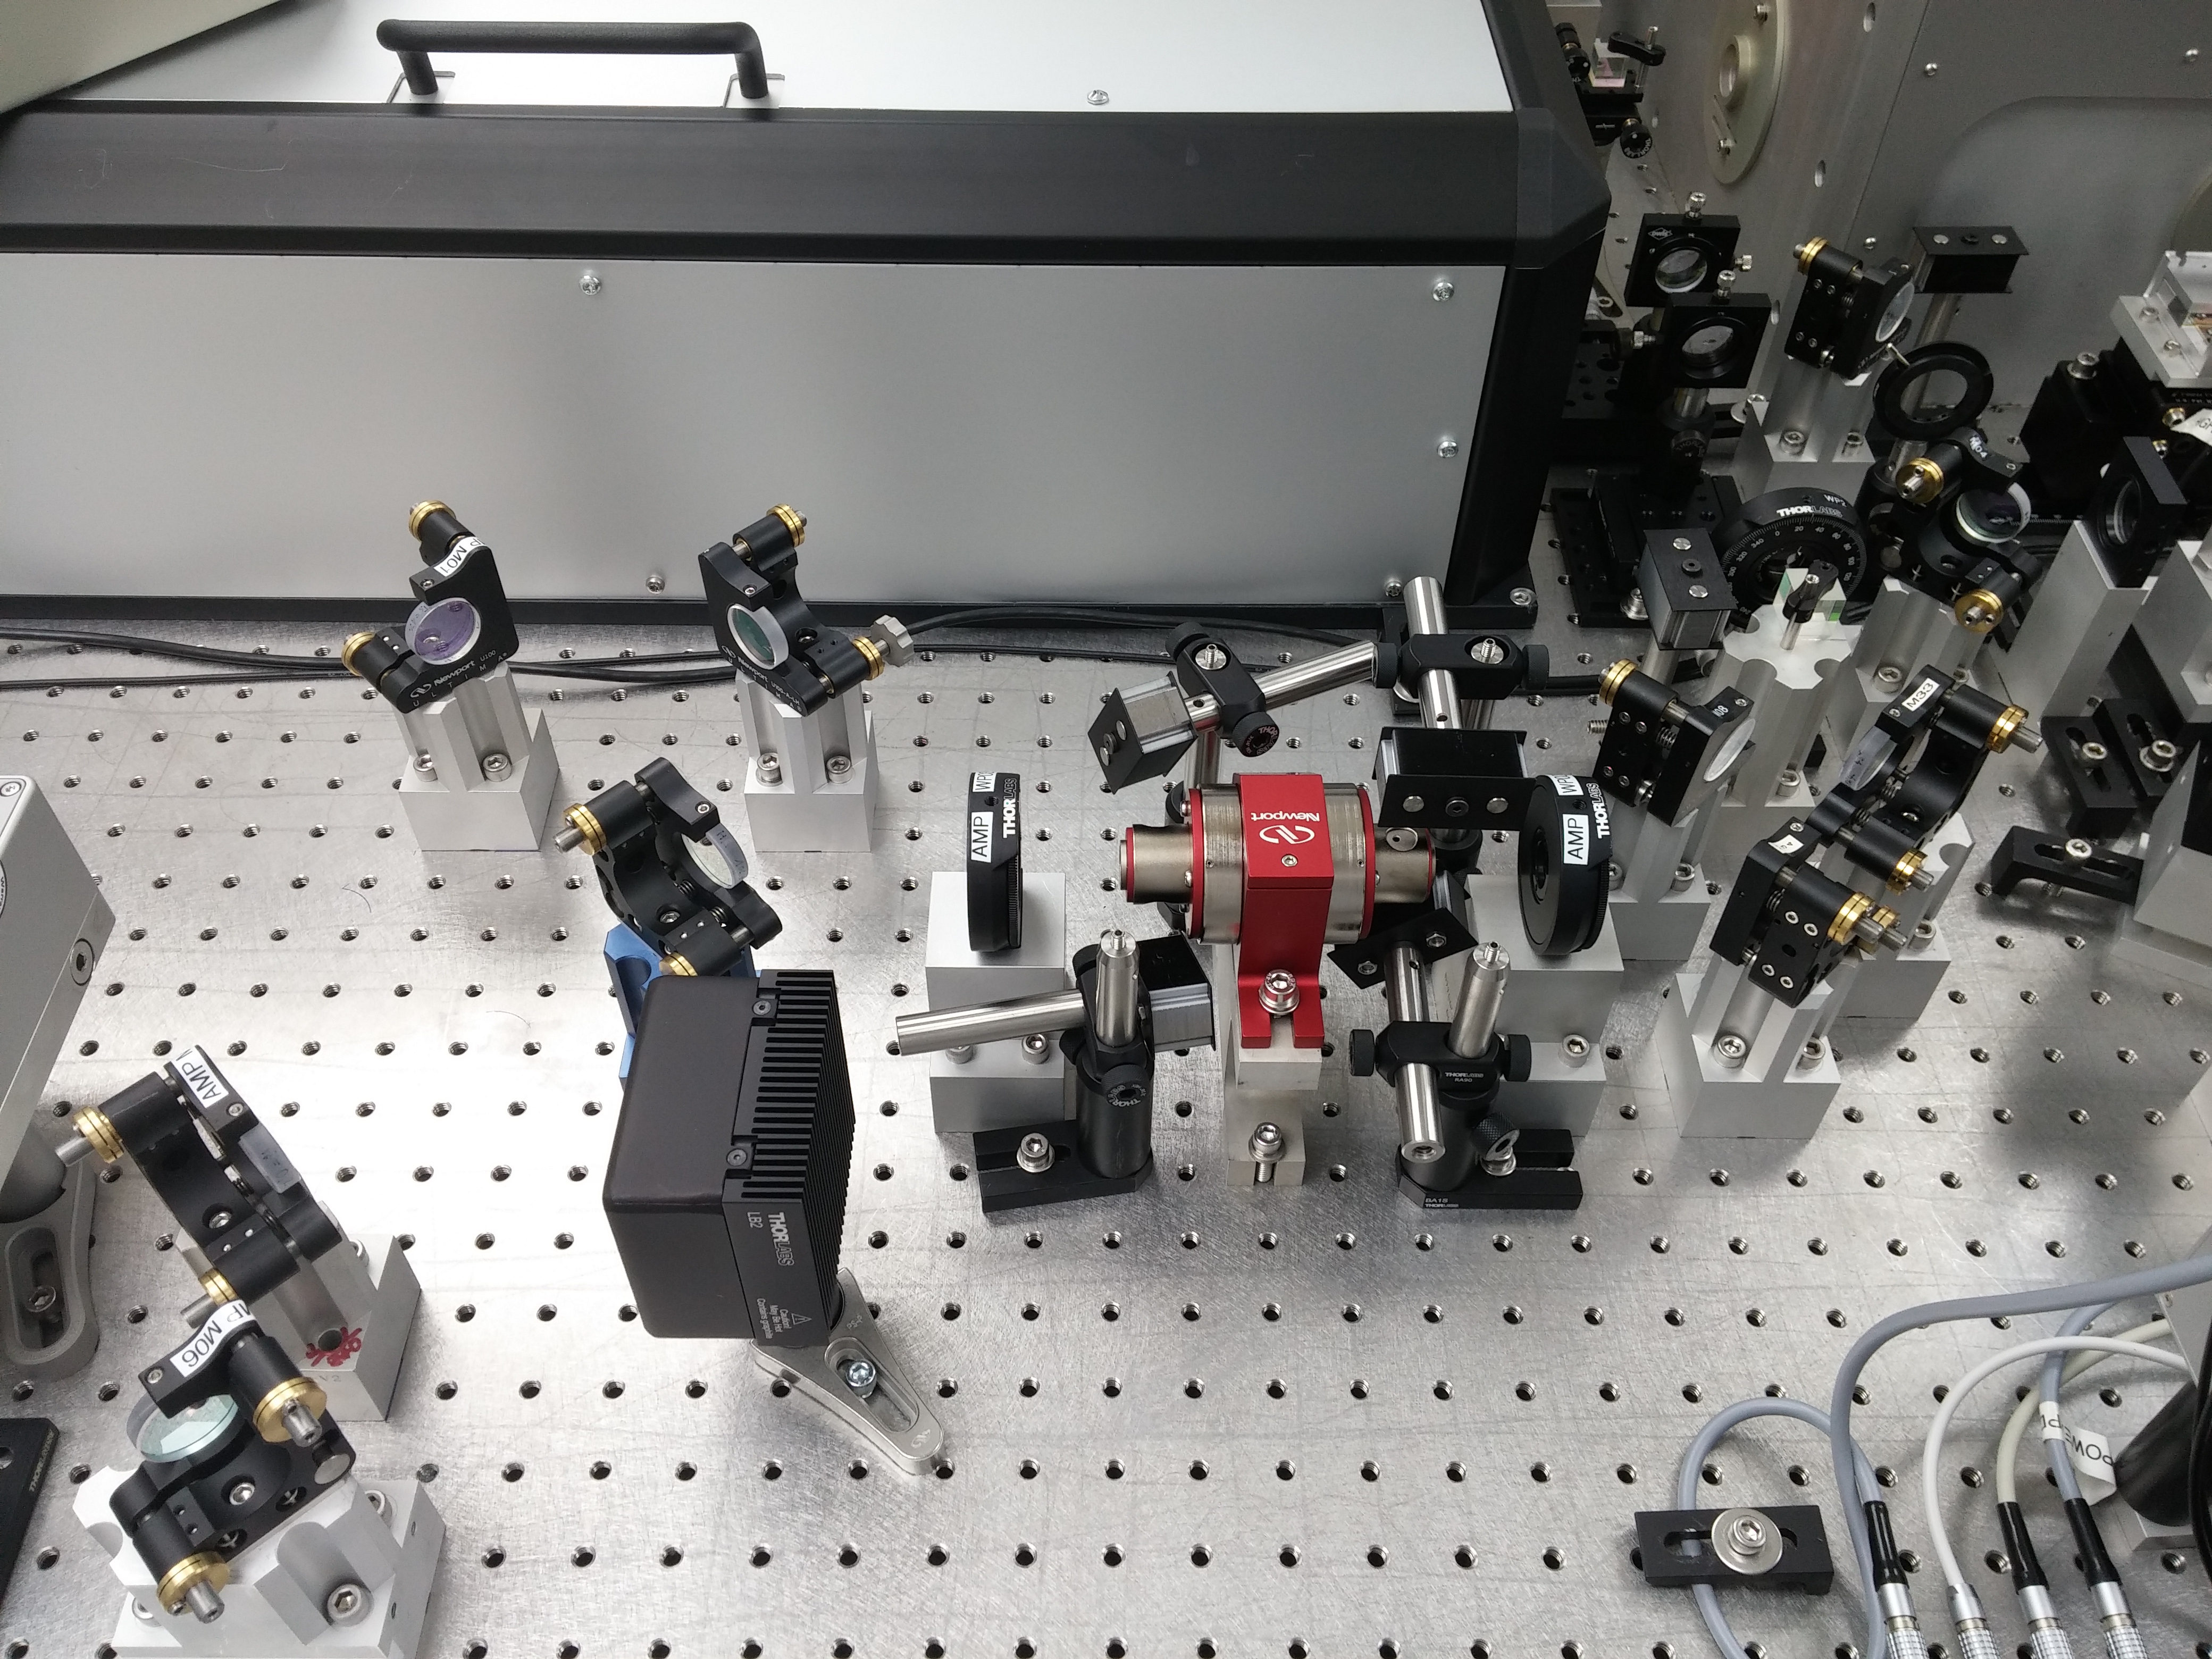
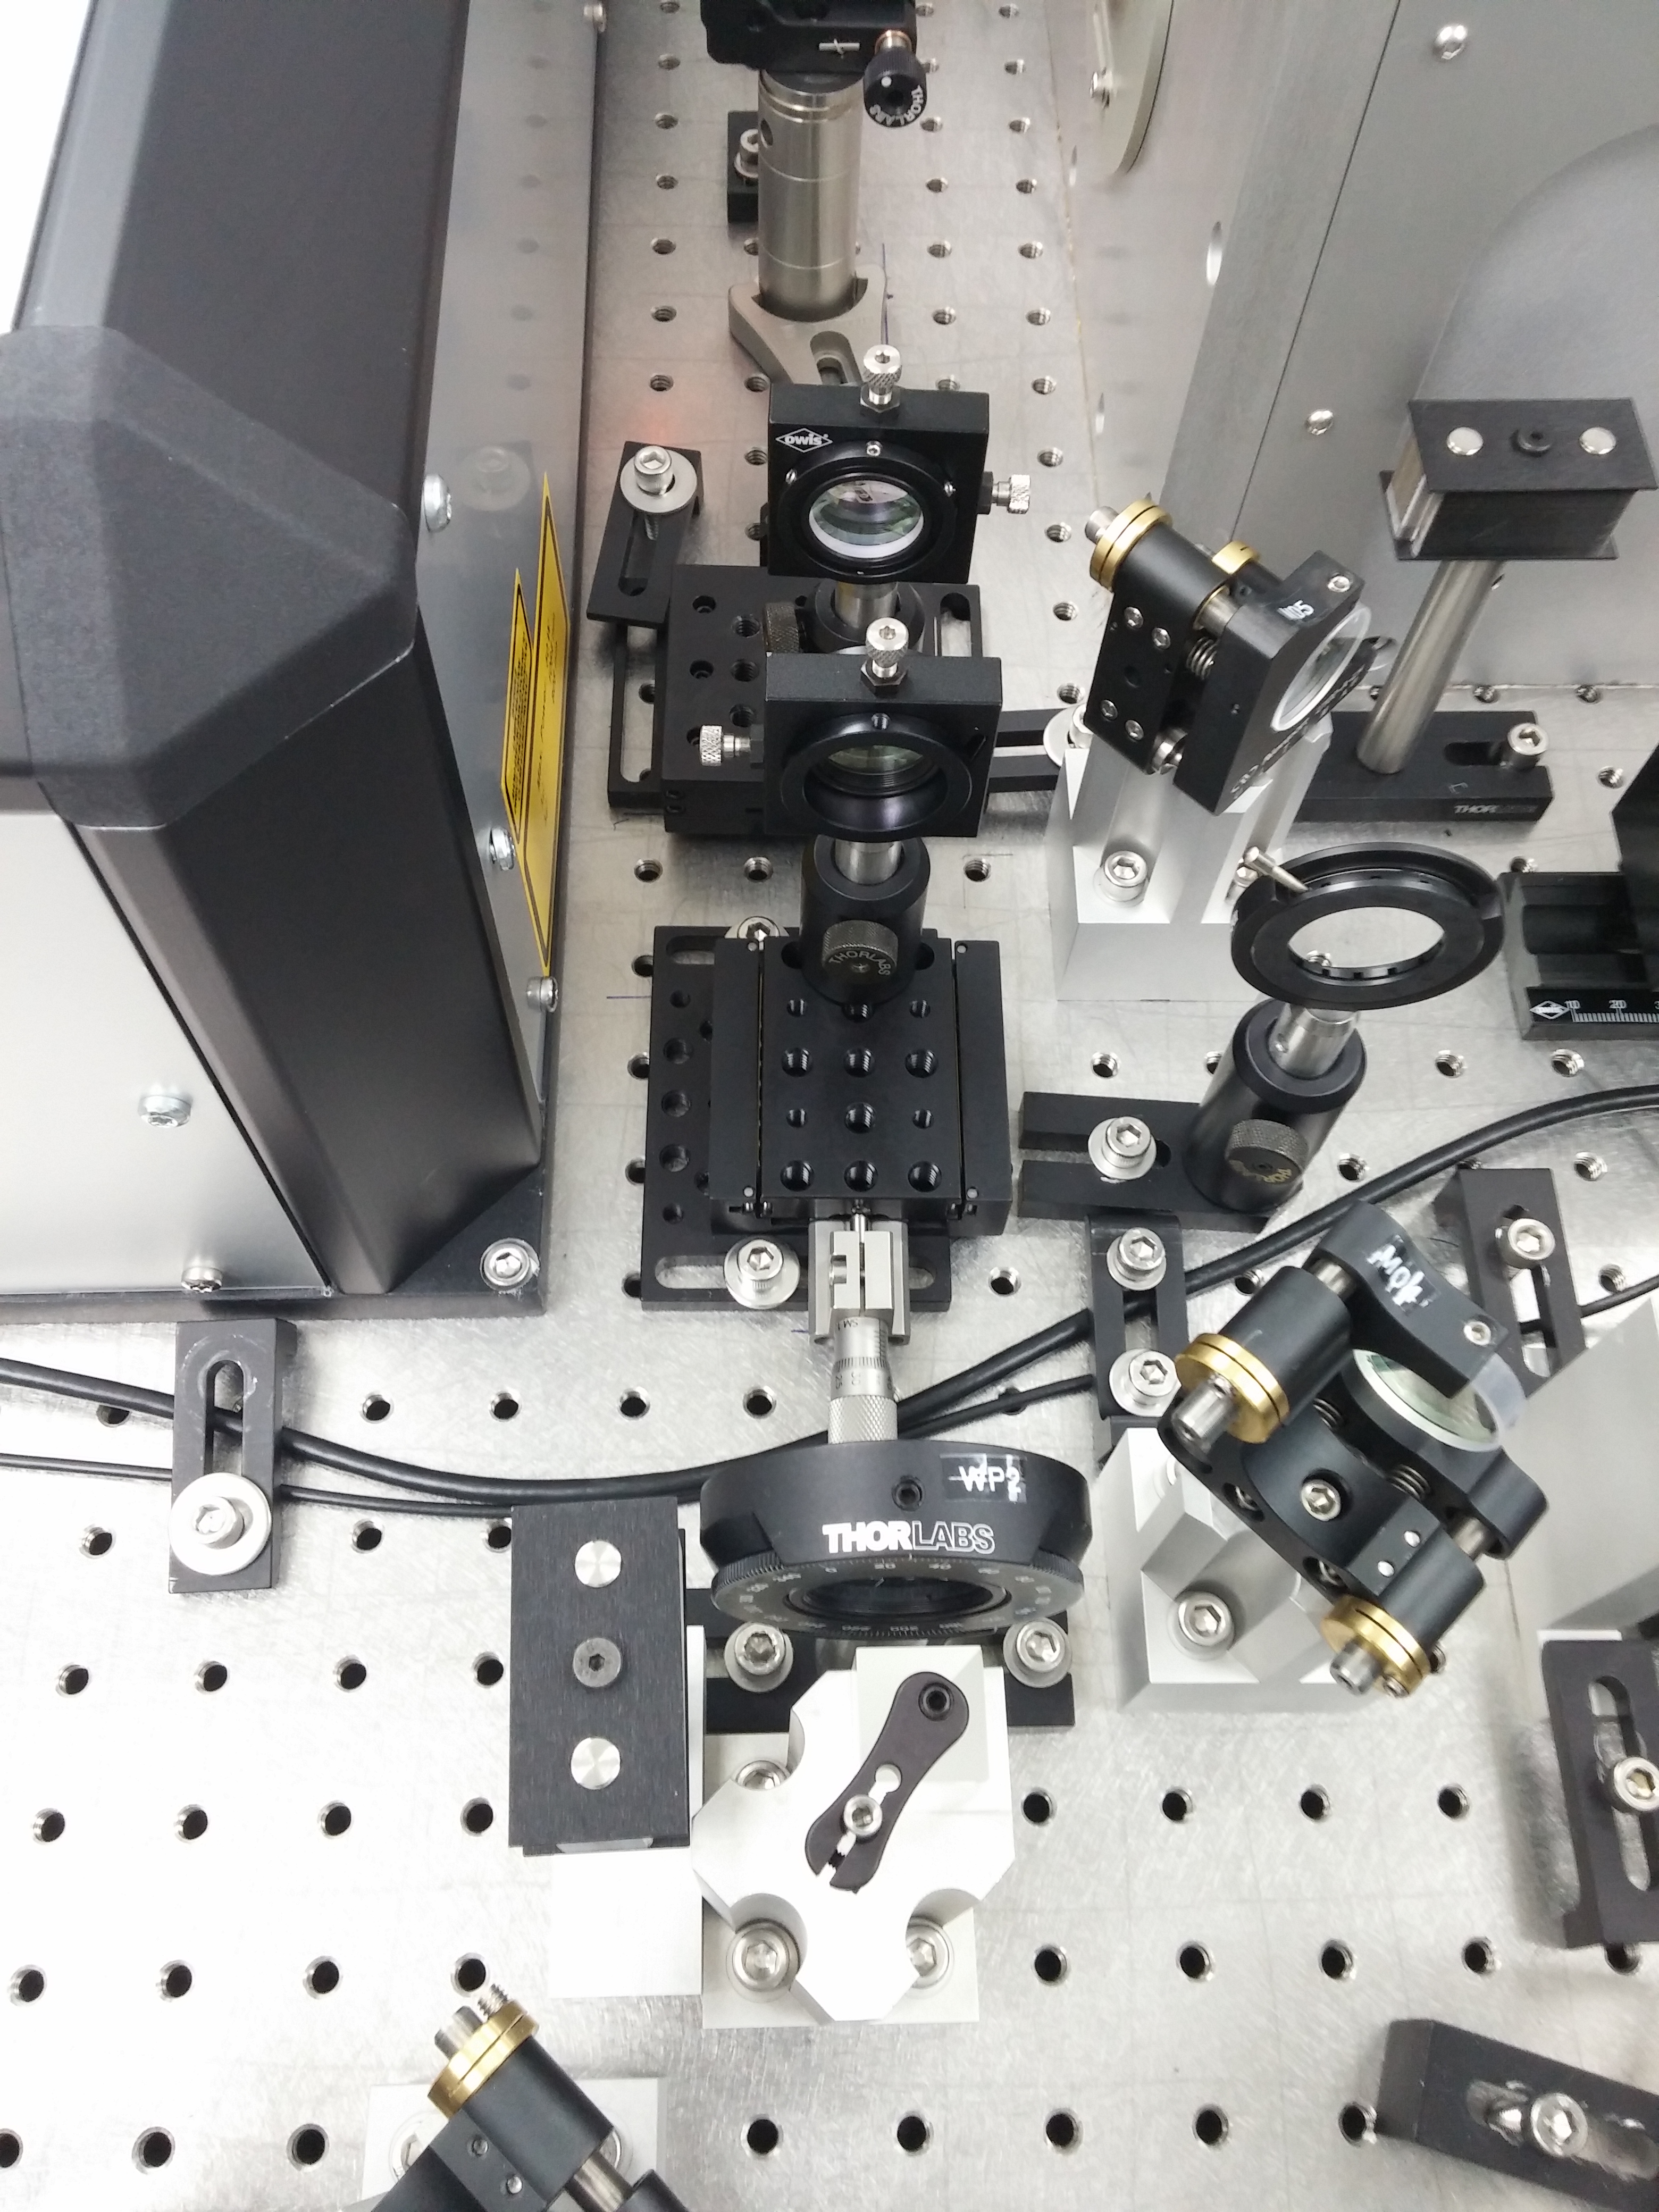
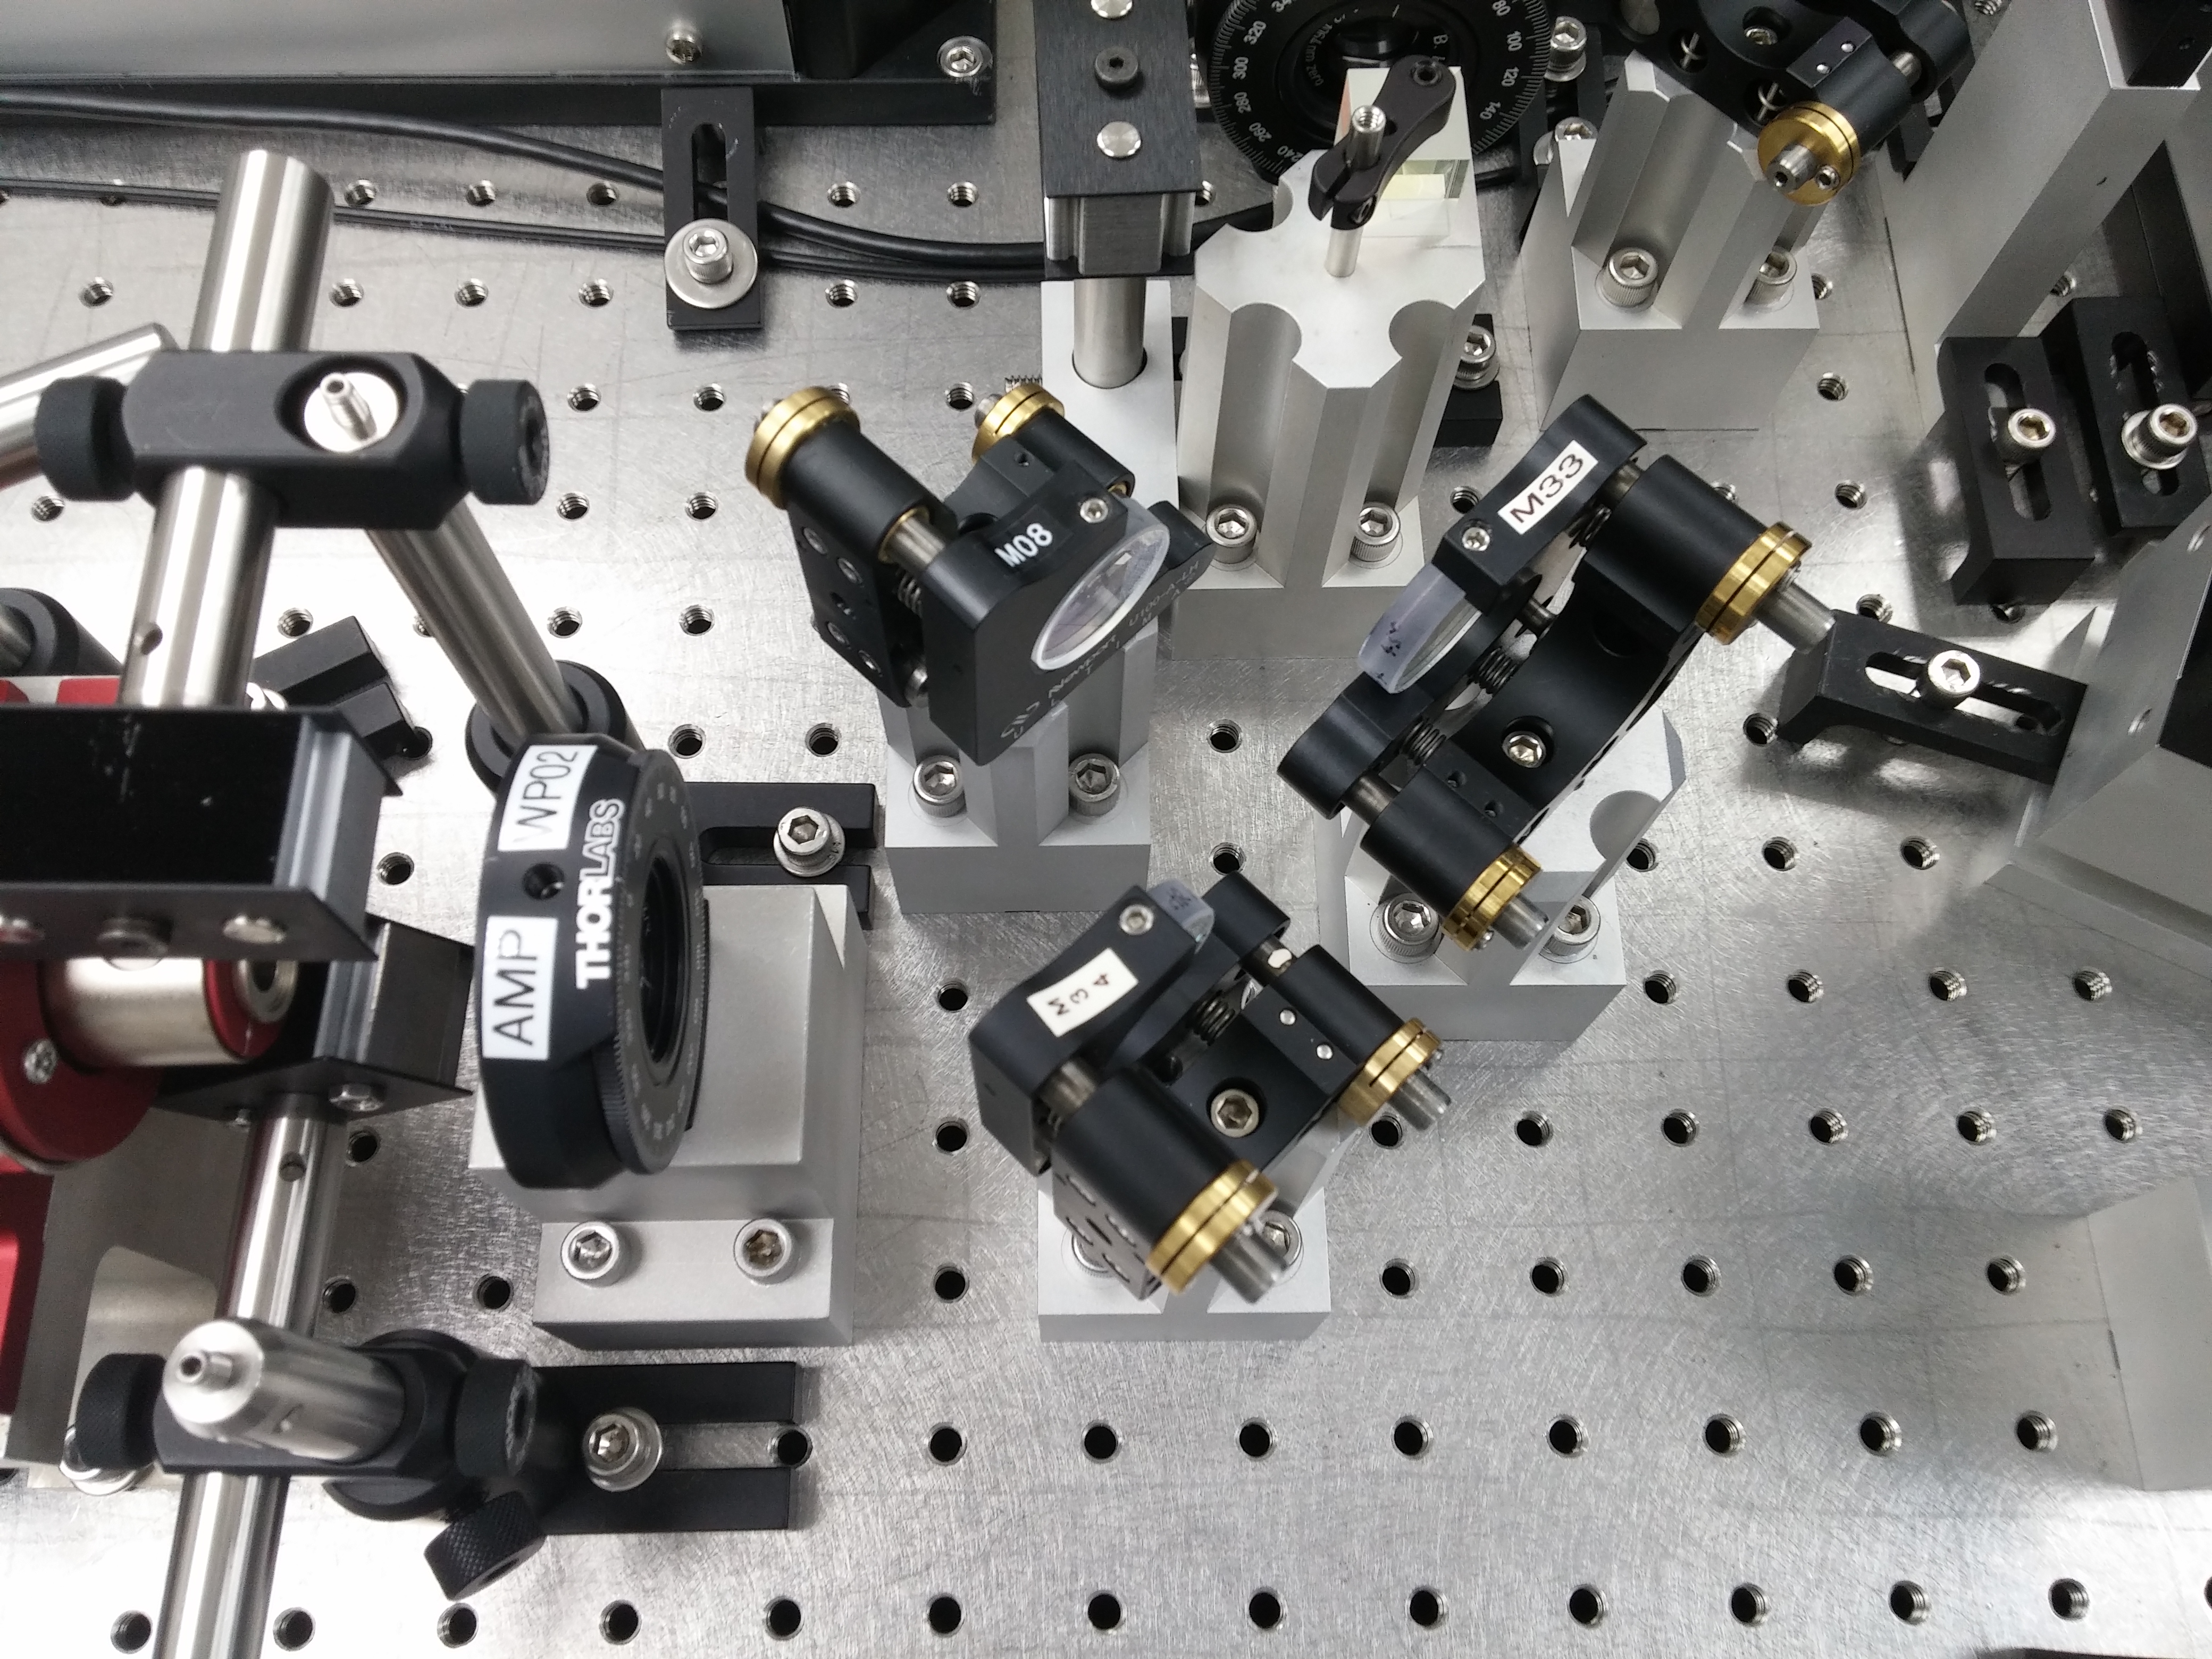
We then mounted and installed 2 HR mirrors to re-direct the beam back online for the 70W amplifier. We used a couple of mirror pedestals from the IOO cabinet and used spare HR mirrors from the PSL spare stock. We then proceeded to align the beam. We started with the mode matching lenses, as the 2nd lens needed to be removed to install the shorter micrometer. We then realigned through the dog leg, using M08 and M34 to bring the beam up to the level for AMP_FI. We used a beam target to to align the beam down the required row of holes and at the right height. We then installed AMP_FI, AMP_WP02, and AMP_WP03 and checked that the beam was centered on them all. Using the same alignment target, we then used our 2 new HR mirrors to align the beam down the required row of holes for AMP_M01 and the new FE DBB beam path.
At this point we placed the Thorlabs beam profiler and spent some time optimizing the lens positions. The best waist we could get today was 365µm diameter horizontal and 344µm diameter vertical, likely due to the slightly increased optical path length due to AMP_FI, AMP_WP02, and AMP_WP03. This is close enough for rough mode matching, so we moved on. We roughly placed the 70W amp in its location so we could install AMP_M02 and mark its location for alignment purposes. We then removed AMP_M02 and the 70W amplifier and installed AMP_M01. Using the same alignment target, and the 2nd new HR mirror and AMP_M01, we aligned the beam down the row holes between AMP_M01 and AMP_M02. This is a very rough starting alignment for the 70W amplifier, likely not close to the final alignment but at least somewhere to start. We then installed AMP_M02 and AMP_M06, and placed beam dumps so all beams (leakage beams through AMP_M01 and AMP_M02 and the main beam reflected from AMP_M02) were blocked. Finally, we installed the 4 beam dumps for AMP_FI.
I've attached a few pictures of the new layout. The 1st shows the new, shorter micrometer. The 2nd is an overview shot of the pre-70W amp beam path. The 3rd shows the mode mathcing lenses, as well as WP02 and PBS02 in their new homes. The 4th shows the re-located dog leg and AMP_WP02 at the entrance to AMP_FI. The final picture shows AMP_WP03 at the exit of AMP_FI, the 2 new HR mirrors, AMP_M01, AMP_M02, and AMP_M06. The 70W amplifier will sit in-between AMP_M01 and AMP_M02.
Next week, Peter will begin the process of aligning the 70W amplifier and optimizing the mode matching.
Nutsinee Terry Daniel
OPO locking:
Fibers:
Translation stage:
Next:
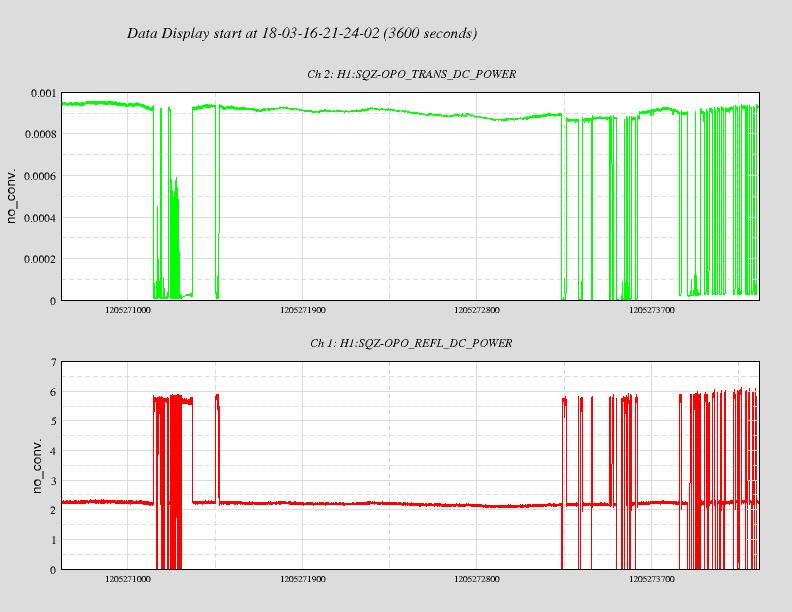
Taking the 62% dip in reflection at face value, we can calculate the crystal loss assuming we know the input coupler (nominally 98% reflectivity) and neglecting any effects from mode mismatch:
| R input coupler | Crystal Loss | Finesse | Power buildup | Crystal Loss | Finesse | Power buildup |
| 0.975 | 0.60% | 200 | 103 | 10% | 48 | 6.1 |
| 0.980 | 0.48% | 250 | 129 | 8.2% | 59 | 7.5 |
| 0.985 | 0.36% | 335 | 173 | 6.2% | 79 | 10 |
There are two possible solutions. However, the high loss solution is not very likely.
The newest version of VerbalAlarms is now running on alarm0 (alarm handler computer). I've been running it on zotws8 all week and I think it is stable enough for control room use. If there are any issues with it, running the normal "VerbalAlarms -dc" will start the old one.
There will be a longer alog with details of this new version on another day.
JimW, NikoL, JimW, ArijitS, RickS
This morning, we went into X-end to try to restore the alignment of the Pcal beams.
First, we tried tapping on the Pcal periscope flexures with the newly-acquired aluminum hammers. That was not as successful as we had hoped. The beams didn't move as we expected, which probably means that the tapping was not moving the periscope the same way it had shifted during the addition of the vibration absorbers and the "baffles and shields" hardware.
In the end, we used the adjustable mirror mounts on the periscope to restore pointing to the ETM target mounted on the suspension frame.
We also adjusted the centering on the 4th lower beam periscope mirror (M4)r. We name the lower beam relay mirrors M1-M5 starting at the Tx module. We adjusted M2 pitch to bring the beam up on M3, then adjusted the pitch of M3 to lower the beam on M4. With a couple of iterations, we significantly improved the centering of the lower beam on M4.
We then adjusted the relay mirrors in the Receiver Module to center the beams on the aperture of the Rx integrating sphere.
We also adjusted the compression of the upper periscope flexures. As found, the upper gaps were slightly more that 0.230". We adjusted the flexure compression screws to reduce the gaps to slightly less than 0.210", increasing the pre-load forces constraining the periscope structure.
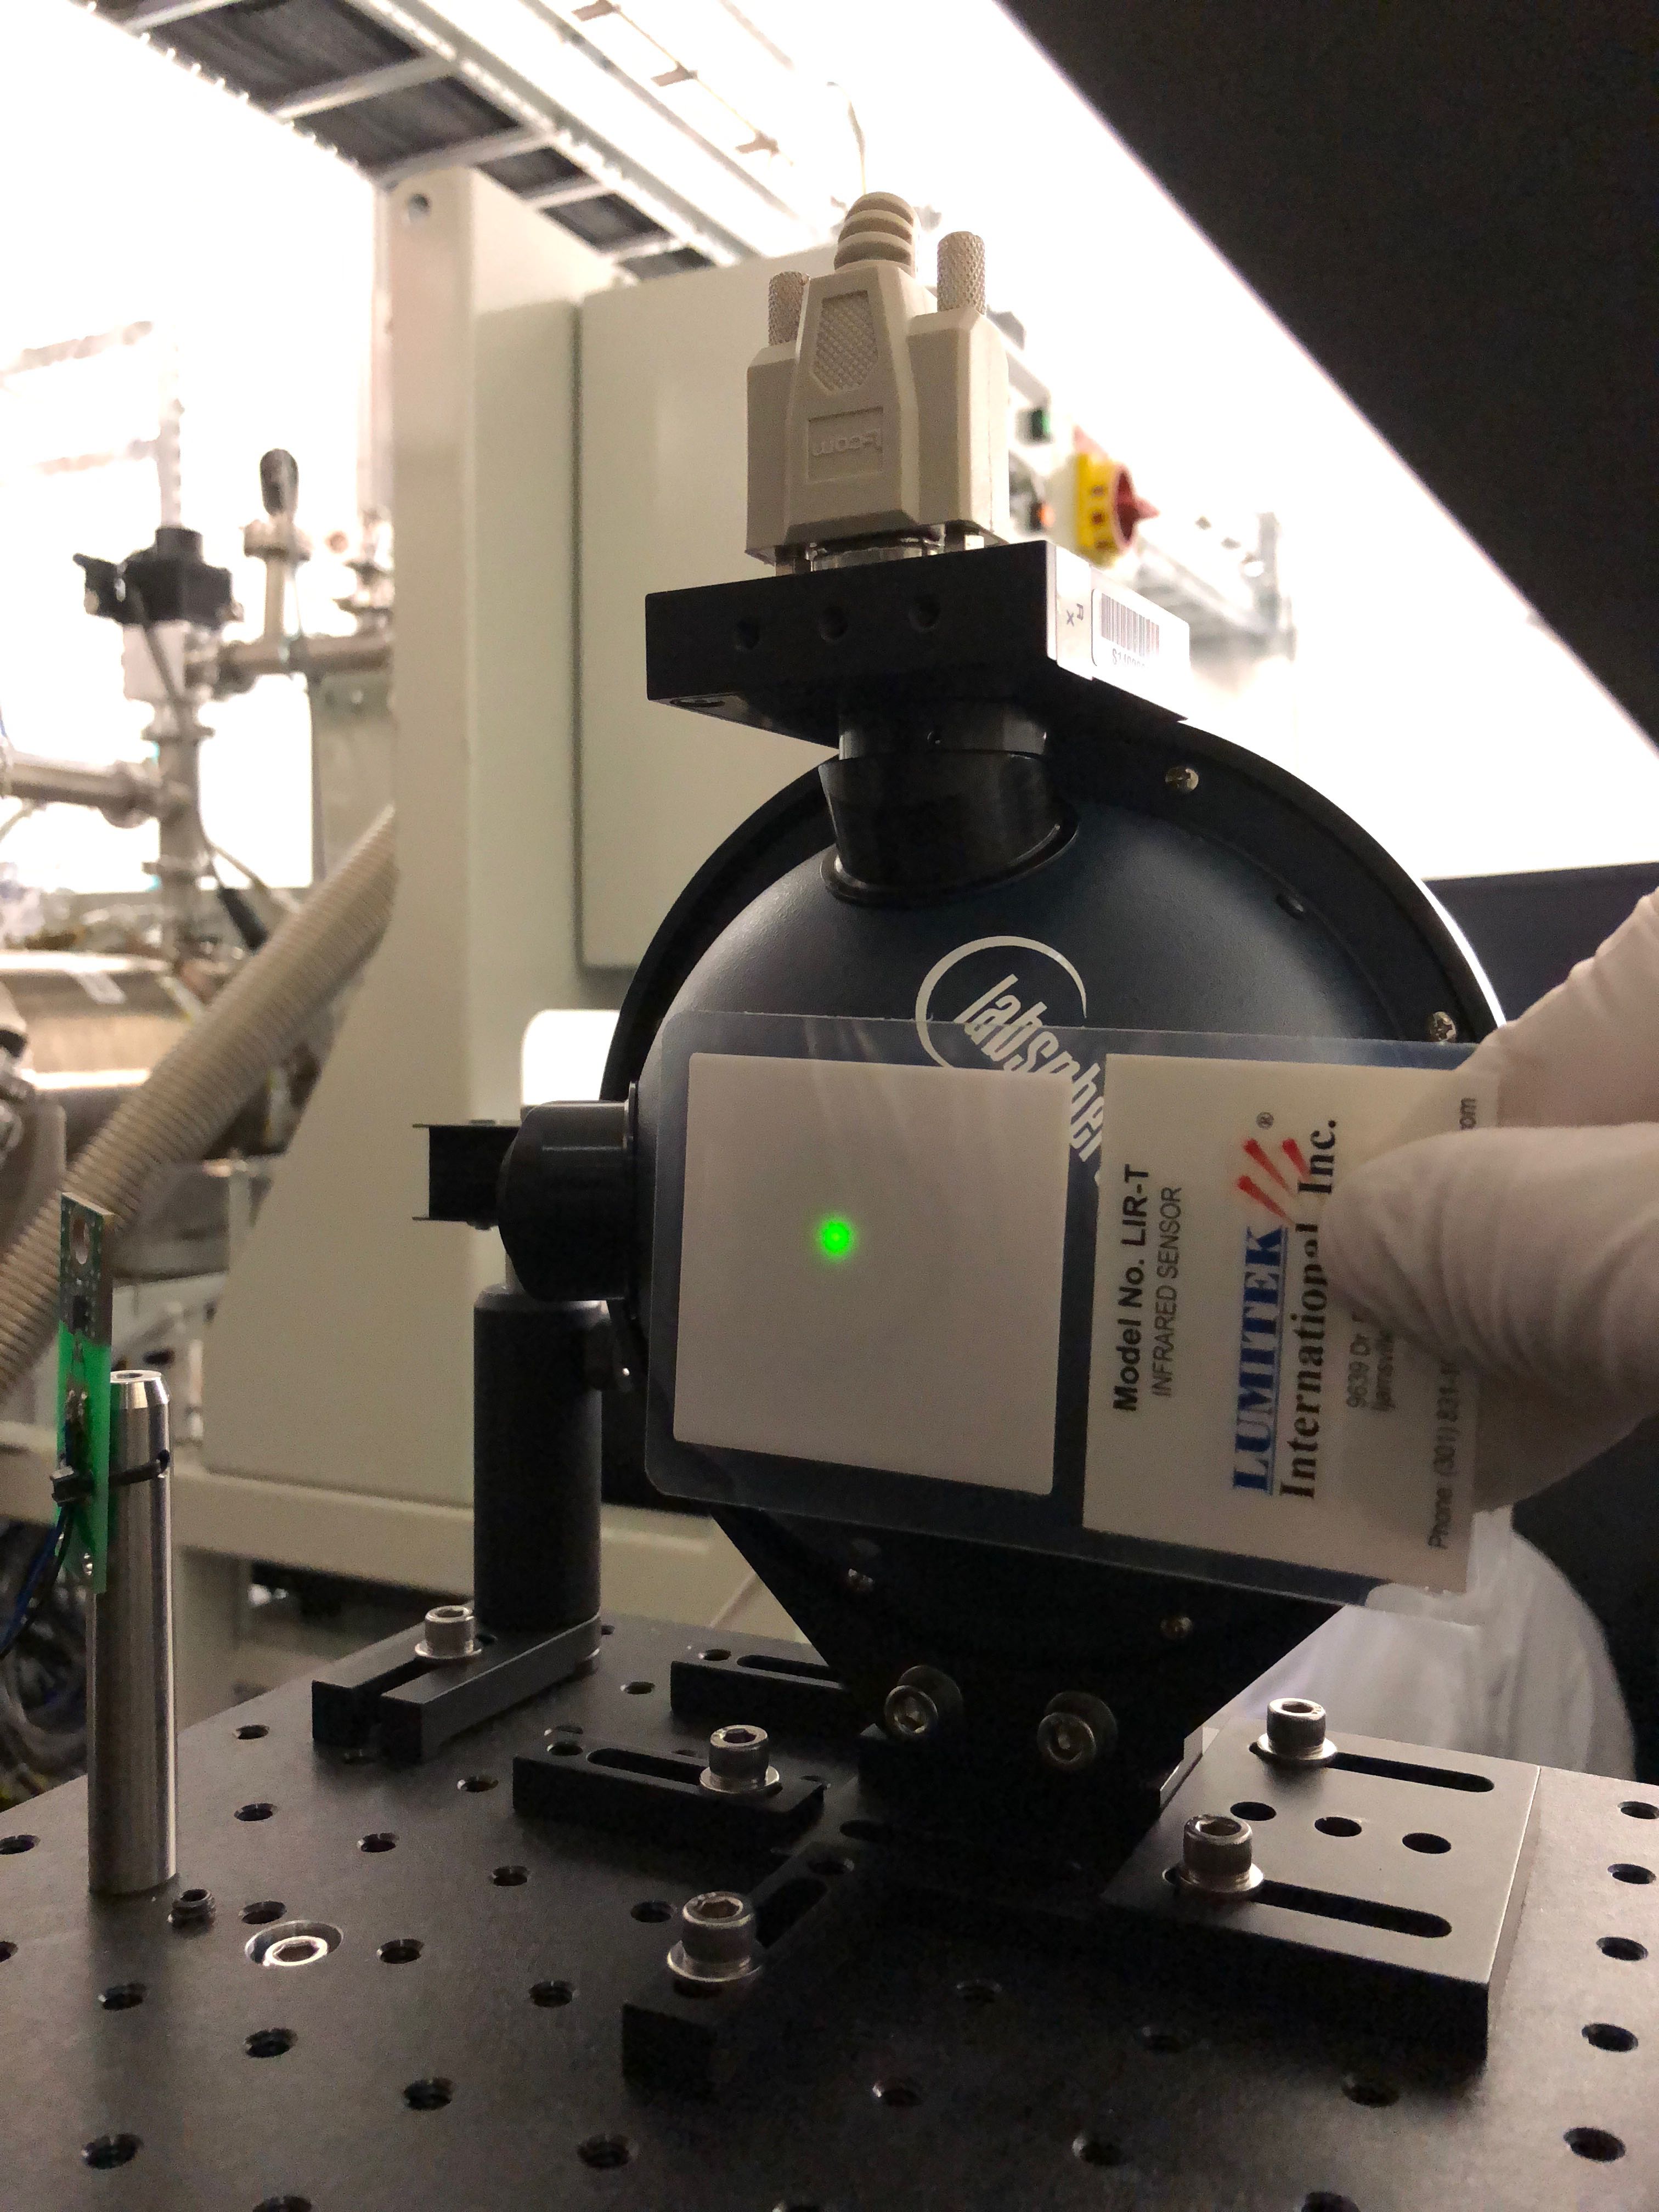
Photos of the beam positions on the ETM target and at the entrance to the Rx module integrating sphere are attached.
Second work day: LHO aLOG 40968
First work day: LHO aLOG 40892
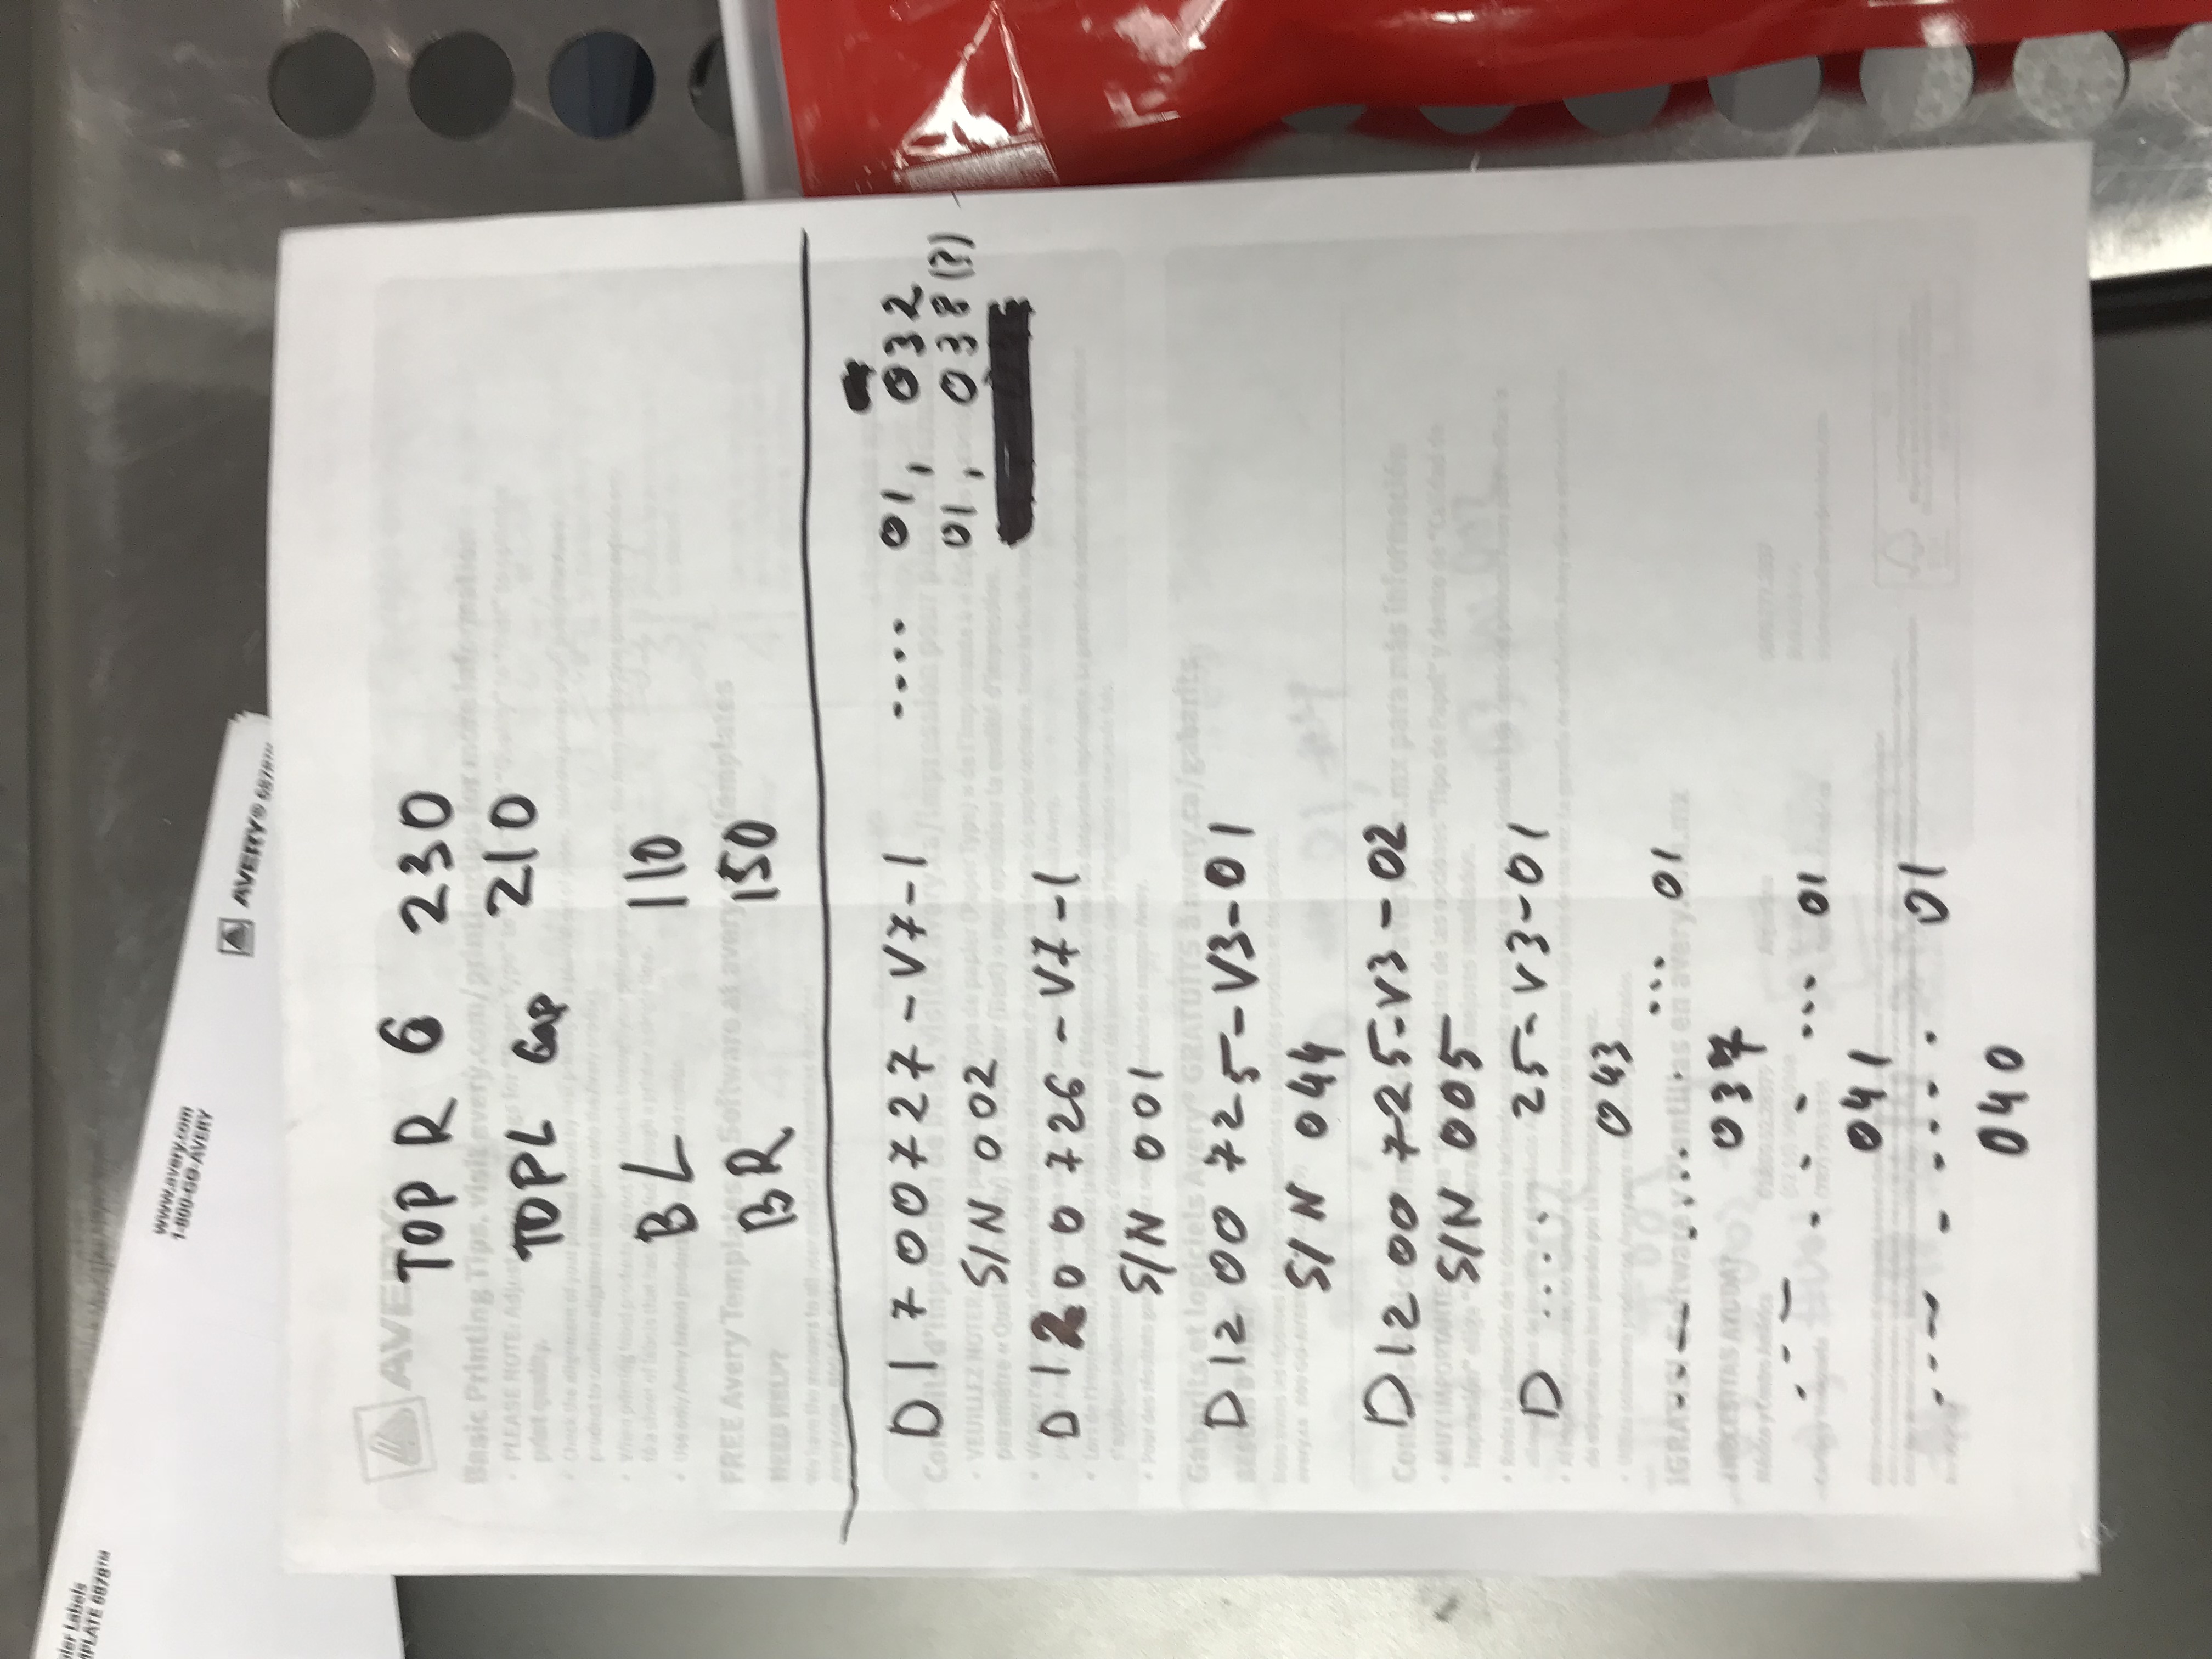
Flexure gap log:
Purge-air flow was brought to a halt once the BSC door was installed earlier this week -> Isolated purge-air from VE via closing vent/purge isolation valve. Shut down purge-air supply. We will restart as required to install the refurbished 2500 l/s ion pump, new gate valve, nipple and chevron baffle as soon as all items have arrived at LHO.
launching foton from MEDM is having problems. As a temporary solution, I have modified instafoton.py to run /ligo/apps/debian8/gds-trunk/bin/foton
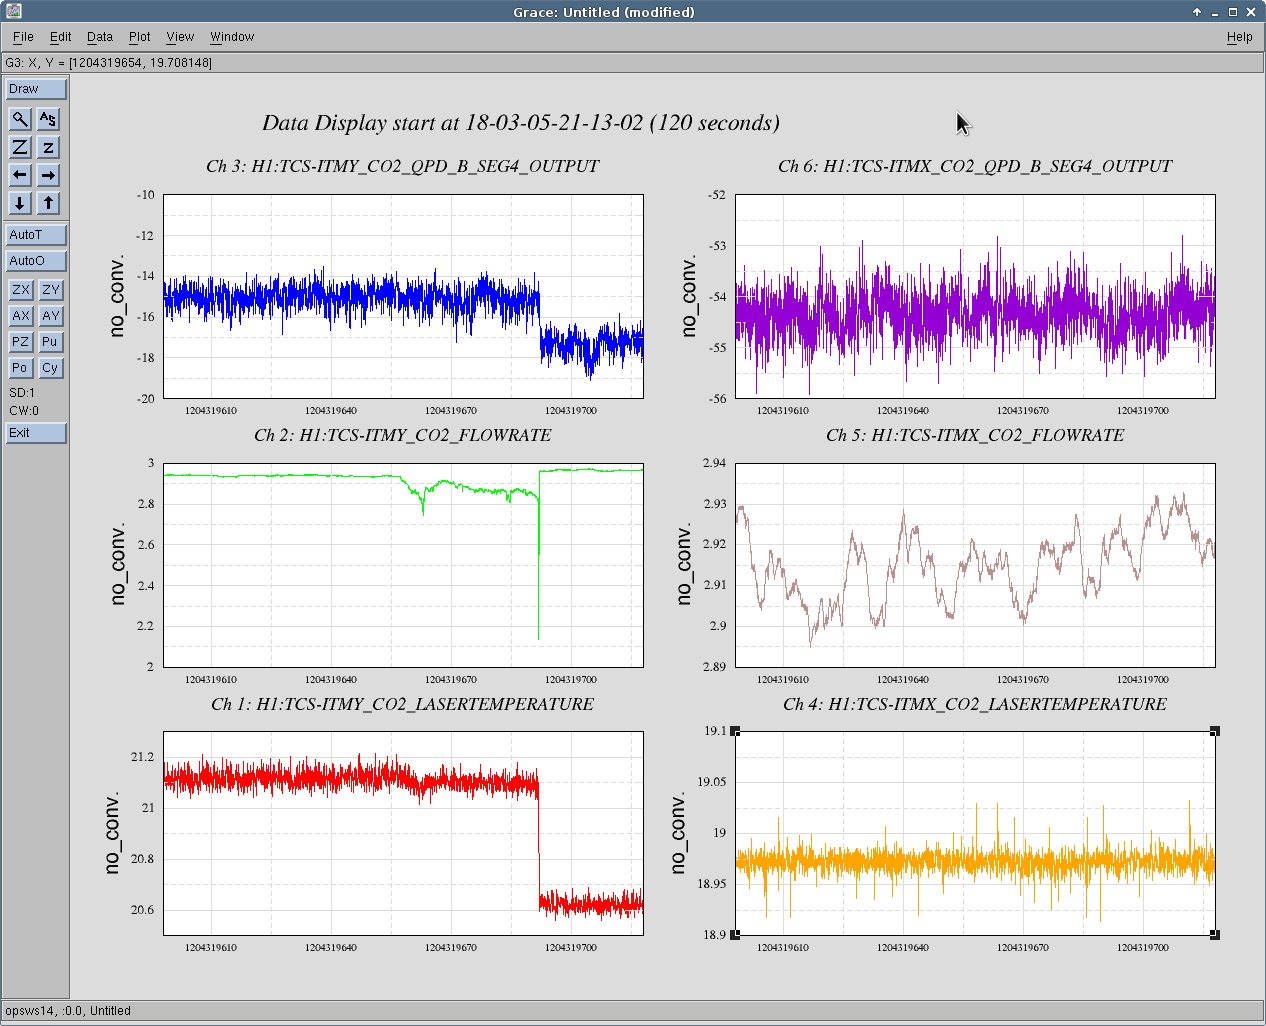
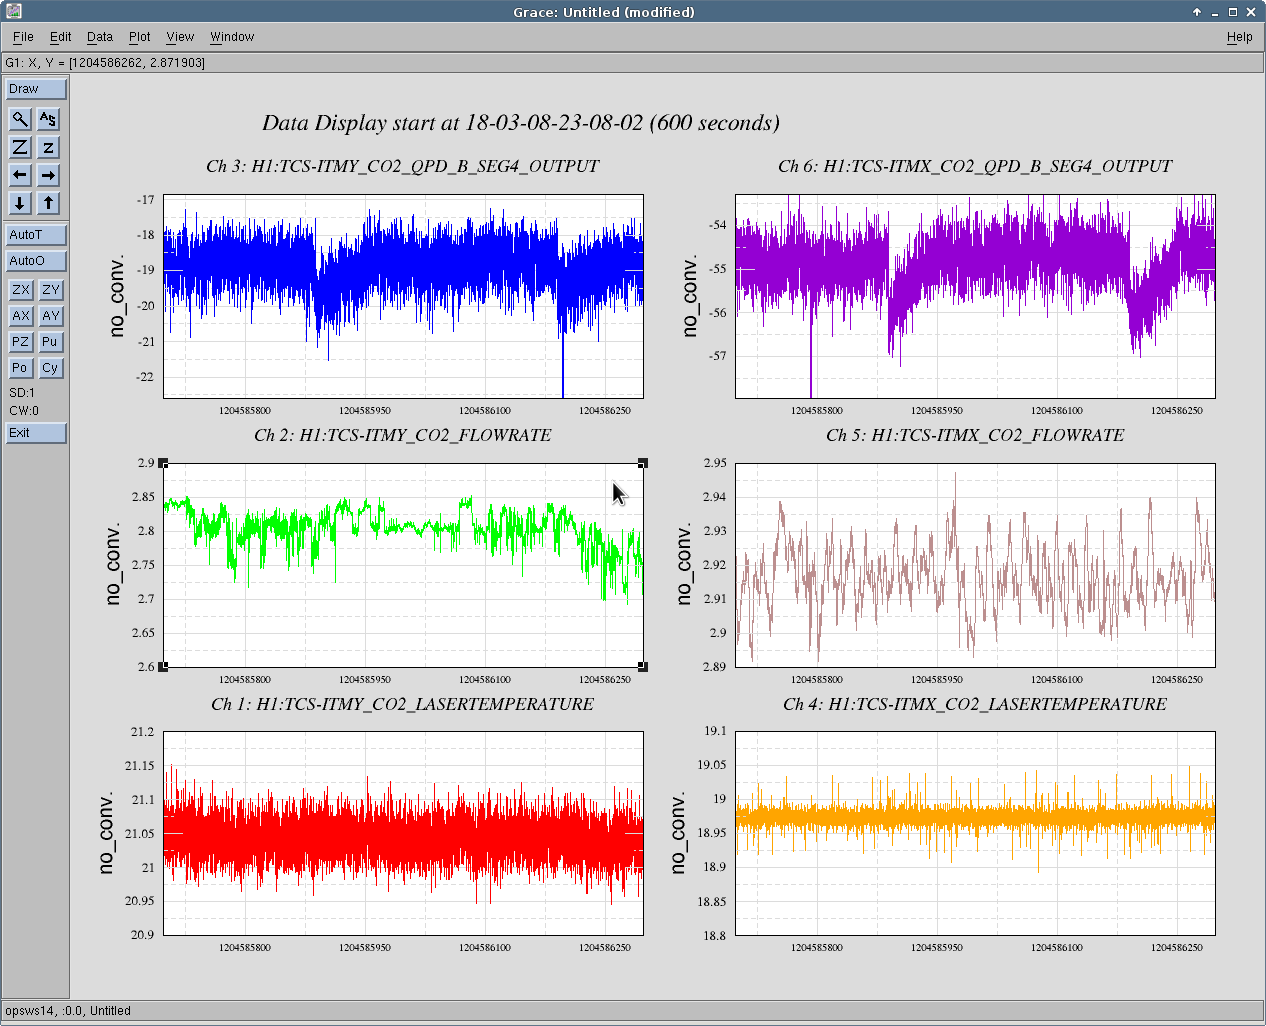
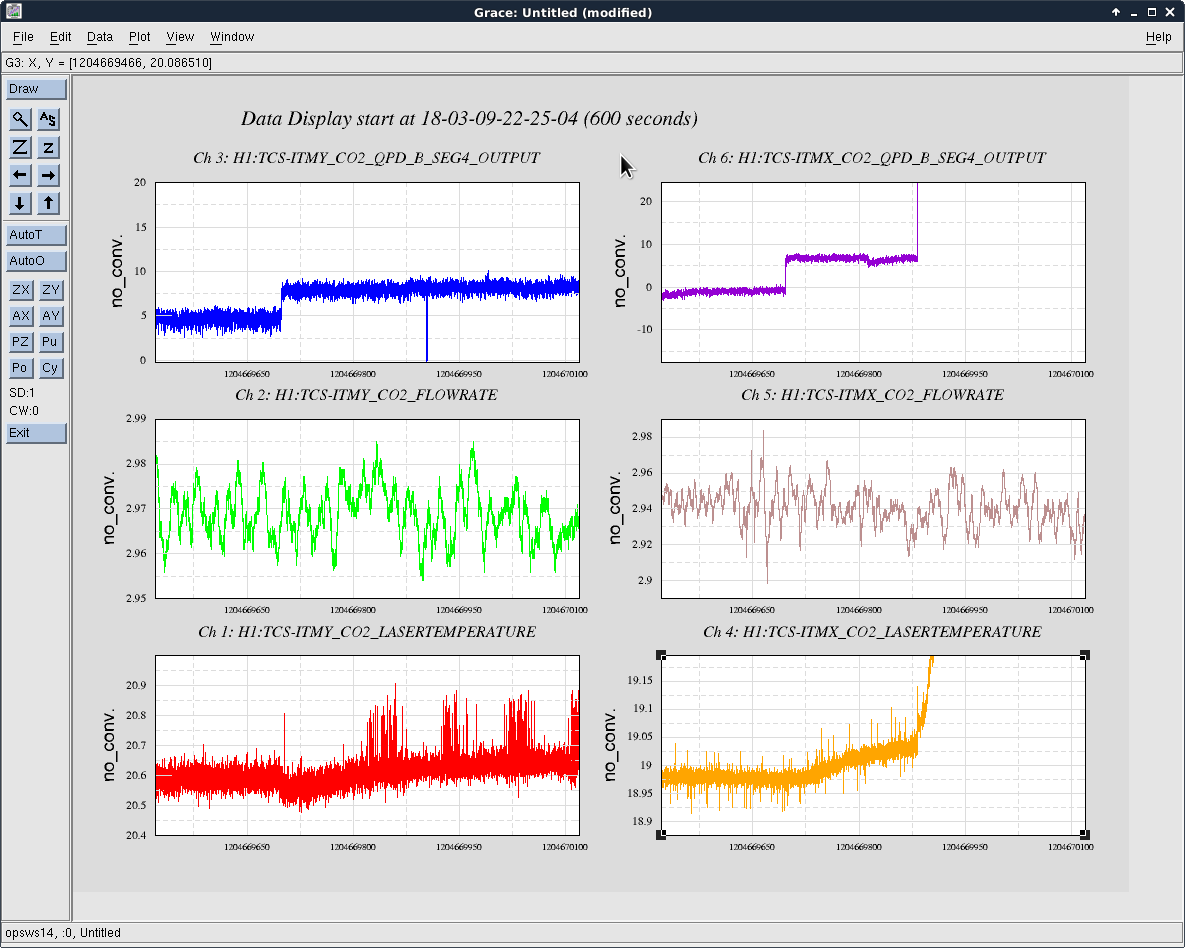
From these plots, I would say that it's very possible that there are multiple sources of glitching in the TCS system.
J. Kissel Hugh and Corey have unlocked, balanced, floated, and damped the HAM6 ISI LHO aLOG 41031, so I wanted to see if I could get new, more coherent TFs of the OPOS to better understand if the problems we're seeing are dynamics (rubbing, bad physical parameters, unmodelled but physical cross-coupling), electronics, basis issues, or something else. The TFs are more coherent (I've also used the same drive filtering and amplitudes used to get the beautifully clean LLO aLOG 37508), but they're still confusing. The encouraging news: now that I account for - The updated dynamical model, as discussed in LHO aLOG 41032 - The change in transconductance between a v2 and v3 HAM-A driver (I had mistakenly used the -v3 transconductance, which was a factor 10 weaker) - The understood-but-not-yet-fixed, factor of 1e-6, unit flaw in the lever arm calculation in L1's OSEM2EUL and EUL2OSEM matrices the DC scale of all DOFs in L1's TFs line up with the dynamical model exquisitely, and *at least one* of the DOFs of H1's data also line up. Also -- a lot of the (apparently incoherent) features in the H1 OPO's 2018-02-27 data that I was trying to explain with dynamics have gone away with the improved drive templates and the unlocking of the ISI. Now, the response features and shape in L2L, V2V, P2P, and R2R (aside from scale factor issues) TFs look quite similar between L1 and H1. Progress! What remains as strange and/or a problem: - 5 of 6 H1 DOFs still don't match the DC scale factor of the dynamical model. - There remains a good deal of Yaw to Transverse coupling in T2T. - Also in T2T -- there's very little actual of the primary transverse model - The high-frequency asymptote in P2P seems to have drastically changed. It's unclear if this is dynamical interaction between the floating ISI and the floating OPOS, or if, for some strange reason the well-known electrical cross-coupling between drive and sensor has changed. Comparing pg 17 of 2018-03-16_1652_H1SUSOPO_M1_ALL_TFs.pdf and 2018-02-27_2209_H1SUSOPO_M1_ALL_TFs.pdf, one sees that the source of the change is mostly do to a change in V2's response. However, now that we understand the DC gain of these transfer functions better, I'll take a look at the damping loops again and check if I can get somewhere by adjusting their gain to match the better understood plant.
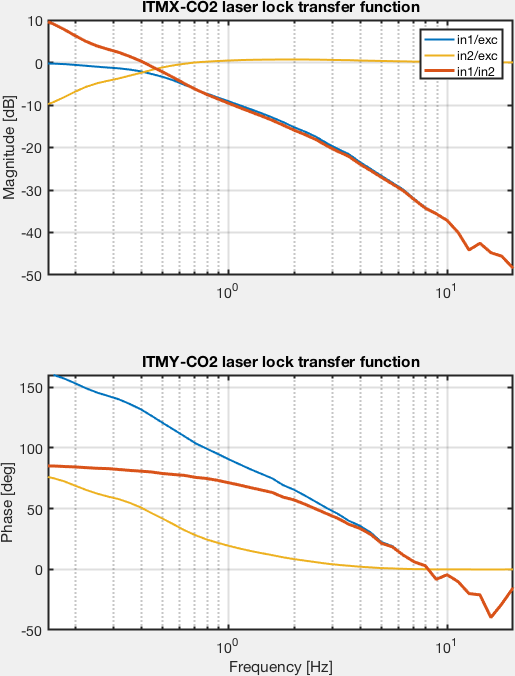
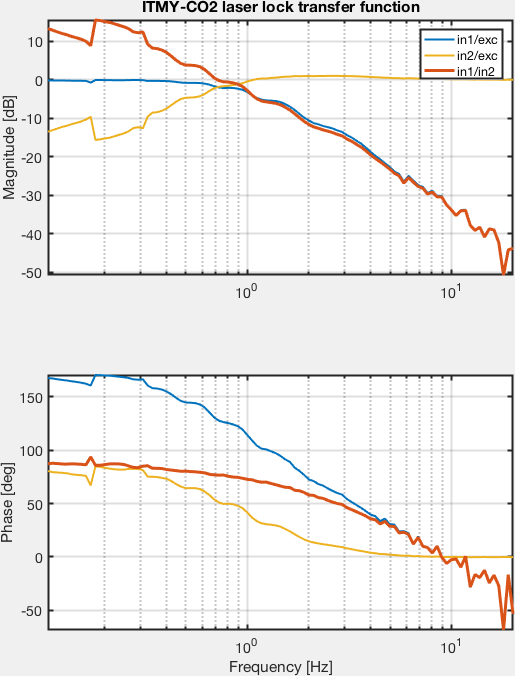
To become more familiar with TCS, I've taken open loop transfer functions (OLTF) for the TCS lasers. These maintain the CO2 laser output powers at some reference level by feeding back to the laser PZT and the chiller temperature.
The UGF is 0.7 Hz and ITMY_CO2 and 0.4 Hz for ITMX_CO2, which is the same order of magnitude as presented in llo-alog-14338. I didn't wait to go down to mHz where the chiller servo takes over.
Transfer functions attached for reference, with the OLTF shown in red. Note that I took the TFs from TSC-ITMX_CO2_LSRPWR_ERR_SIGNAL_EXC, with 0.05 amplitude which gives ~4Vpk-pk to the laser PZT.
J. Kissel, T. Shaffer I've remeasured transfer functions on H1 SUS ZM1 after TJ has improved the UL flag situation (see LHO aLOG 41001). I'm sad to say this has changed the problem, but not fixed it: - The primary P and L mode frequencies are still low with respect to the model and other suspensions in L2L and P2P - There is now Y cross coupling seen in L2L where there was not before (and is never expected to be there) - What was one extra mode below the primary Y resonance in Y2Y, is now two, and the lower of the two doesn't correspond to an L, P, or Y mode. (Maybe it's a T R or V mode?) For this measurement, the ISI is now floating and damped. Suggestions (in order from NONINVASIVE to DRASTIC): - Investigate LL OSEM. - Comparing EUL L and P drive to OSEM UL LL UR LR basis response plots -- pages 7 and 8 of 2018-03-16_1643_H1SUSZM1_M1_ALL_TFs.pdf against 2017-08-08_1520_H1SUSRM2_M1_ALL_TFs.pdf and 2018-01-24_1909_H1SUSZM2_M1_ALL_TFs.pdf -- one can see that ZM1's LL OSEM has less response than is typical (i.e. typically LL and LR show roughly the same response). - Also, In the L to UL LL UR LR plot, (pg 7) one can see some coupling to modes at 6.1 and 8.8 Hz in LL that's not in the other OSEMs. ZM2 shows some minor 8.8 Hz coupling, but it appears in all OSEMs. - Measure some of the fundamental parameters of the suspension - Do we have the right wire length? The right wire thickness? - The Y2Y TF worries me, and so does the reduced frequency of the L and P TFs. It makes me worried that there's some mechanical parameter of the suspension is wrong. - The tip tilts, to-date, have had remarkably reproducible transfer functions, and H1 ZM1 is definitely an outlier -- see allhttss_2018-03-16_Phase3a_AllHTTS_ALL_ZOOMED_TFs.pdf. OK, OK, H1 OM1's pitch frequency is a little bit low, but all DOFs of H1 ZM1 look obviously different. - Back off all eddy current damping magnets, EQ stops and any other adjustable thing that might possible by rubbing. See what anything changes. - (Measure H1 OM2 before you do this, but) swap in-vacuum cables between OM2 and ZM1. In otherwords, use an entirely different, known-to-be-healthy (to be confirmed with the prior measurement) suspension's electronics chain, so as to completely rule out all electronics questions. - Completely replace the tip-tilt for a spare, and swapping the optic into another suspension. It really is depressing how difficult these new single stage suspensions are to debug! HAM Single State Suspensions (HSSS) are supposed to be the easy ones...
StephenA, AlenaA, NikoL, MarekS, JimW, RickS
Jim and crew completed the installation of the shield panels today. They also adjusted the compression of the upper-right (when viewed from the ETM) flexure gap to ~0.220".
Everything seems to be installed as designed.
NikoL, MarekS, TravisS, RickS
Began assessing the centering of the Pcal beams on the input and output apertures using targets mounted to the Pcal window flanges on the A1 adapter. We plan to continue this work in the morning, going inside the vacuum envelope to assess centering on the Pcal periscope relay mirrors.
We plan to install the Pcal target on the ETM suspension cage for this work.
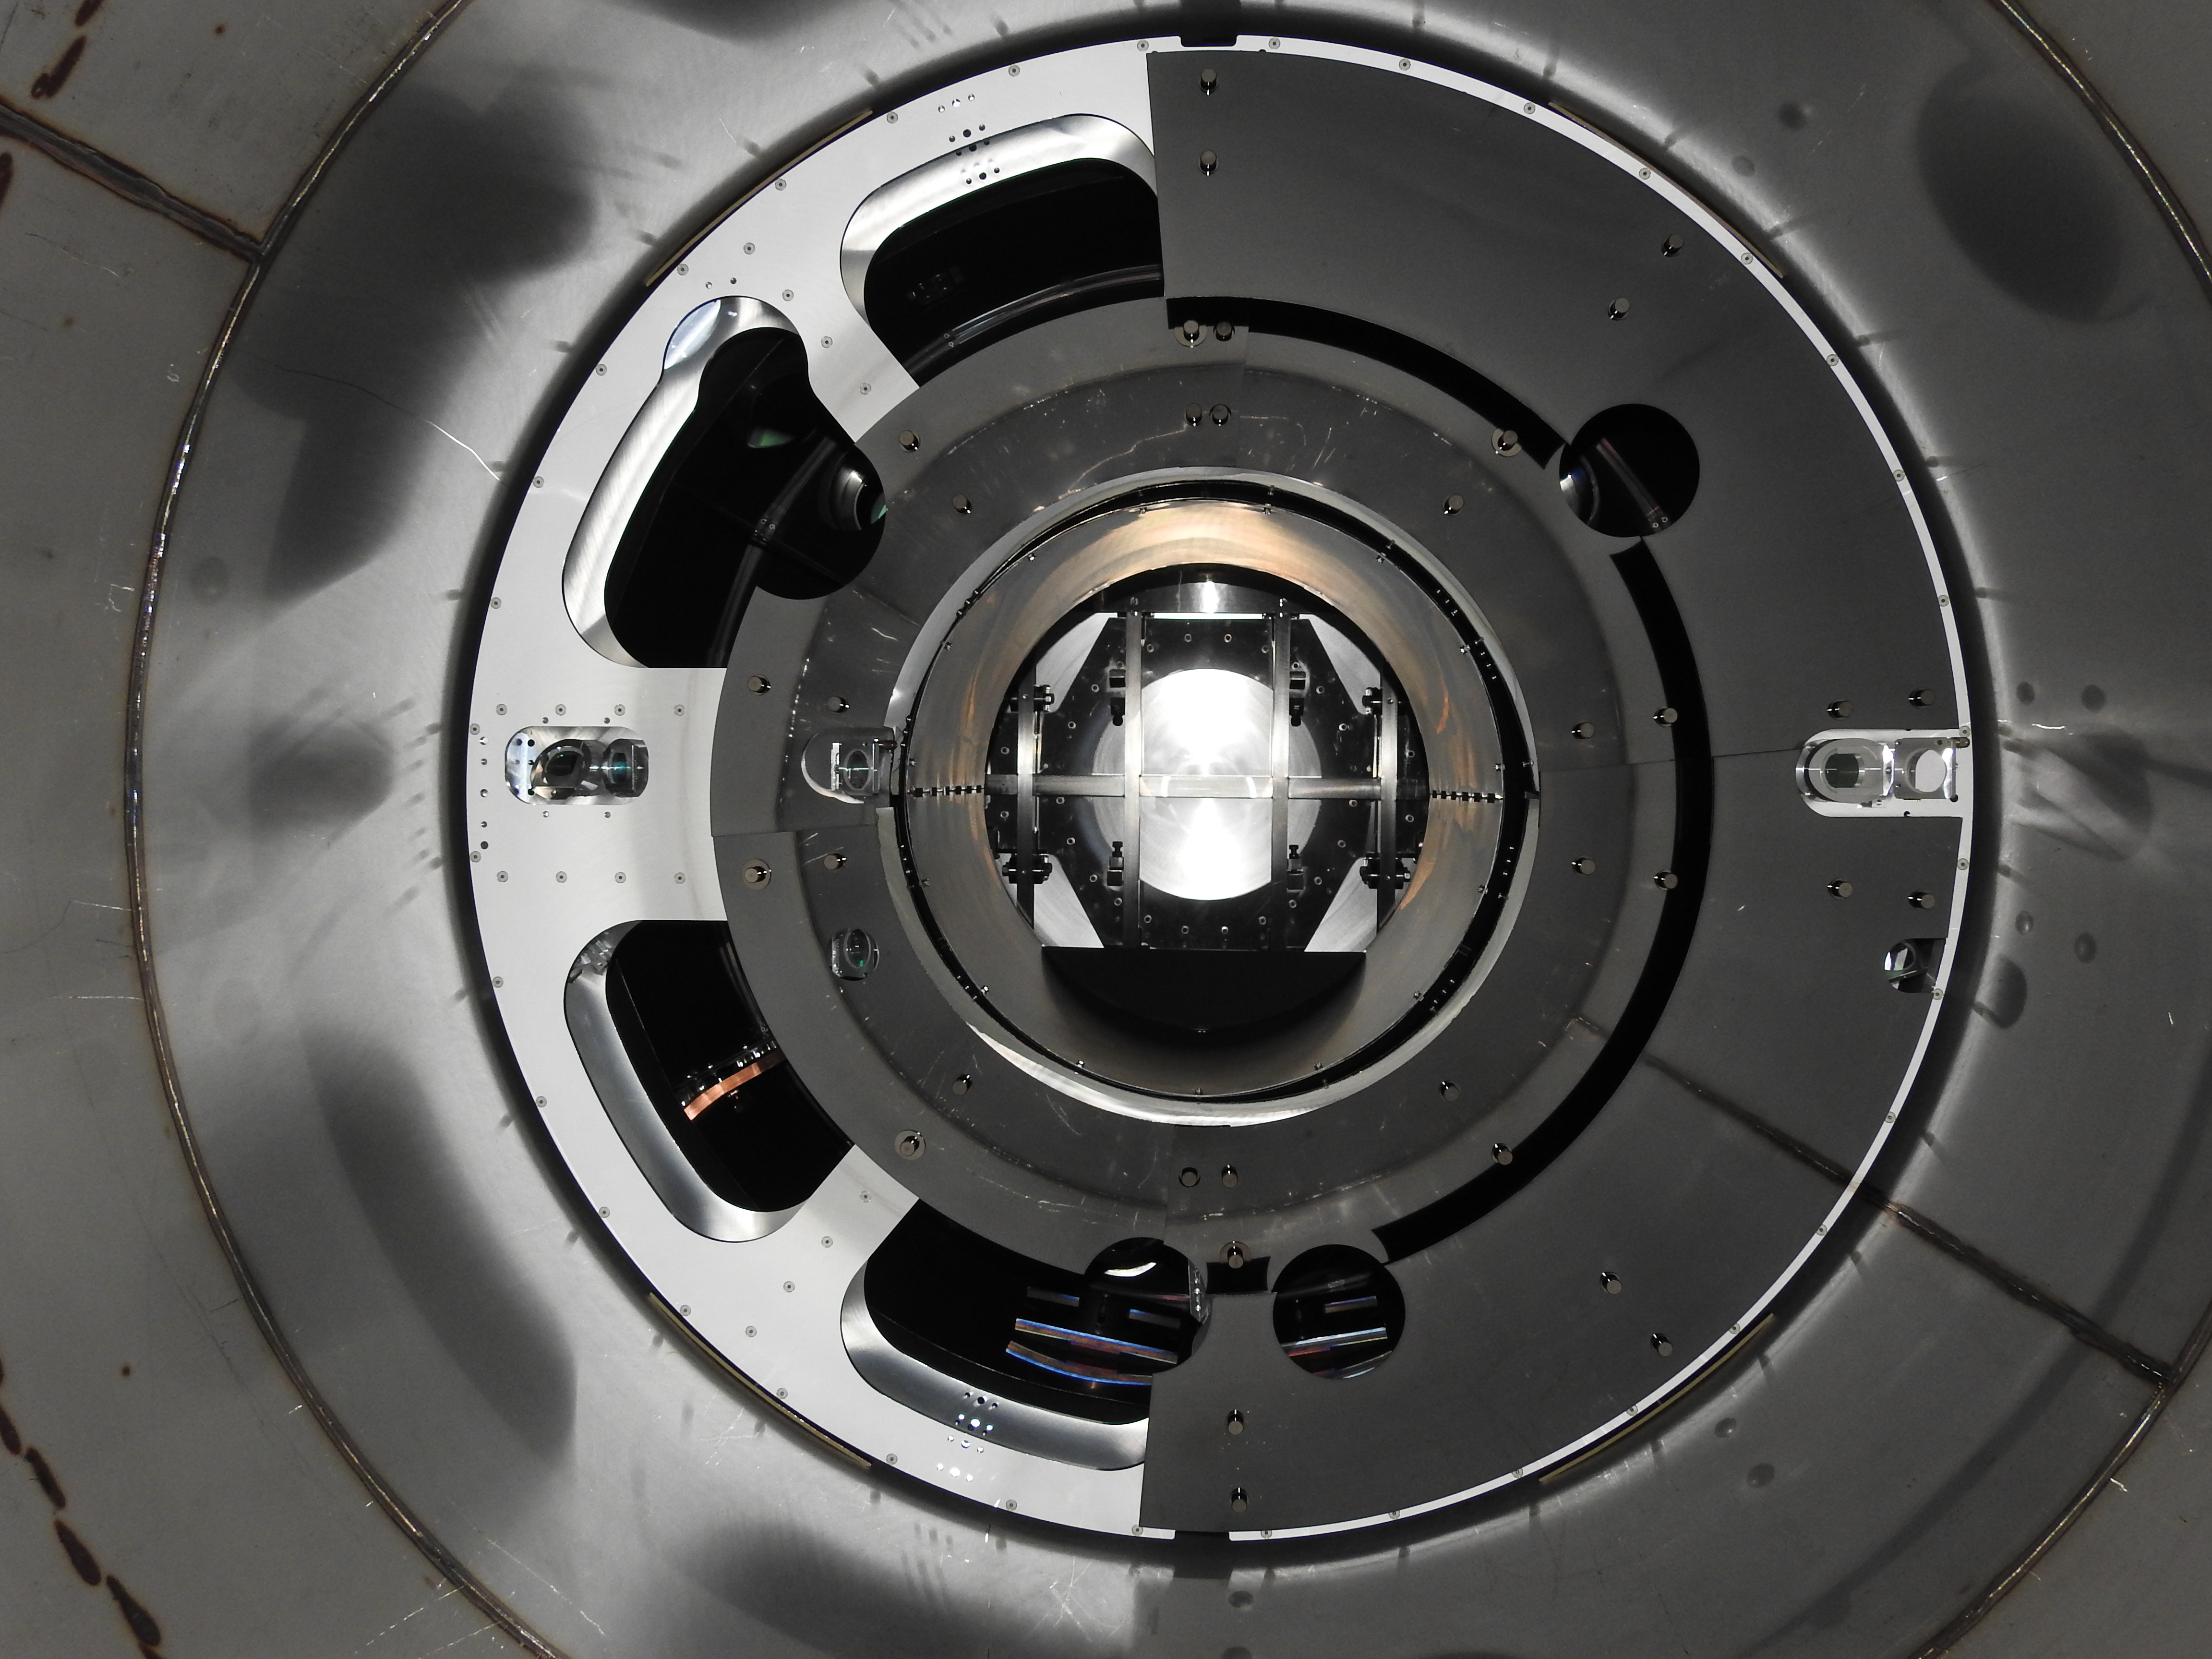
Reflections of the beam tube surface in the baffle not to be confused with smooth finish of the baffle on this photo
Here is a photo logging S/N of periscope components, collected during the above PCal Yend Baffle and Shields install effort. These articles conveniently do not appear to be assembled into any of the existing D1200174 assemblies. :(
Previous work: LHO aLOG 40759
Build records: T1800172
Summary of flexure measurements documented in T1800172:
| Flexure Location (viewed from Front per D1200174-v8) | Flexure Gap (in) |
|---|---|
| Upper Left | .210 |
| Upper Right | .230 |
| Lower Right | .150 |
| Lower Left | .110 |
| Flexure Location (viewed from Front per D1200174-v8) | Flexure Gap (in) |
|---|---|
| Upper Left | .210 |
| Upper Right | .220 |
| Lower Right | n/a |
| Lower Left | n/a |
2018 LHO End Y Flexure Gap, all baffles installed