[Jeff, Paul]
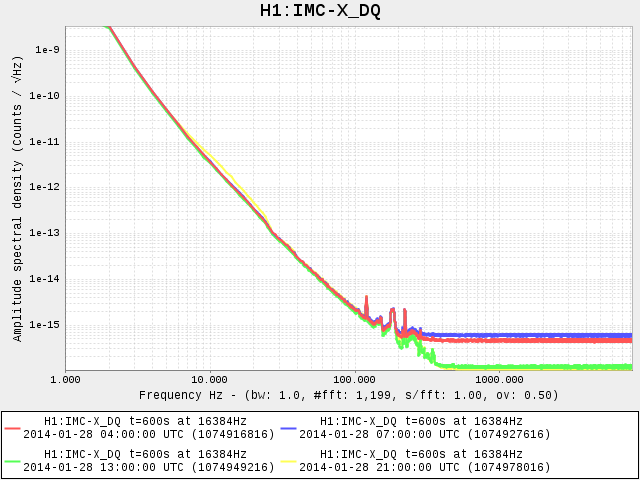
I had a look through the calibrated length and frequency paths for the IMC (IMC-X and IMC-F respectively) to check that the calibration is still in order. A description of all the filters in the IMC-X and IMC-F paths can be found in Giacomo's entry 5945.
In fact, some things were amiss in the IMC_X path:
IMC-X_M1 path:
Filters that were engaged: to_m
Filters that are now engaged: dc_cal, wresg1, wresg2, to_m
MC2 M1 feedback is not currently engaged, so this may not matter right now. However, I've engaged the filters that calibrate the IMC-X_M1 signal to M3 motion. wresg1 and wresg2 model the suspension TF from M1 actuation to M3 actuation with the resg damping filters engaged (as they are currently). If and when M1 stage feedback is applied, the corresponding IMC-X channel should be calibrated now.
IMC-X_M2 path:
Filters that were engaged: dc_cal, white, sus_d1, sus_d2, to_m
Filters that are now engaged: dc_cal, wresg, to_m
The sus_d1 and sus_d2 filters are used to model the suspension TF without the resg filter in the M1 L damping path turned on. Because we are now using the resg damping I have switched the sus_d1 and sus_d2 filters off and engaged the wresg filter, which is used to model the suspension TF with the resg filter in the M1 L damping path. The white filter is a filter which was implemented in L1 in an attempt to avoid digitization noise above 50Hz (since the signal is so small there). I don't think we want to have this filter engaged, since it has to be accounted for later in data analysis, and I think we can ignore IMC_X so far above the L to F crossover. I've therefore disengaged this filter. This isn't the first time this one has come back to haunt us: see e.g 5311 or 5452.
IMC-X_M3 path:
Filters that were engaged: dc_cal, white, sus_d, to_m
Filters that are now engaged: dc_cal, wresg, to_m
Same story as for the M2 path.
I took a snapshot of all IMC-X filter banks.
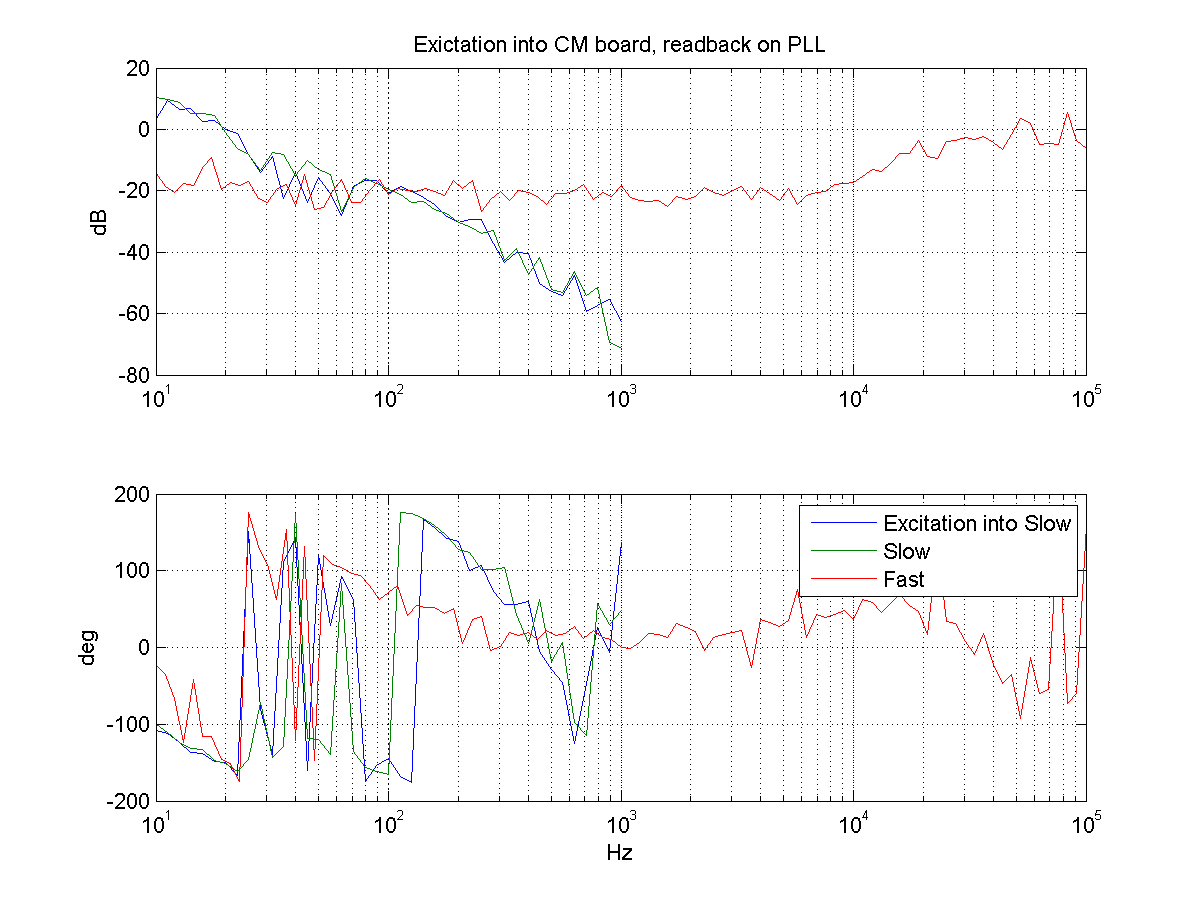
IMC-F path:
Filters that were engaged: cts2V, InvGenFilt, VCO, FtoL
Filters that are now engaged: cts2V, InvGenFilt, VCO, FtoL
The only filter that changed since Giacomo's entry 5945 is the FtoL filter being engaged now instead of the tokHz filter. This means that the IMC_F signal is now calibrated in meters, presumably for ease of comparison with IMC_X. I checked the VCO gain filter: it is still the 536,604 Hz/V value, agreeing with Kiwamu's number from entry 5556 after accounting for the double pass of the AOM.