- Vacuum alarm: criopump 5 were refilled, Kyle mention that tomorrow and next Tuesday, Wednesday and Thursday will refilled other criopumps, so, expect this alarm
- PSL alarm: there is a problem with H1:PSL-OSC_LPSCLSD and H1:PSL-OSC_PWRDOGON channels, neither M Rodruck, nor Dale understand what is going on. Will need further study
- FMCS alarm: max temperature of MID X and Y will be set at 85F. The sensor for H0:FMC-CS_LVEA_ZONE4_B_DEGF seems that is broken, Ski will unplug it.
- Dave restarted all DAQ at 11:42
- SUS watchdog alarm: ETMY and SEIB6 were all invalid. Dave, Cyrus, Richard diagnosing network switch problem at EY. All EY DAQ data bad since 9am. Cyrus found a broken fiber. Solved ~13:30.
- LVEA Crane survey continues
- M Rodruck and Filiberto installing cables into H2 LEA for Pcal pre-alignment
- Keita working on the TMSY ~14:00
- Robert S. from ~12:40 to 2:30 working outside, tube's enclosure, between OSB - MX
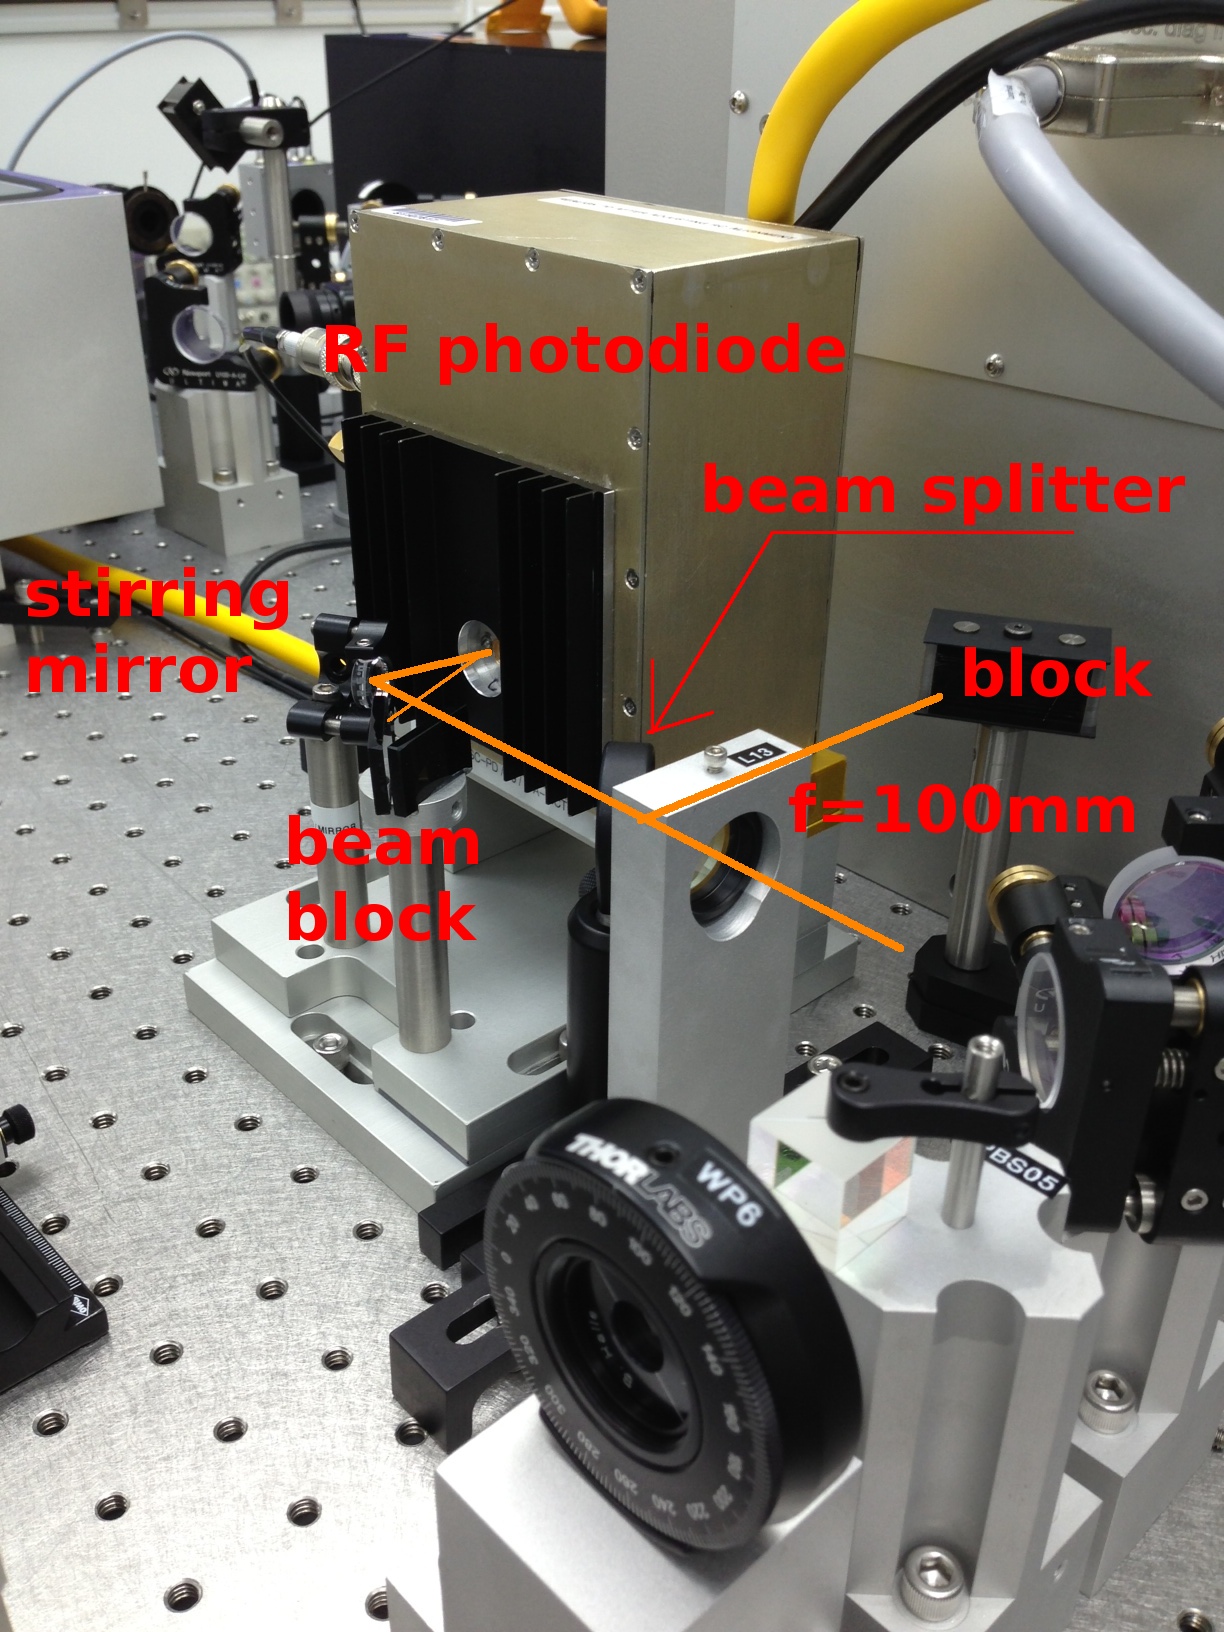
- Kiwamu increased the laser power into the IMC to 1W
- Thomas working on viewports, laser into HAM1 has being shuttered, contact him before unshutter it