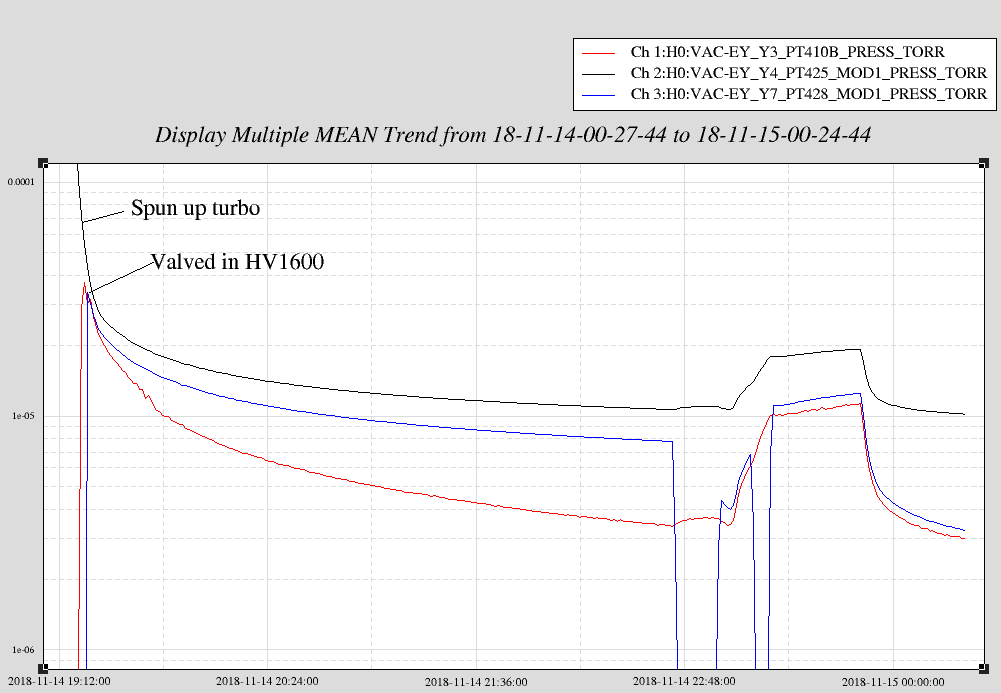
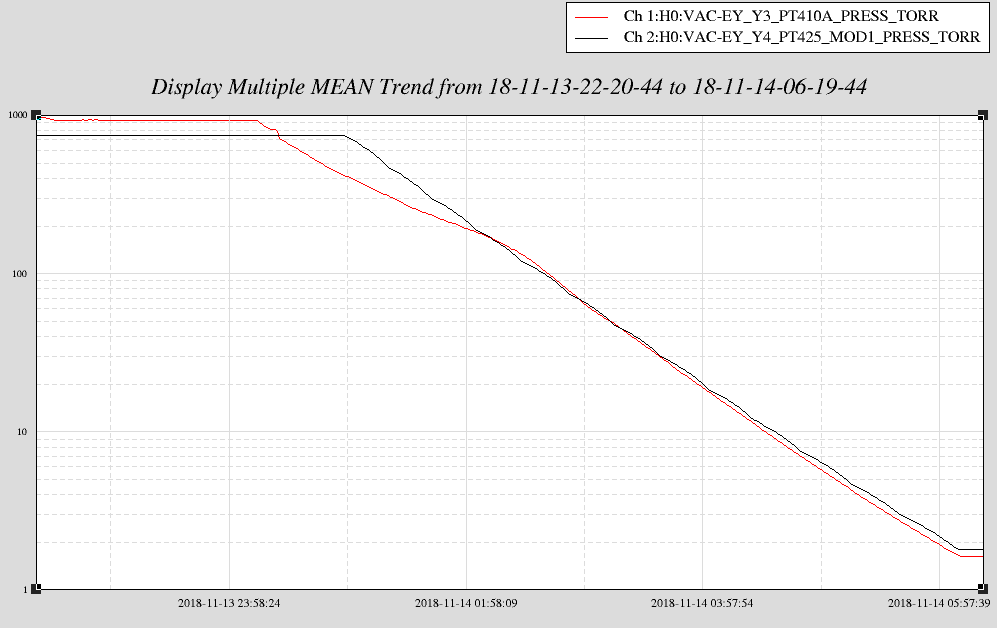
We finally got a chance to test a new "high vacuum" style 1600 l/s NEG pump, installed at only EY, on BSC6, at relatively high pressures after the BSC10 vent. At around 3e-5 Torr, I valved in the HV1600 (turned its built-in 10 l/s IP off first), shortly after having spun up the main 2000 l/s turbo pump. After three hours of pumping, I cycled valves in time series below, all while running the RGA in faraday mode. Times are local.
(turbo pump valved in at start)
Annotated pressure plots attached.
*these hot cathode wide-range gauges have a large offset and don't follow pressure readings from cold cathode gauges until it changes emission current at 5.6e-6 Torr
By itself, this NEG pump is not able to maintain the gas load, but does contribute to pumping in high vacuum region.
I haven't had a chance to look at partial pressures yet, but RGA scan is attached.
RGA data collected this afternoon in SEM mode. Main turbo and HV1600-10 both valved in. Total pressure measures 1.4e-7 Torr.
Jeff B. phoned me while I was doing this as he had noticed a very large spike in particulate in the Y-end VEA which exactly correlated with my having done this. Investigation revealed that the Y-end Turbo's local scroll pump never got a particulate filter installed at its exhaust - Ooops! -> I located this unit and will install it.
Also, the chilled water booster pump used with the QDP80 is now leaking at the pump end -> will put this on the list.
FRS ticket 11827
11/15/2018
I installed the particulate filter on the exhaust of the Y-end local scroll pump.
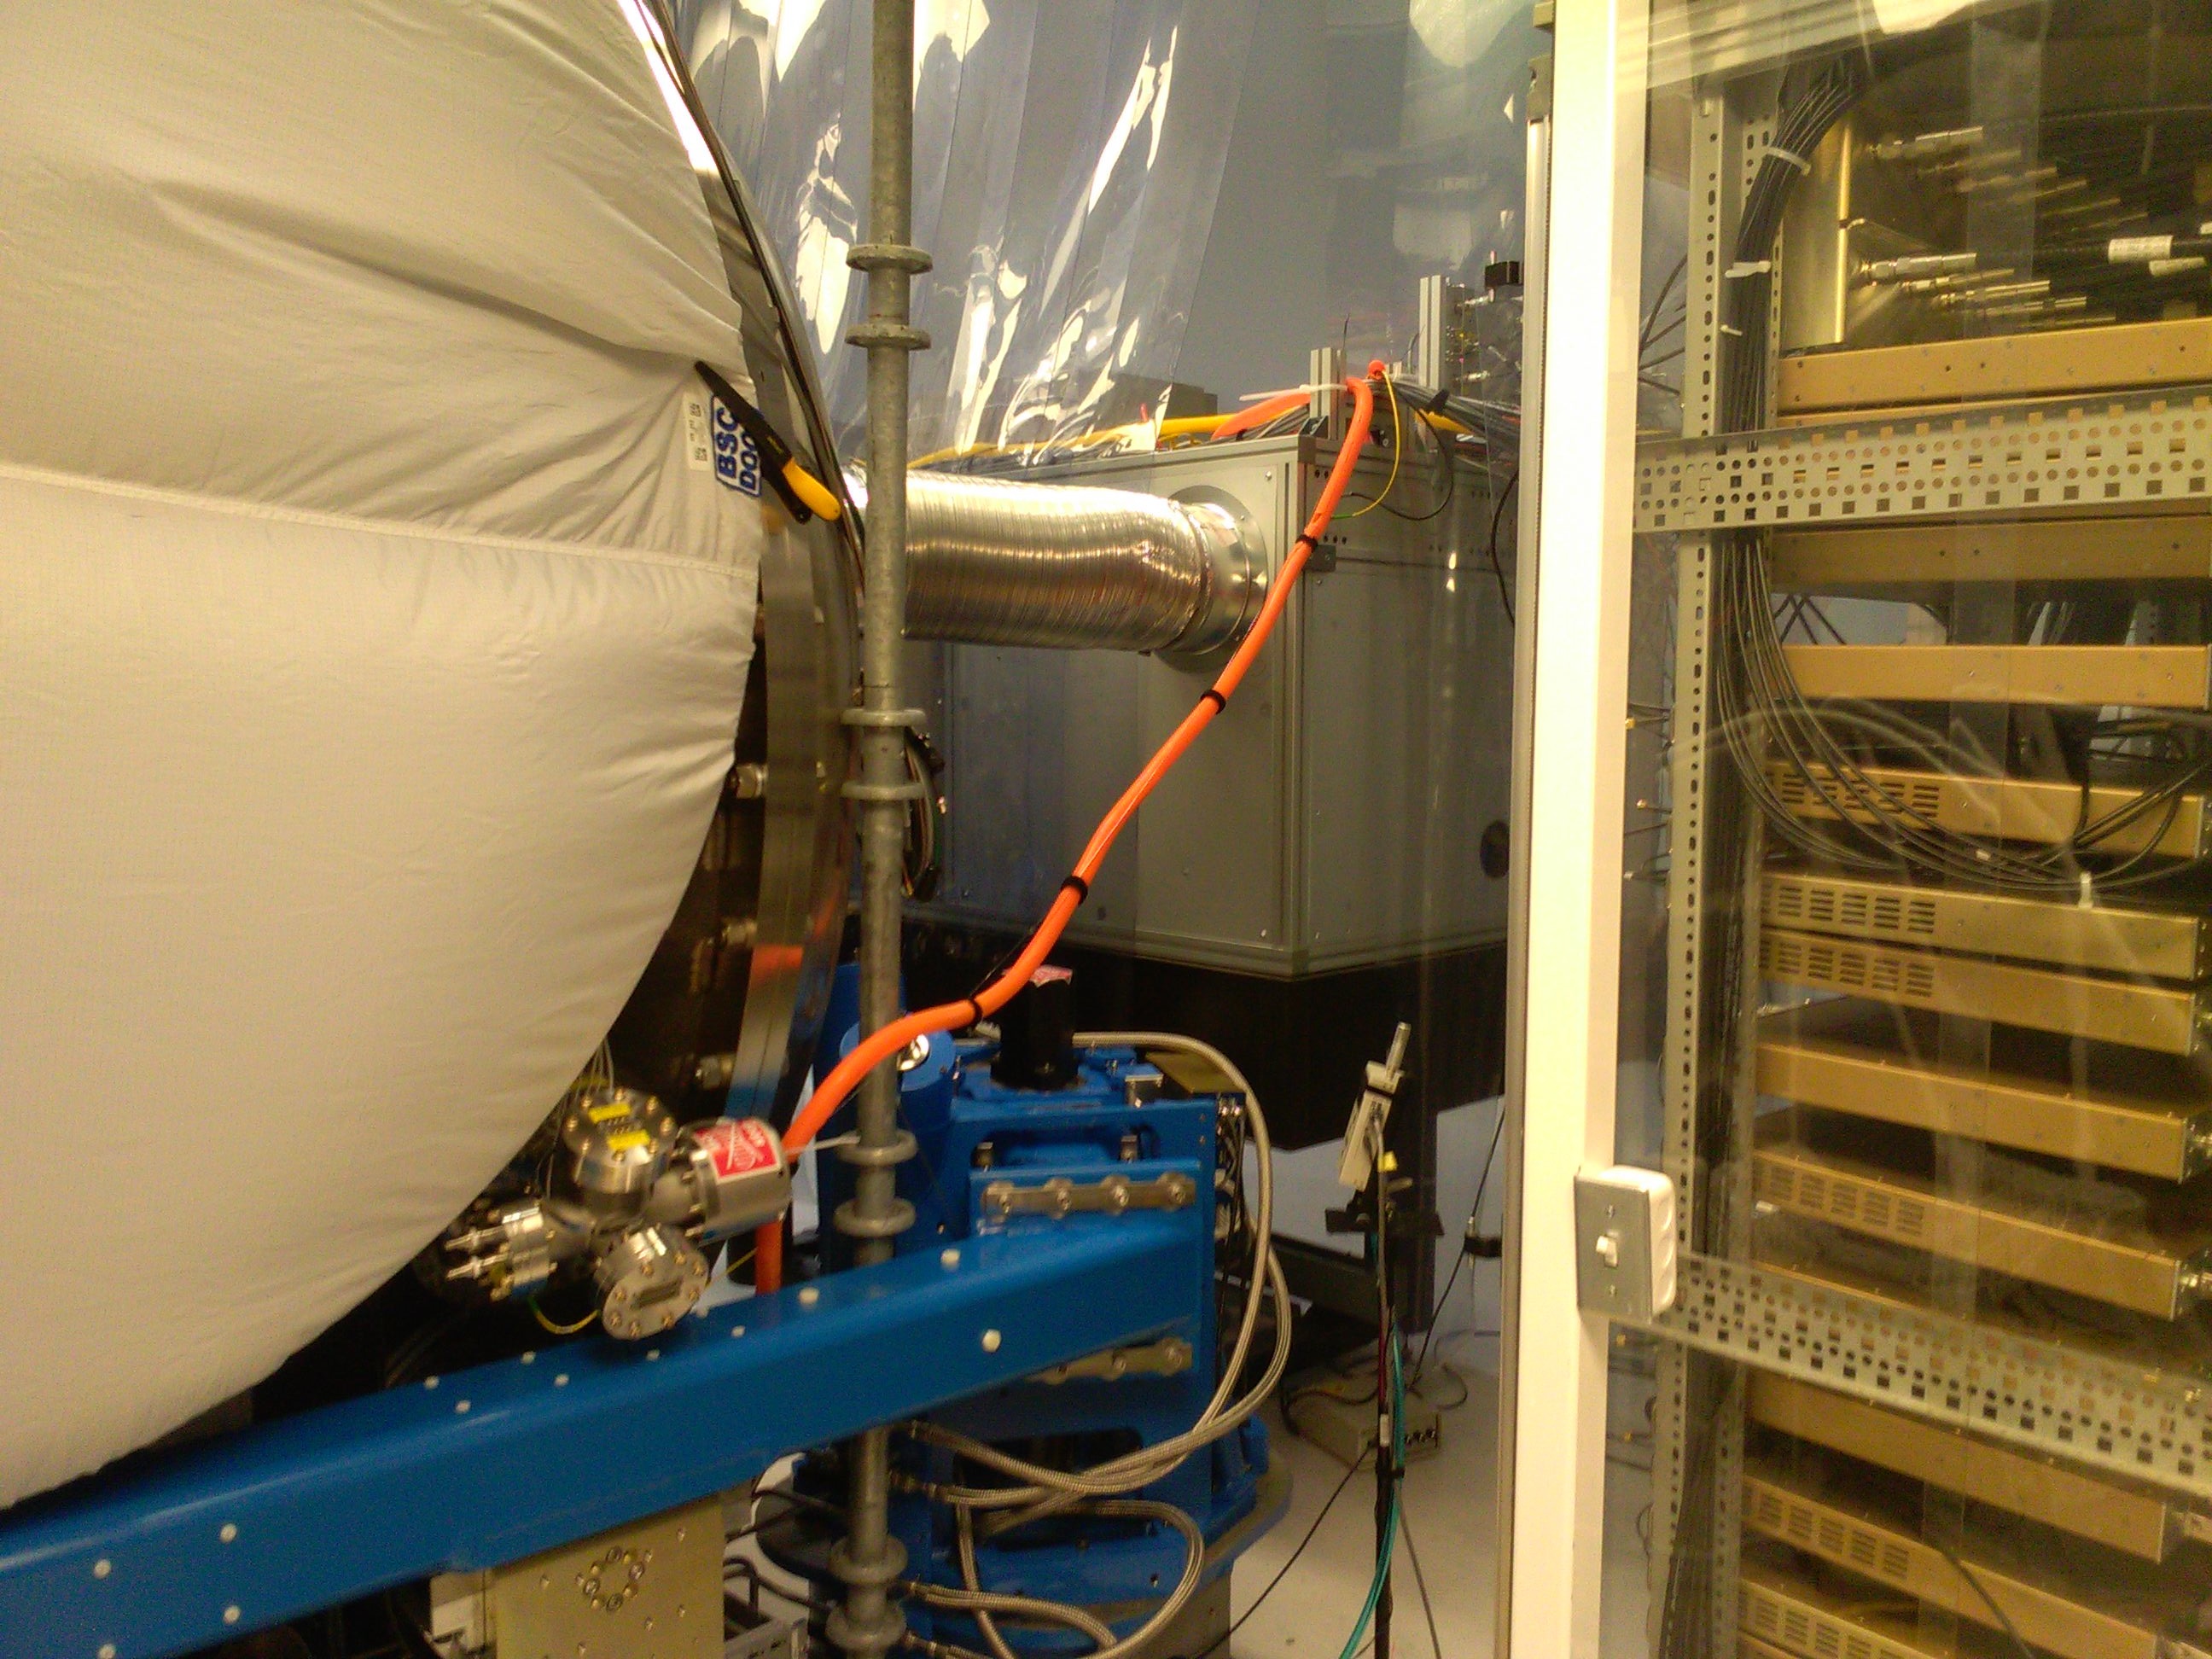
I was asked to final-torque the 2.75" CFF which is part of the recently replaced squeezer fiber cable assembly at HAM6. Fabrice had installed this assembly previously but was concerned about using a wrench to complete the task as multiple mechanically vulnerable components reside close by.
For future reference, I have attached a photo showing the routing of this fiber (within orange loom) - Don't mechanically manipulate this run of fiber.
Bubba G., Chris S., Gerardo M., Kyle R.
Removed HAM1's West then East doors (Chandra R. & Corey G. had prepped yesterday).
~1/2 of the West Door's outer O-ring came out of its groove and contacted the C3 material placed on the floor for just such an event. During the handling to re-seat the O-ring, we noticed excessive debris on it including a sliver of what looked to be remnant adhesive - from tape? This was easily and completely removed. However, considering the fact that this door had been leak tested under much scrutiny following the last door cycle, combined with the excessive particulate observed today, Chandra R. has elected to replace this O-ring when the door goes back on and not gamble on the sealing integrity. The dirty O-ring can be reprocessed for future use. A possible explanation as to the excessive debris could be the result of having removed all-but-four door bolts prior to the final wipe-down of the chamber. A gap between the door and chamber flanges, large enough to allow debris to enter via wiping the flange perimeter, results when the door is prepped for removal. We ended up being out of "sync" with this door removal exercise when compared to our normal sequence and didn't recognize this contamination potential.
Keita, Richard, Corey, Craig, Georgia
For now,
These are finalized/installed/checked on Saturday after the PSL beam becomes available and IMC locked in vacuum.
Here is some experience on cleaning the foggy patterns on black glass: https://nodus.ligo.caltech.edu:8081/OMC_Lab/283 https://nodus.ligo.caltech.edu:8081/OMC_Lab/283
After quick peeks at the TFs at closeout yesterday showed healthy suspensions, the door to the chamber was closed and pump downs started. Today, Travis and I ran the full set of Transfer functions for ETMY MAIN, REACTION, and TMSY suspensions (18 measurements). All plots look good and can be found at 2018-11-14* Files in the appropriate directories. Between Travis and I, we're a few hours into this today (running, exporting, troubleshooting matlab, etc) and I need to move on to other things, so pretty plots aren't going to be posted today, especially without the auto-renumbering scrip at my fingertips for the master plotting script. See the files if you want to look at them yourself although I still need to commit them to the svn.
Note, the alignment offsets were ON for these measurements.
Directory of measurements:
ligo/svncommon/SusSVN/sus/trunk/QUAD/H1/ETMY/SAMG0/Data/2018-11-14-1658_H1SUSETMY_*
or R0 and Results directory for processed matlab files.
Can't commit data to svn because it throws an error about upgrading svn. I was working on the "controls login. Maybe someone can fix this.
Spun up main turbo pump and also valved in a new NEG pump that we're testing at EY that is designed to pump relatively high pressures (e-4/e-5 Torr range). I turned its little ion pump off before valving in.
Purge air valve is closed.
The chilled water booster pump is leaking water in mechanical room. Kyle is investigating.
Next I'll valve in RGA and warm up filament to collect some data on NEG.
Turned EY RGA filament on at 12:07 pm local.
Installed new DB25F to DB9M cable from ISC-R1 to HAM1. Part of installation of new REFL Photodiode.
Pin Layout:
DB25 Pin 1 to DB9 Pin 1
DB25 Pin 14 to DB9 Pin 6
DB25 Pin 2 to DB9 Pin 2
DB25 Pin 15 to DB9 Pin 7
DB25 Pin 3 to DB9 Pin 3
DB25 Pin 16 to DB9 Pin 8
DB25 Pin 4 to DB9 Pin 4
DB25 Pin 17 to DB9 Pin 9
Pin 5 on DB9 not connected.
I valved-in the BSC10 AIP that had been isolated whilst the remaining portion of the annulus piping had been vented for the door removal. Upon doing so, the turbos spun down as the AIP isolation valve must have leaked -> a lot!
We started pumping on EY volume around 4pm local and continued for 6 hours before valving out for the evening. Pressure is currently at 1.6 Torr (same reading at local gauges on turbo station). Will valve back in tomorrow morning and spin up the turbo at ~100 mTorr.
I first closed the header o-ring valve, then the 10" gate valve, and finally the safety valve. This gate valve is the only CETEC turbo valve left in operation (aside from midstations and H2). When I closed it the wheel rotated CCW (open) slightly with spring back. I didn't want to over extend and break something (known to happen with these valves) so I turned it in CW direction a few times until the spring back dissipated. I closed the safety valve as well since there is a leak in foreline behind it.
Leaving site now.
I looked at the coherence between DARM and the ESD power supply voltage monitors (the power supply voltages are run into temporary PEM channels through high-pass filters - soon to be permanent). There was quite a bit of coherence around 60 Hz, explaining some, but not all of the features around the 60 Hz peak in DARM (see Figure 1). Some of the other 60 Hz sidebands in DARM are associated with suspension resonances at about 0.4 Hz (Figure 2). There is also a roughly 1 Hz comb of side bands that is visible in the temporary channel that monitors the voltage between rack ground and the chamber (Figure 1) as well as in the mains monitors at all stations (Figure 3). Finally, at certain other frequencies, such as around 280 Hz, there is also strong coherence between DARM and power supply or rack-to-chamber voltage monitors (Figure 4).
We hope that at least some of the noise from the power supply will be reduced once the ESDs have dedicated power supplies (I think the plan is to replace them this week), but the 1 Hz comb on the mains, at least, will still likely couple and needs to be tracked down. I have doubts that the broad features around 280 will go away either, since they are in the rack-to-chamber voltage monitors as well as the power supply monitor.
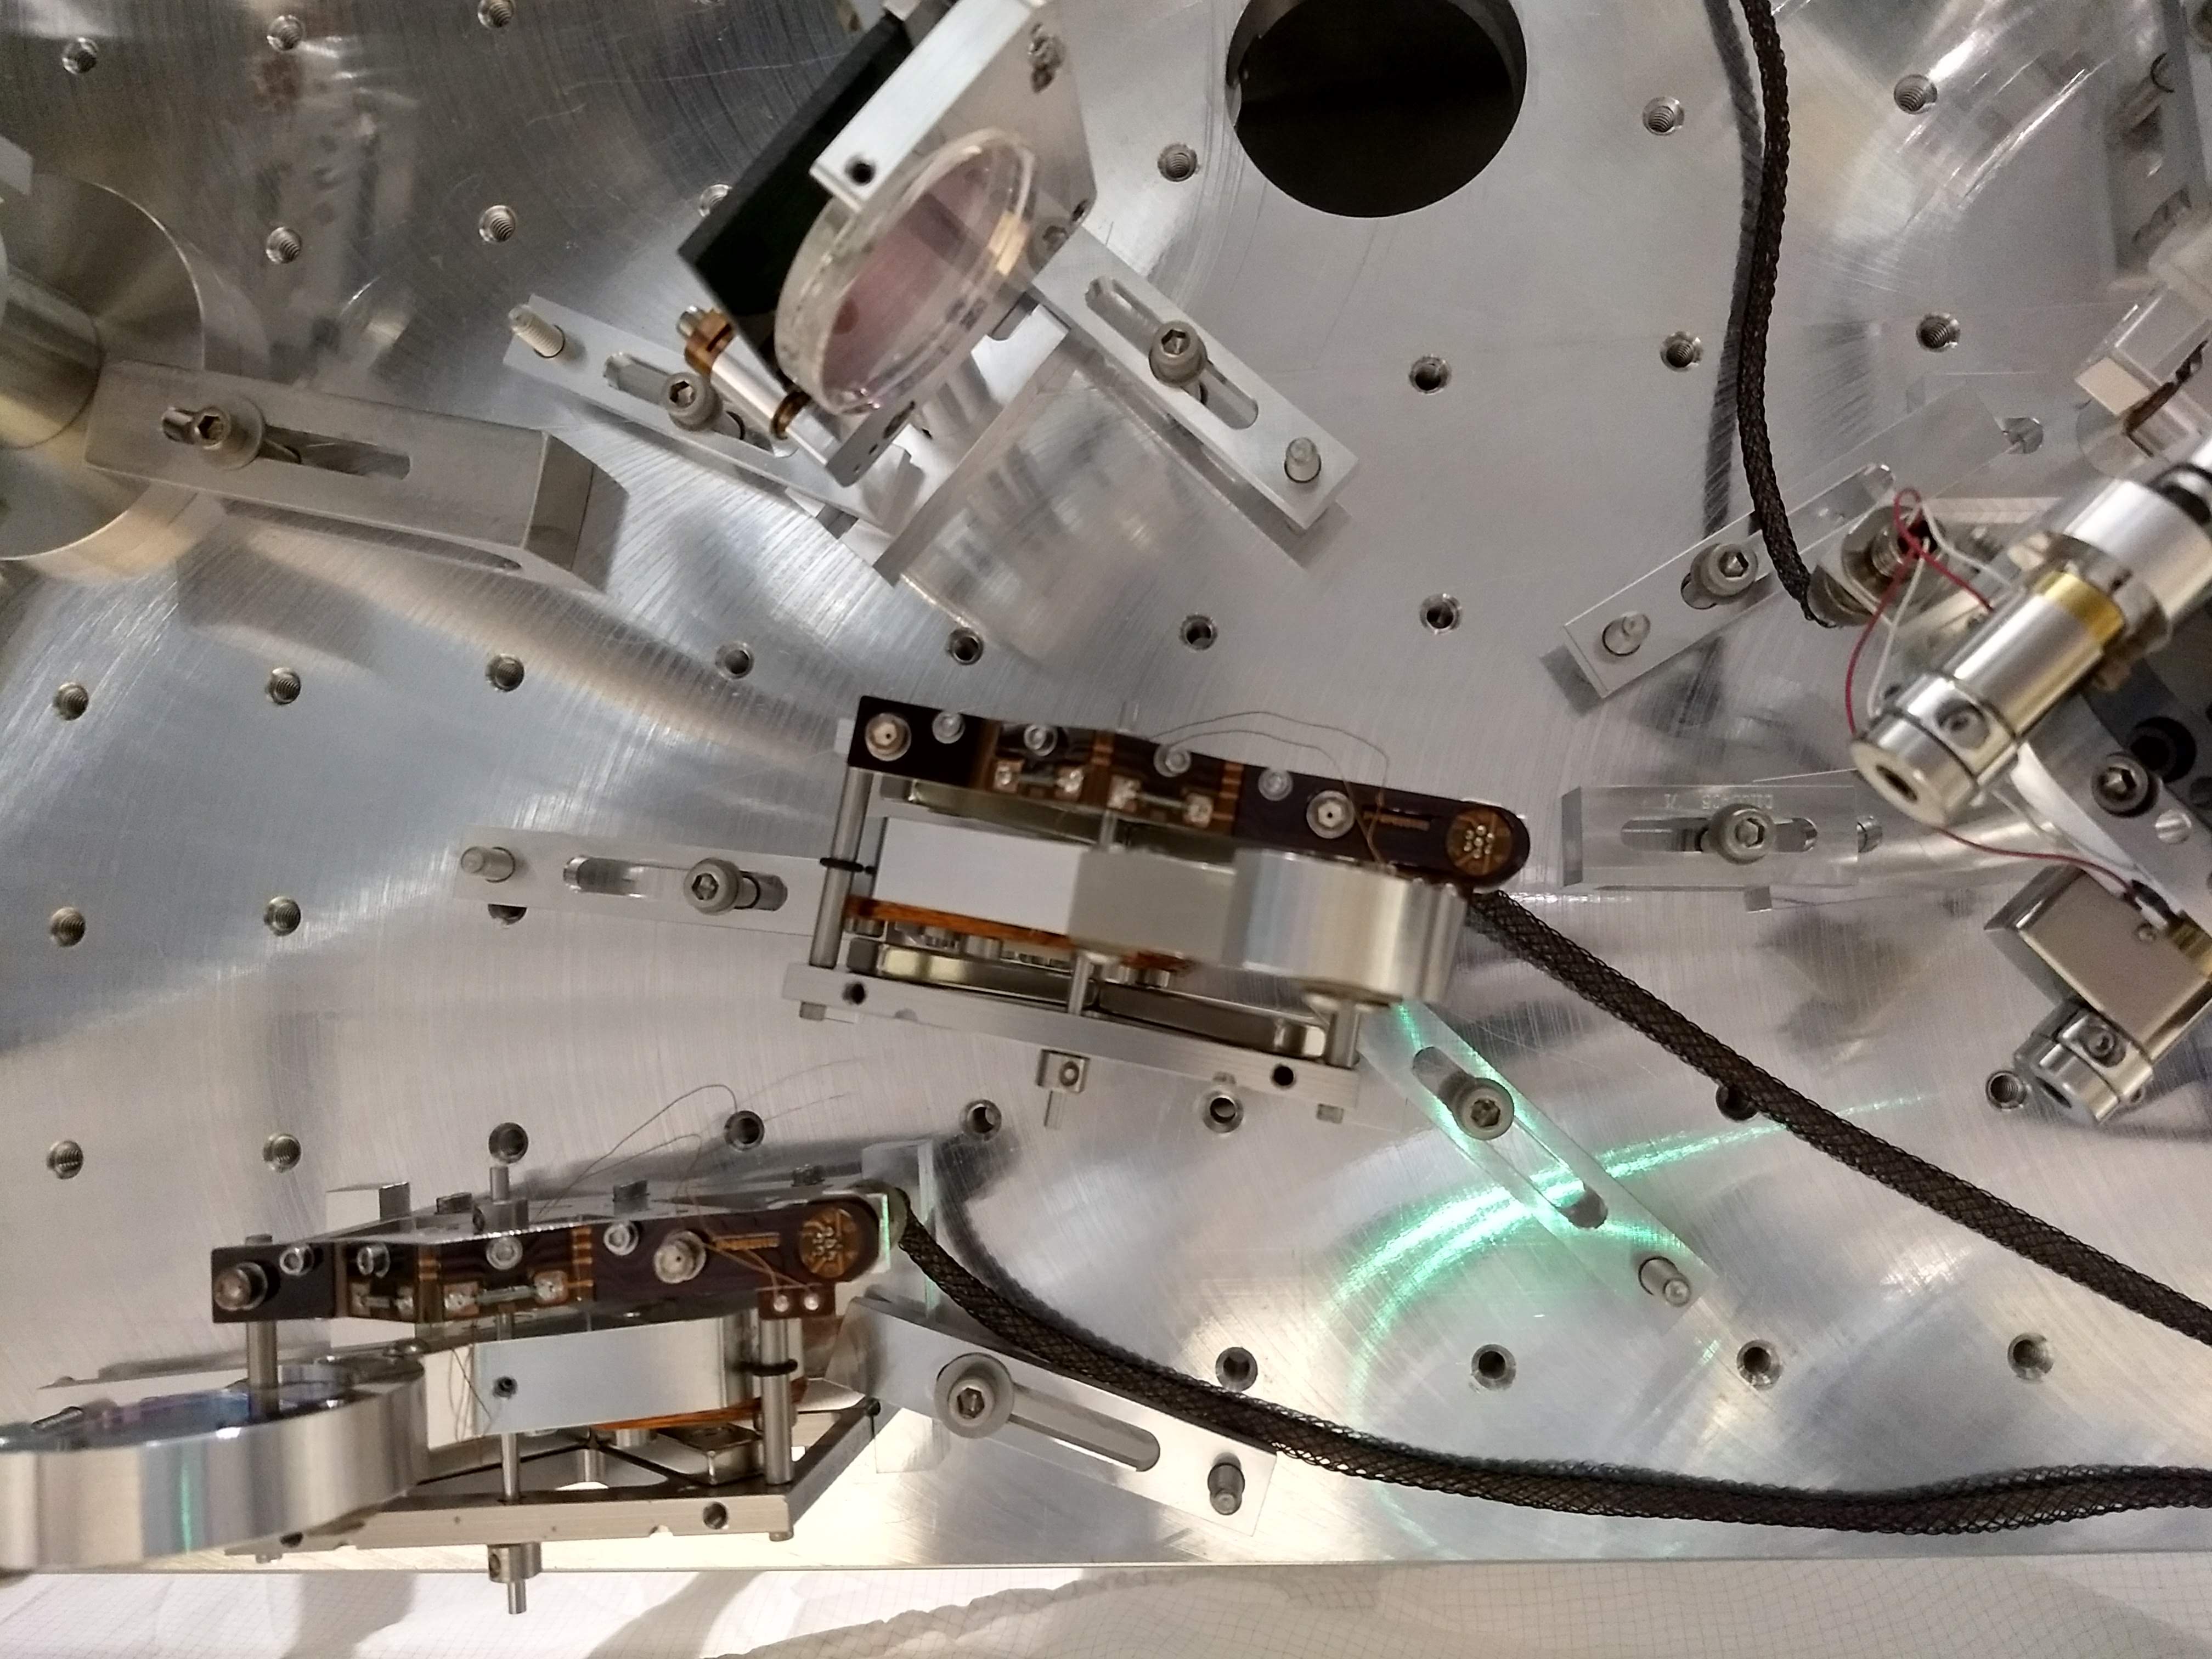
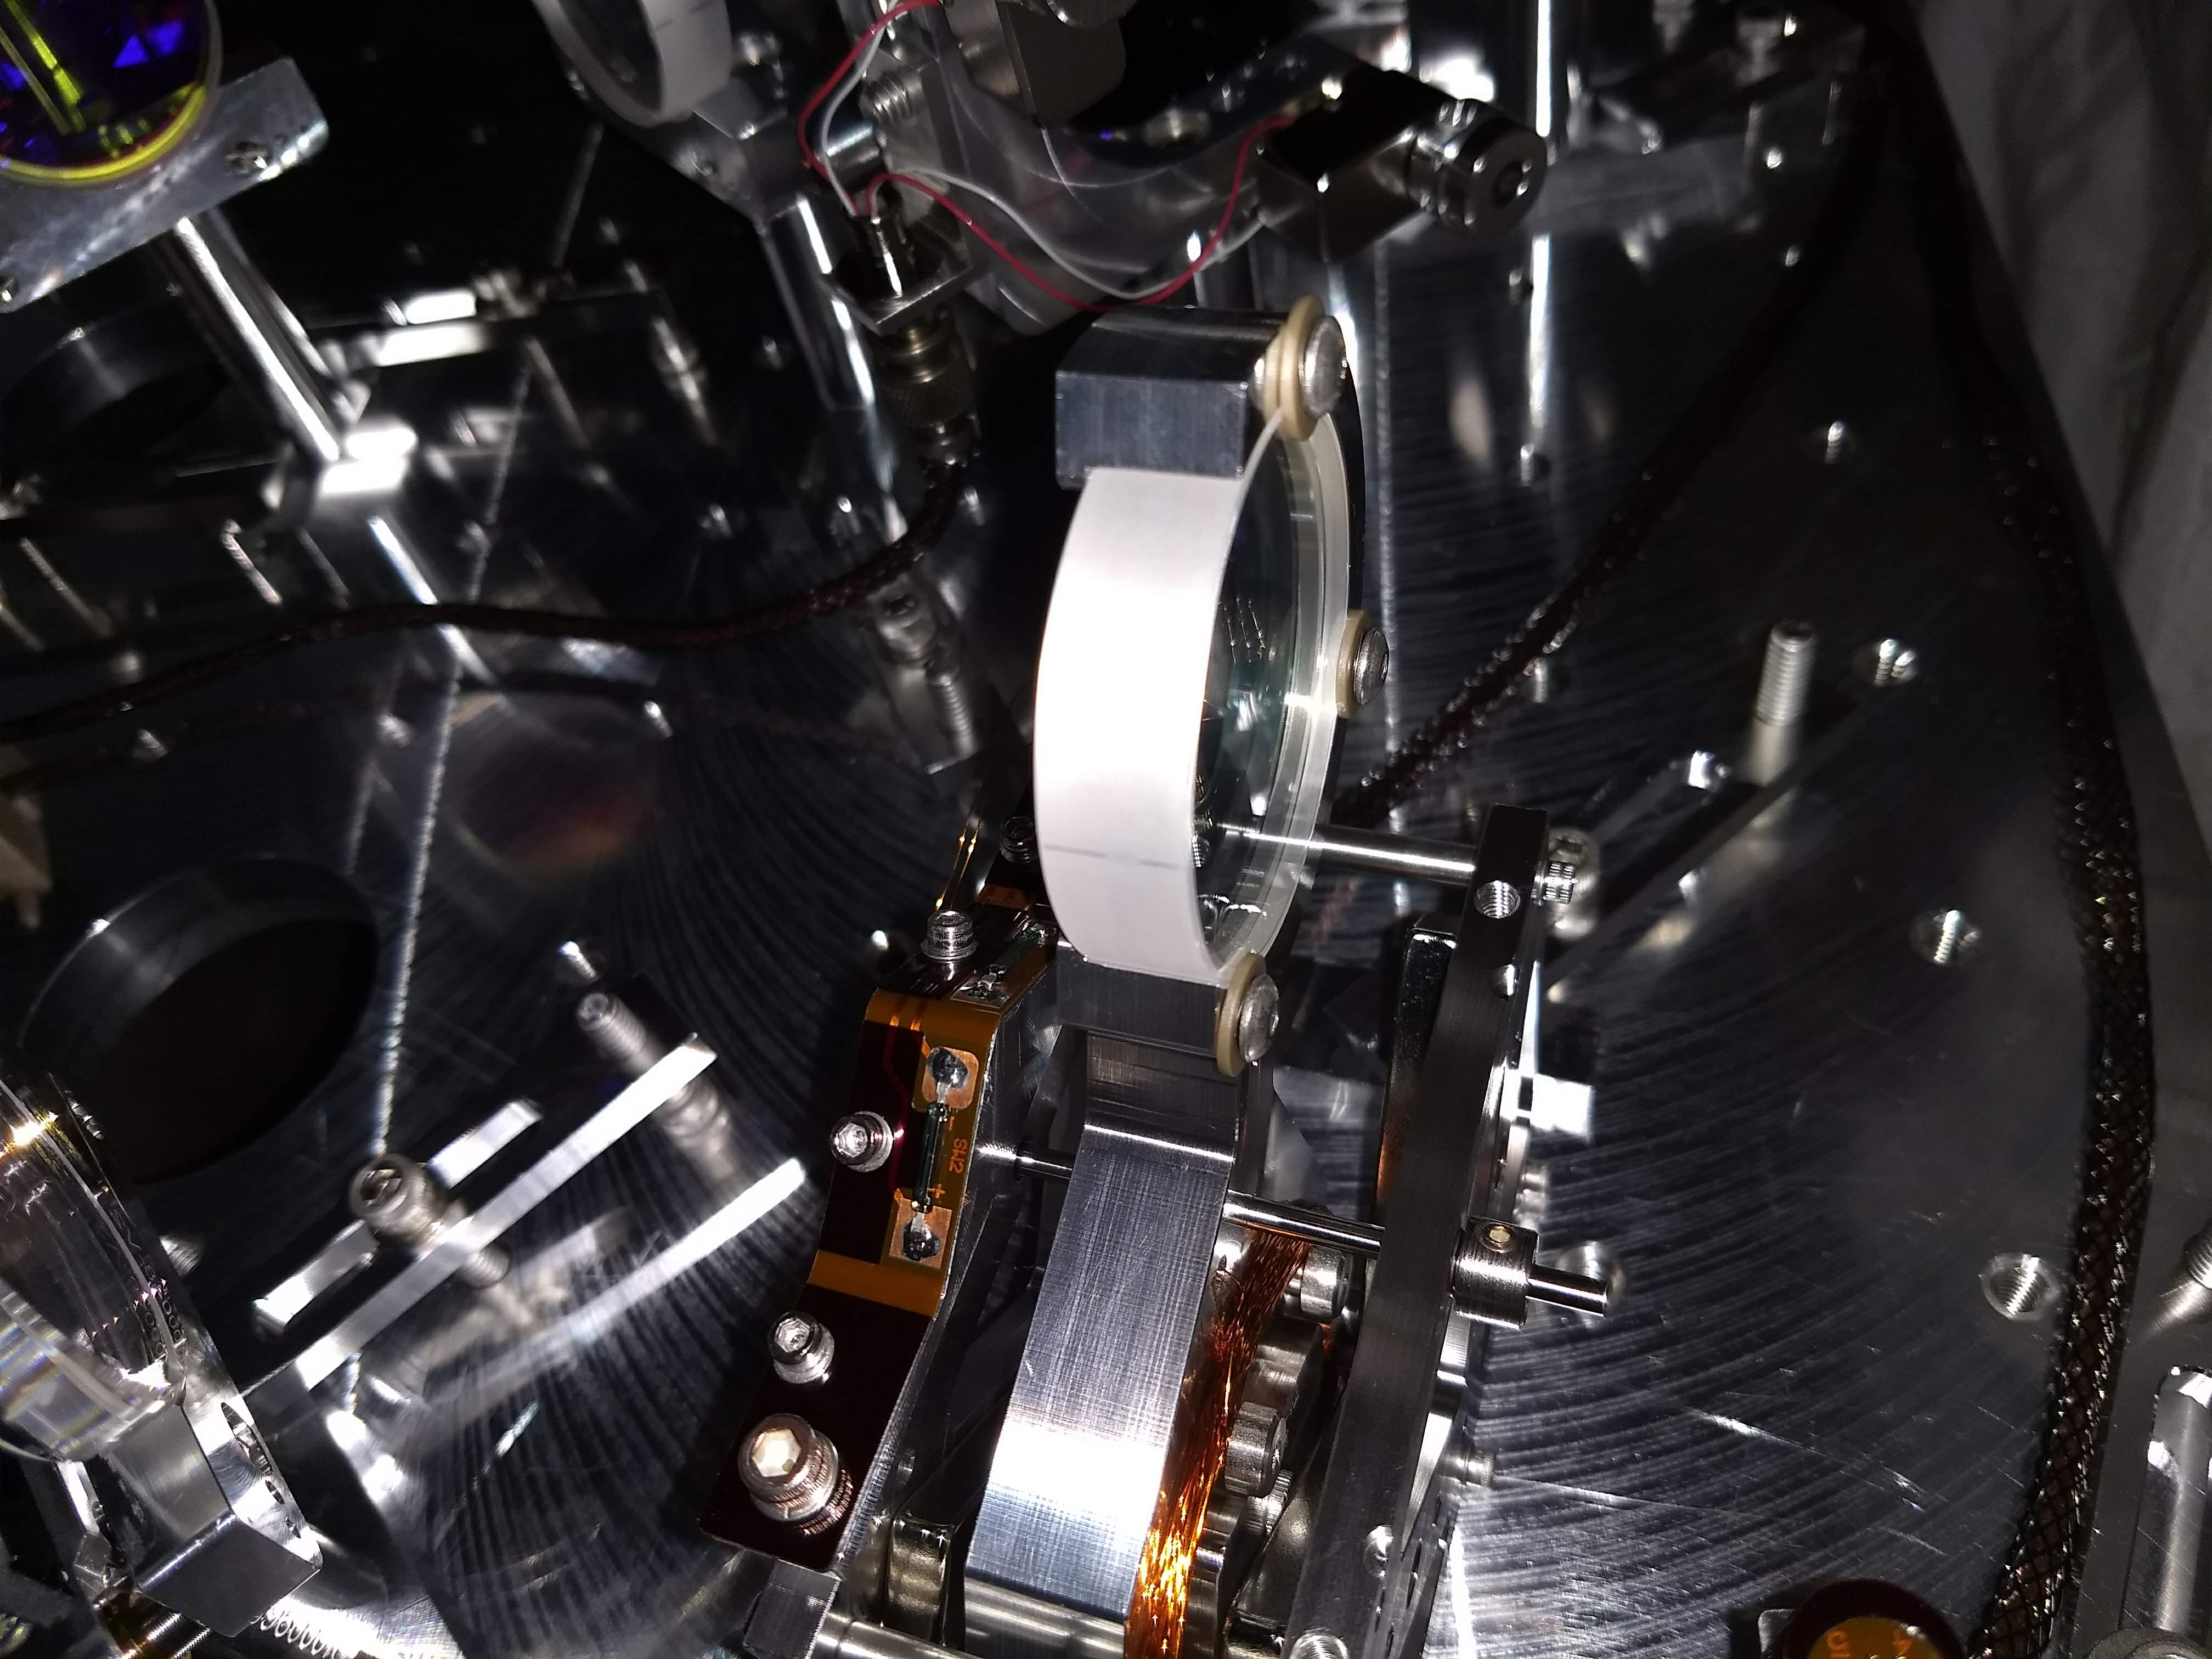
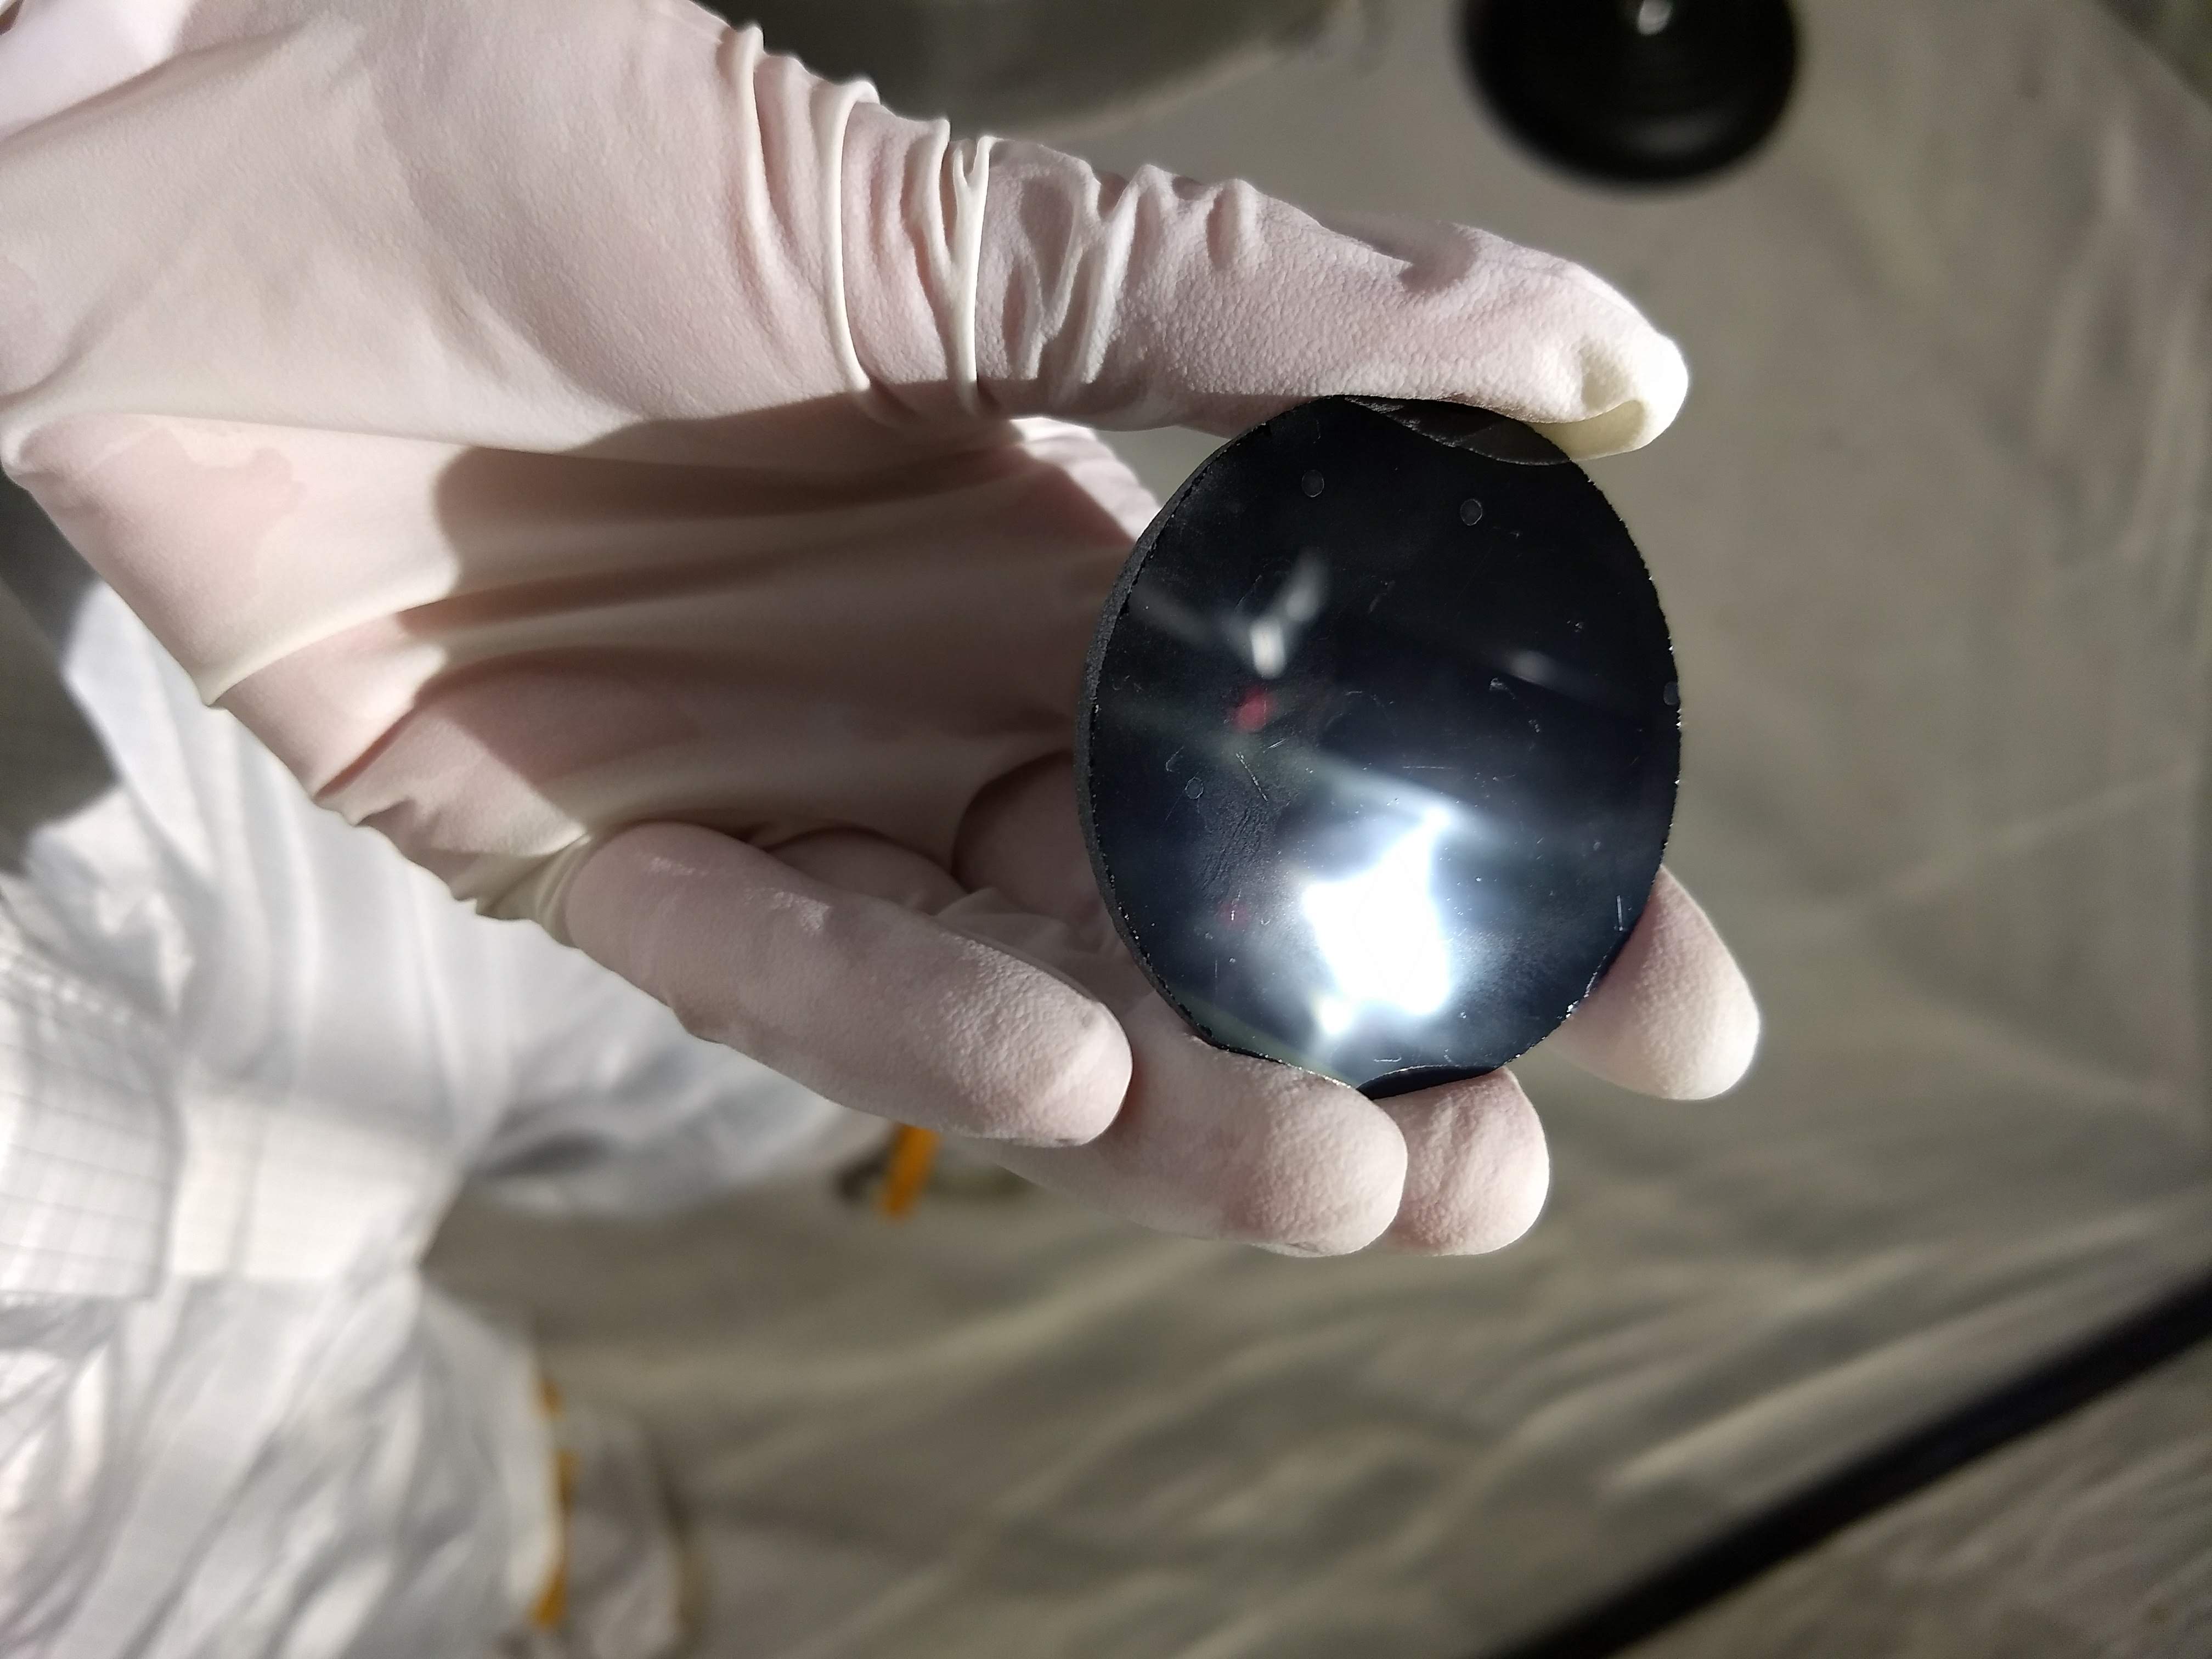
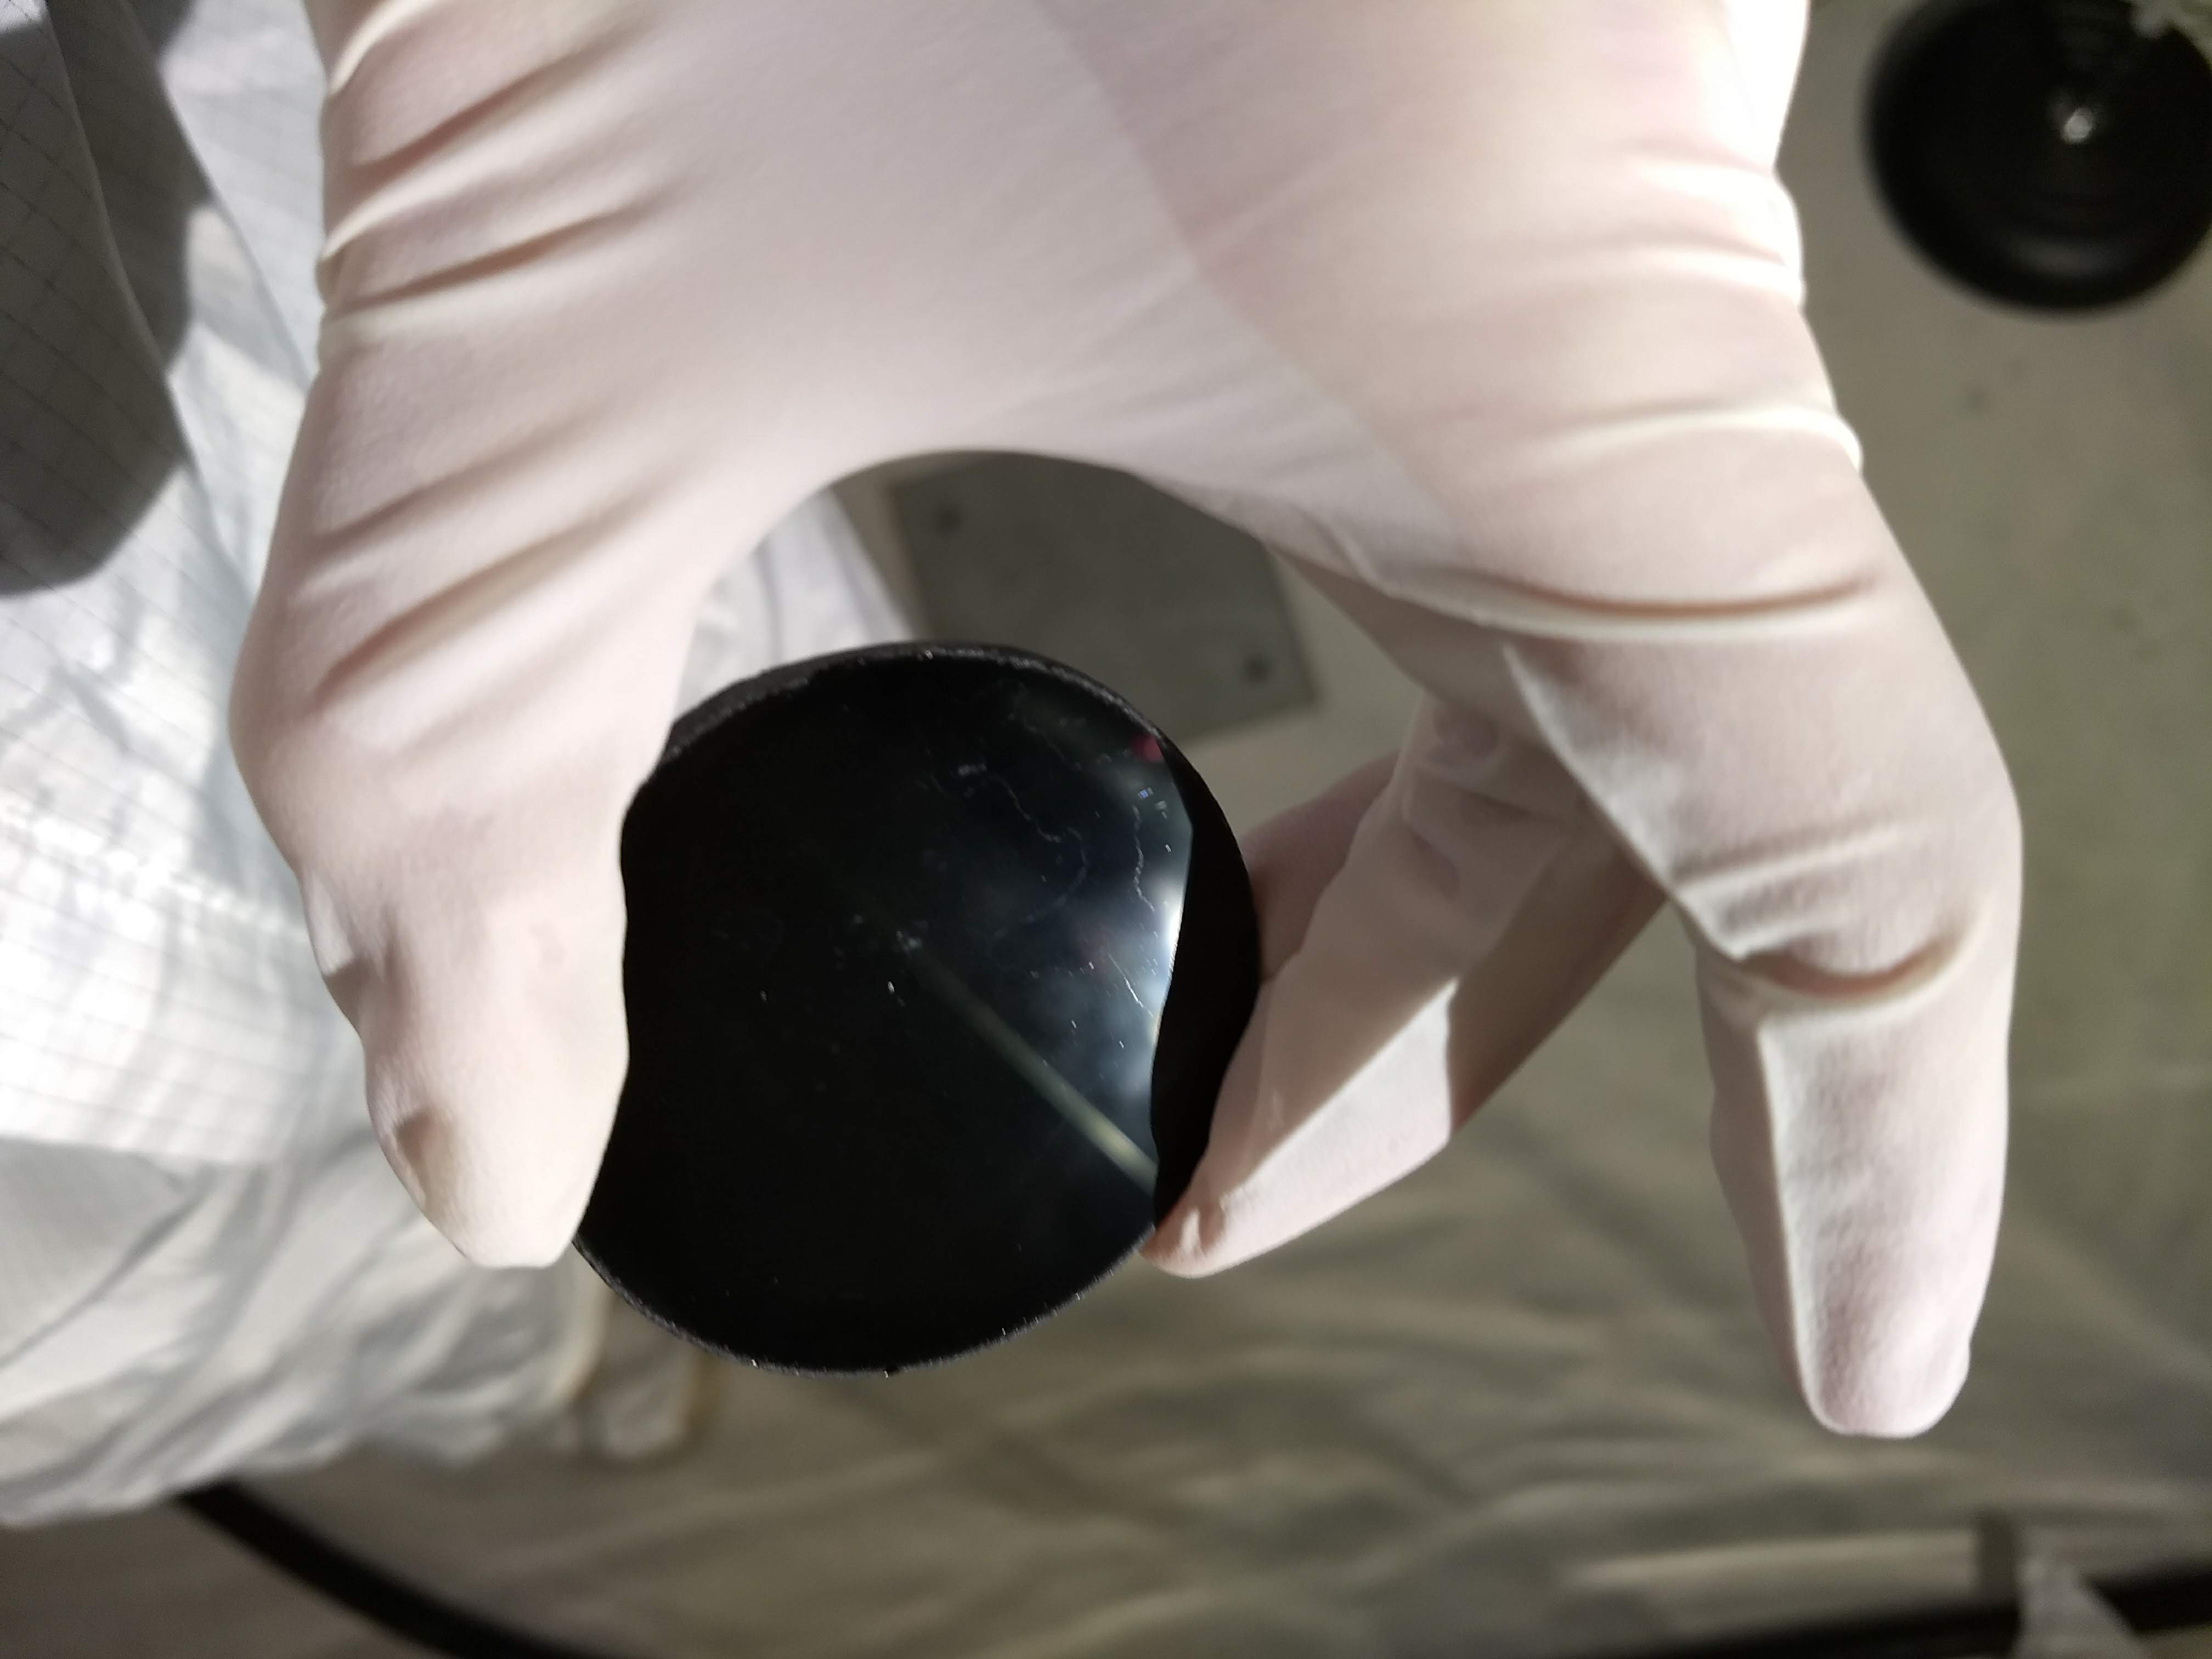
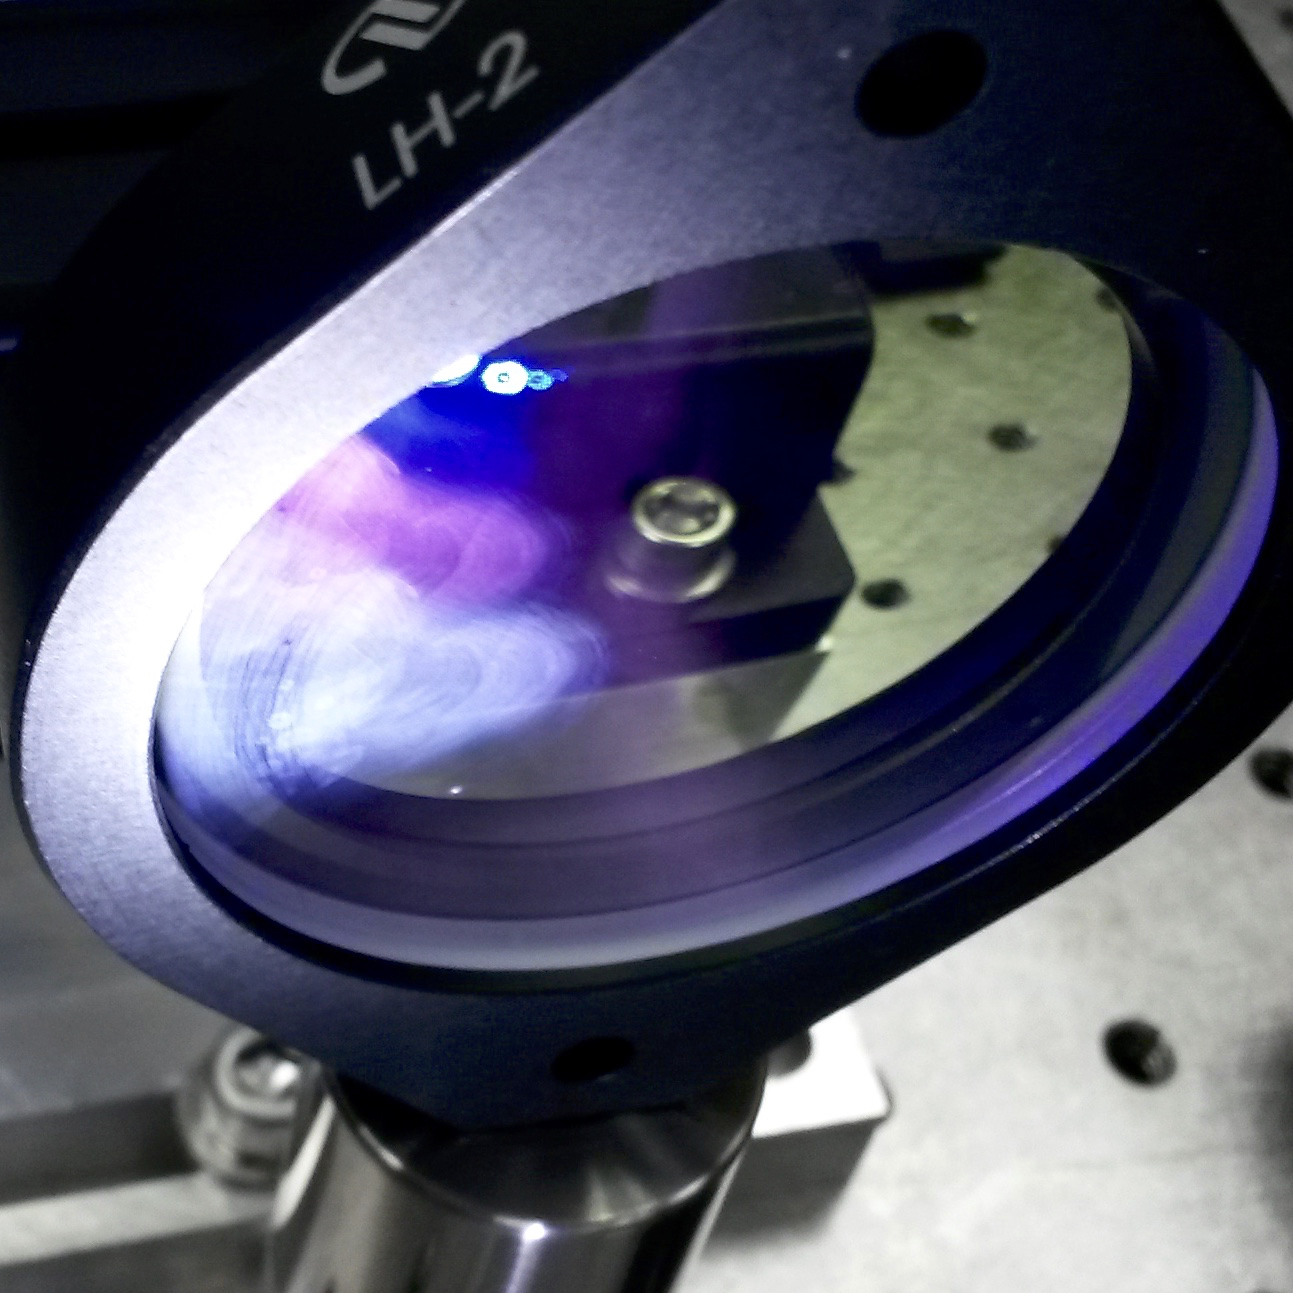
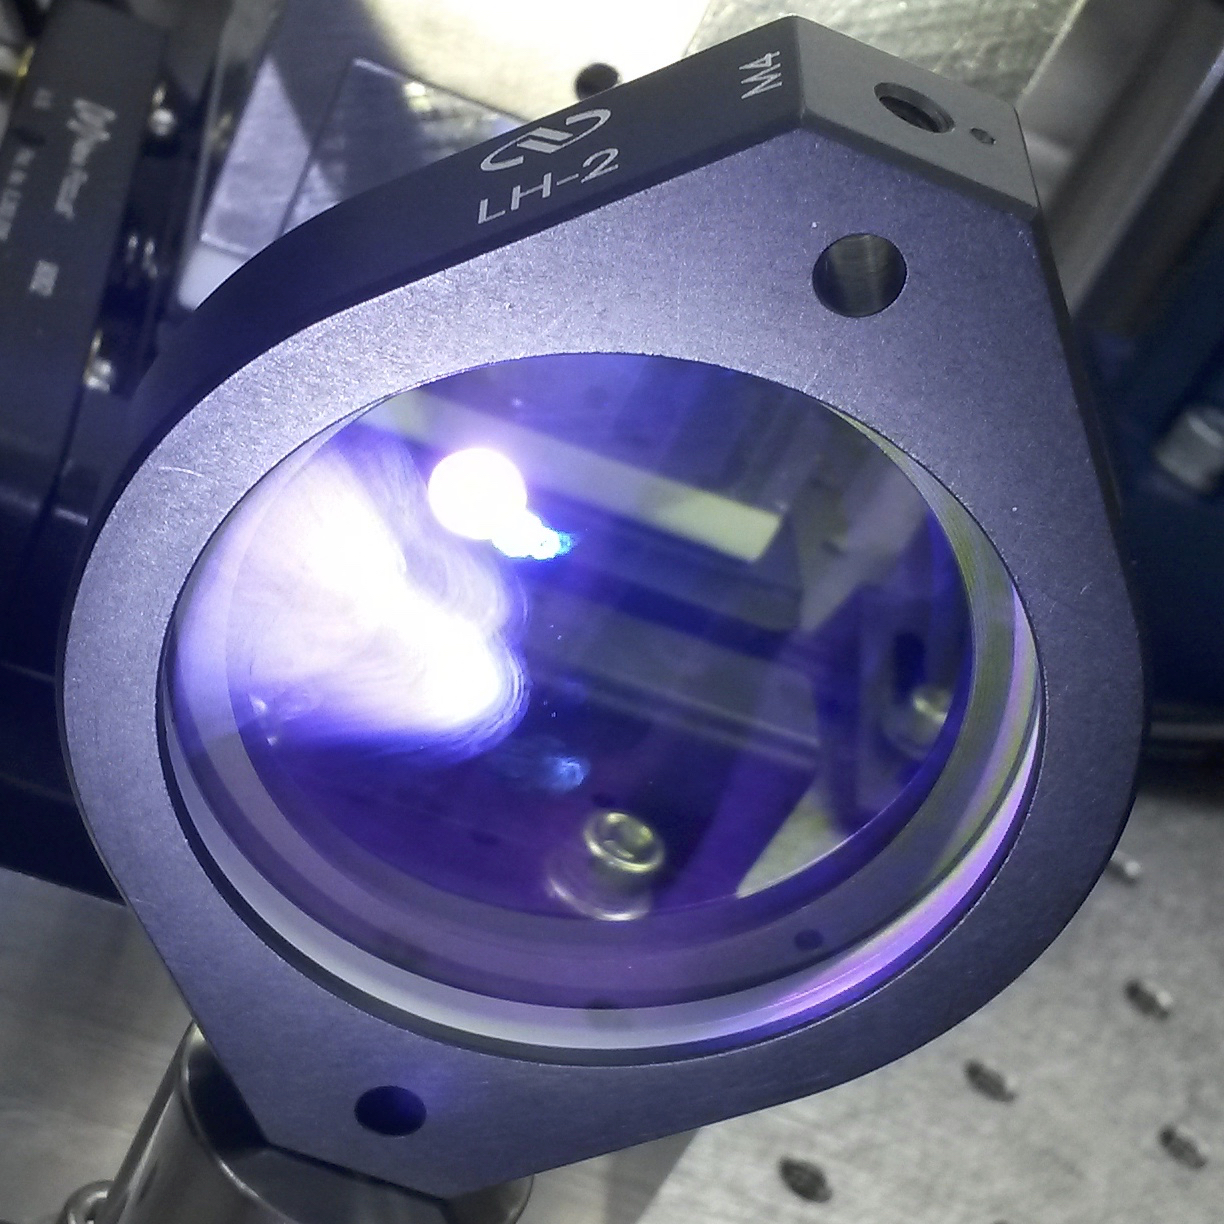
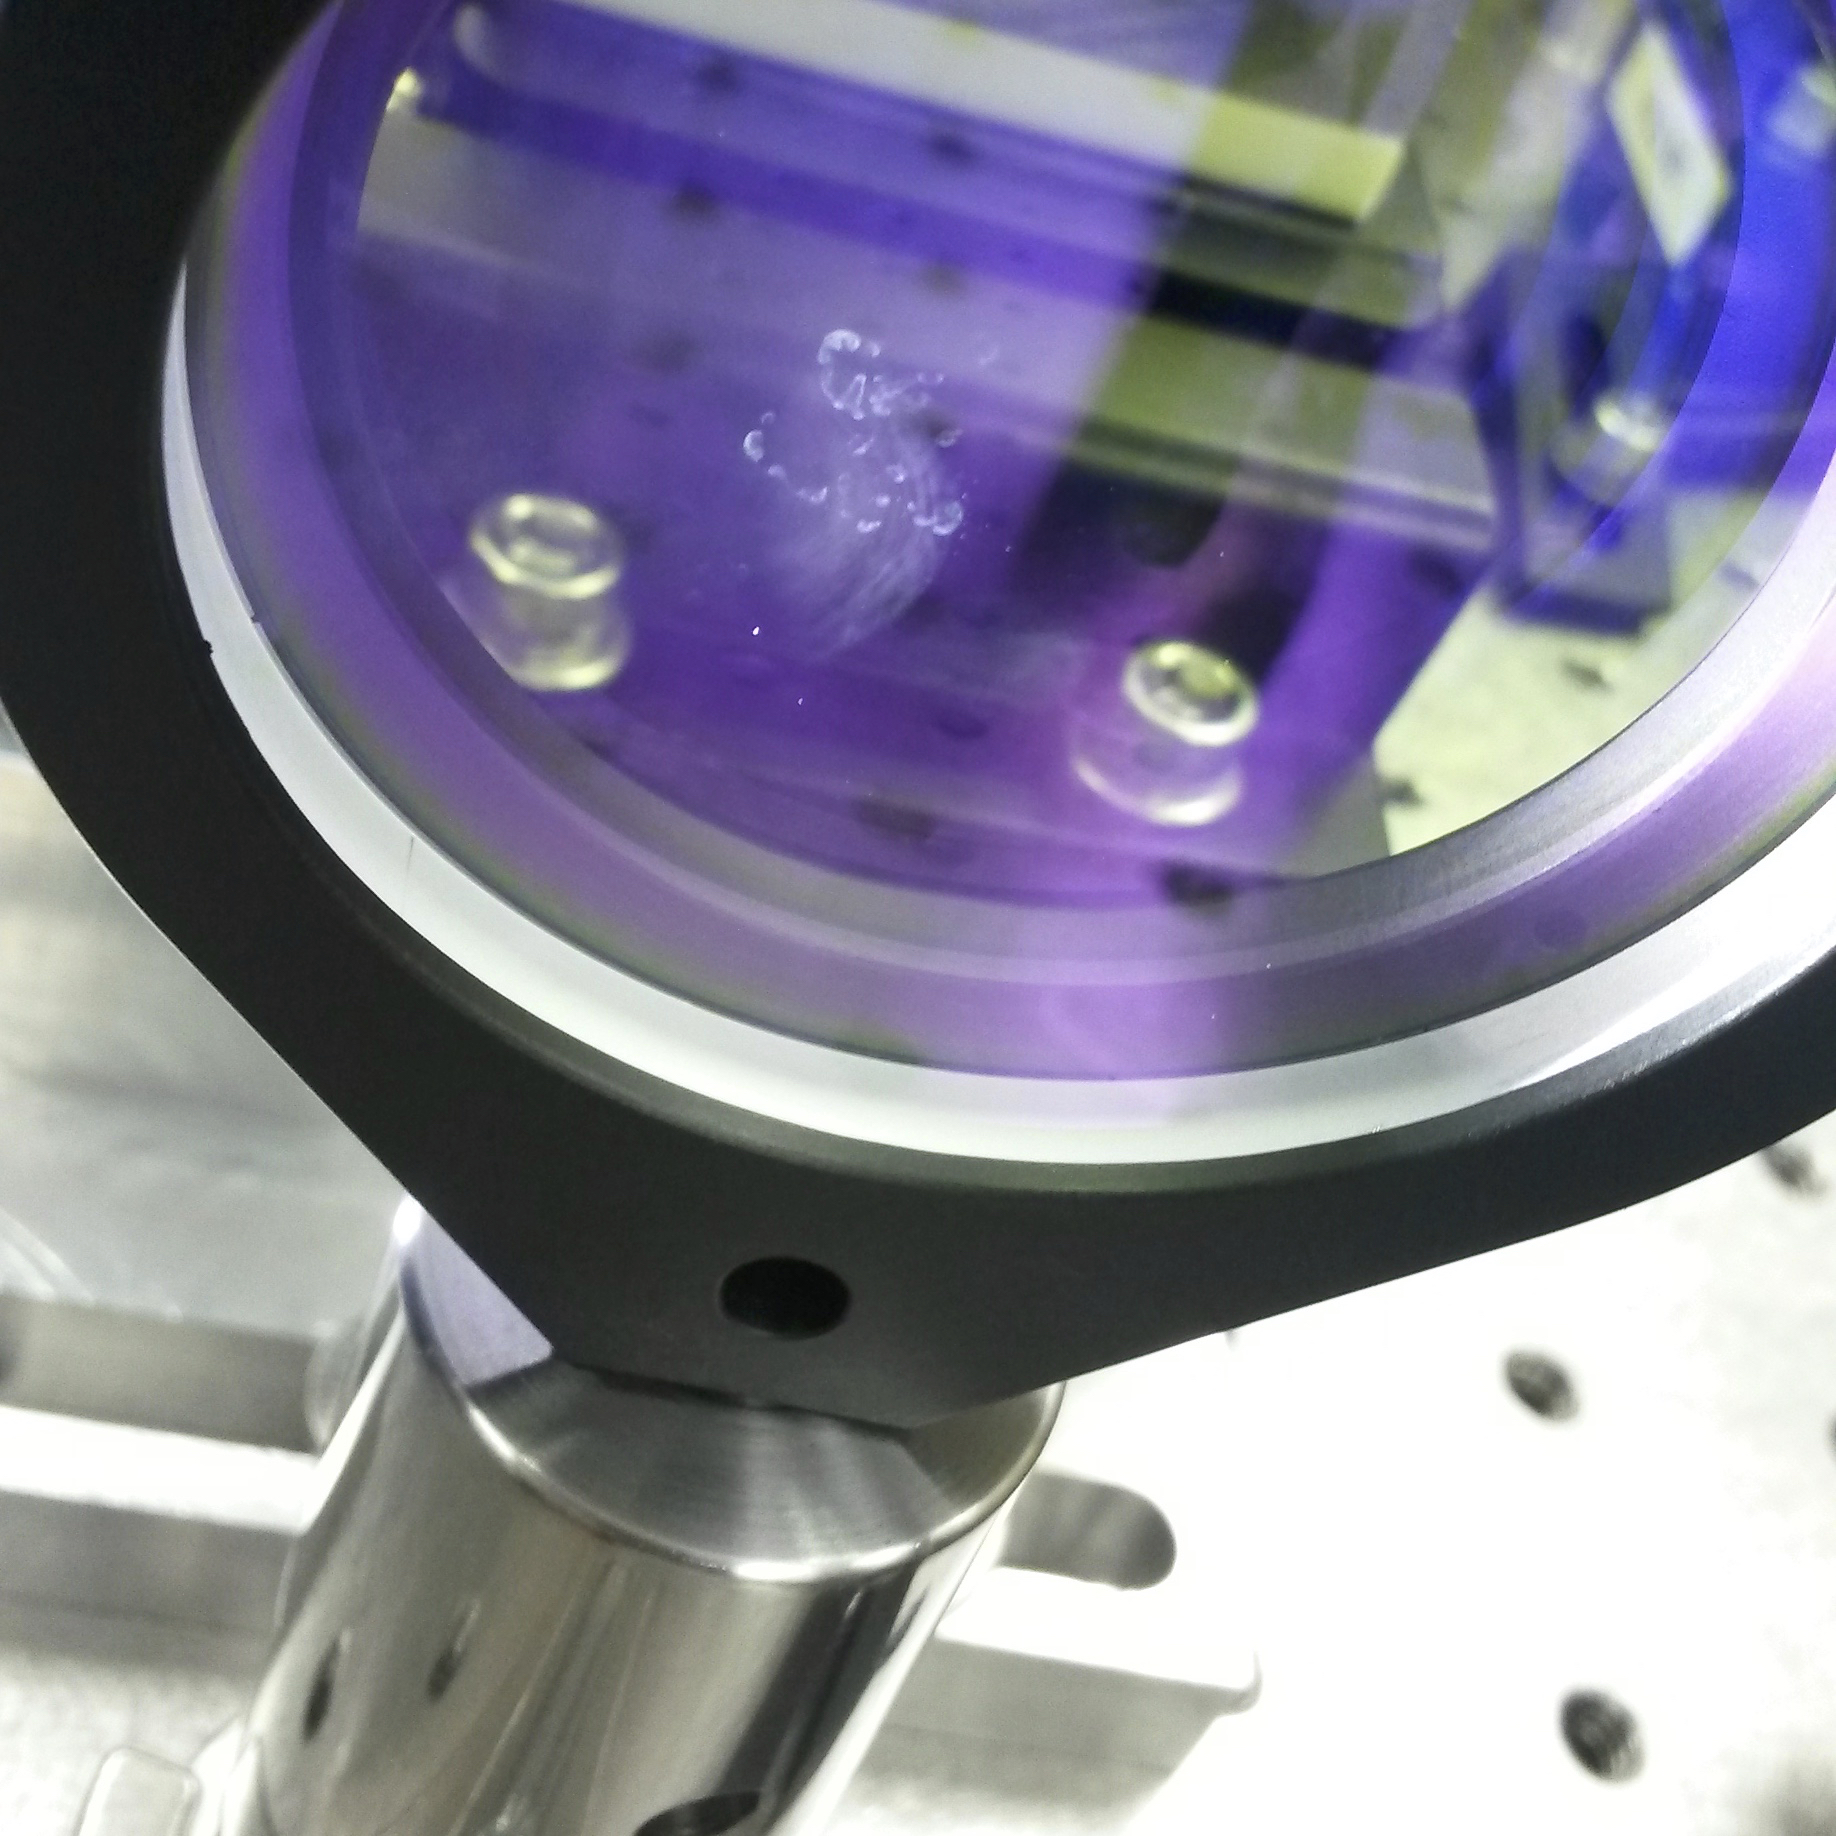
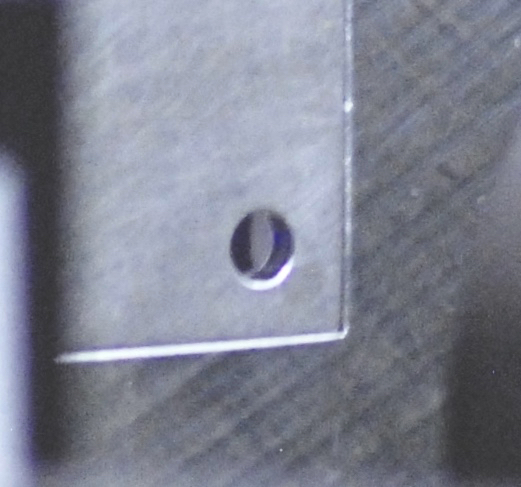
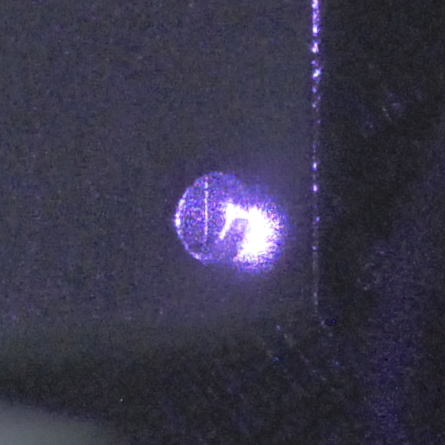
I inspected the optics in the IO path on the PSL, and discovered that L1, the first lens after the EOM, has one easily identifiable area on the surface near the EOM, and two easily identifiable areas on the surface away from the EOM, that are contamination/damage to the coating. Two areas are at or close to the center of the optic, the other area is about 1/8th of the optic that is covered in what looks like a thick film.
The first three images attached are of L1:
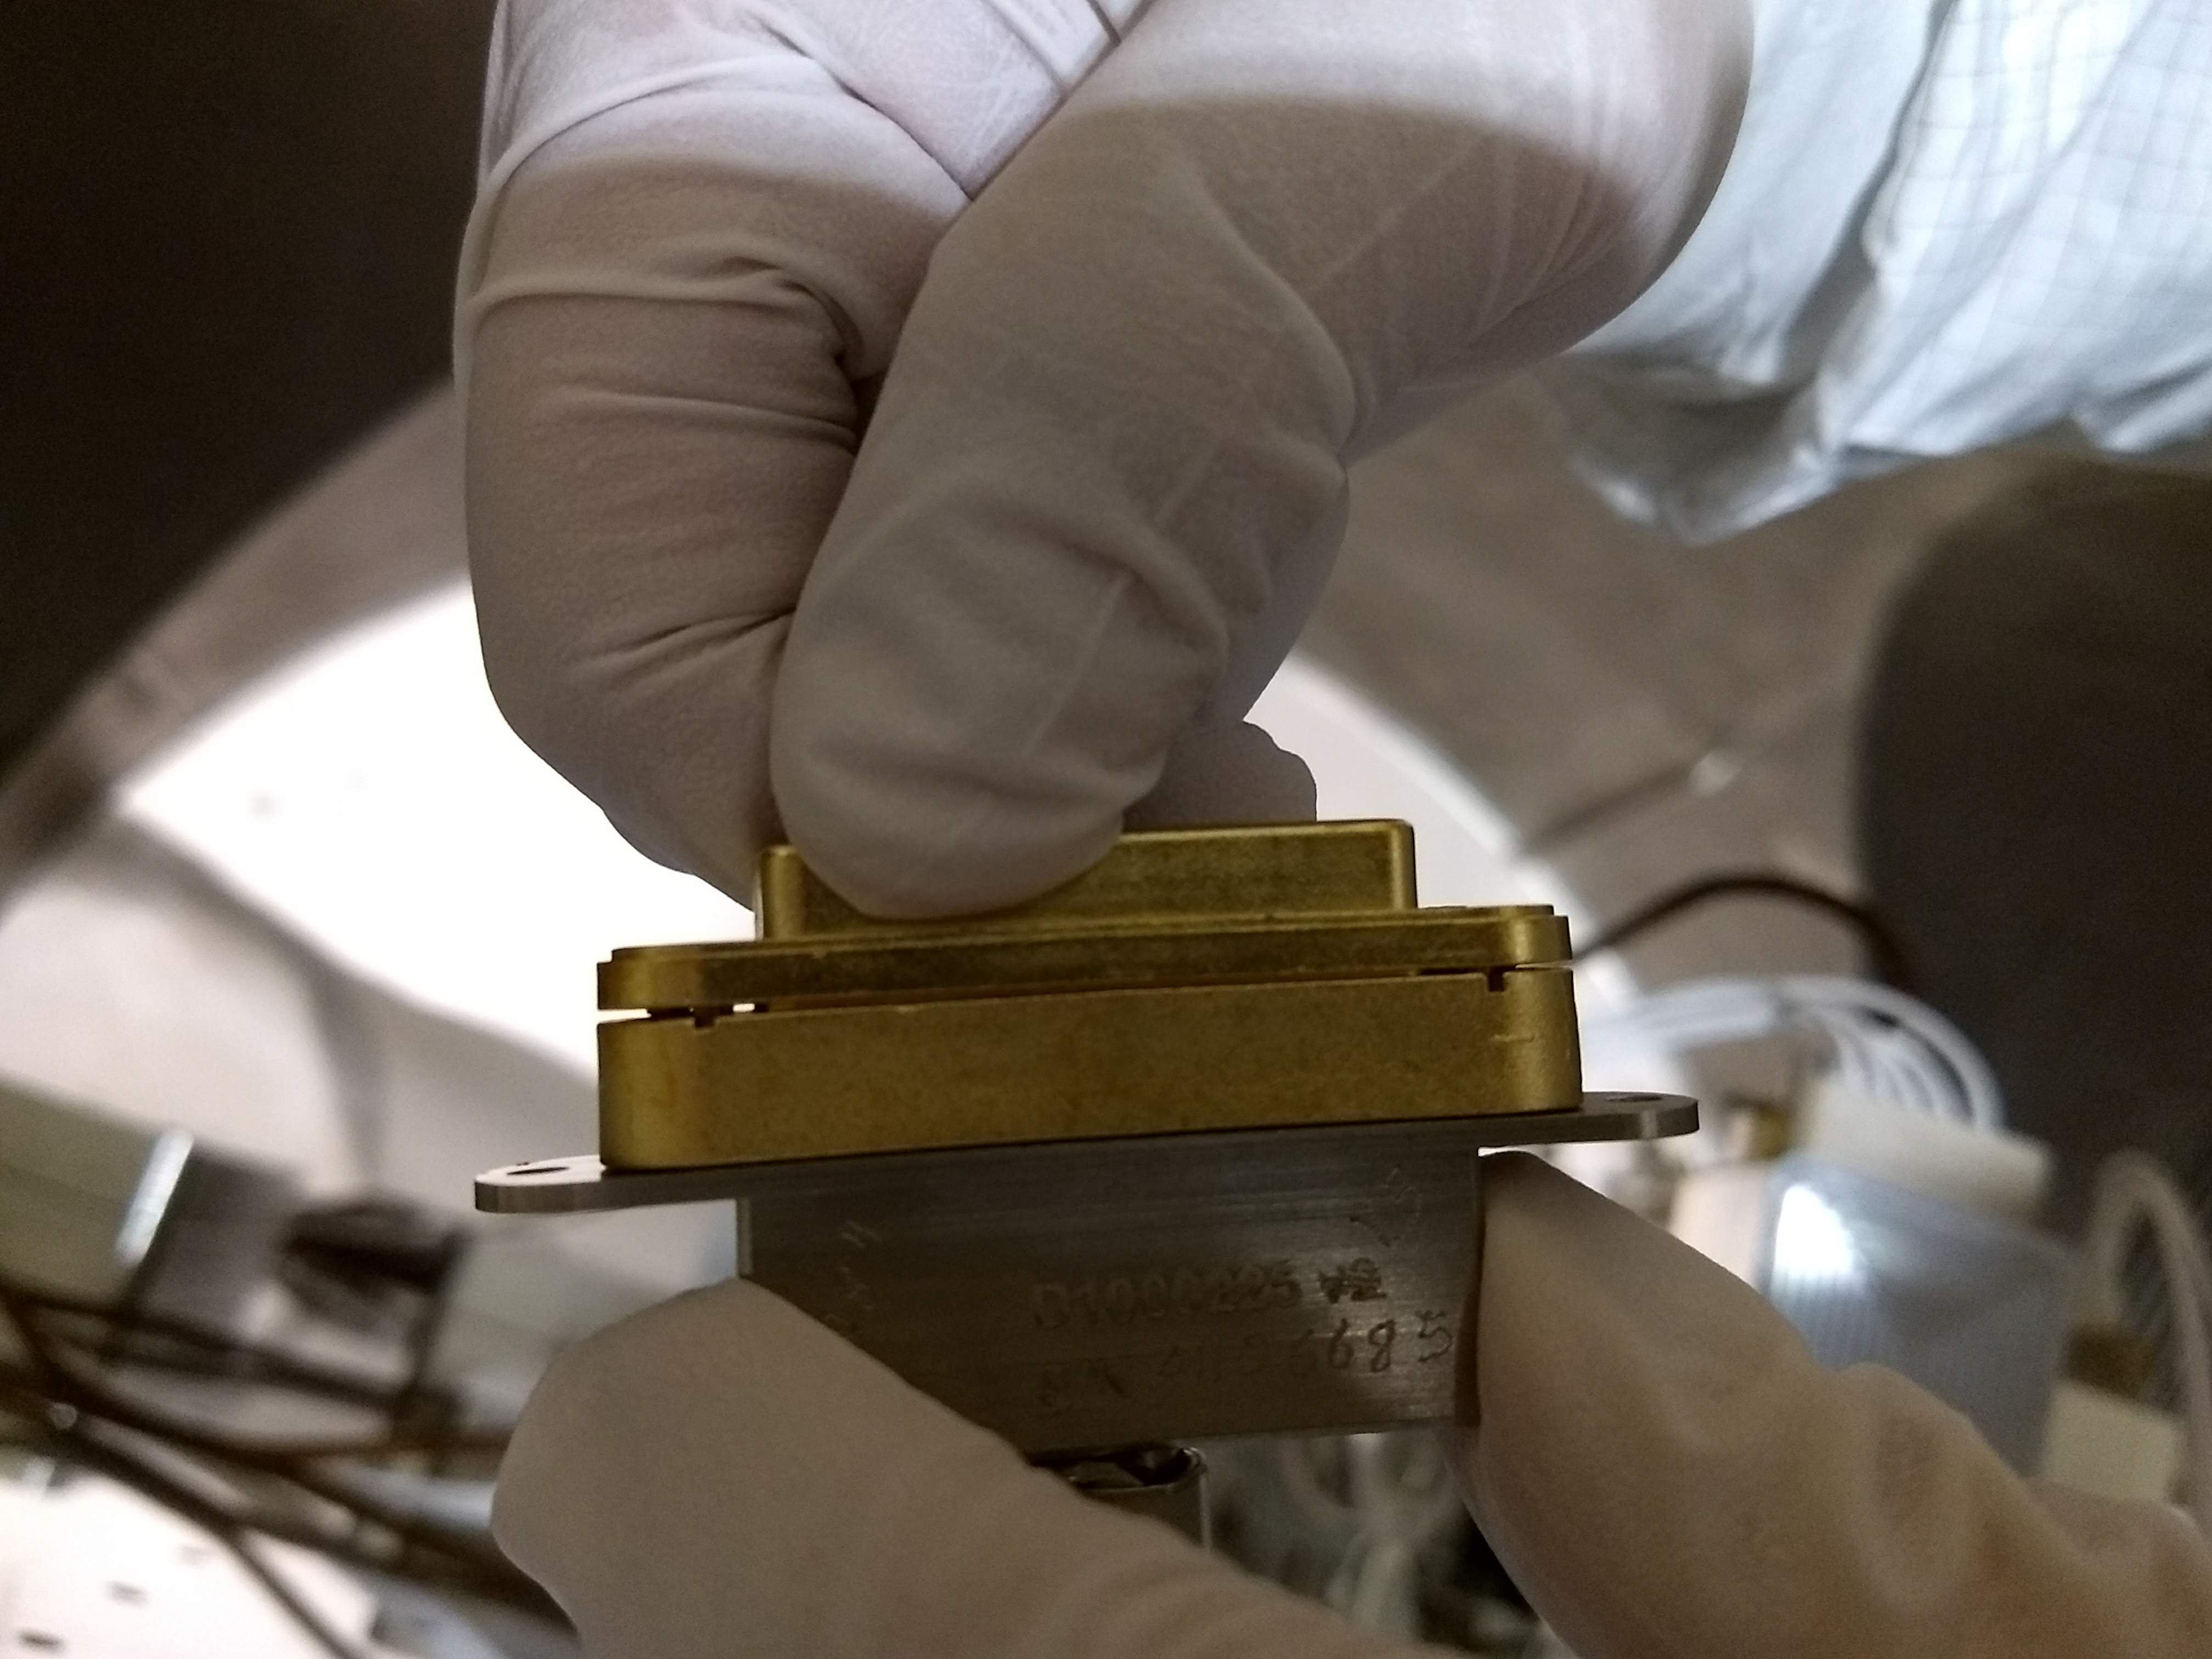
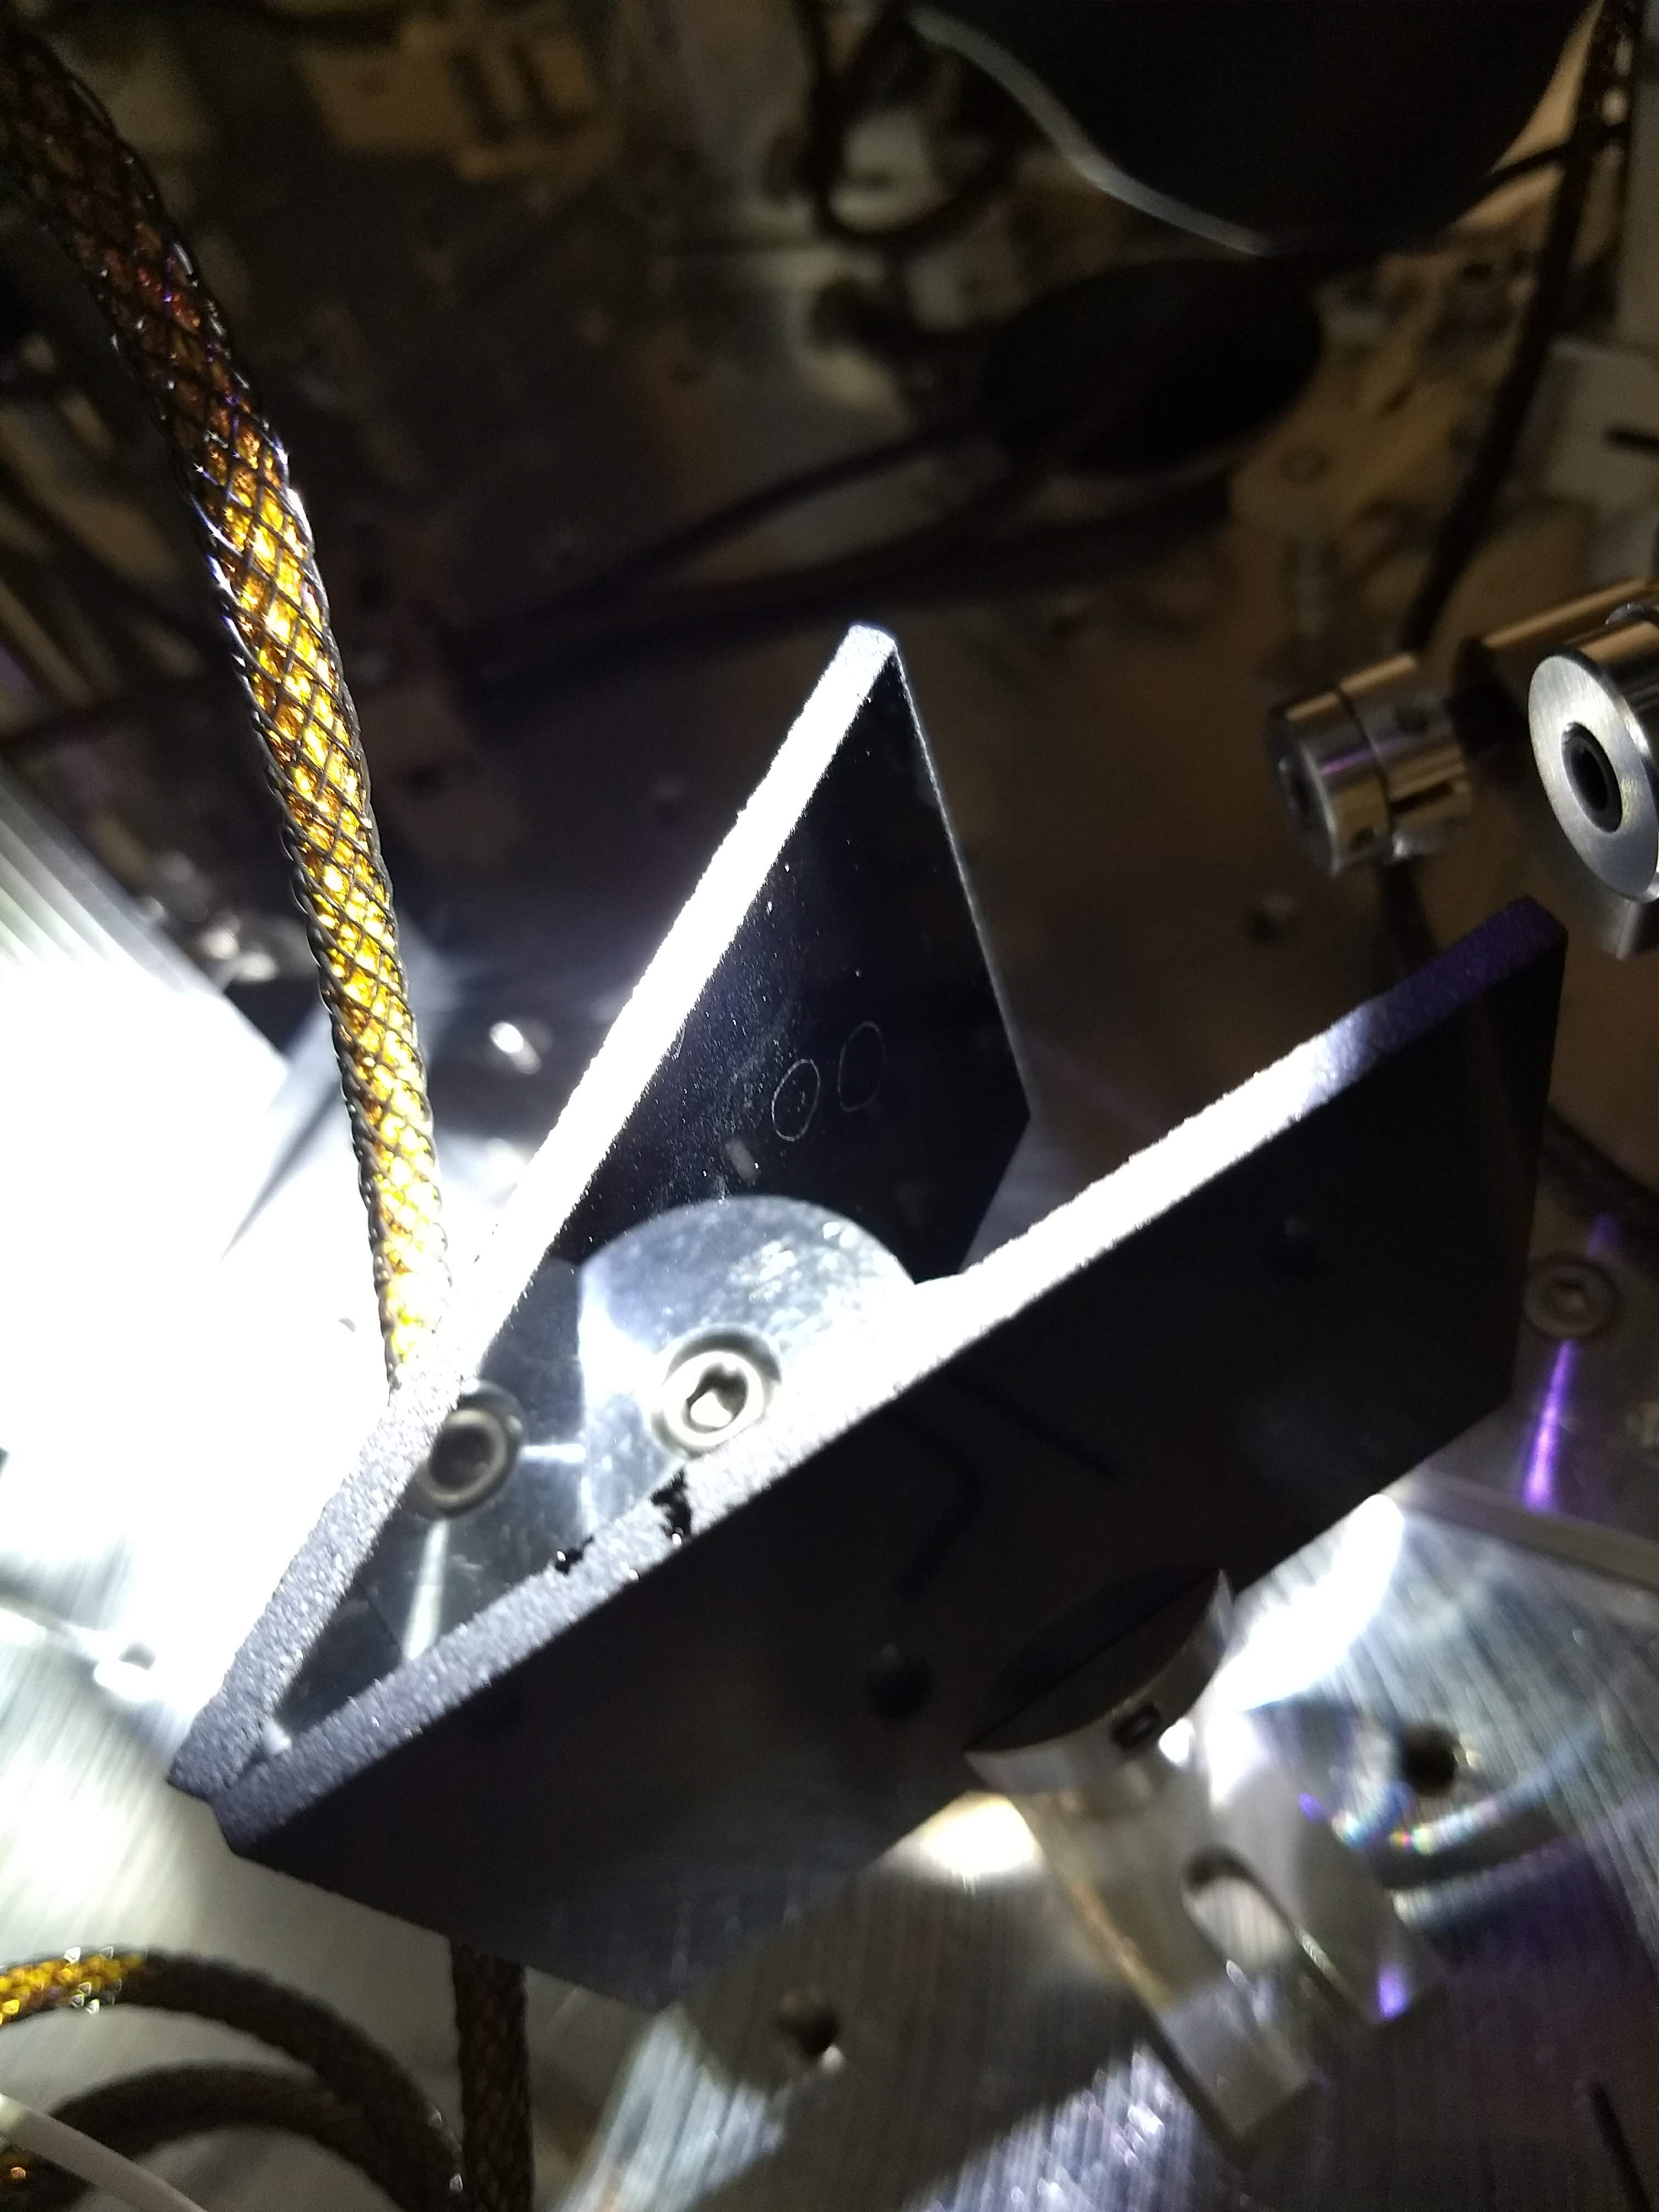
With L1 being very close to the EOM output, I was not able to see the output face of the EOM crystal, so this still needs ot be inspected, and the best opportunity to do this is when L1 is replaced. The EOM crystal surface sits within a few mm of housing aperture, so it can be seen through the EOM housing.
The last two images attached are of the EOM output aperture and crystal:
I talked to Daniel, and he saw the images, and we talked about replacing this lens after recovering the IMC, so next week or later, and before O3.
J. Oberling, P. King, J. Bartlett, R. Savage
Following on from yesterday's plumbing work, today we concentrated on recovering the 35W FE, the 70W amplifier, and completing the remaining items from FRS 10753.
This morning, Peter recovered the 35W FE without much fuss and also installed the new solid block base for the 70W amplifier. He and I recovered the 70W amplifier, also without much trouble; we tweaked beam alignment for a compromise of power and beam quality and were able to return the beam very close to what it was before the new base installation. We then proceeded to take a beam propagation measurement to use in PMC mode matching. This was necessary as the installation of the new amplifier base resulted in the 70W amp moving closer to the PMC by ~1/2", which in turn will have an effect on PMC mode matching. At this point we broke for lunch.
The final part we needed to complete the chiller work (an adapter for installation of a throttling valve on the supply line out of the chiller) arrived today, so this afternoon Jeff and I installed the valve. After leak checking and leak fixing, we fired the chillers up and all was well.
Rick and I then balanced the flows and pressures out of the crystal chiller. To do this we completely opened the new external bypass Jeff installed a couple months ago and completely closed the chiller's internal bypass; this internal bypass being open was what was causing the very high operating pressure (70 psi!) for the system. In this configuration the chiller had a flow of 38 lpm. We then used the throttling valve to reduce the overall chiller flow to 18.7 lpm (keep in mind that the external bypass was still completely open, so almost all of that water was flowing through the bypass, not the PSL manifold). We then slowly closed down the external bypass to provide a pressure drop for the PSL manifold, therefore letting water flow through the various cooling circuits. As it stands right now, the flows and pressures of the PSL cooling system are:
Please keep in mind that most of that chiller flow is still going through the external bypass. This is an absolutely huge improvement as prior to this work we were running with a manifold inlet pressure of 70 psi (!!!). At this point I returned to the enclosure to return it to "Science Mode" so Robert can assess if all of this plumbing work made a difference in PSL table vibration. Tomorrow we will begin mode matching the PMC, with our goal being >50W transmitted power with the ISS ON.
One small, but important, clarification.
The high supply- and return-side pressures observed earlier were not due to the internal bypass being open. They were due to the 50 psi pressure drop across the heat exchanger due to the high total flow (internally bypassed, externally bypassed, and through the laser circuits) going through the heat exchanger (on order 30 lpm) inside the chiller on the return path to the open reservoir.
Similar pressures were observed with the internal bypass closed but the external bypass open, also giving about 30 lpm through the heat exchanger.
Closing the internal bypass valve, reducing the pump output flow by about a factor of two using the throttling valve, and adjusting the flow through the laser circuits using the external bypass valve allowed us to set the desired flows through the laser circuits while reducing the overall system pressure.
This scheme was developed in consultation with J. Riebock, an engineer at TechnoTrans, US rep for the chiller manufacturer.
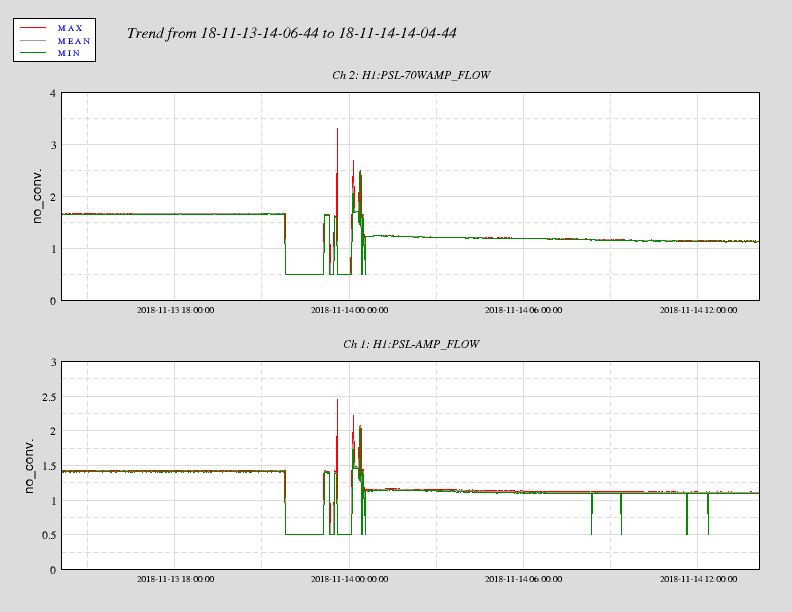
Front end and neoVAN flow rates for the past day. Clear reduction of flow rates observed after the plumbing work. Still settling out I would think. The 4 excursions in the front end flow rate are probably bubbles making their way through the system.
[Sheila, Fabrice, Nutsinee, Terry, Haocun]
Summary:
We have OPO coupling 89% 00 mode, alignment >~95%, mode matching >~95% and polarization mode ~2%.
I will add more details with numbers later.
Detailed measurements:
These numbers are the best ones we tried to take because the signal was noisy in air.
Calculation:
Here's a picture of the scan. Will go back and save the data properly later.
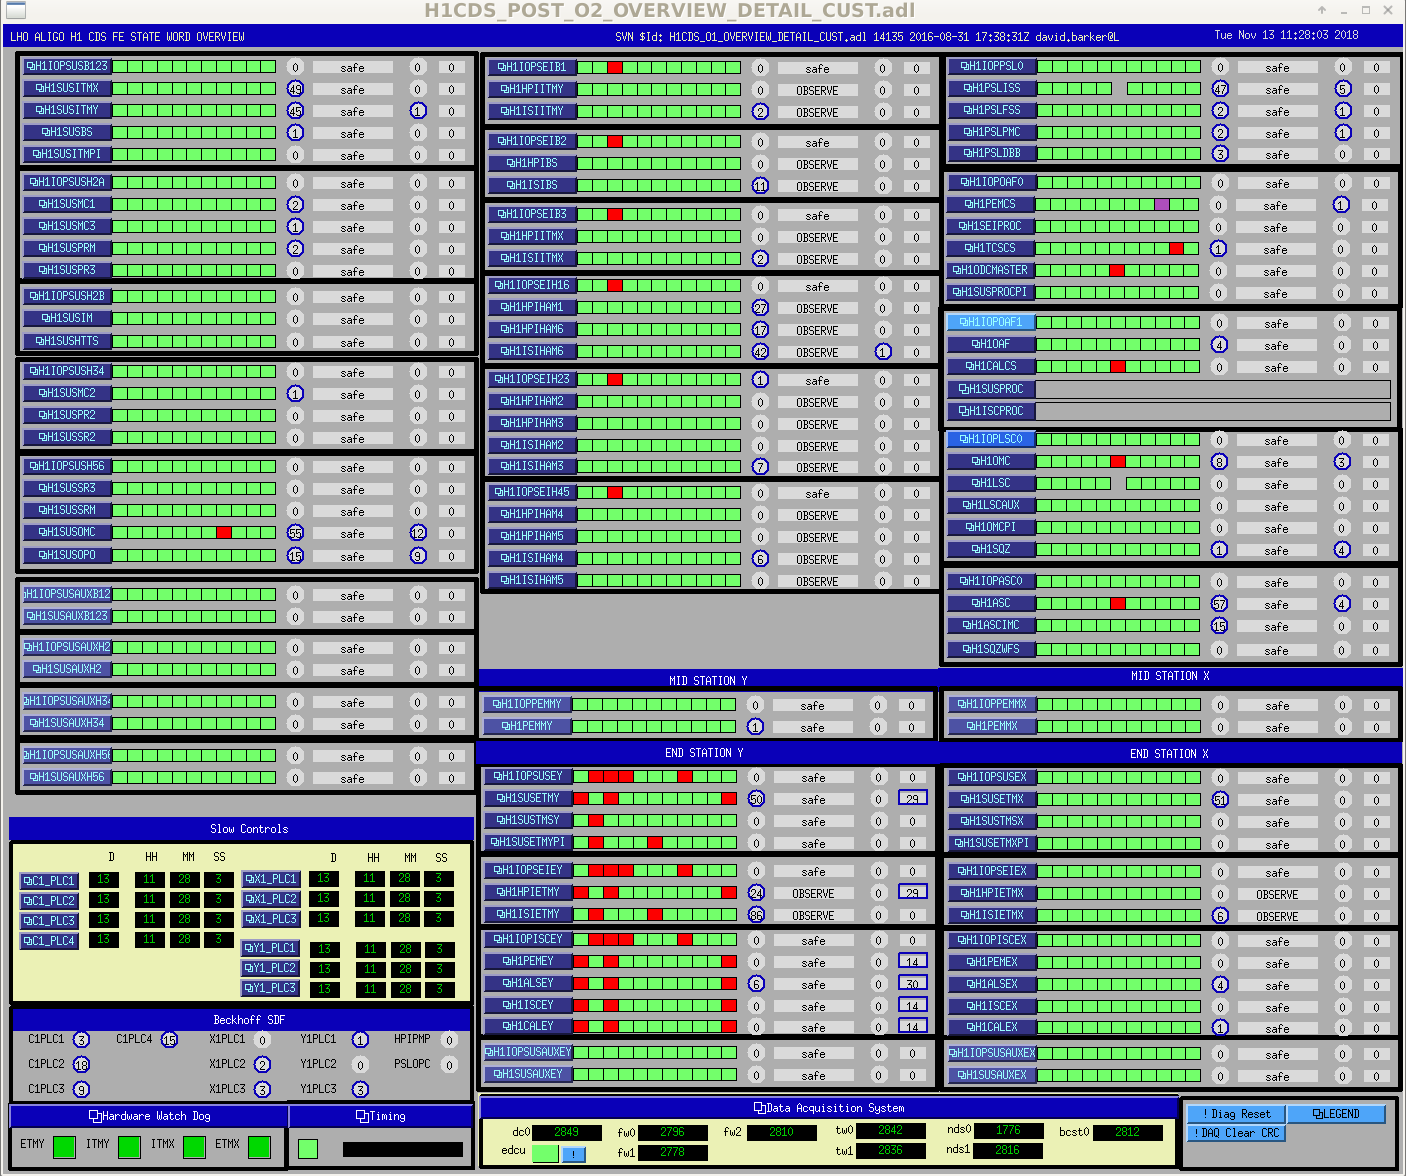
At 11:04 most models stopped running at EY. We are currently unsure if this is a Dolphin crash or caused by electrical work at EY.
Interestingly in addition to the expected corner station IPC errors, all SEI frontends have an ADC error on their IOPs.
And to answer the question of what is special about the seismic IOP models: they all have Dolphin receivers.
However, h1susitmpi is a 64kHz user model with Dolphin receivers.