(Kiwamu, Alexa)
With the ISCTEY Prometheus laser set as follows,
PPKTP Crystal @ 32.27 C
NPRO Crystal @ 24.00 C
Diode A @ 23.00 C
Diode B @ 21.00 C
we measured the Current (A) vs Power(W) out of the laser aperature for the 1064nm beam (see pdf file).
We found the optimal configuration for the laser to be,
PPKTP Crystal @ 33.81 C
NPRO Crystal @ 24.00 C
Diode A @ 23.00 C
Diode B @ 21.00 C
Current 1.503A
such that at the aperature, the power of each beam was,
1064nm: 1.371W
532nm: 40.1mW
In this optimal configuration, we measured the power after the quarter-wave plate (QWP), half-wave plate (HWP), and Faraday Isolator (FI) for the 1064nm beam, and found it to be 1.282W. Thus, we deduced that the throughput of the FI was about 93%. Then we proceeded to examine the beam profile with the nanoscan.
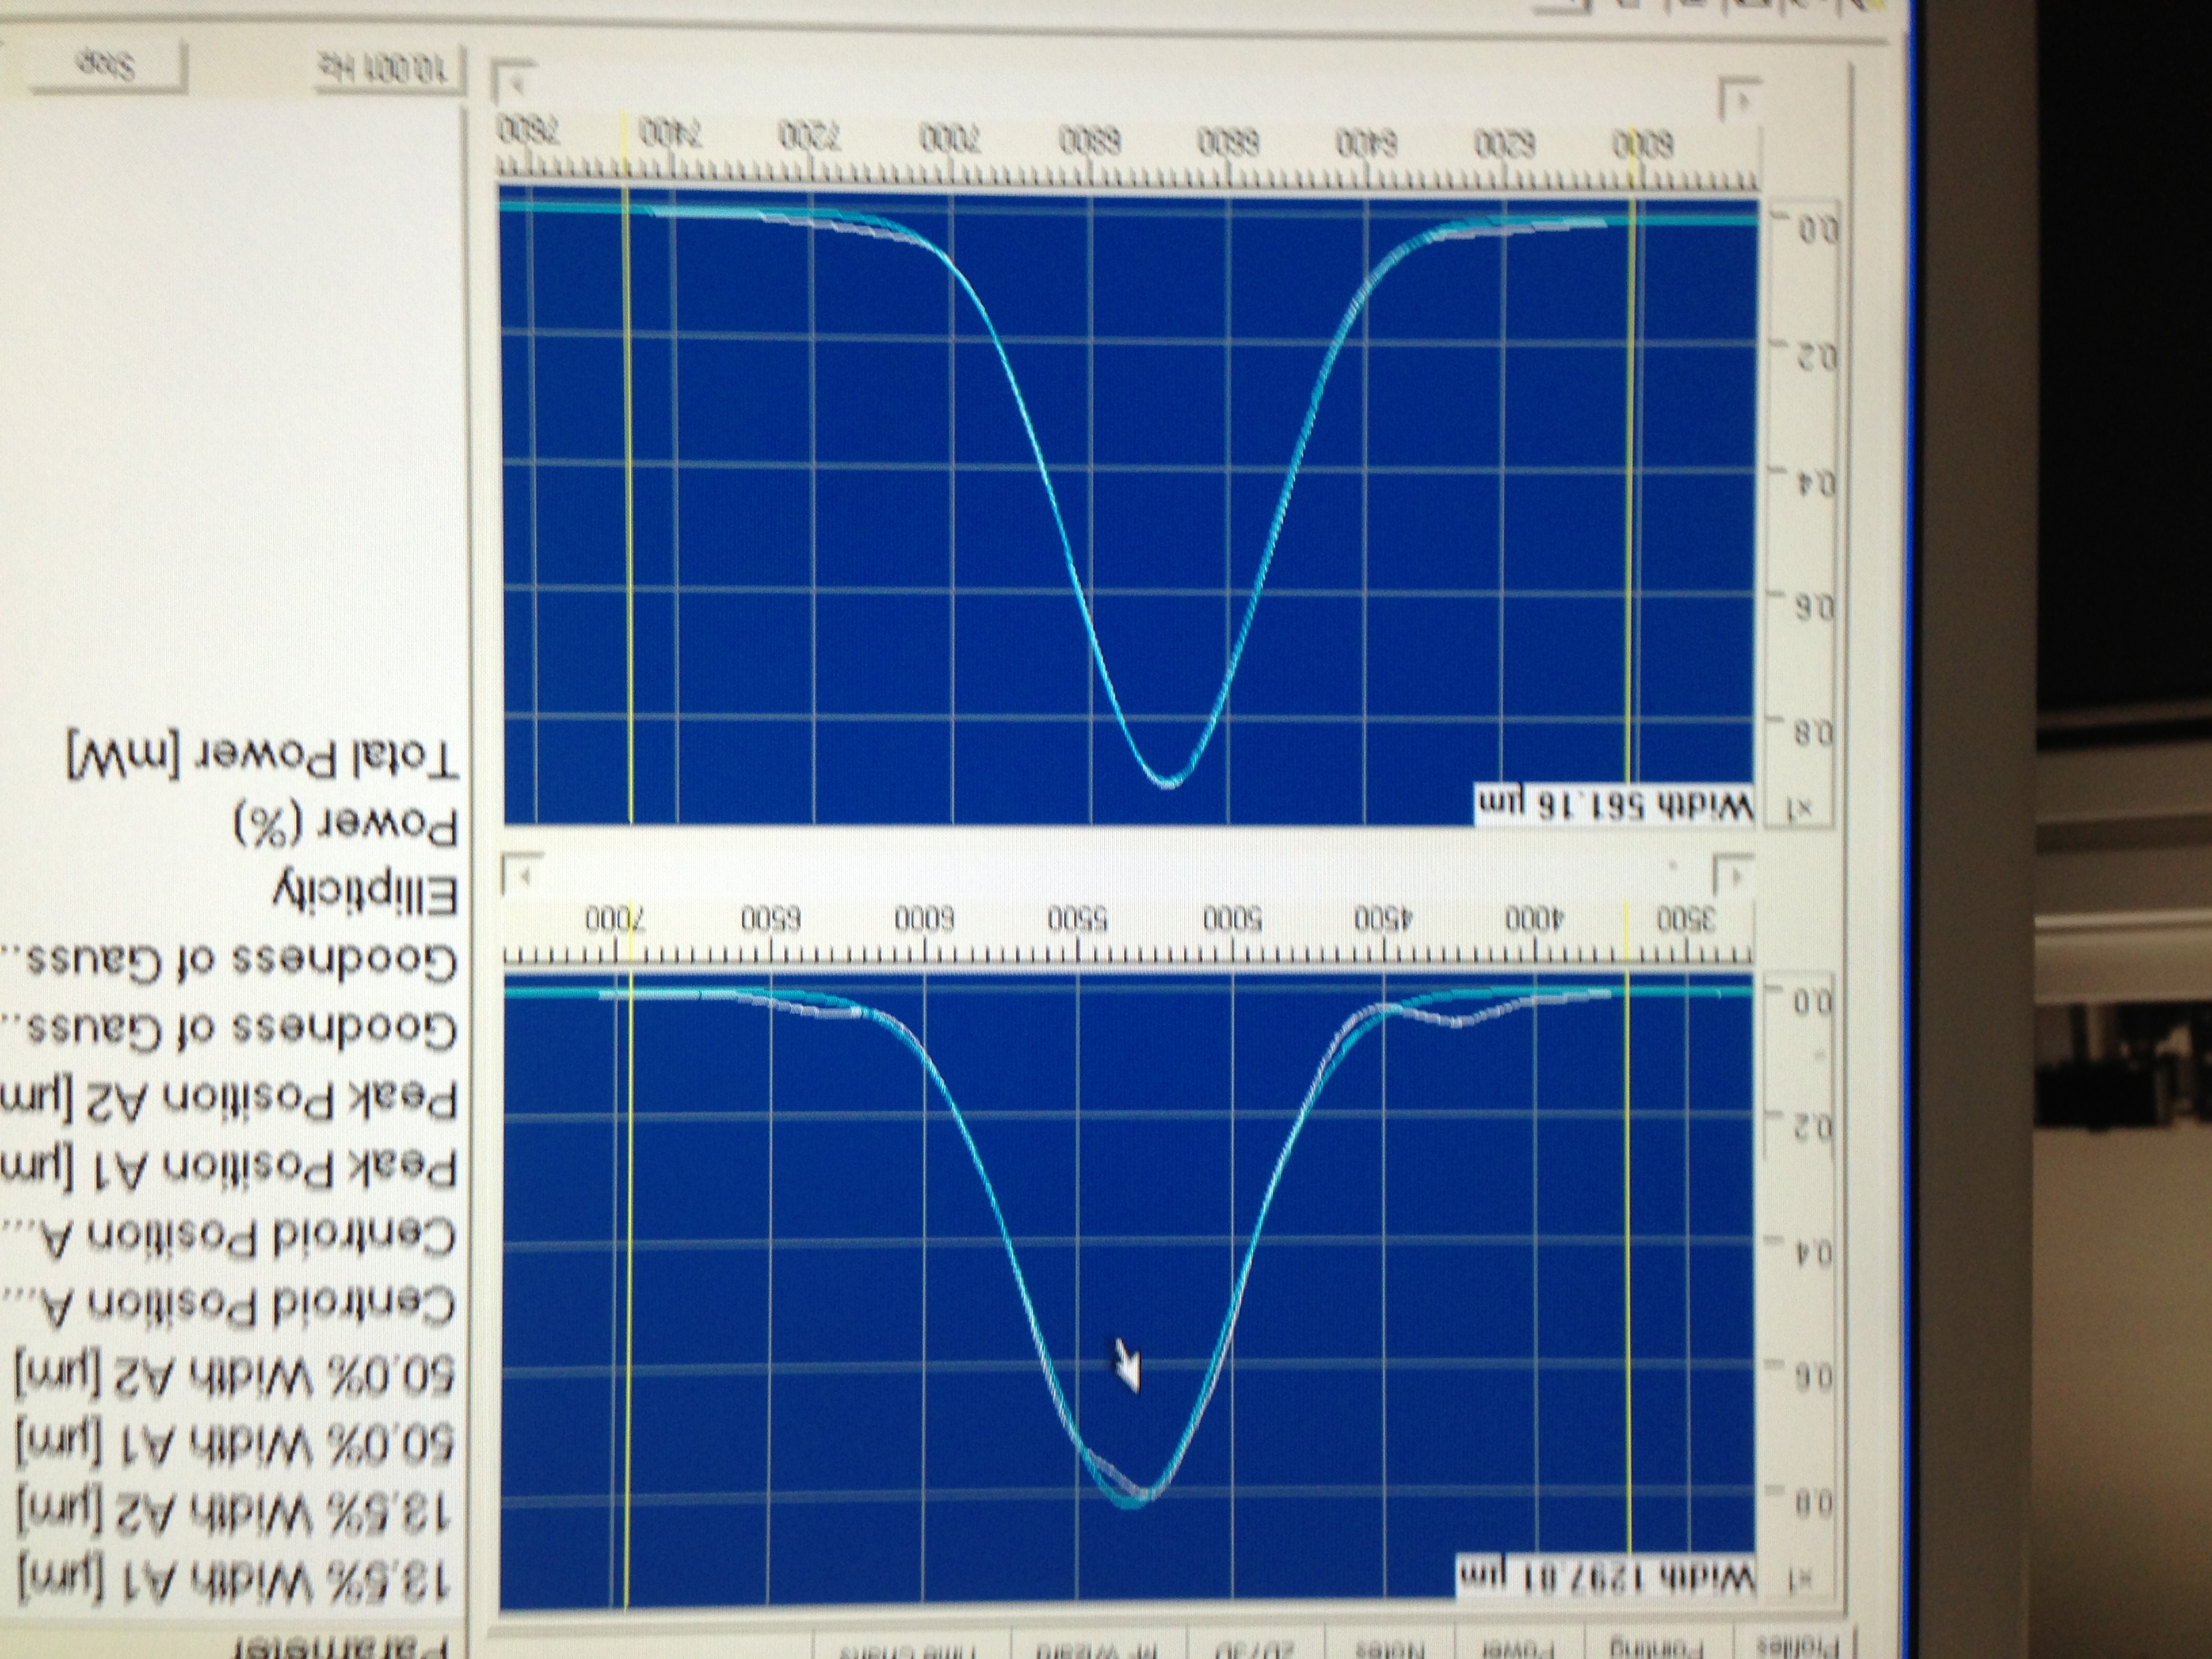
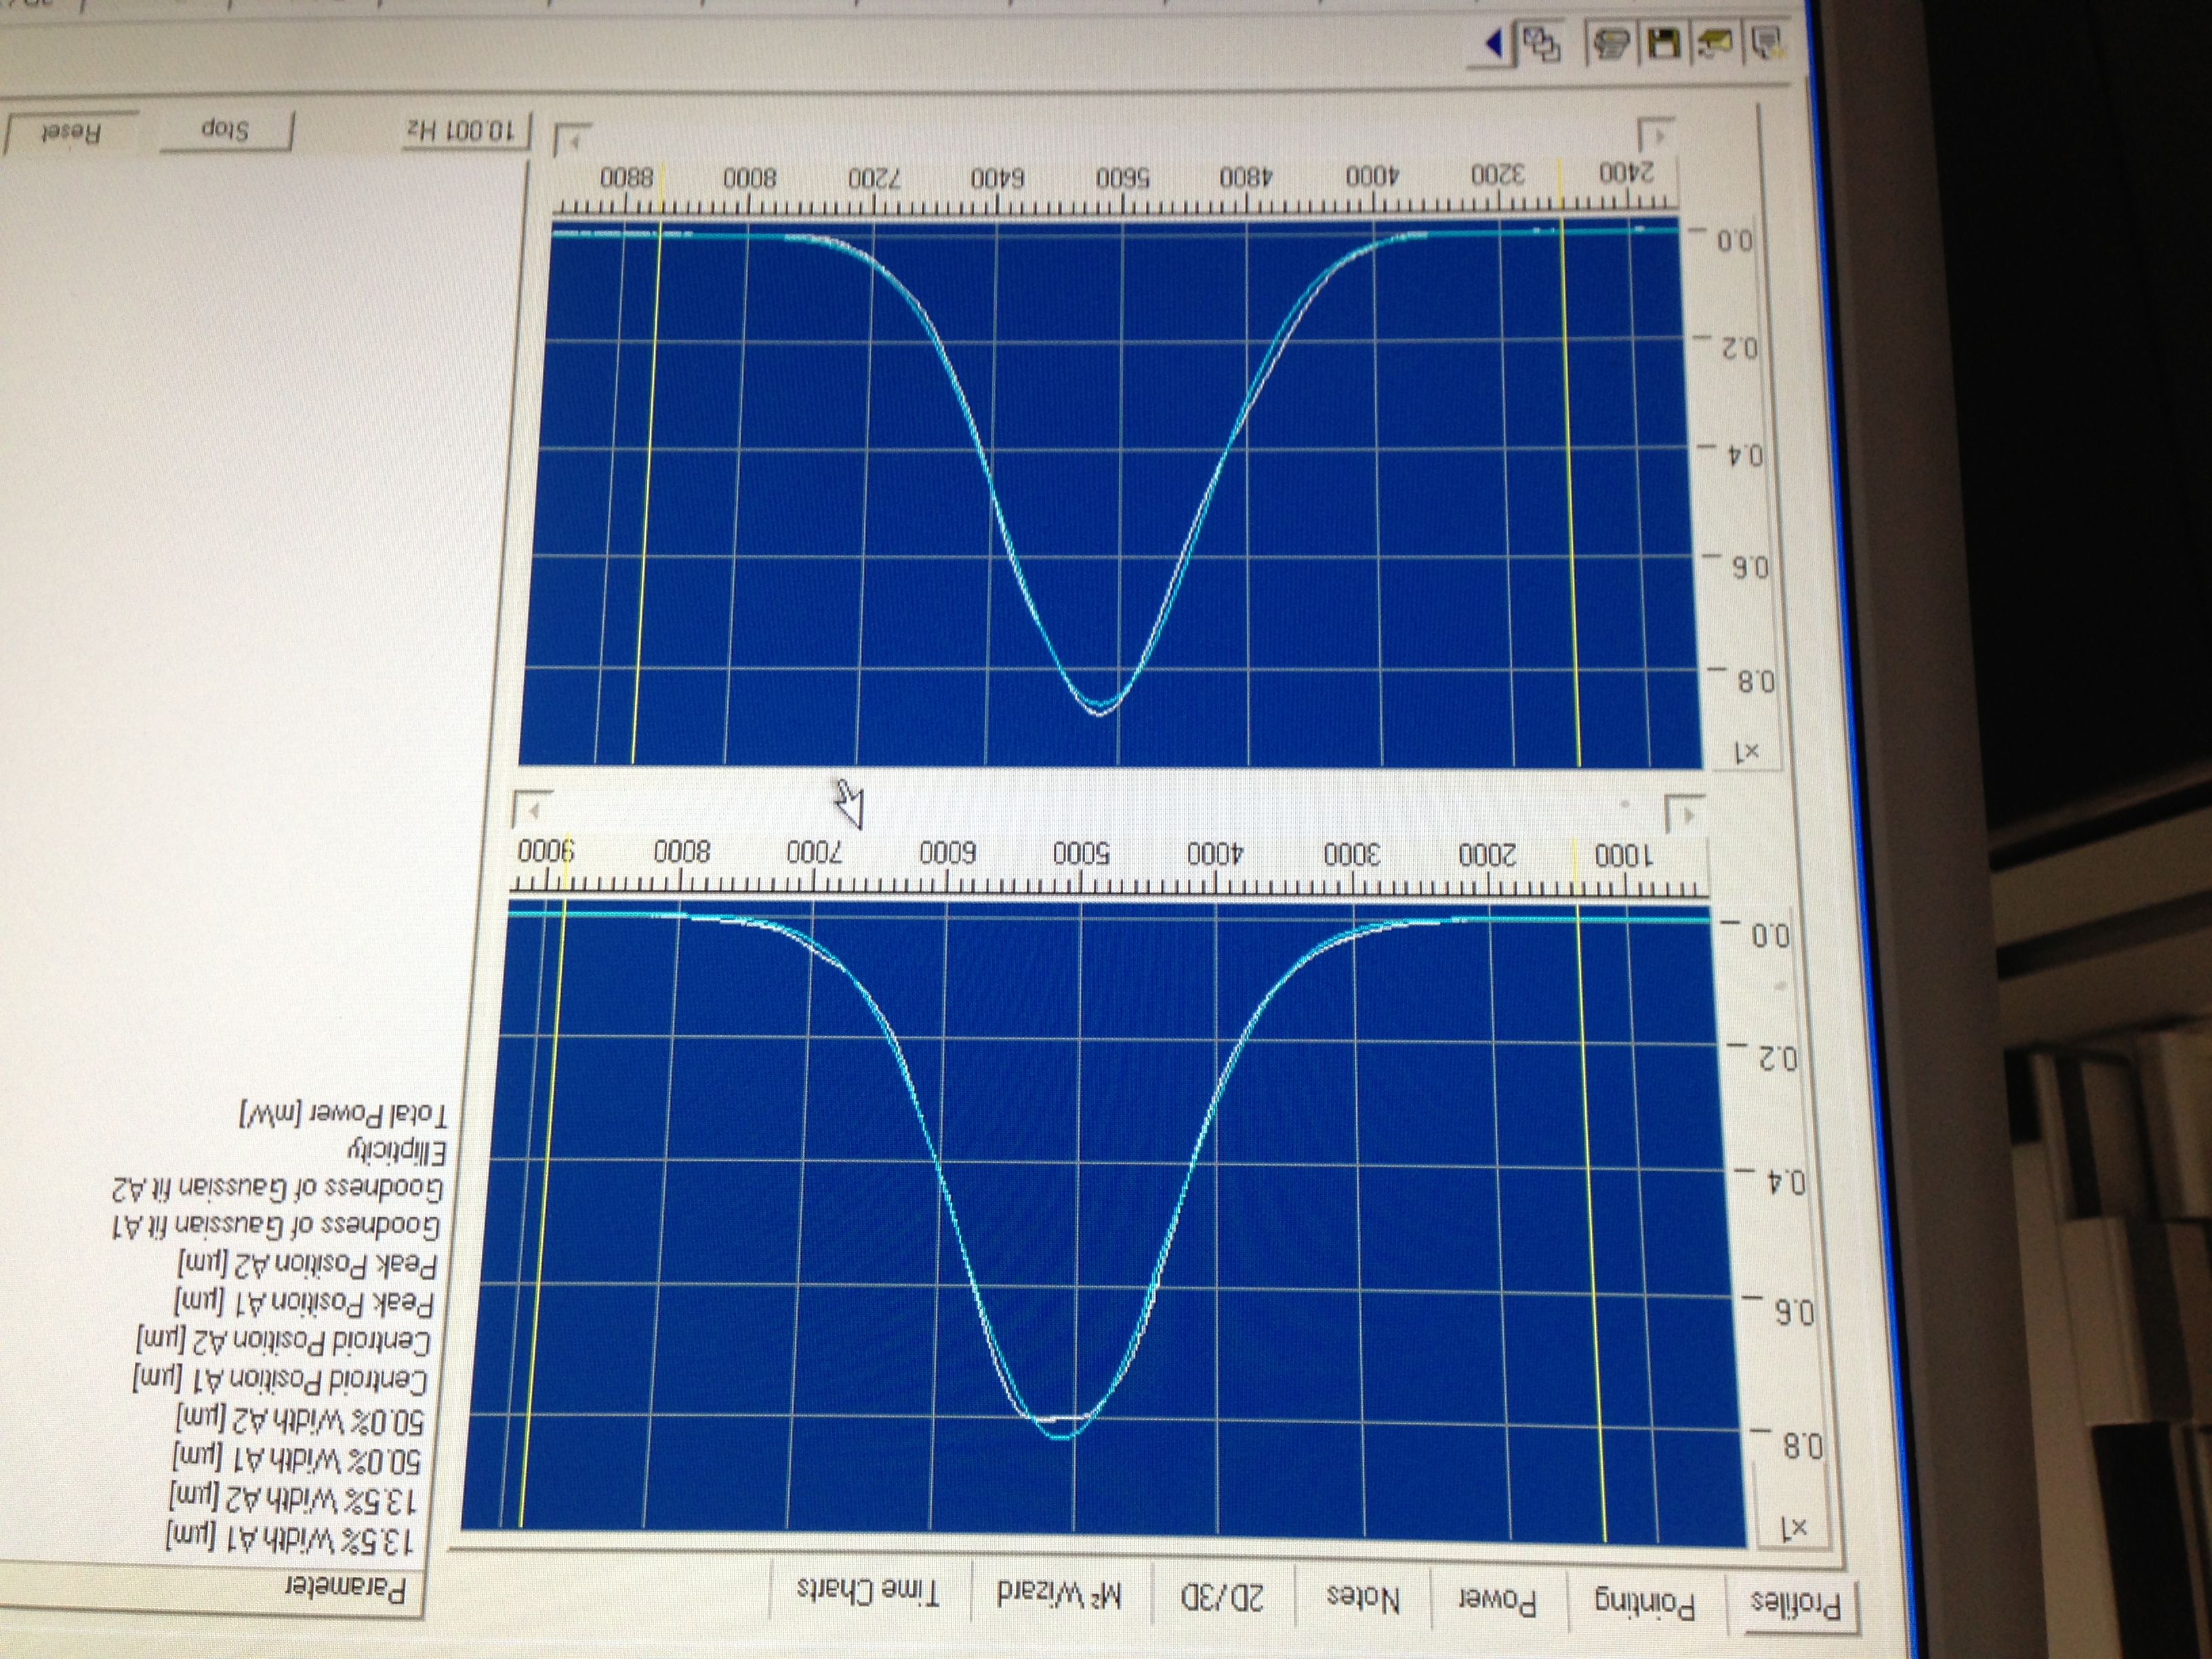
The first picture (1064nmNoFI.pdf) shows the beam profile immediatly following the aperature of the laser.
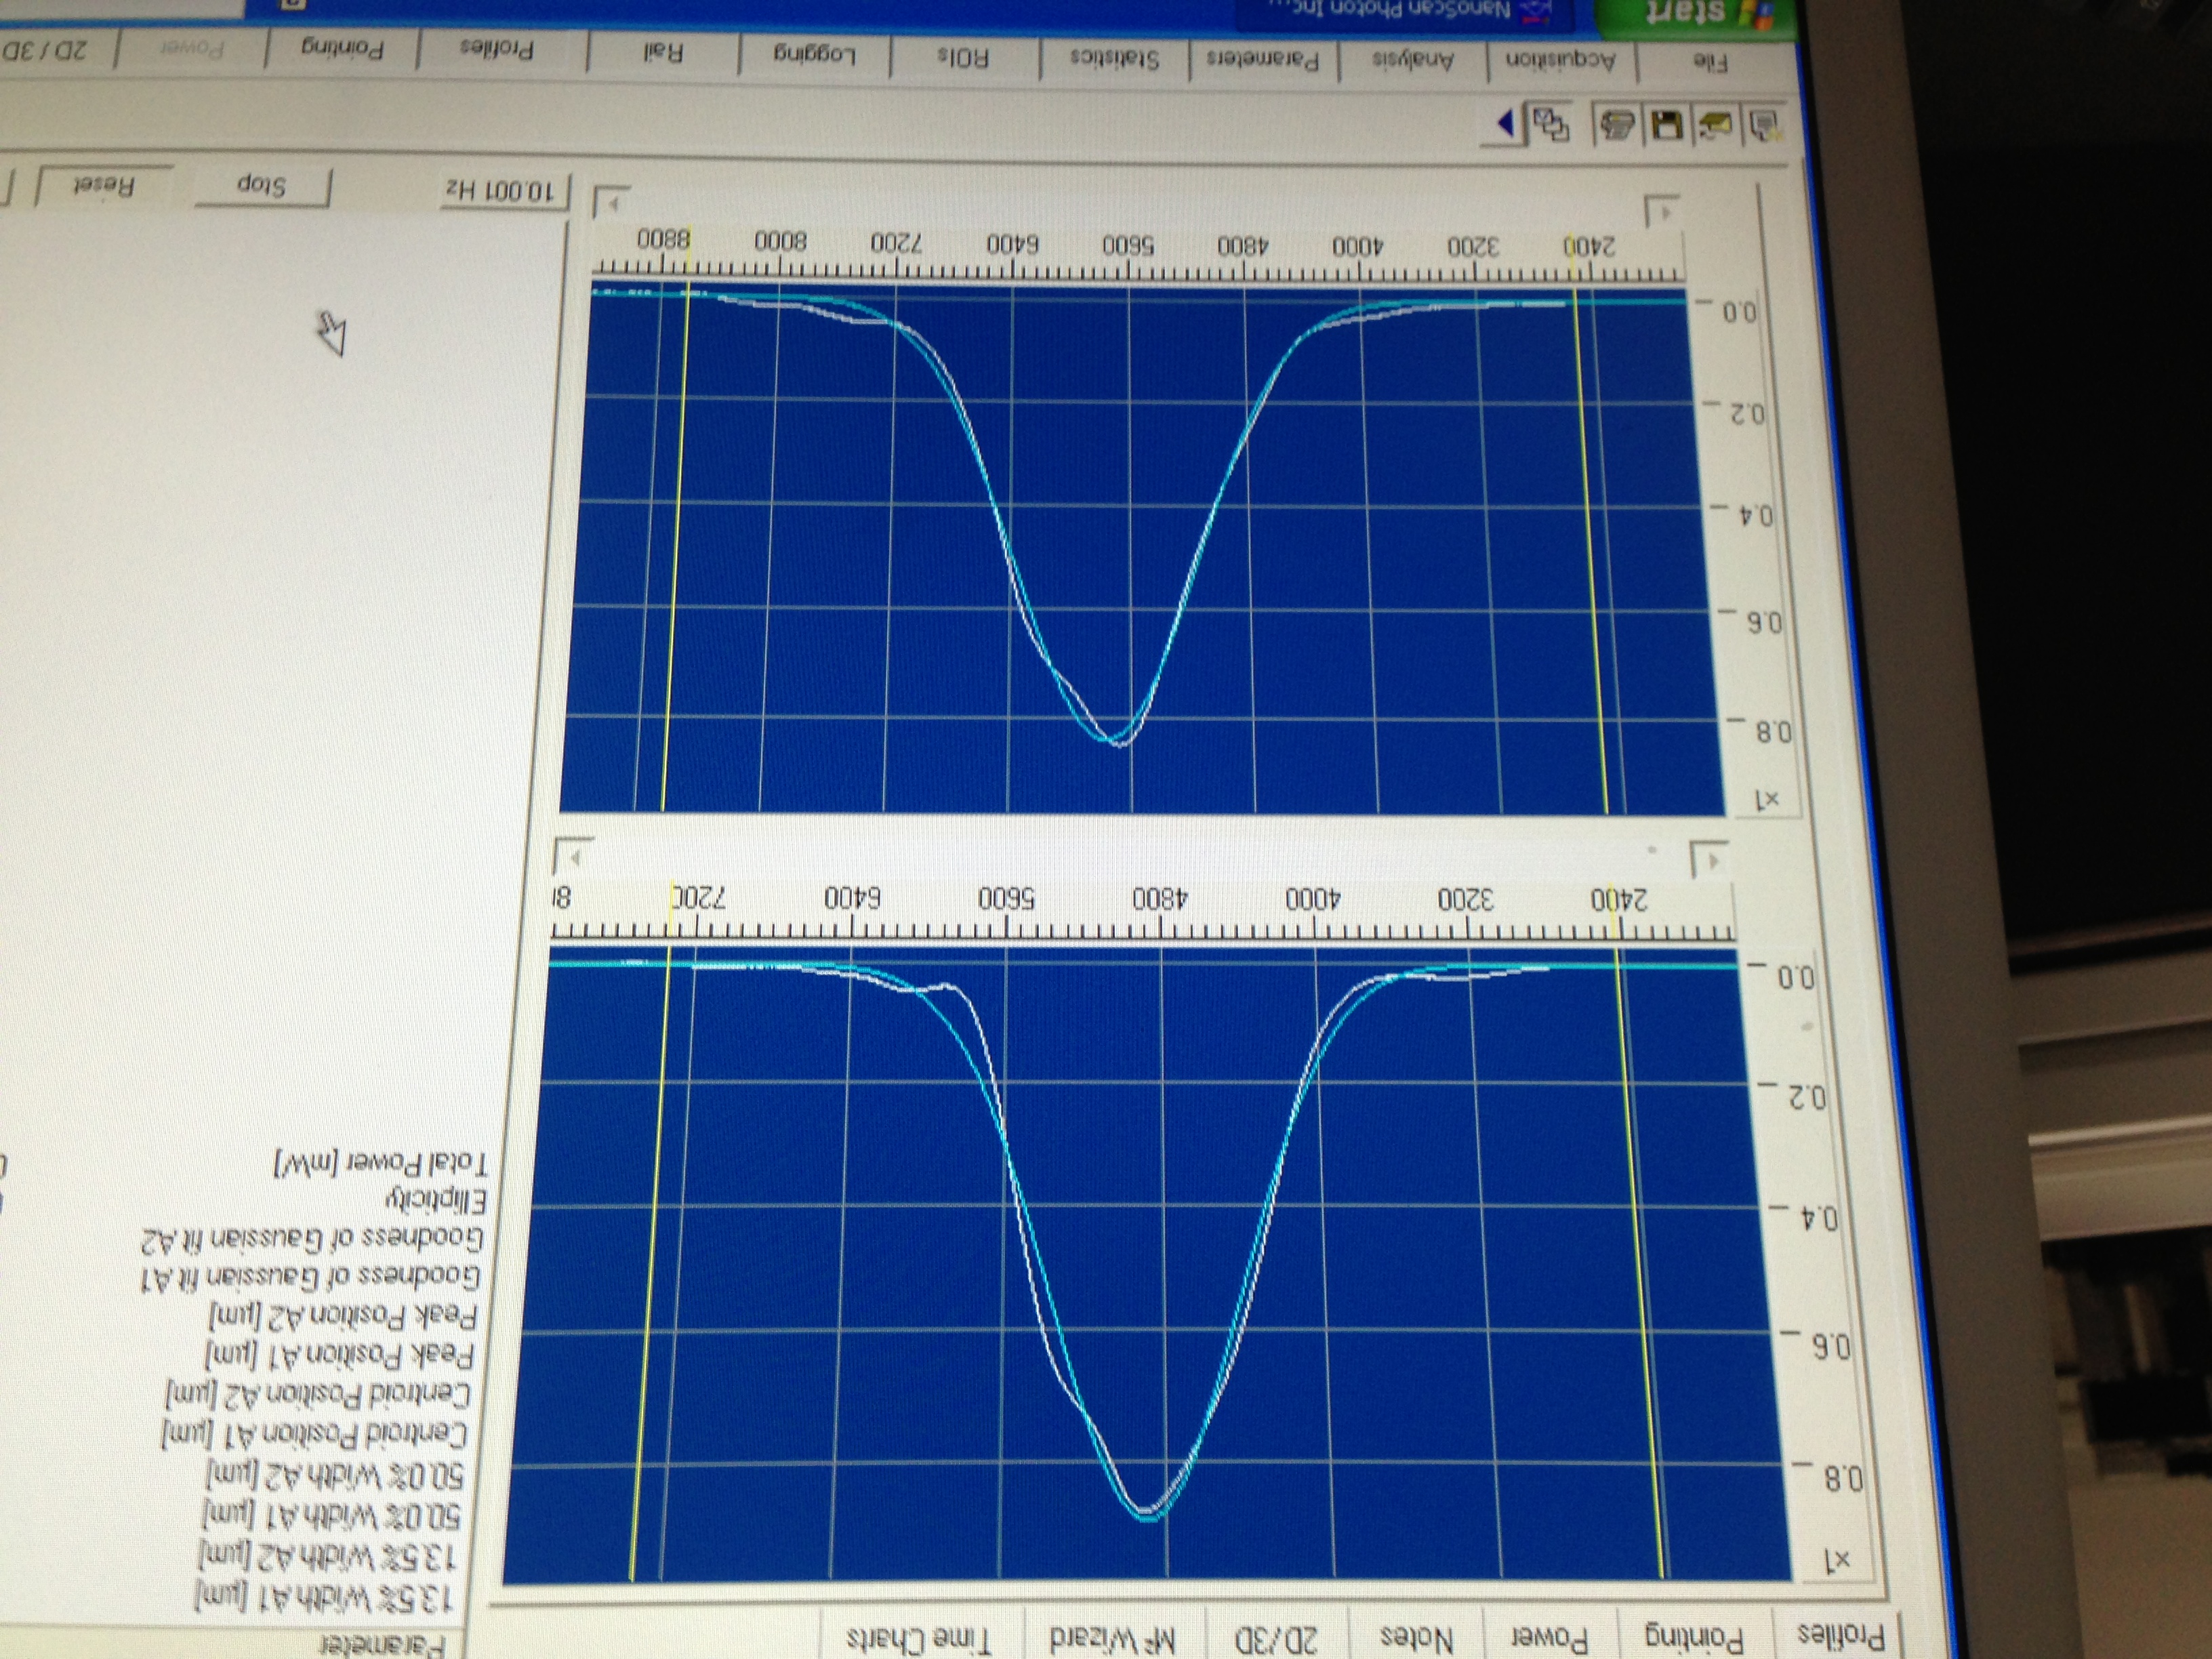
The second picture (1064nmFILowCurrent.pdf) shows the beam profile after the FI with the current set to 0.803A (about 10mW of power)
The third picture (1064nmFIFullCurrent.pdf) shows the beam profile after the FI with the current set to 1.503A (about 100mW of power)
In these images, the top graph is of the horizontal profile and the lower graph is of the vertical profile. Immediatly after the laser aperature, we see a nice gaussian profile for the vertical profile. As expected, the horizontal profile does not fit a guassian as nicely. After the FI, the vertical profile deviates from the guassian shape. We attempted to adjust the FI alignment in order to improve this profile; however, it only worsened the profile. (Tomorrow I will collect raw data of the beam profiling after the FI).
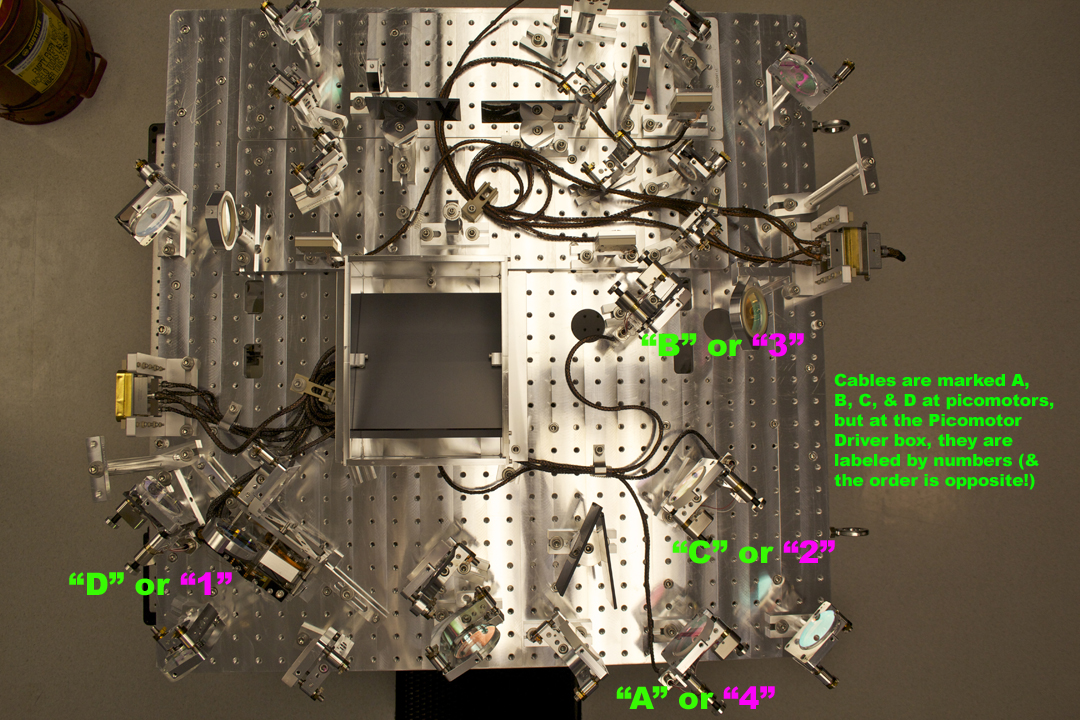
(Note: See D1100607-v13 for table layout as a reference)
(Note: Temporary shin was placed below FI to obtain 4in required height)