Dan Brown, Cheryl, Craig
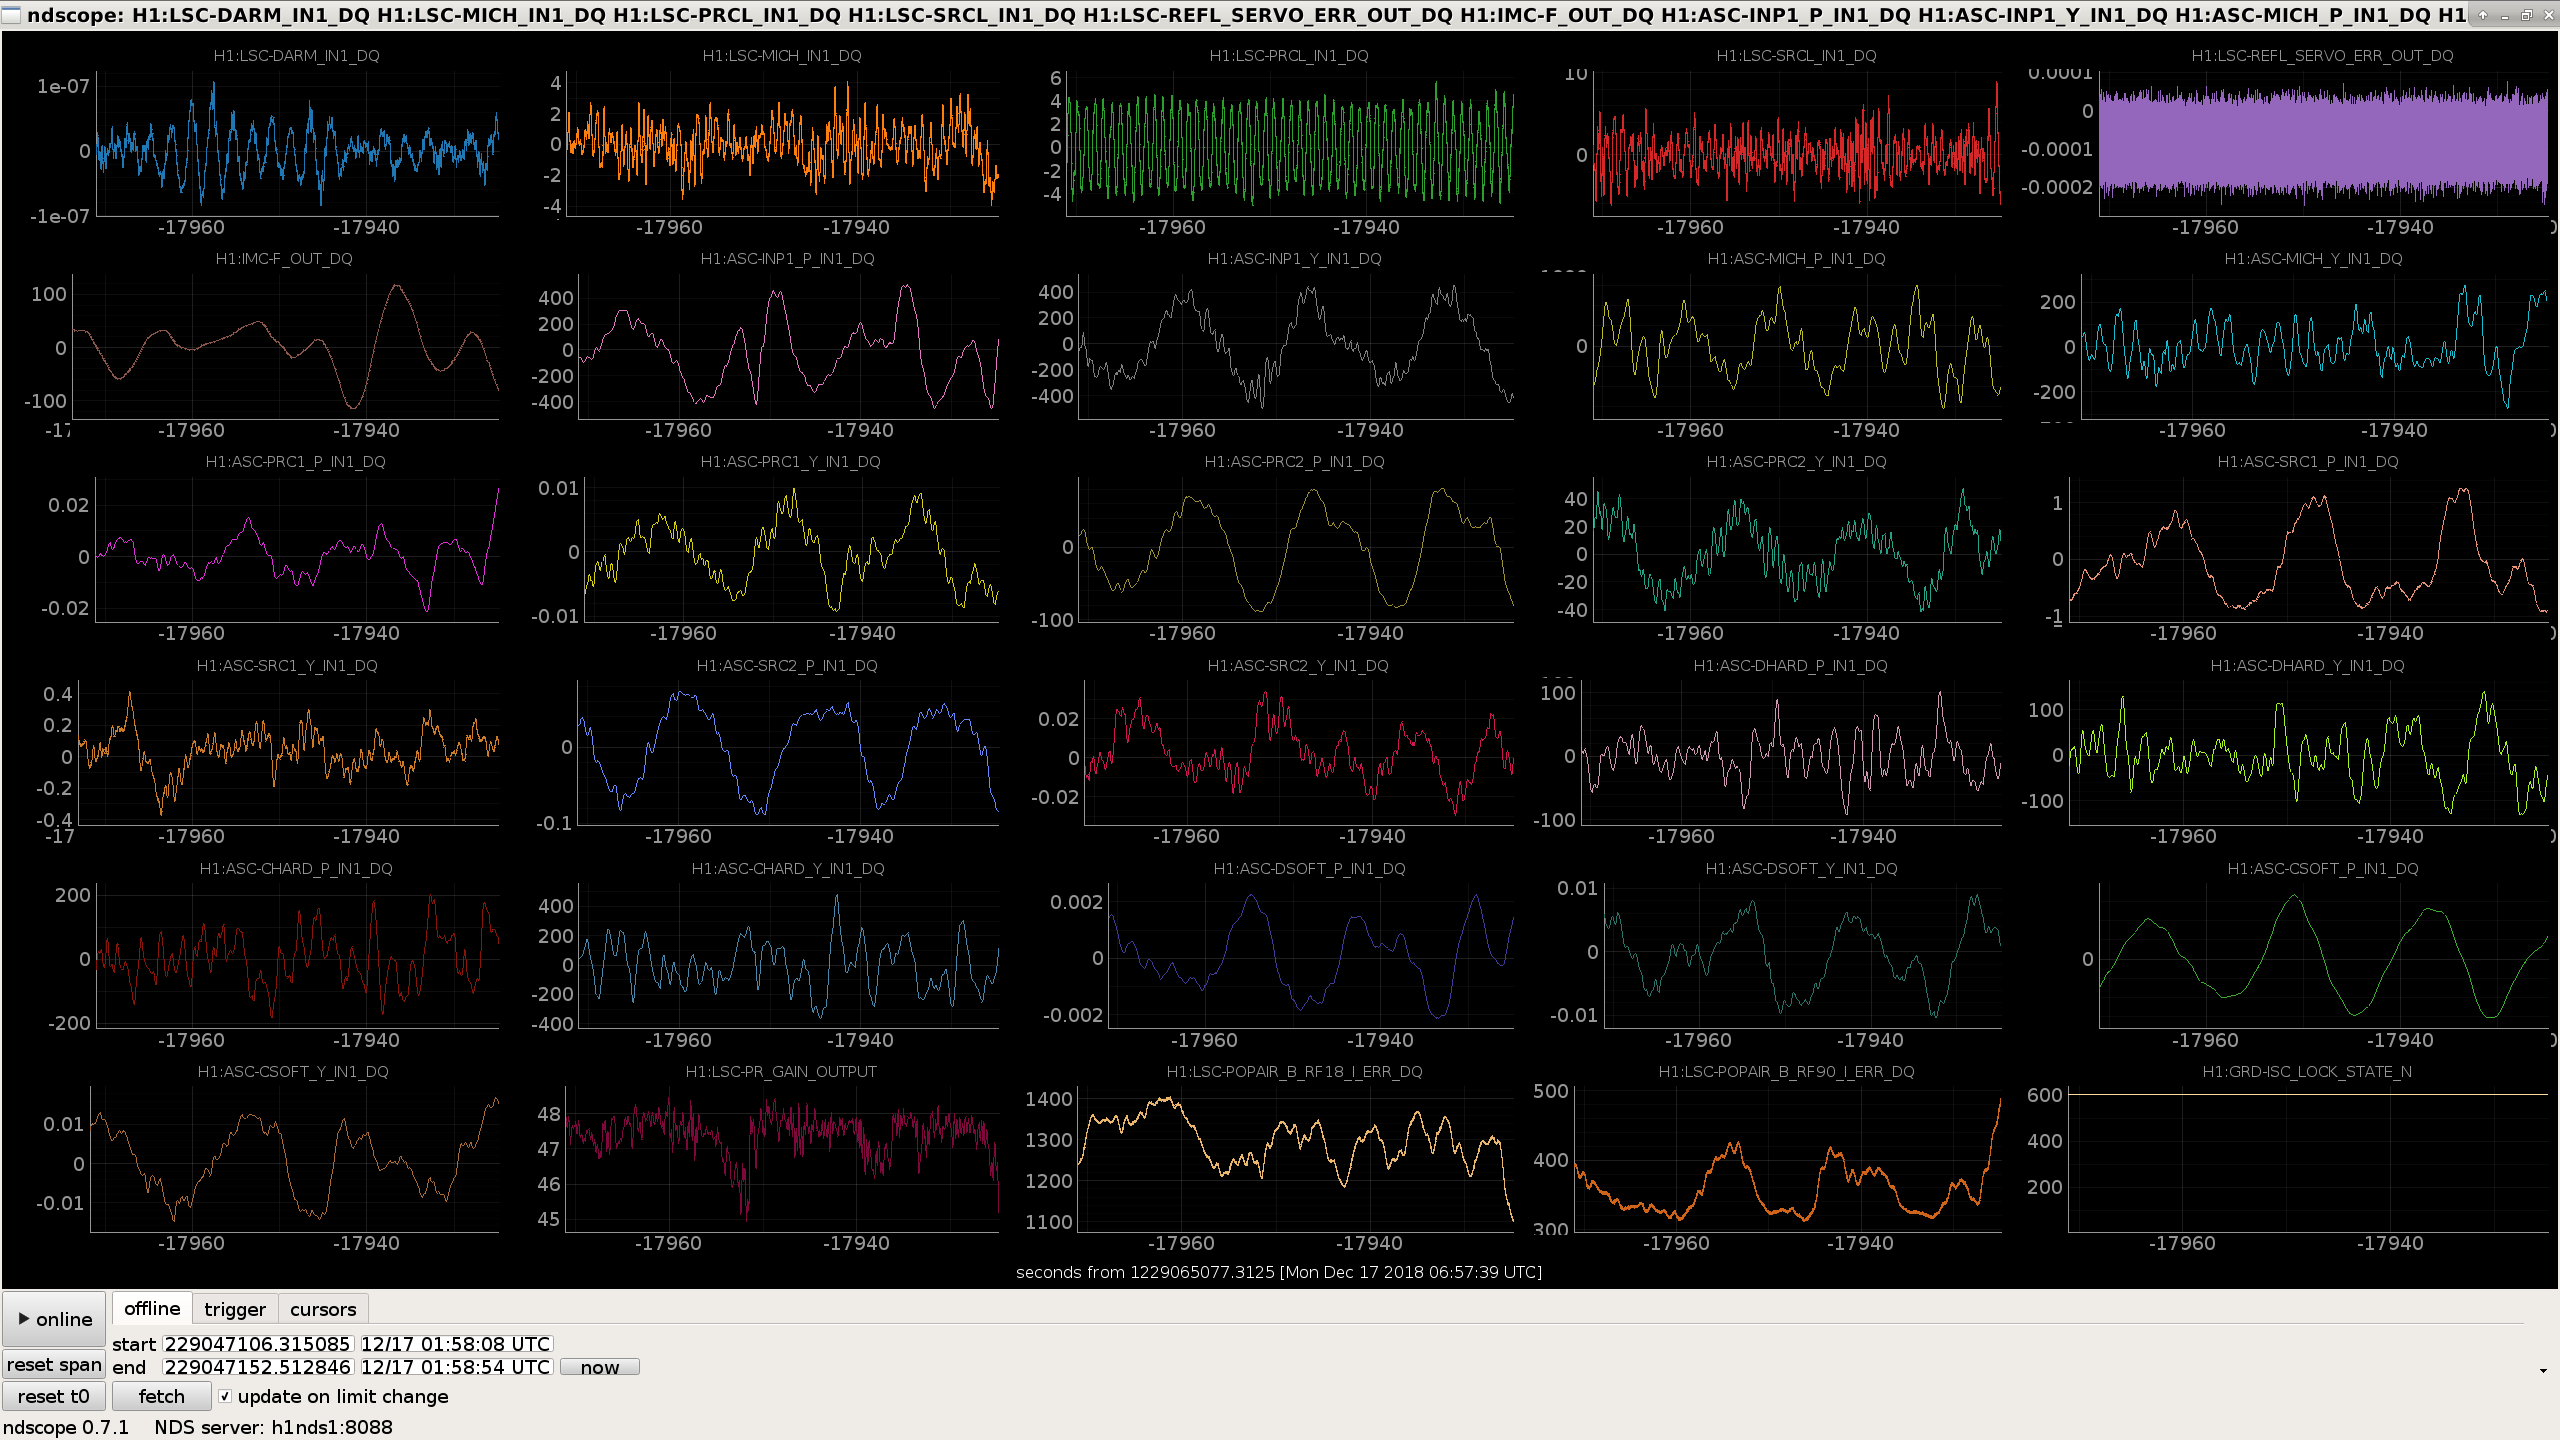
All three observatories have switched on the OBSERVING bit, and are acquiring triple coincident data. (pic 1) #ER13
Some notes from Hanford Saturday Night Locking:
- I fixed the INCREASE_POWER state so that is actually always goes to the power set in lscparams.input_power['NLN'], which is 20 watts currently. Previously it would stop anywhere between 10 and 20 because of a race condition within the state. We lost lock once while trying to get through LOWNOISE_ASC with only 10 watts.
- Dan and I tried engaging the DRMI ASC straight after locking DRMI (INP1, PRC1/2, SRC1/2) using the settings that are in there for full IFO. PRC1/2 were able to close, but made the alignment worse. SRC1/2 killed the DRMI lock straightaway.
- MICH ASC sensor transitions are extremely rough, and have caused some locklosses right after acquiring DRMI.
- We keep having FAST SHUTTER DID NOT CLOSE guardian warnings, even though the fast shutter appears to be working fine. This causes us to linger in DOWN forever rather than continuing to lock. This seems to be happening because the LOCKLOSS_SHUTTER_CHECK guardian is always unhappy with the results of its shutter check test.
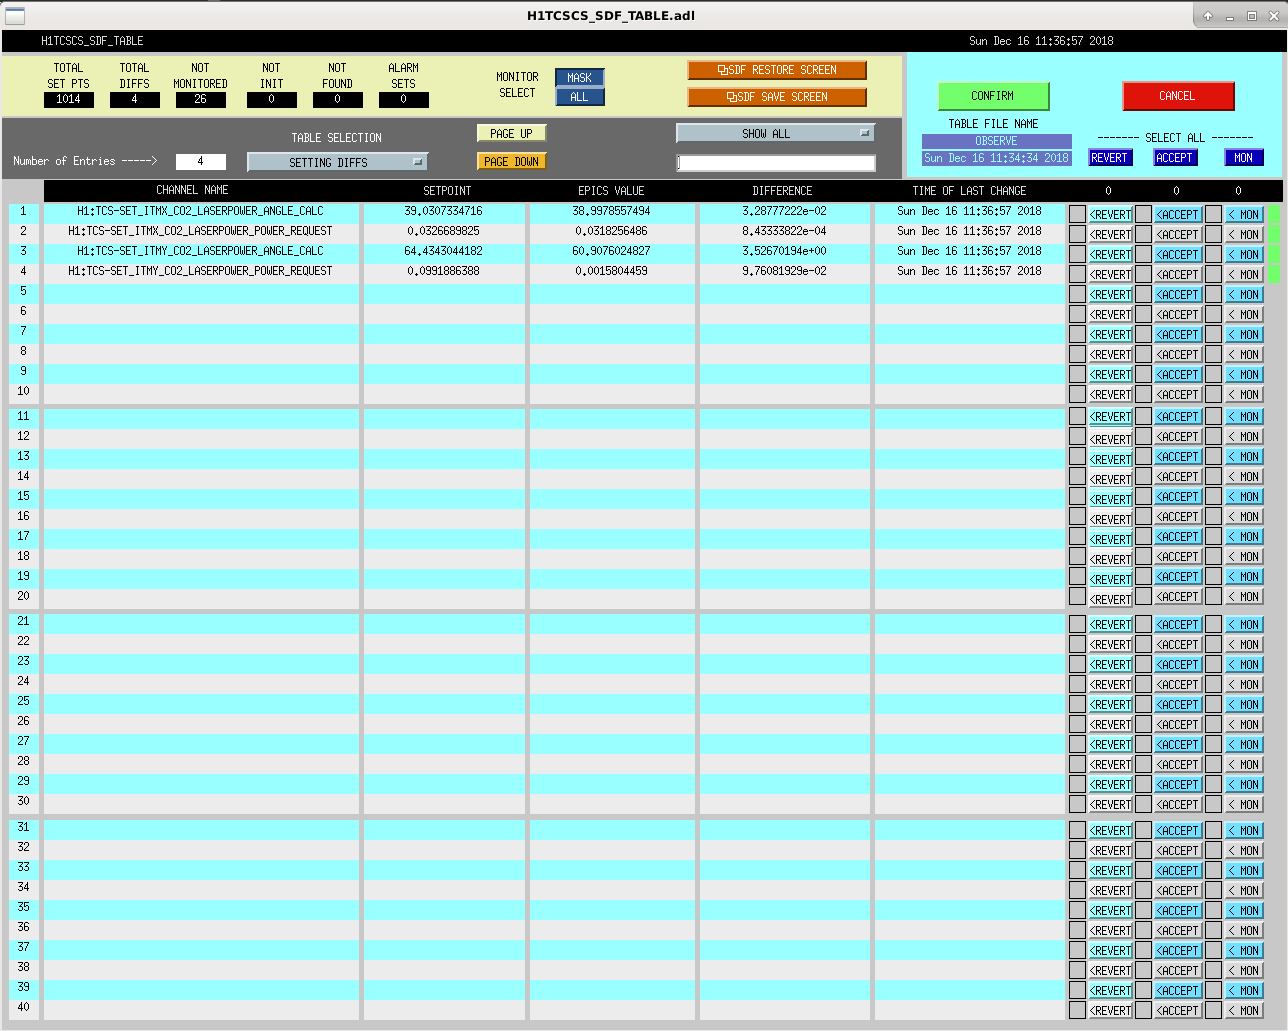
- Dan changed the ITMY ringheater set value from 0.89 W to 1.15 W for both upper and lower heaters at 2018/12/16 1:43:54 UTC. Waiting for things to thermalize to see if this was a move in the right direction.
EDIT:
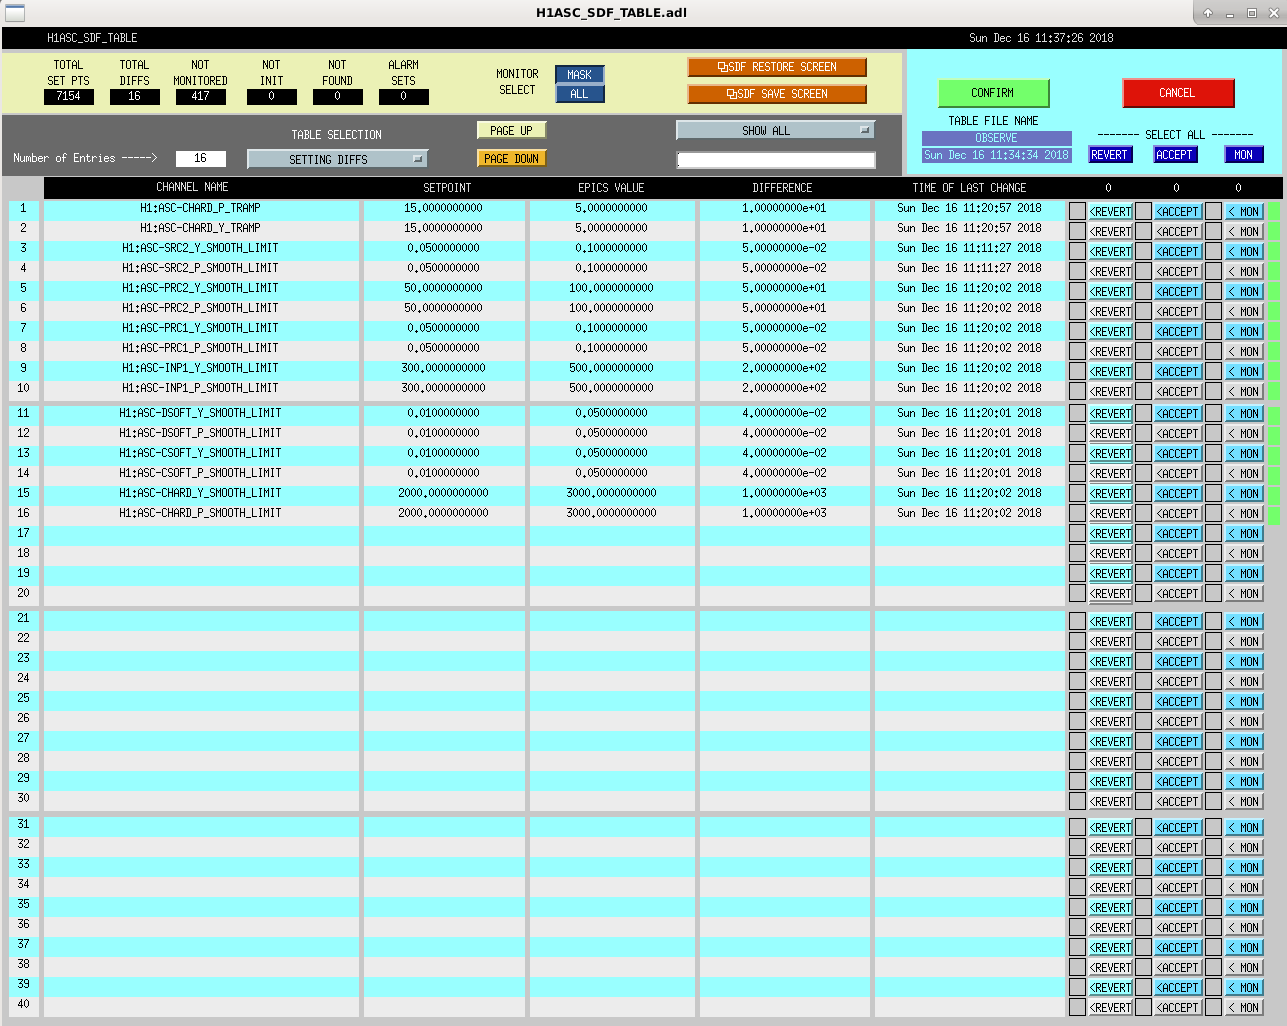
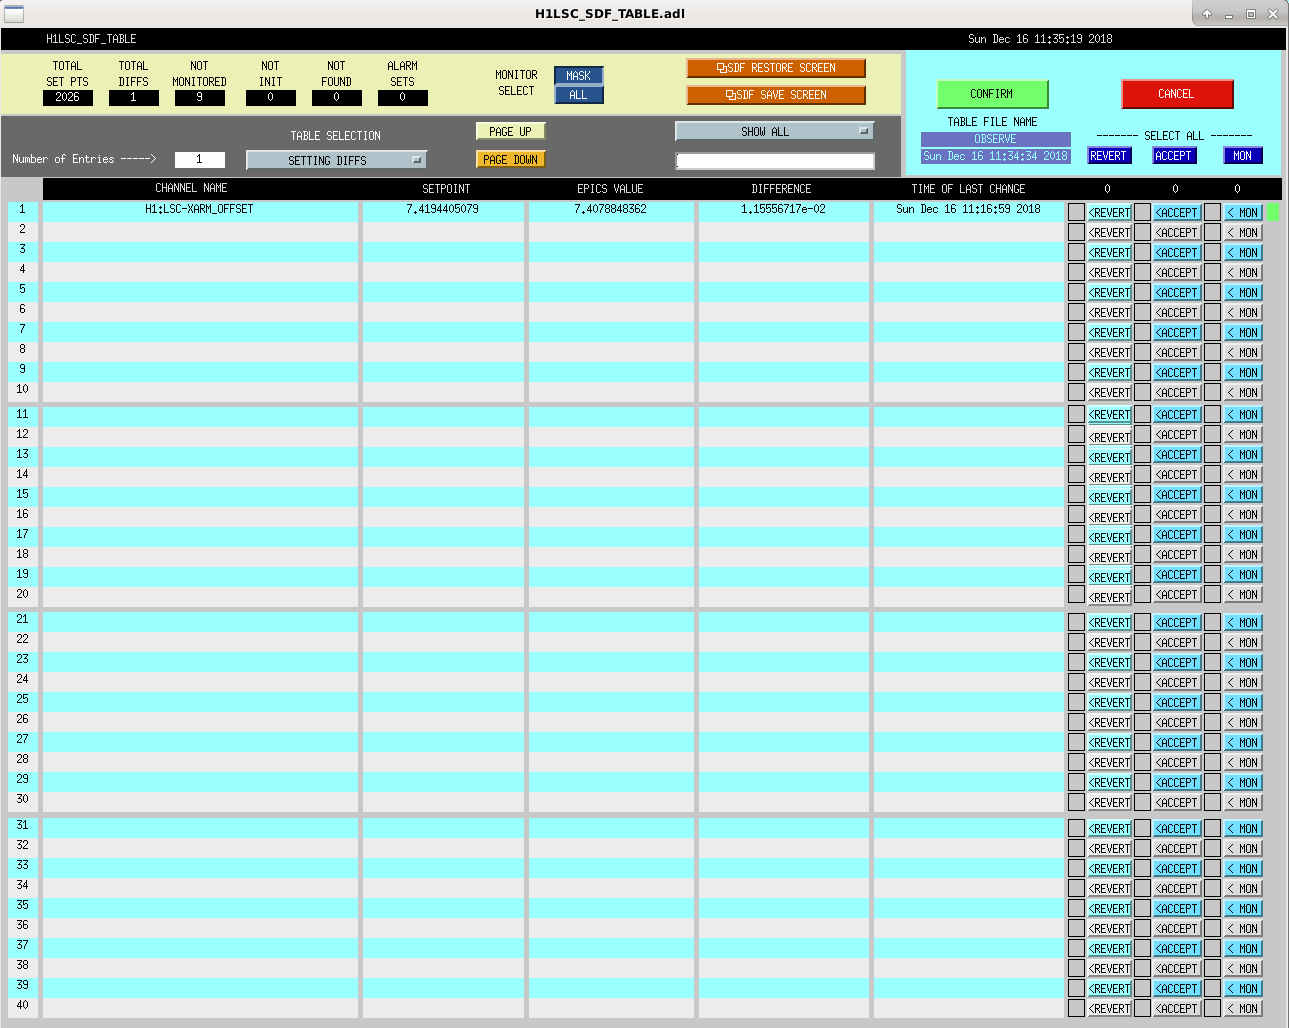
- We've had two locklosses tonight, neither of which we understand. There was nothing too suspicious in any of the ASC or LSC signals, the microseism is super high right now, 1 μm/s. I checked the drift monitors for locks so far, nothing seems to out of the ordinary, maybe SR2 is drifting more than the other optics during the course of the locks, could the significant differential heating of our ITMs be responsible? (pic 3, 4).
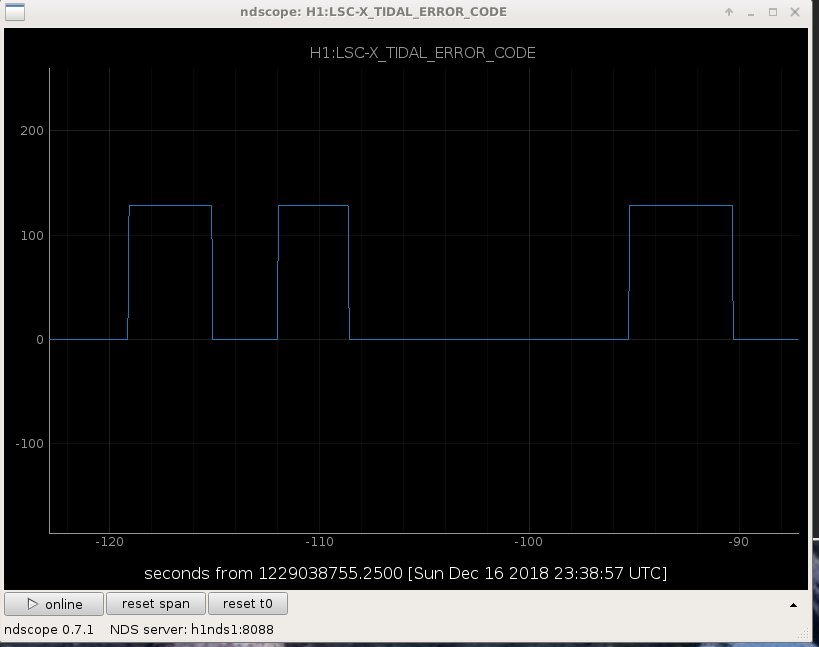
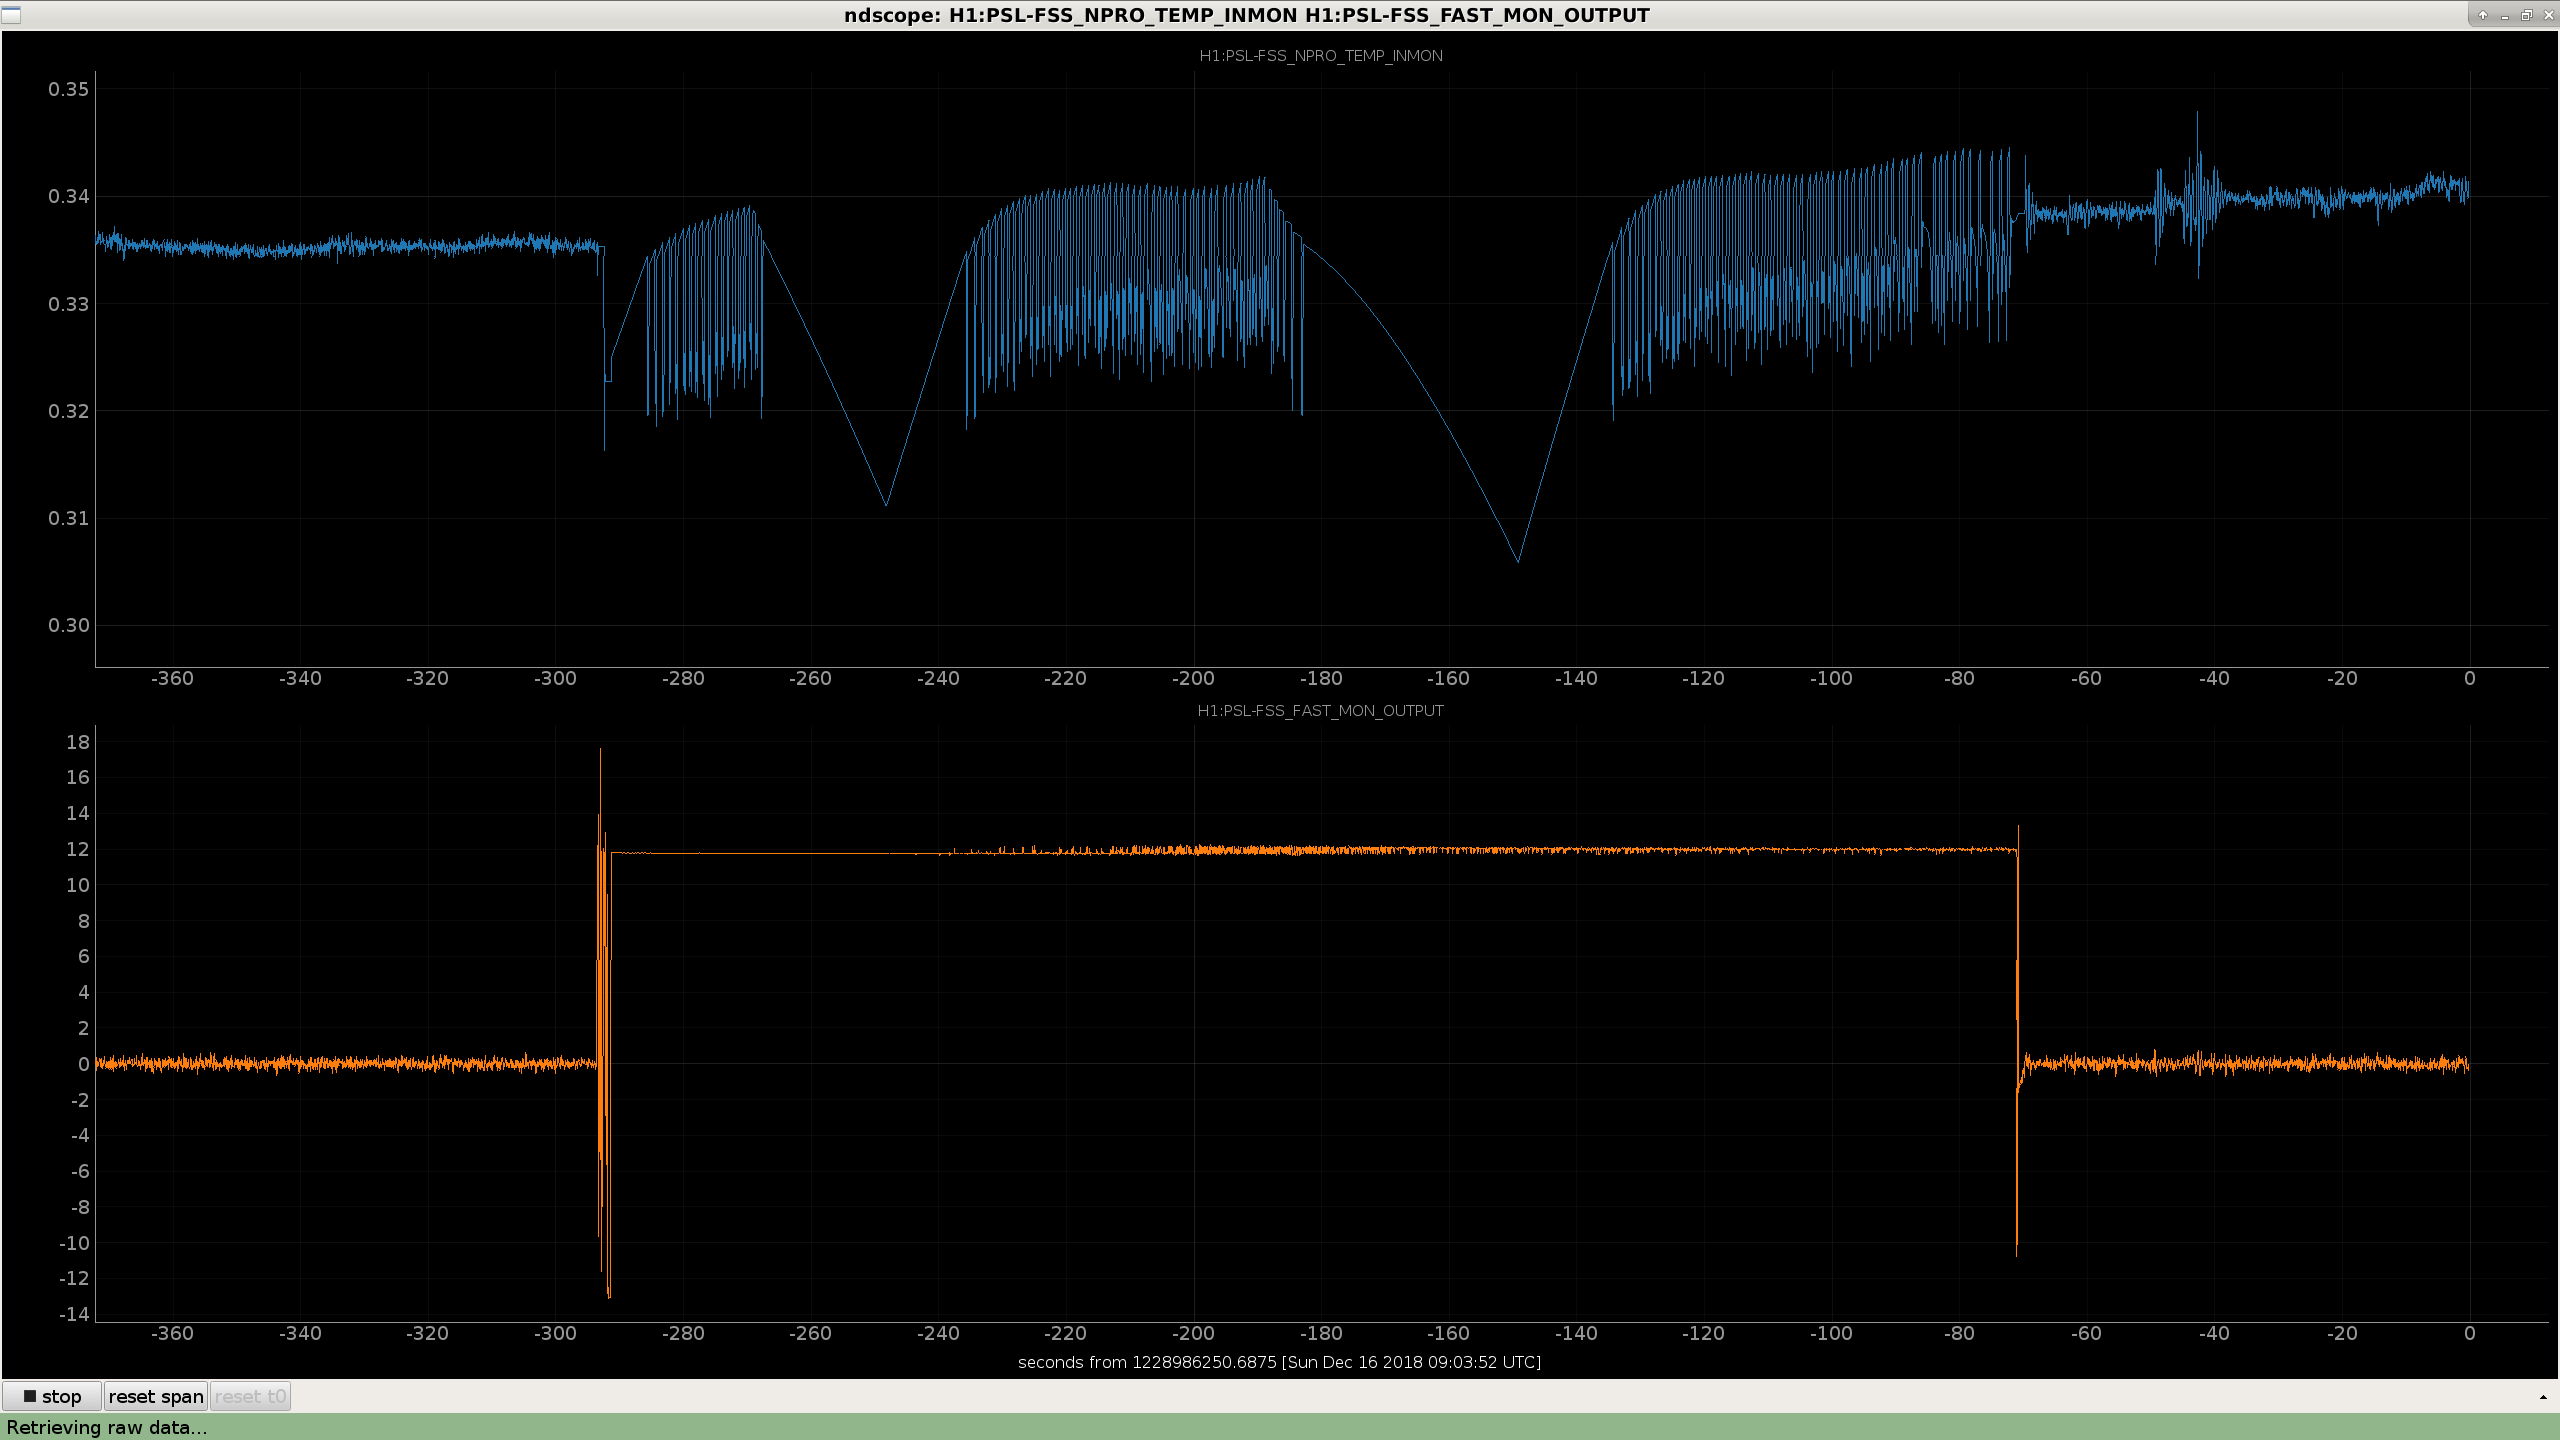
- After locklosses, the FSS seems to be losing lock and remaining down for ~4 minutes or so. The laser crystal temperature seems to be jumping around a lot when it gets close to the correct values (pic 2). I don't understand enough about the FSS autolocker to change anything, but it used to reacquire in under a minute.
- We just recovered the IFO in 28 minutes without us touching it.
EDIT 2:
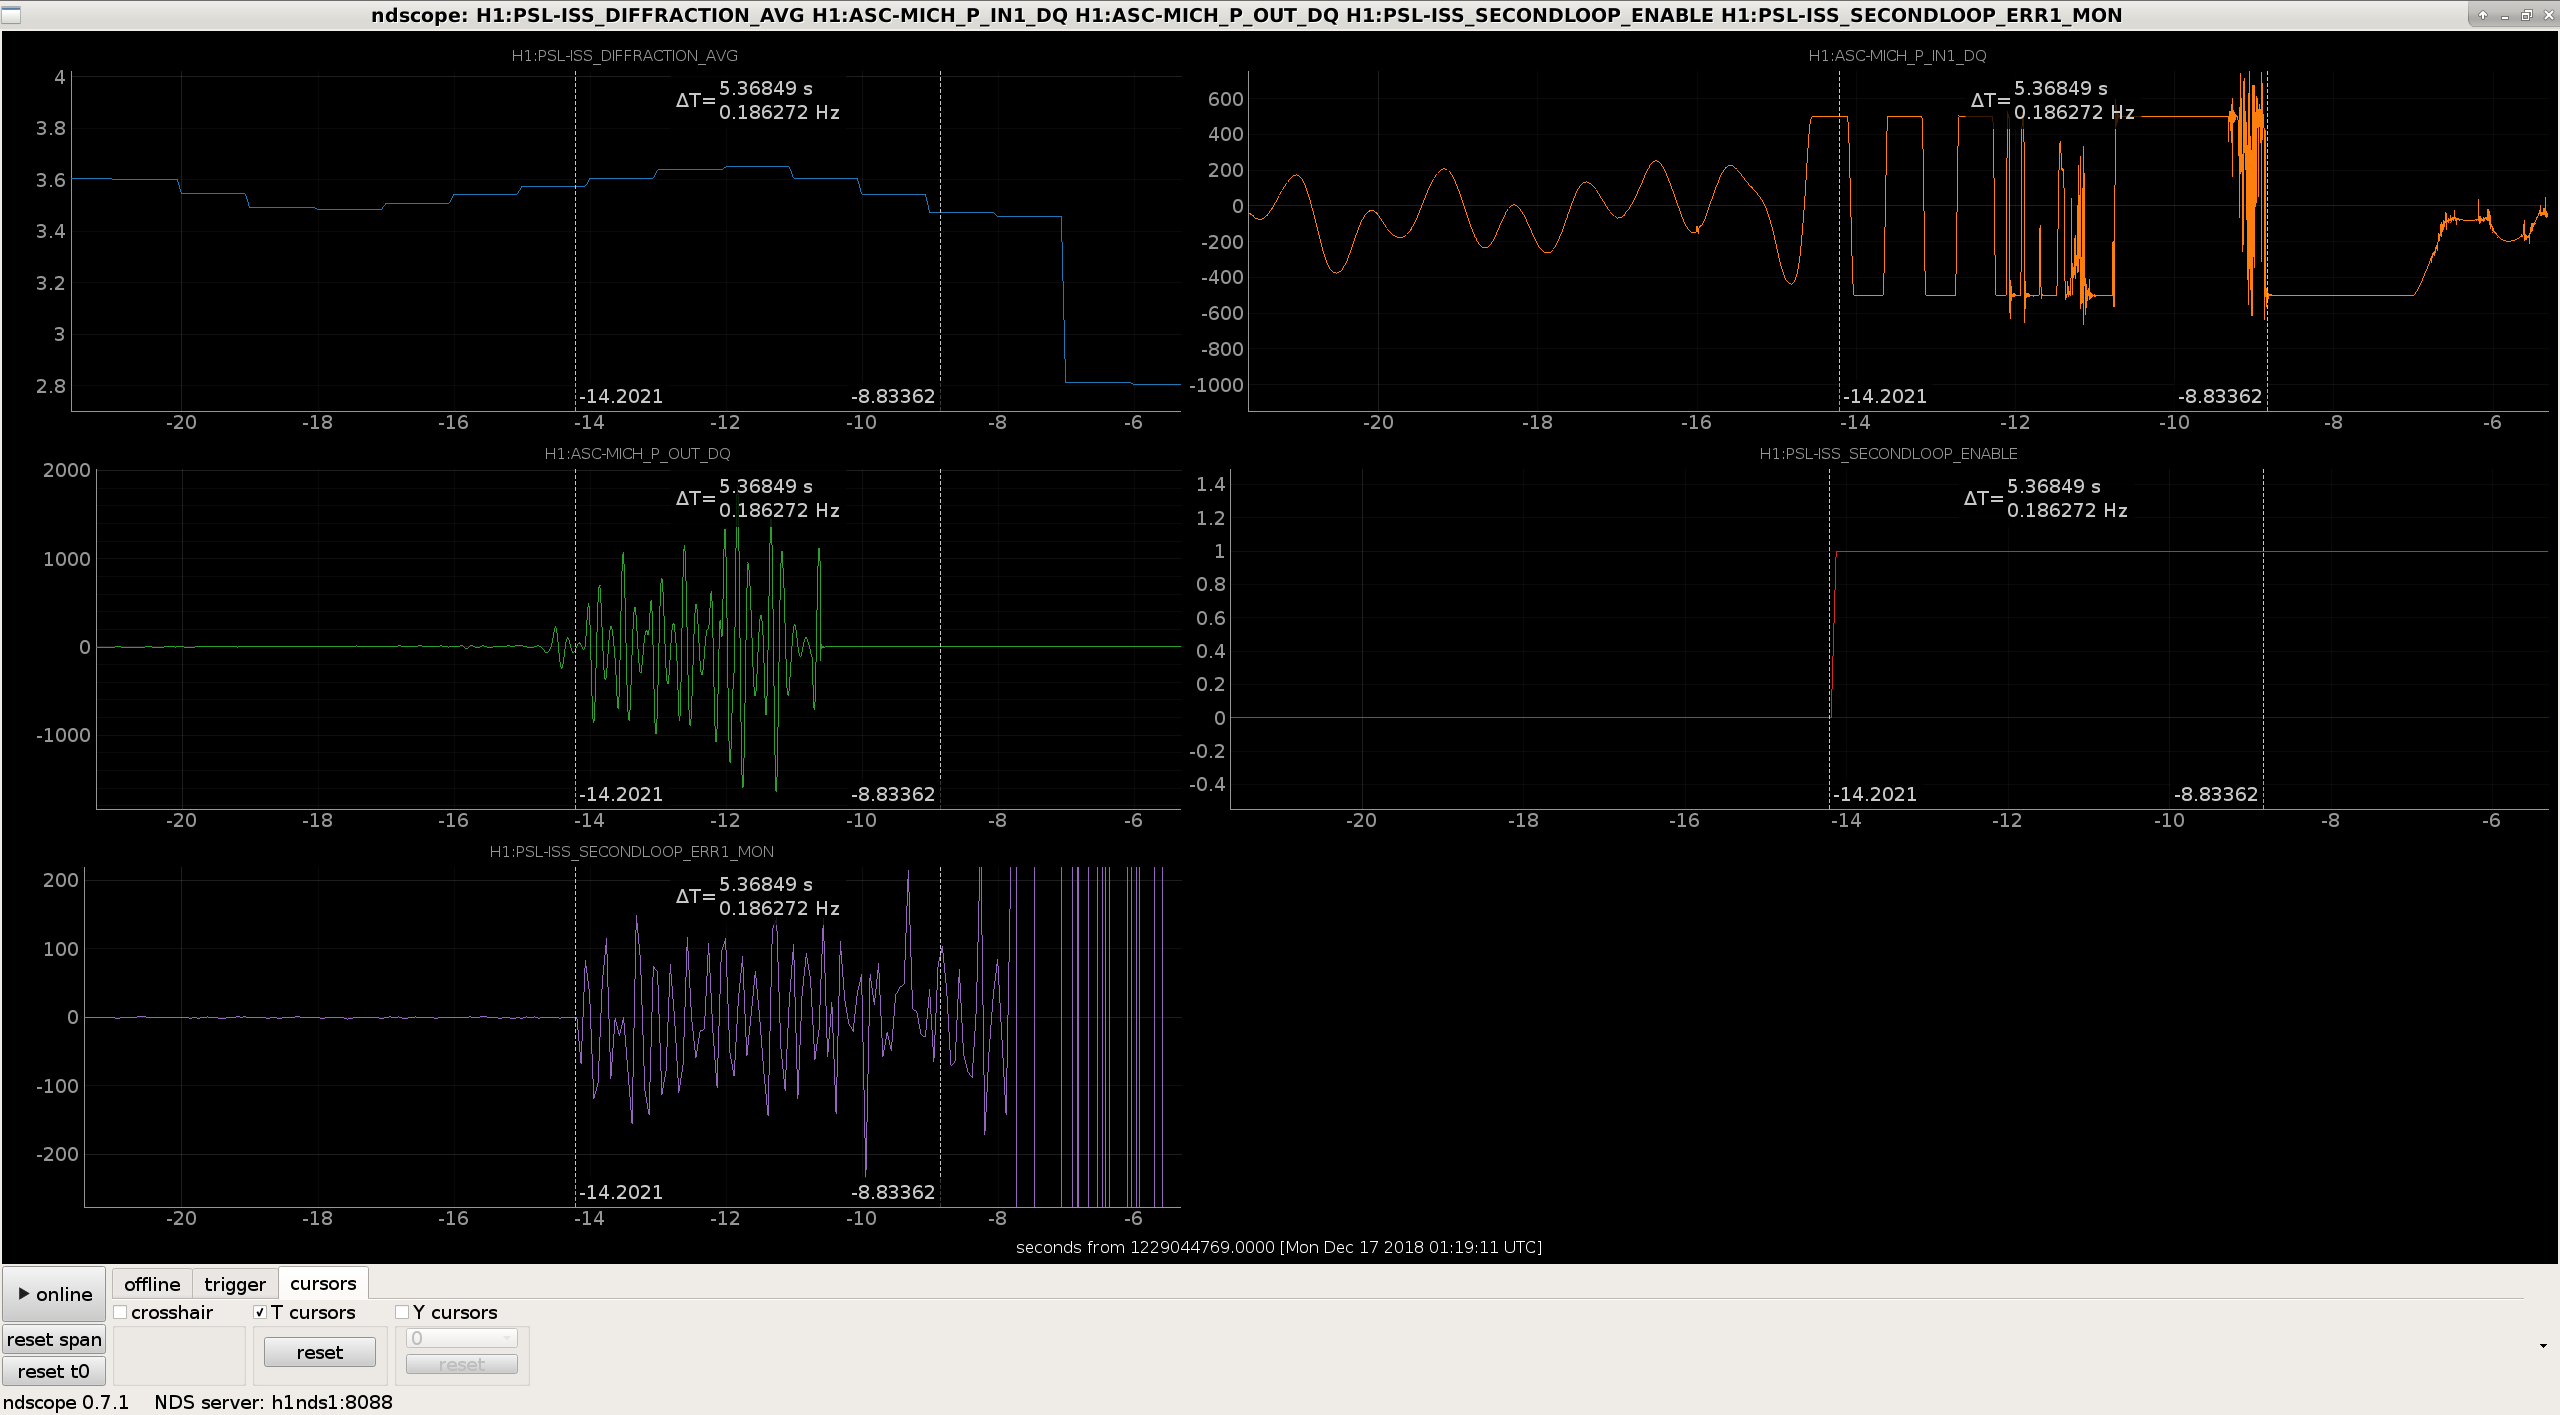
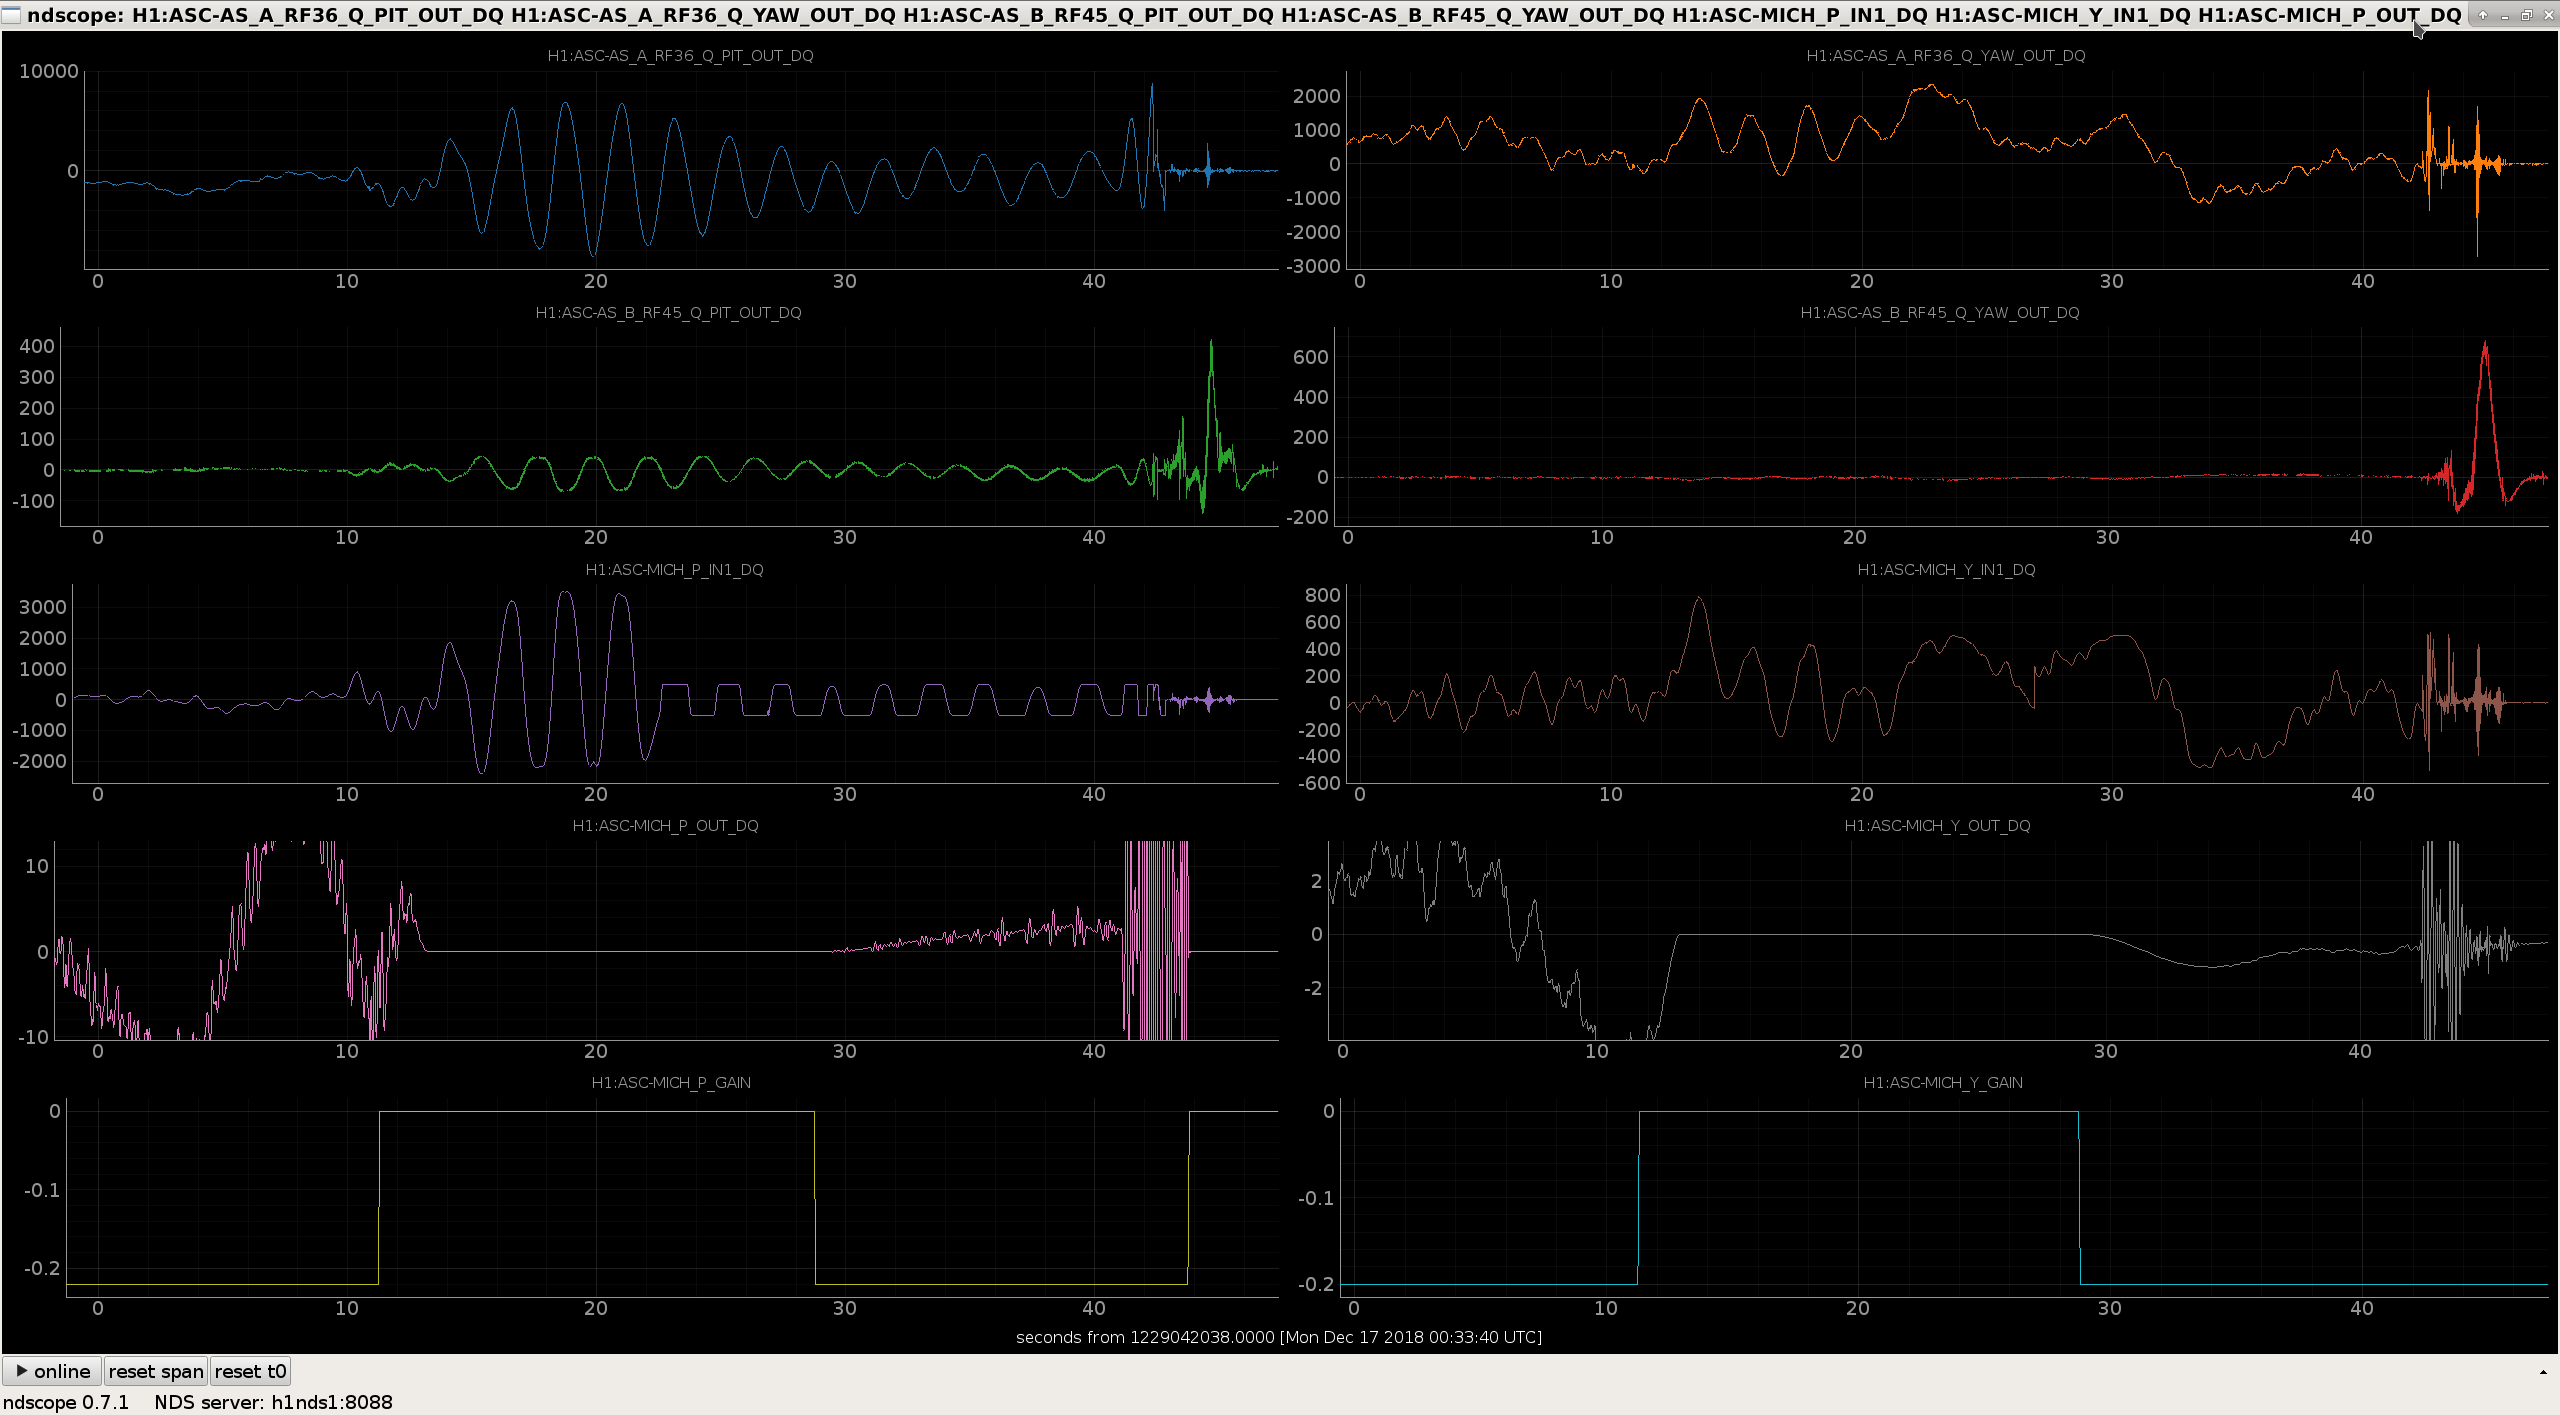
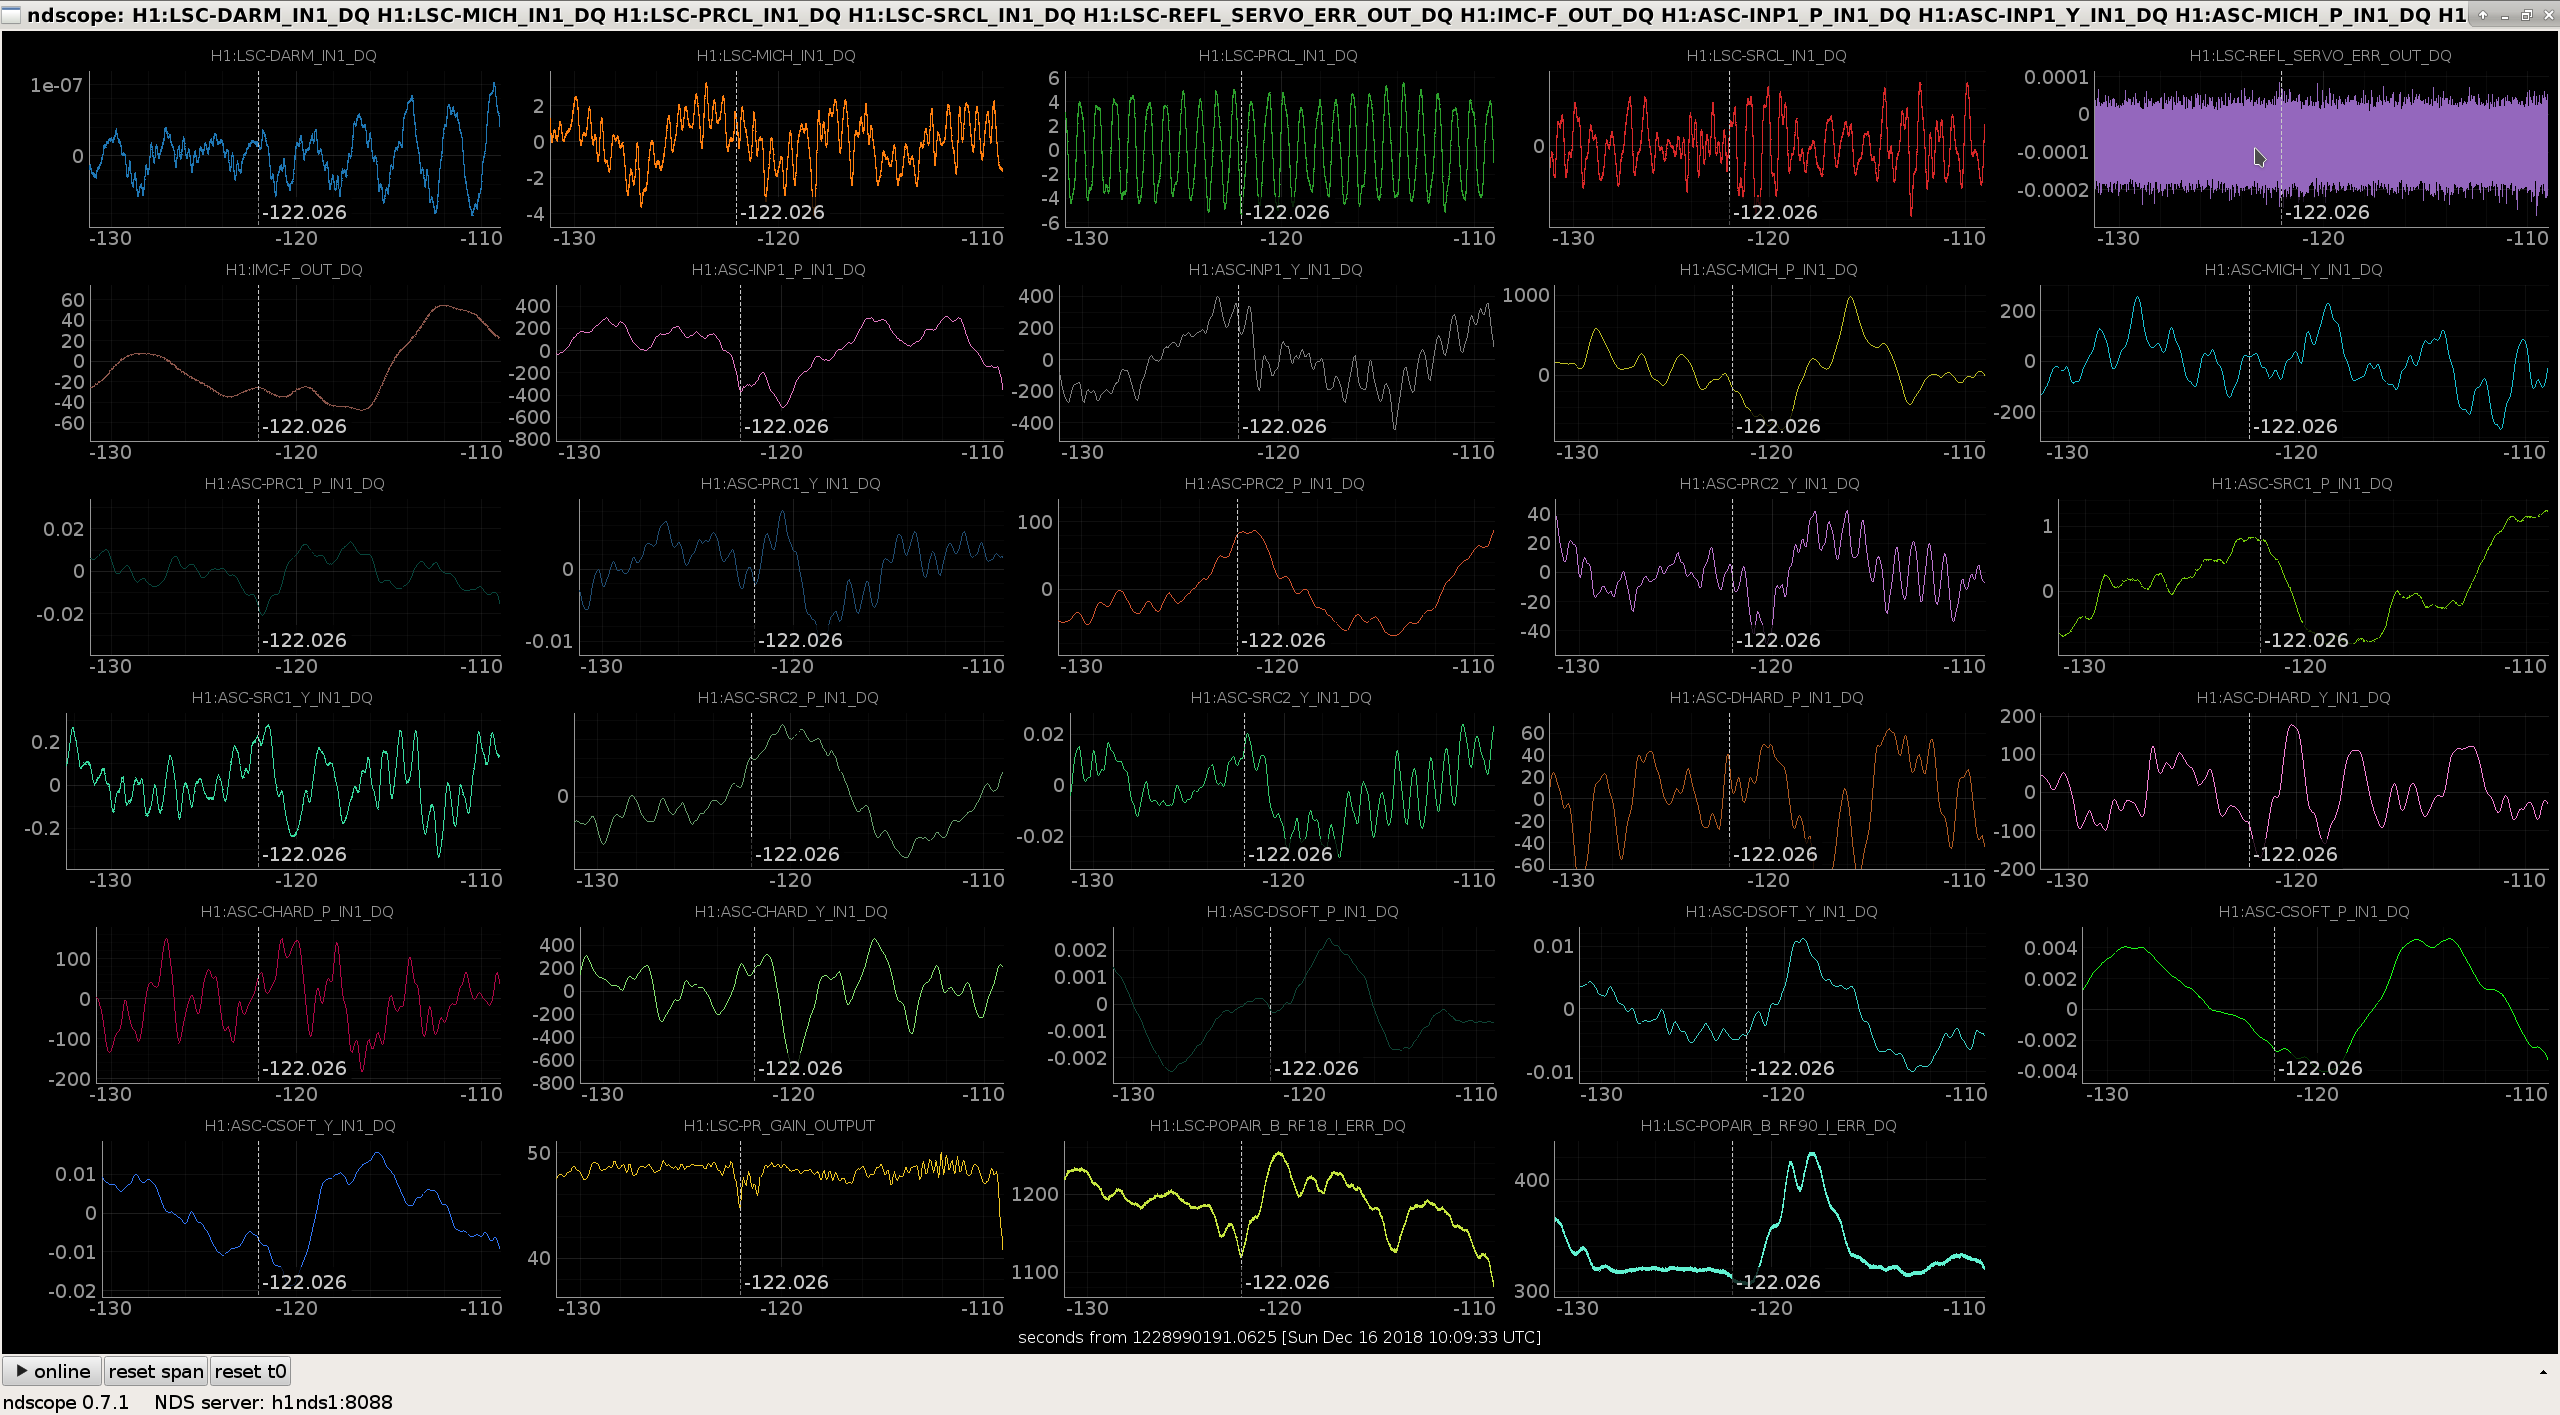
- We lost lock again after about an hour. It's possible that this lockloss was due to INP1, PRC1, and PRC2 pitch, but I'm not certain. It seems like the locklosses tonight have been due to ASC, because the PR gain and POPAIR 18 and 90 respond slightly before the lockloss, and have been "dippy", (i.e. slow fluctions in power) all night. I accuse PRC1 and PRC2 pitch because they all happened to hit local extrema at the same time as the maximum dip in the power monitors (pic 5). The problem is these dips don't seem particularly egregious by themselves, especially considering the previous time series of these error signals.
 The lockloss tool stopped working 4 hours ago.
Problems today, in addition to
The lockloss tool stopped working 4 hours ago.
Problems today, in addition to