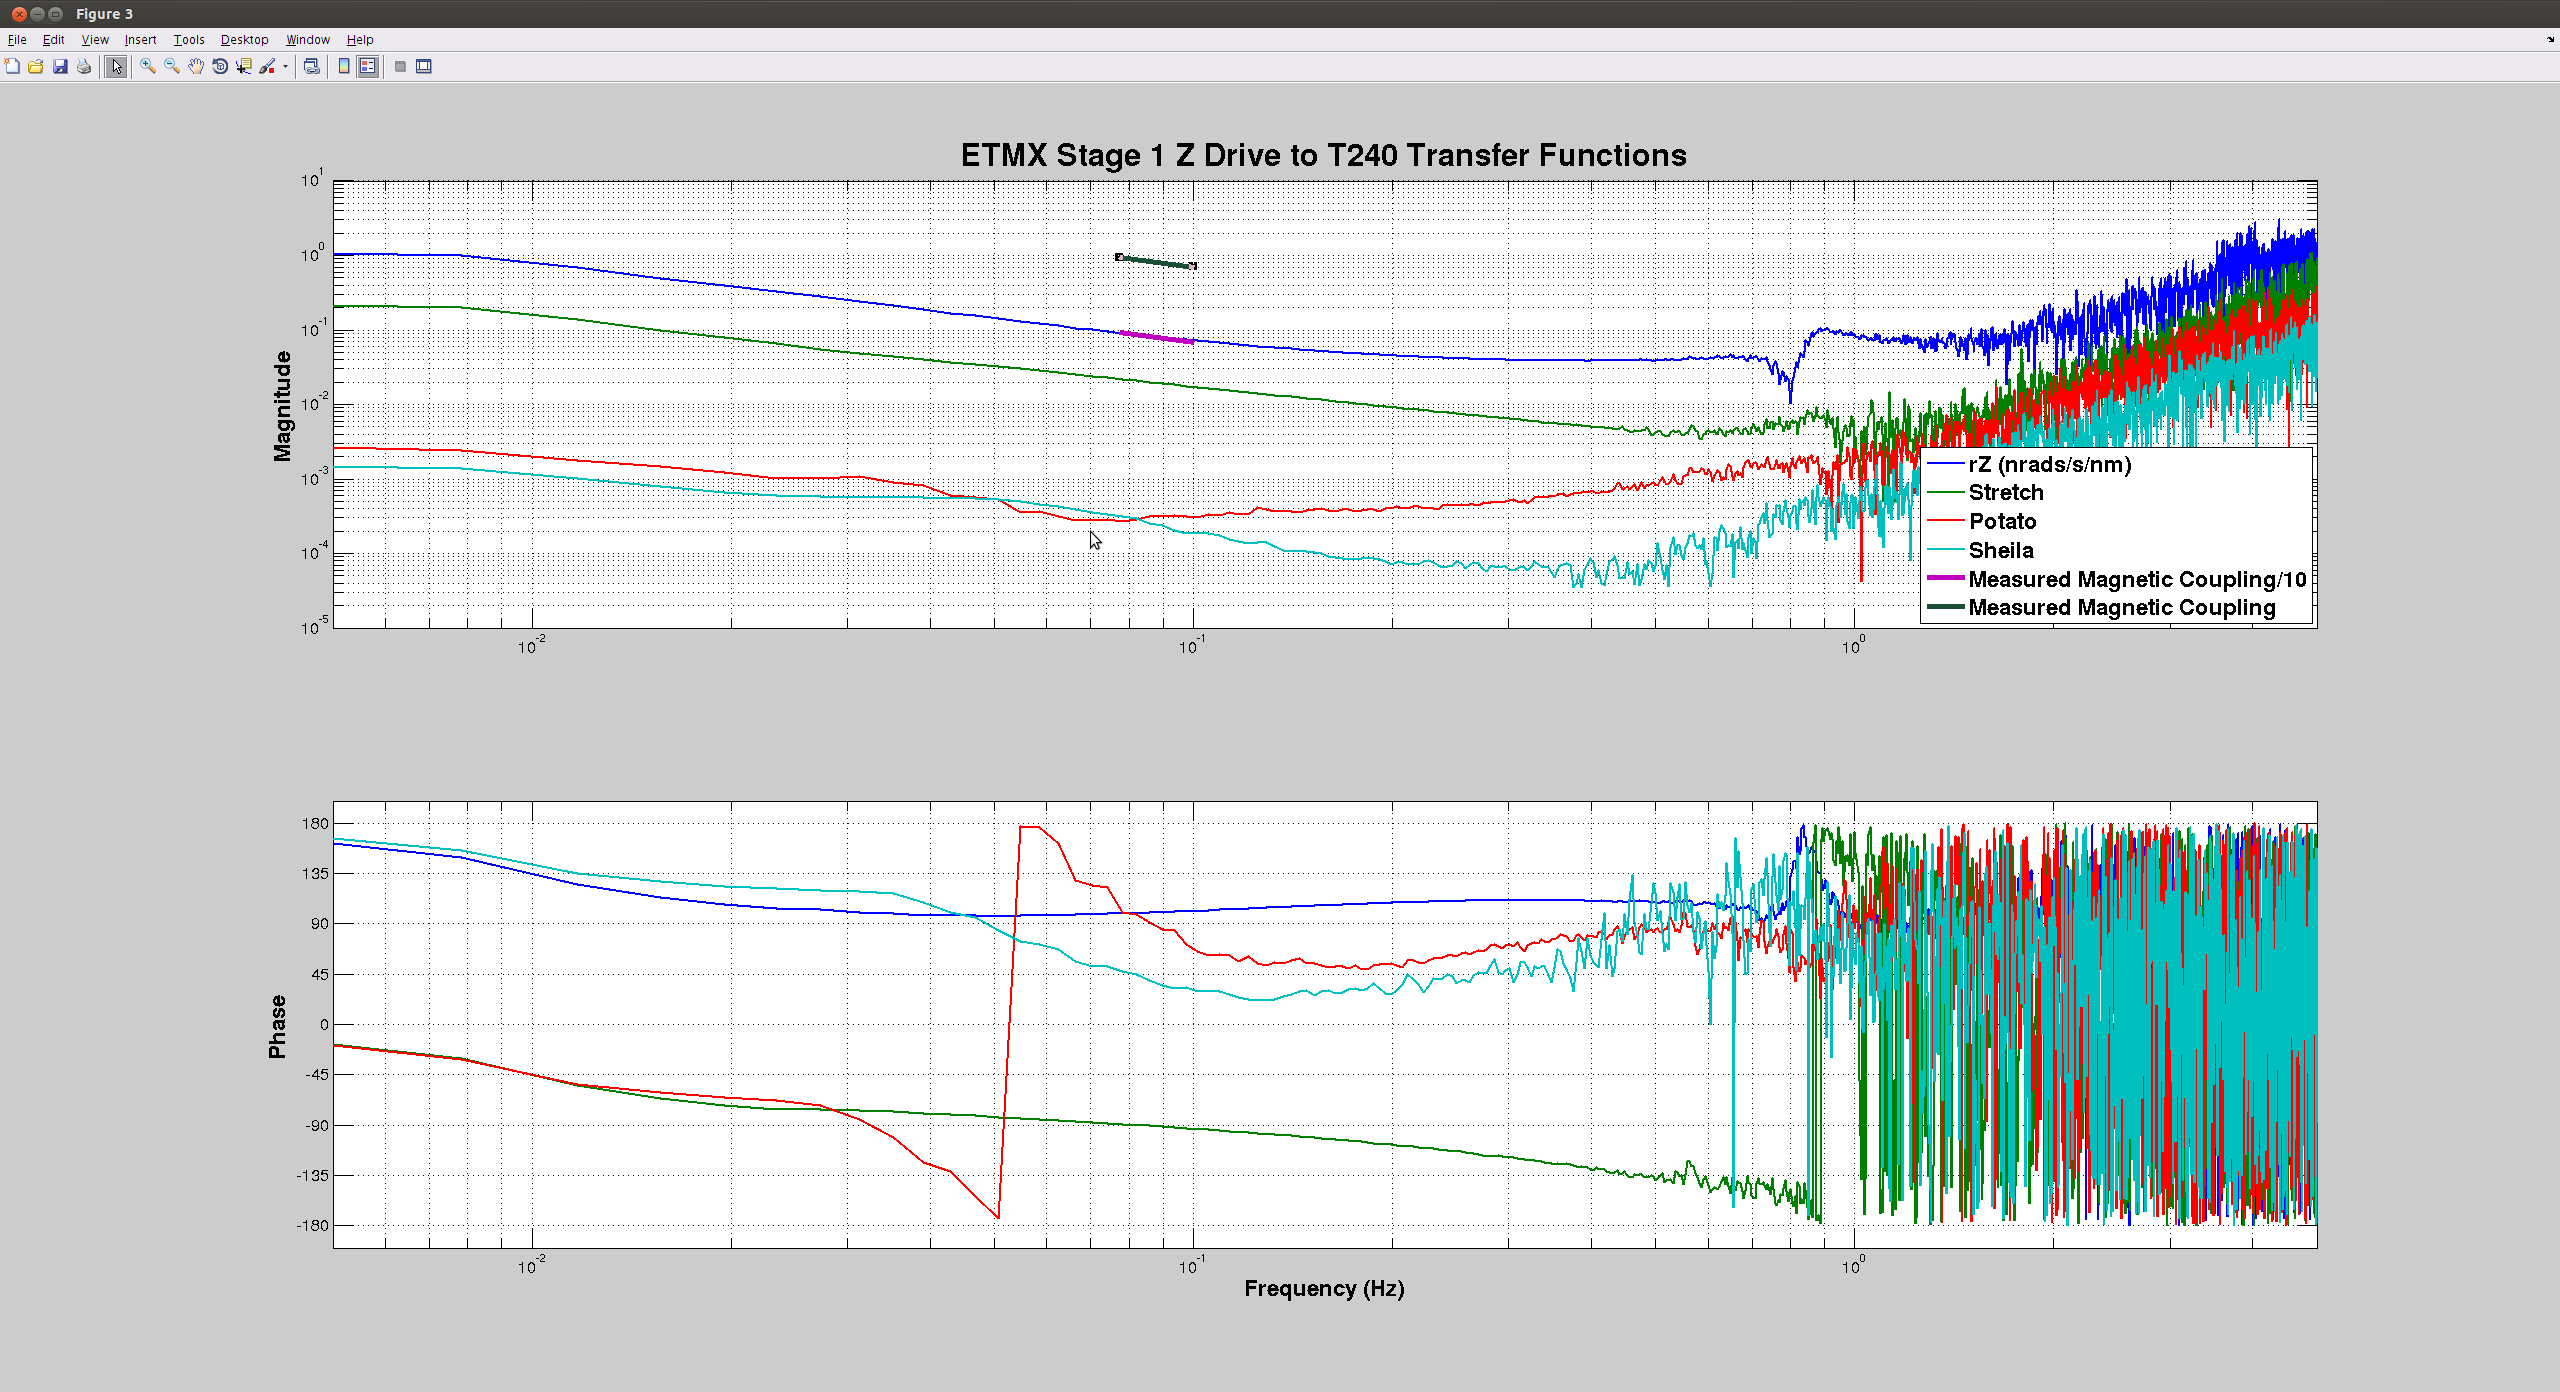
The attached screen shot ZtorZCoupling.ing shows the meaured transfer function from stage 1 Z drive to the T240 rZ signal (blue line) and the measured magnetic coupling which was done in the staging building, there are only
two points in this measurement as of now. If you divide the measured magnetic coupling by 10 it exactly matches the transfer function, so I'm not sure what is going on there, but the case for the mystery coupling being magnetic is pretty strong.
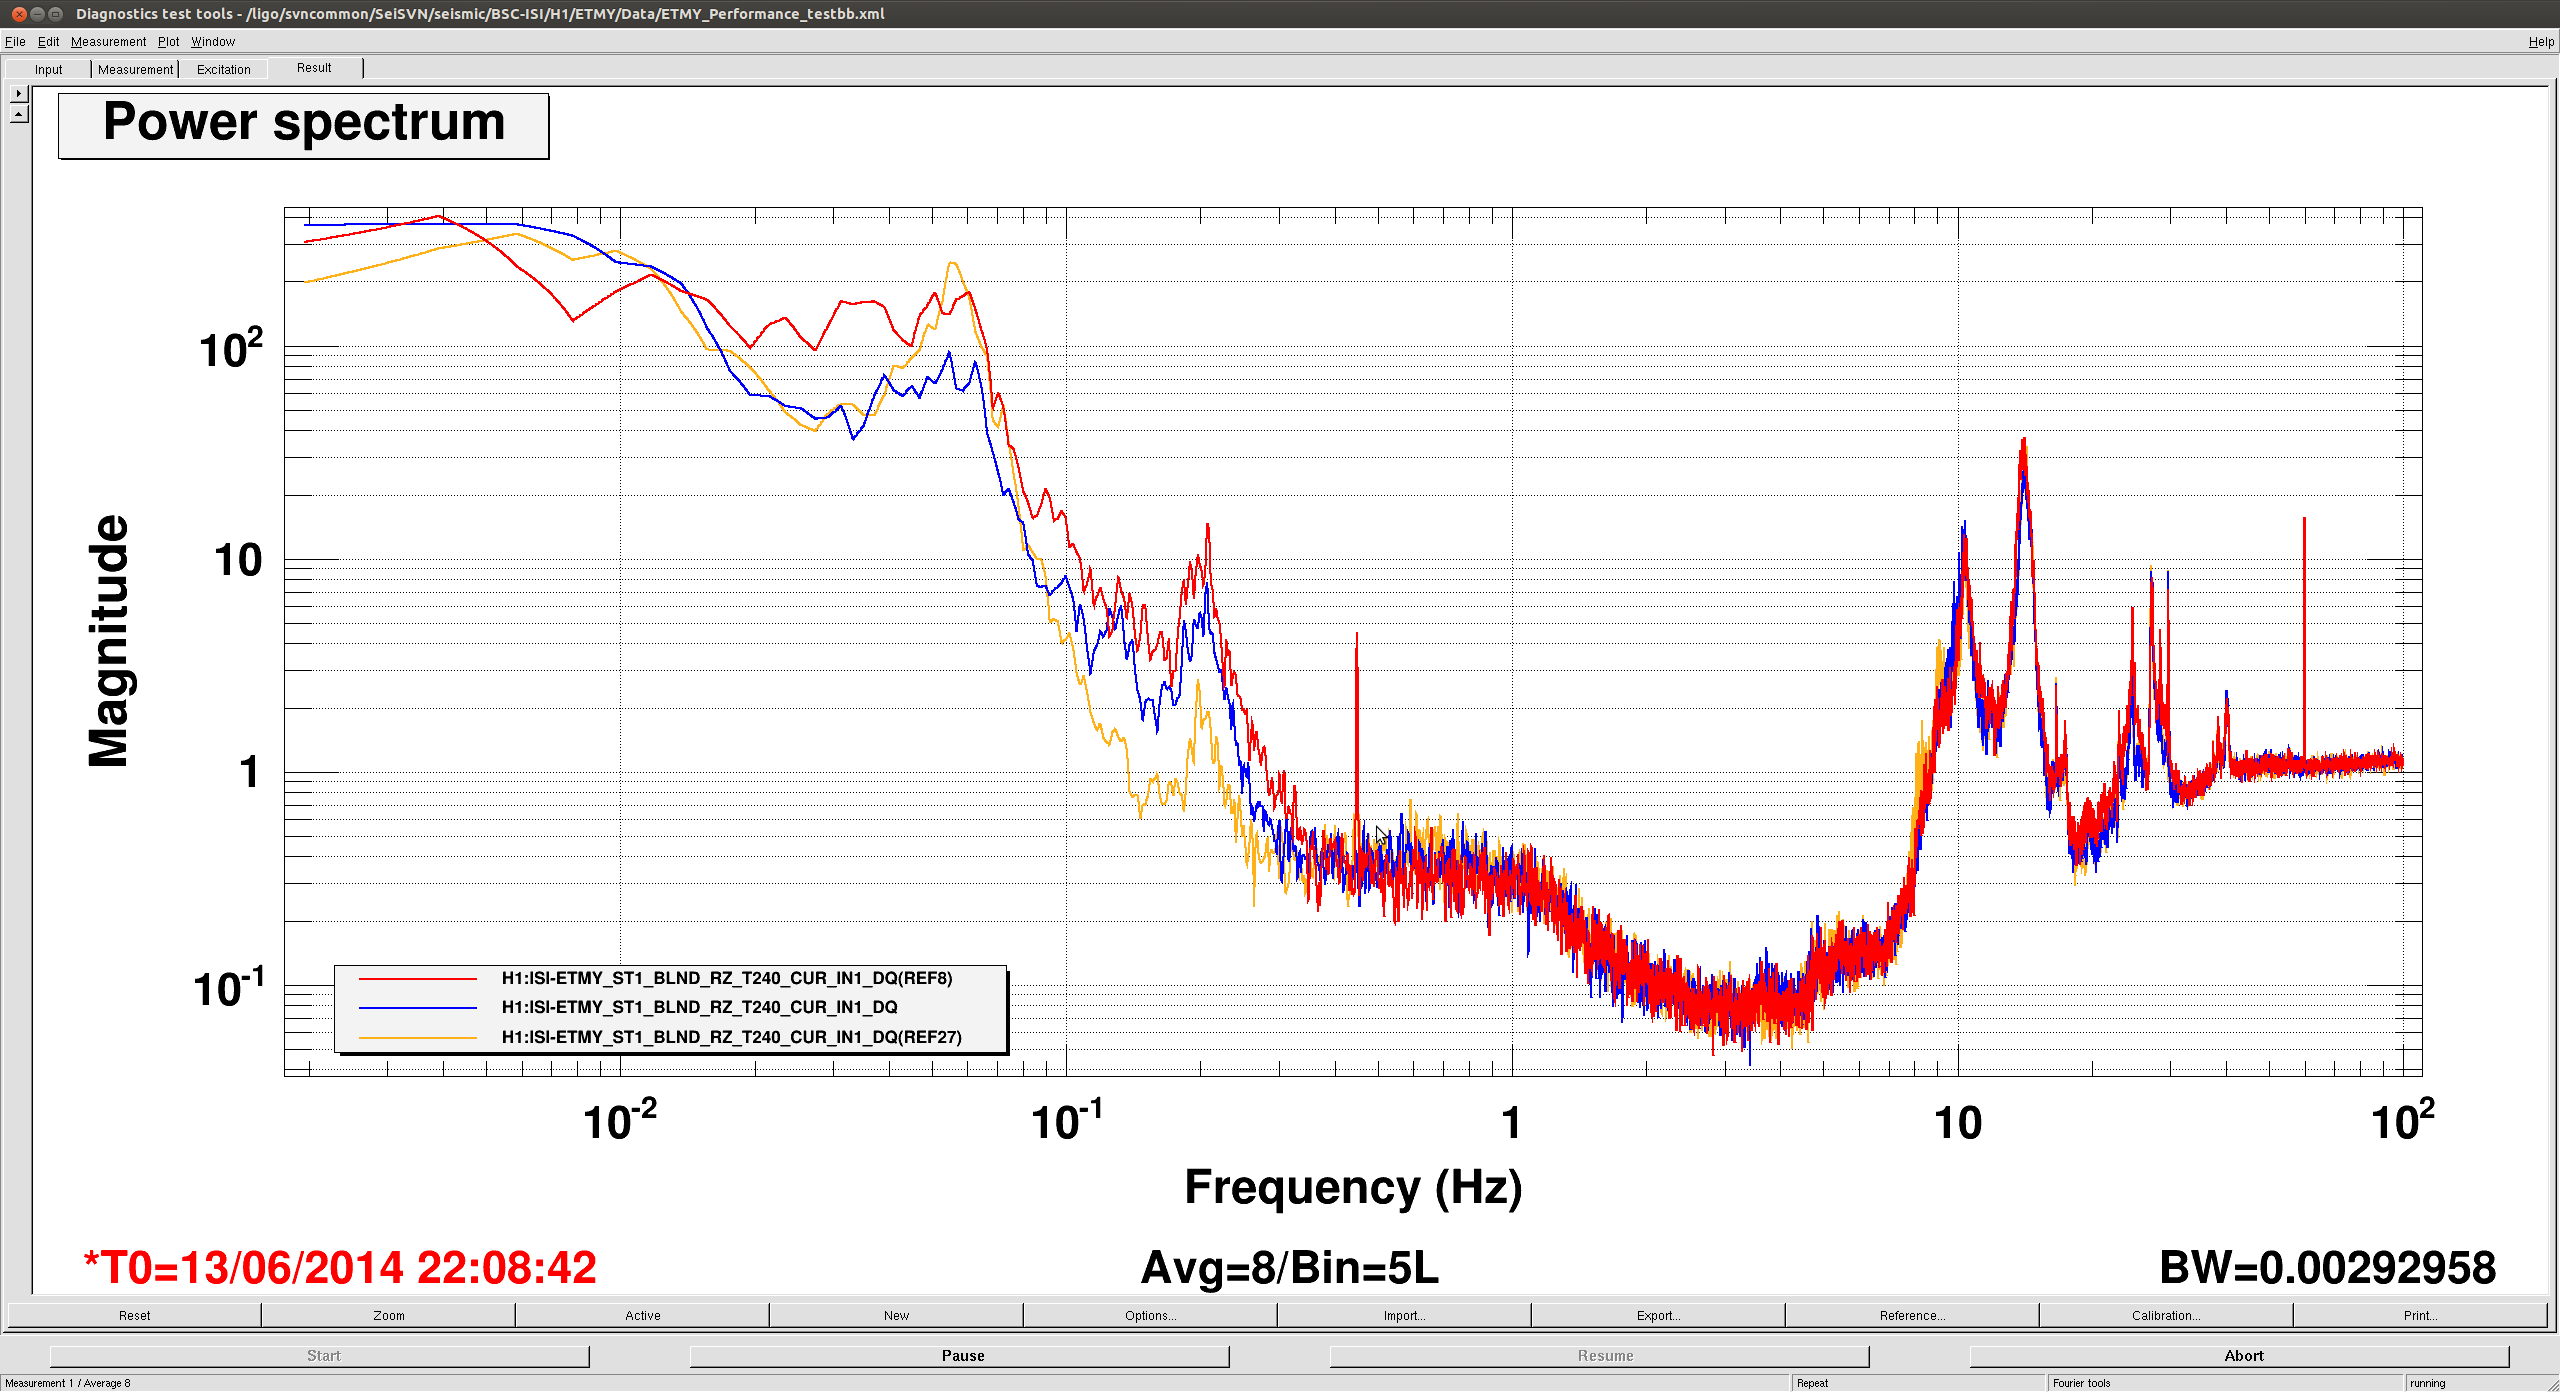
The attached T240 rZ Signal shows the signal from the T240 rZ (trciky huh?) in low blend mode, with the subtraction in three different states
Blue = OFF
Orange = ON
Red = ON with the wrong sign (gain = -1)
You could convince your self that above 60mHz the subtraction is doing something good (it is mostly aimed at below 100mHz), nothing below 60mHz and something very bad at 60mHz, that you get almost
identical badness at 60mHz for either sign must (might?) mean something
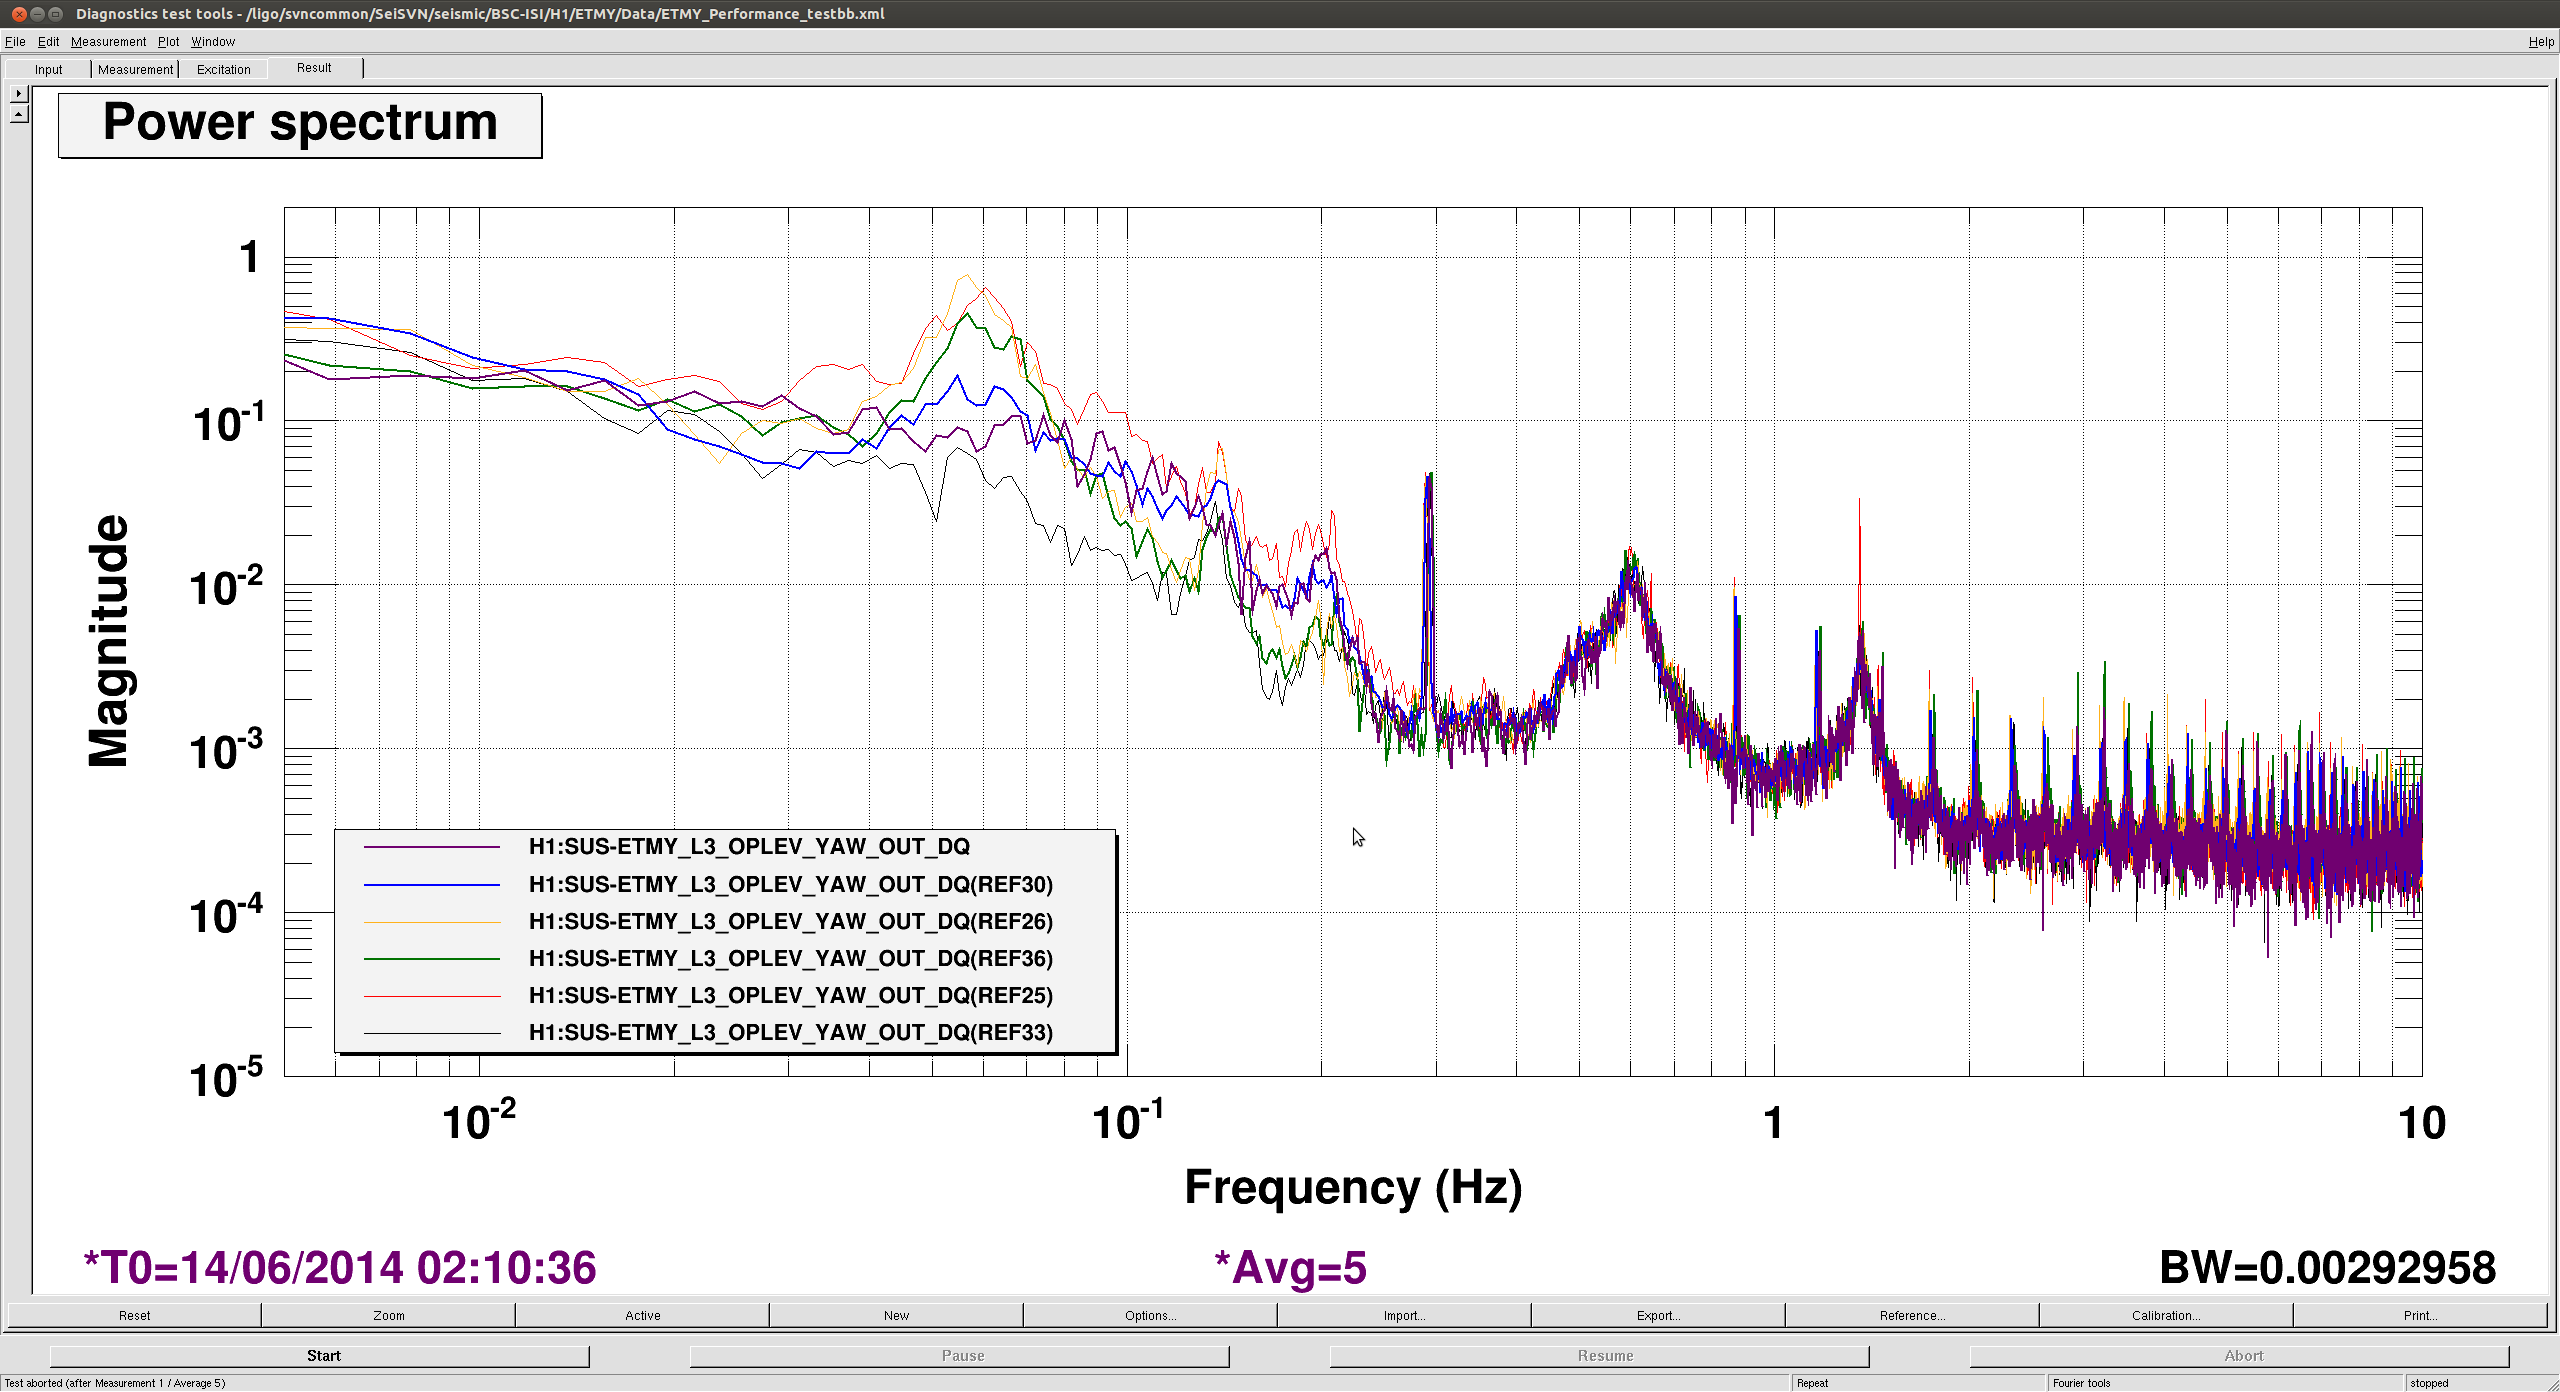
The figure YAW OPLEV shows the same thing using the optical lever signal
The fact that we don't see a factor of 50 improvement isn't very surprising, but the fact that the subtraction makes things worse in the middle of the measurement band is. Right now I'm speculation on drives from other degrees of freedom coupling to the T240s although I
the mechanism isn't very clear to me
We did take a look at rZ to Z coupling, which might create an unindented loop when the subtraction gets turned on, but didn't see anything.
I've been using verious templates in /ligo/svncommon/SeiSVN/seismic/BSC-ISI/H1/ETMX/Data and ETMY/Data
The ETMX_Performance ....xml are passive Twist_Measurement ....xml are driven
I've added a few more plots to the T240rZ.... plot
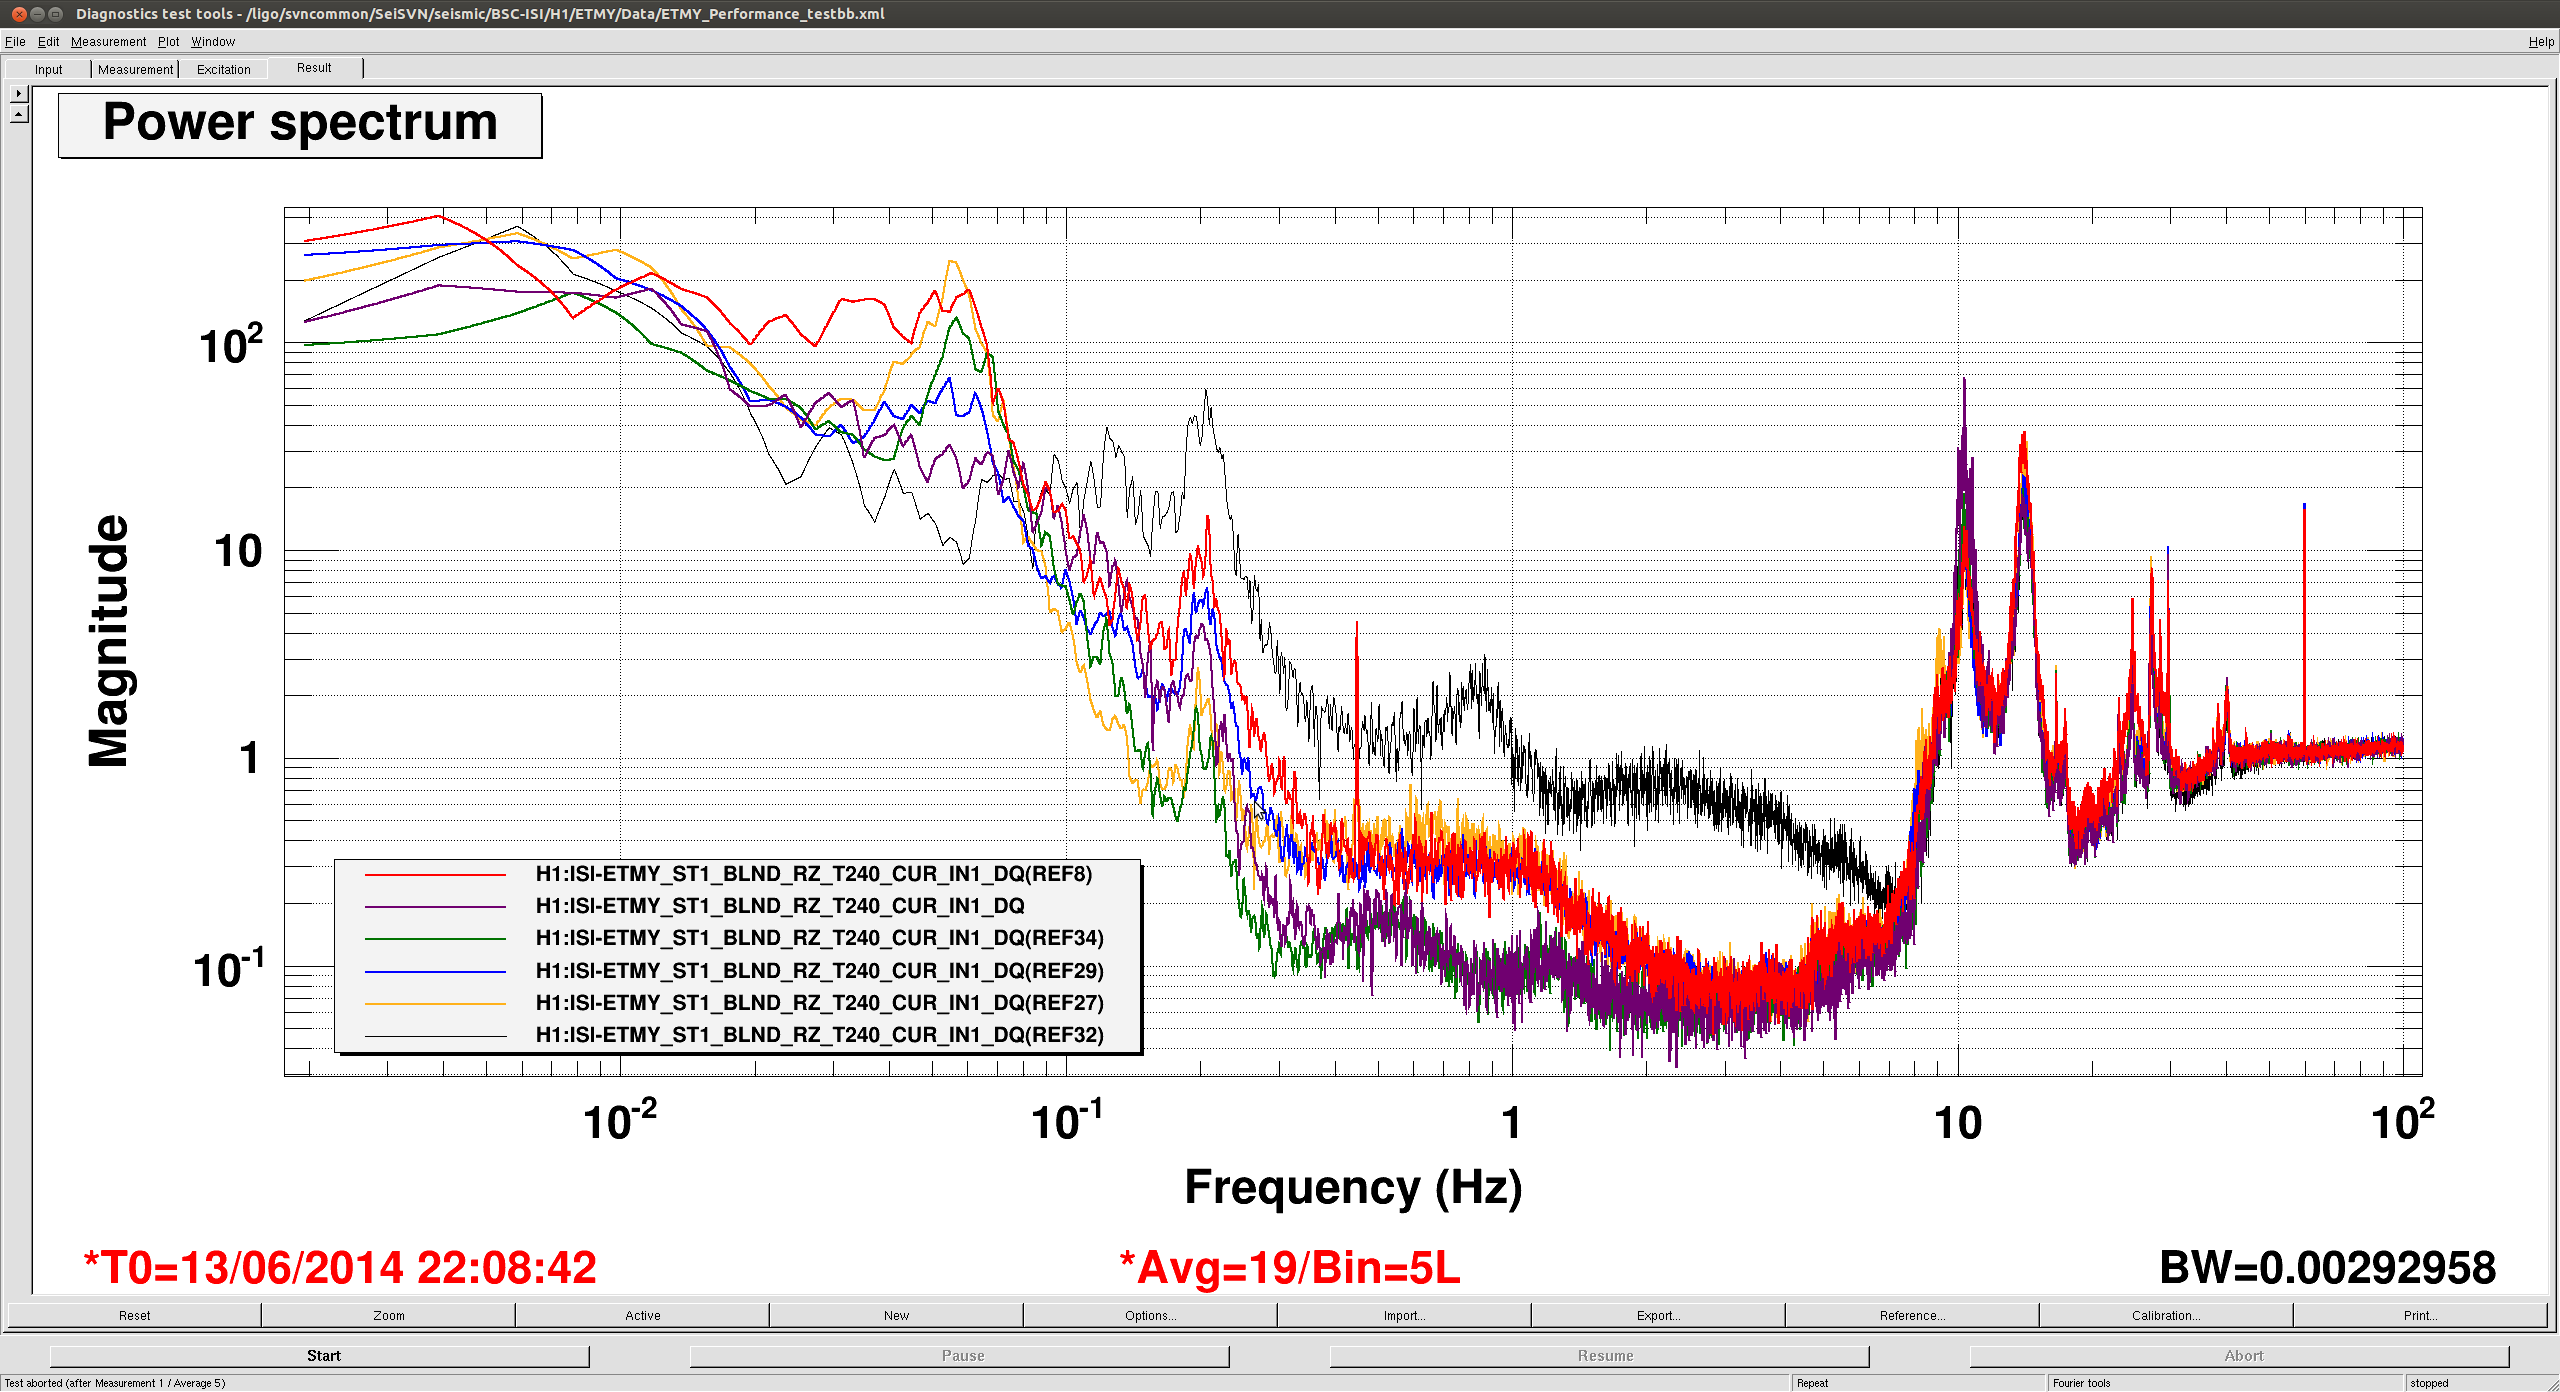
MoreT240Performance
Blue = OFF
Orange = ON
Red = ON with the wrong sign (gain = -1)
Blue
Black Start blend (no T240 in loop)
Green Lower Blend Frequency, ~40mhz pervious ow blend was at ~100mHz (subtraction on)
Purple Lower Blend Frequency (no subtraction)
there are really to many lines here to make an sense of, but as far as the T240 thinks, subtracting hurts at 60Mhz, more interesting is the MoreOpLev plot which shows that above 200mHz it doesn't seem to matter what I'm doing with stage 1 (More OpLev)
if anyone really wants this is all in ETMY_Performance_testbb.xml