TITLE: 06/30 Day Shift: 1430-2330 UTC (0730-1630 PST), all times posted in UTC
STATE of H1: Planned Engineering
OUTGOING OPERATOR: None
CURRENT ENVIRONMENT:
SEI_ENV state: MAINTENANCE
Wind: 13mph Gusts, 7mph 3min avg
Primary useism: 0.01 μm/s
Secondary useism: 0.12 μm/s
QUICK SUMMARY:
Ops workstation (cdsws29) was stuck recovering from morning reboot (hit the on/off button to restore). nuc23 & nuc22 look like they partially came back (will need to log back into them to sort their app windows.
BSC2 SEI work continues (w/ L4C swap & other final checks), FARO measurements may be complete (but FARO remains set-up outside HAM3 just in case). SQZ work continues as well as HAM3 activities and also transfer functions for ITMy.
Workstations were updated and rebooted. This was an OS packages updated. Conda packages were not updated.
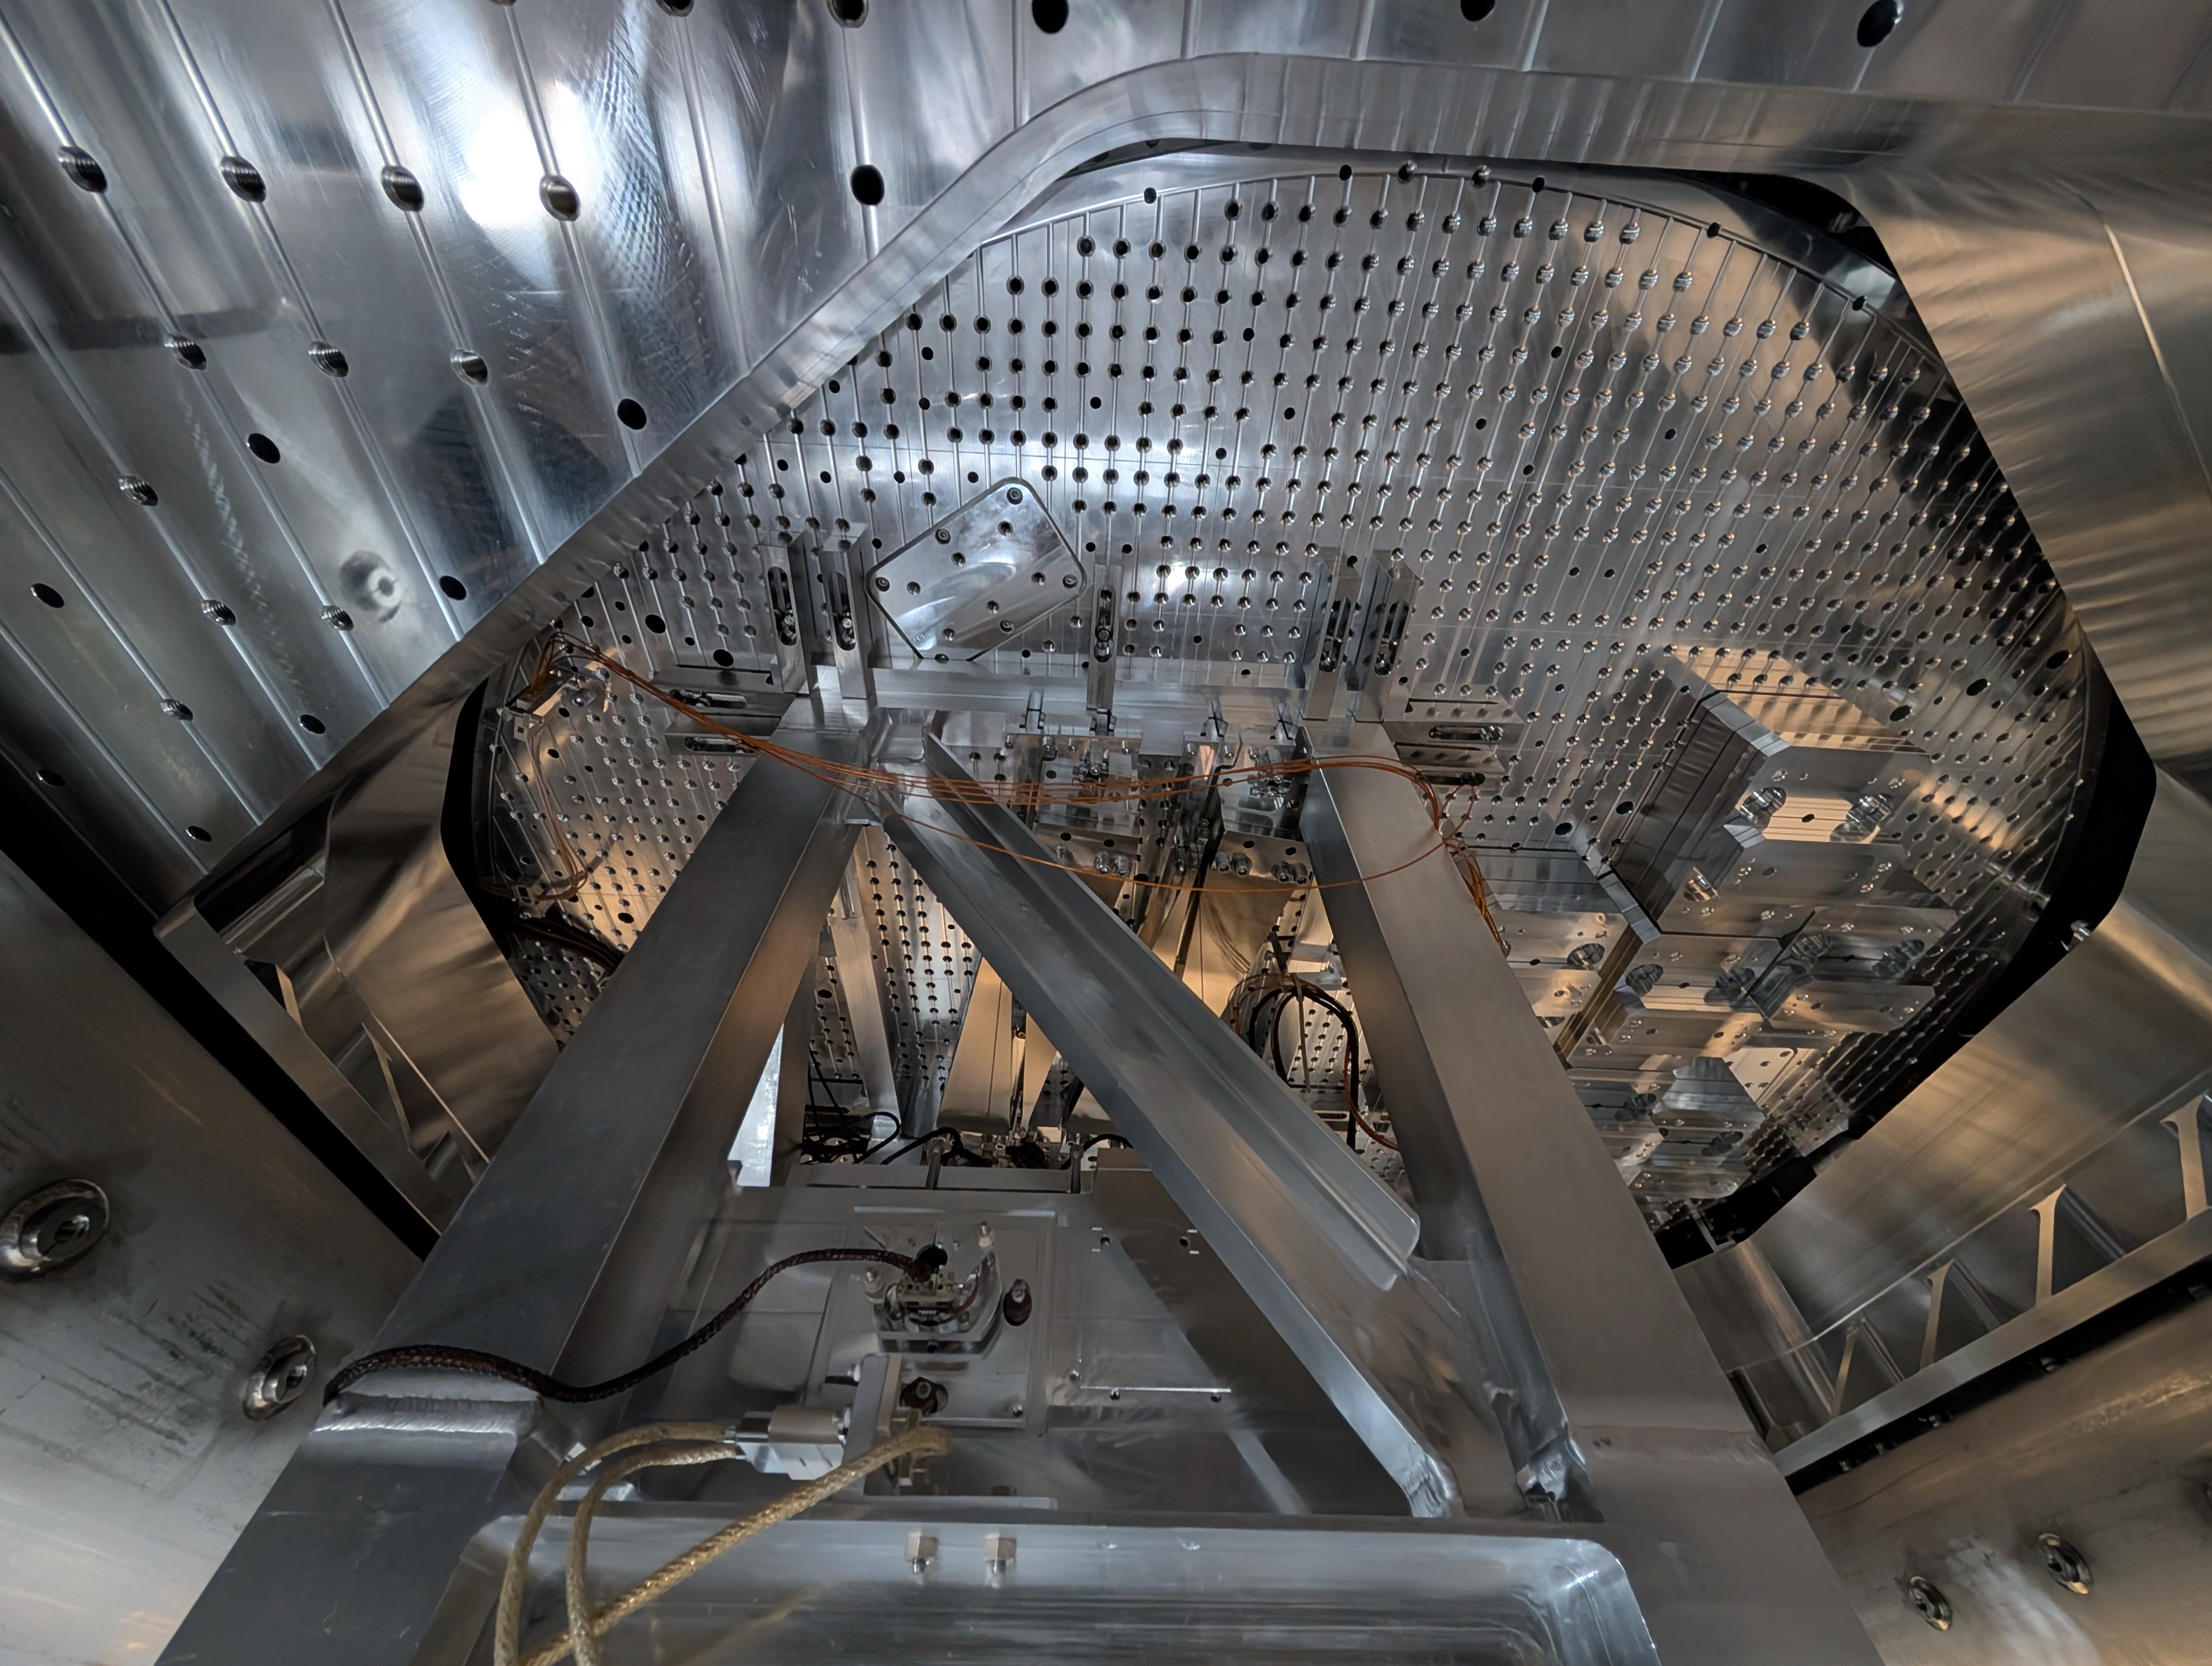
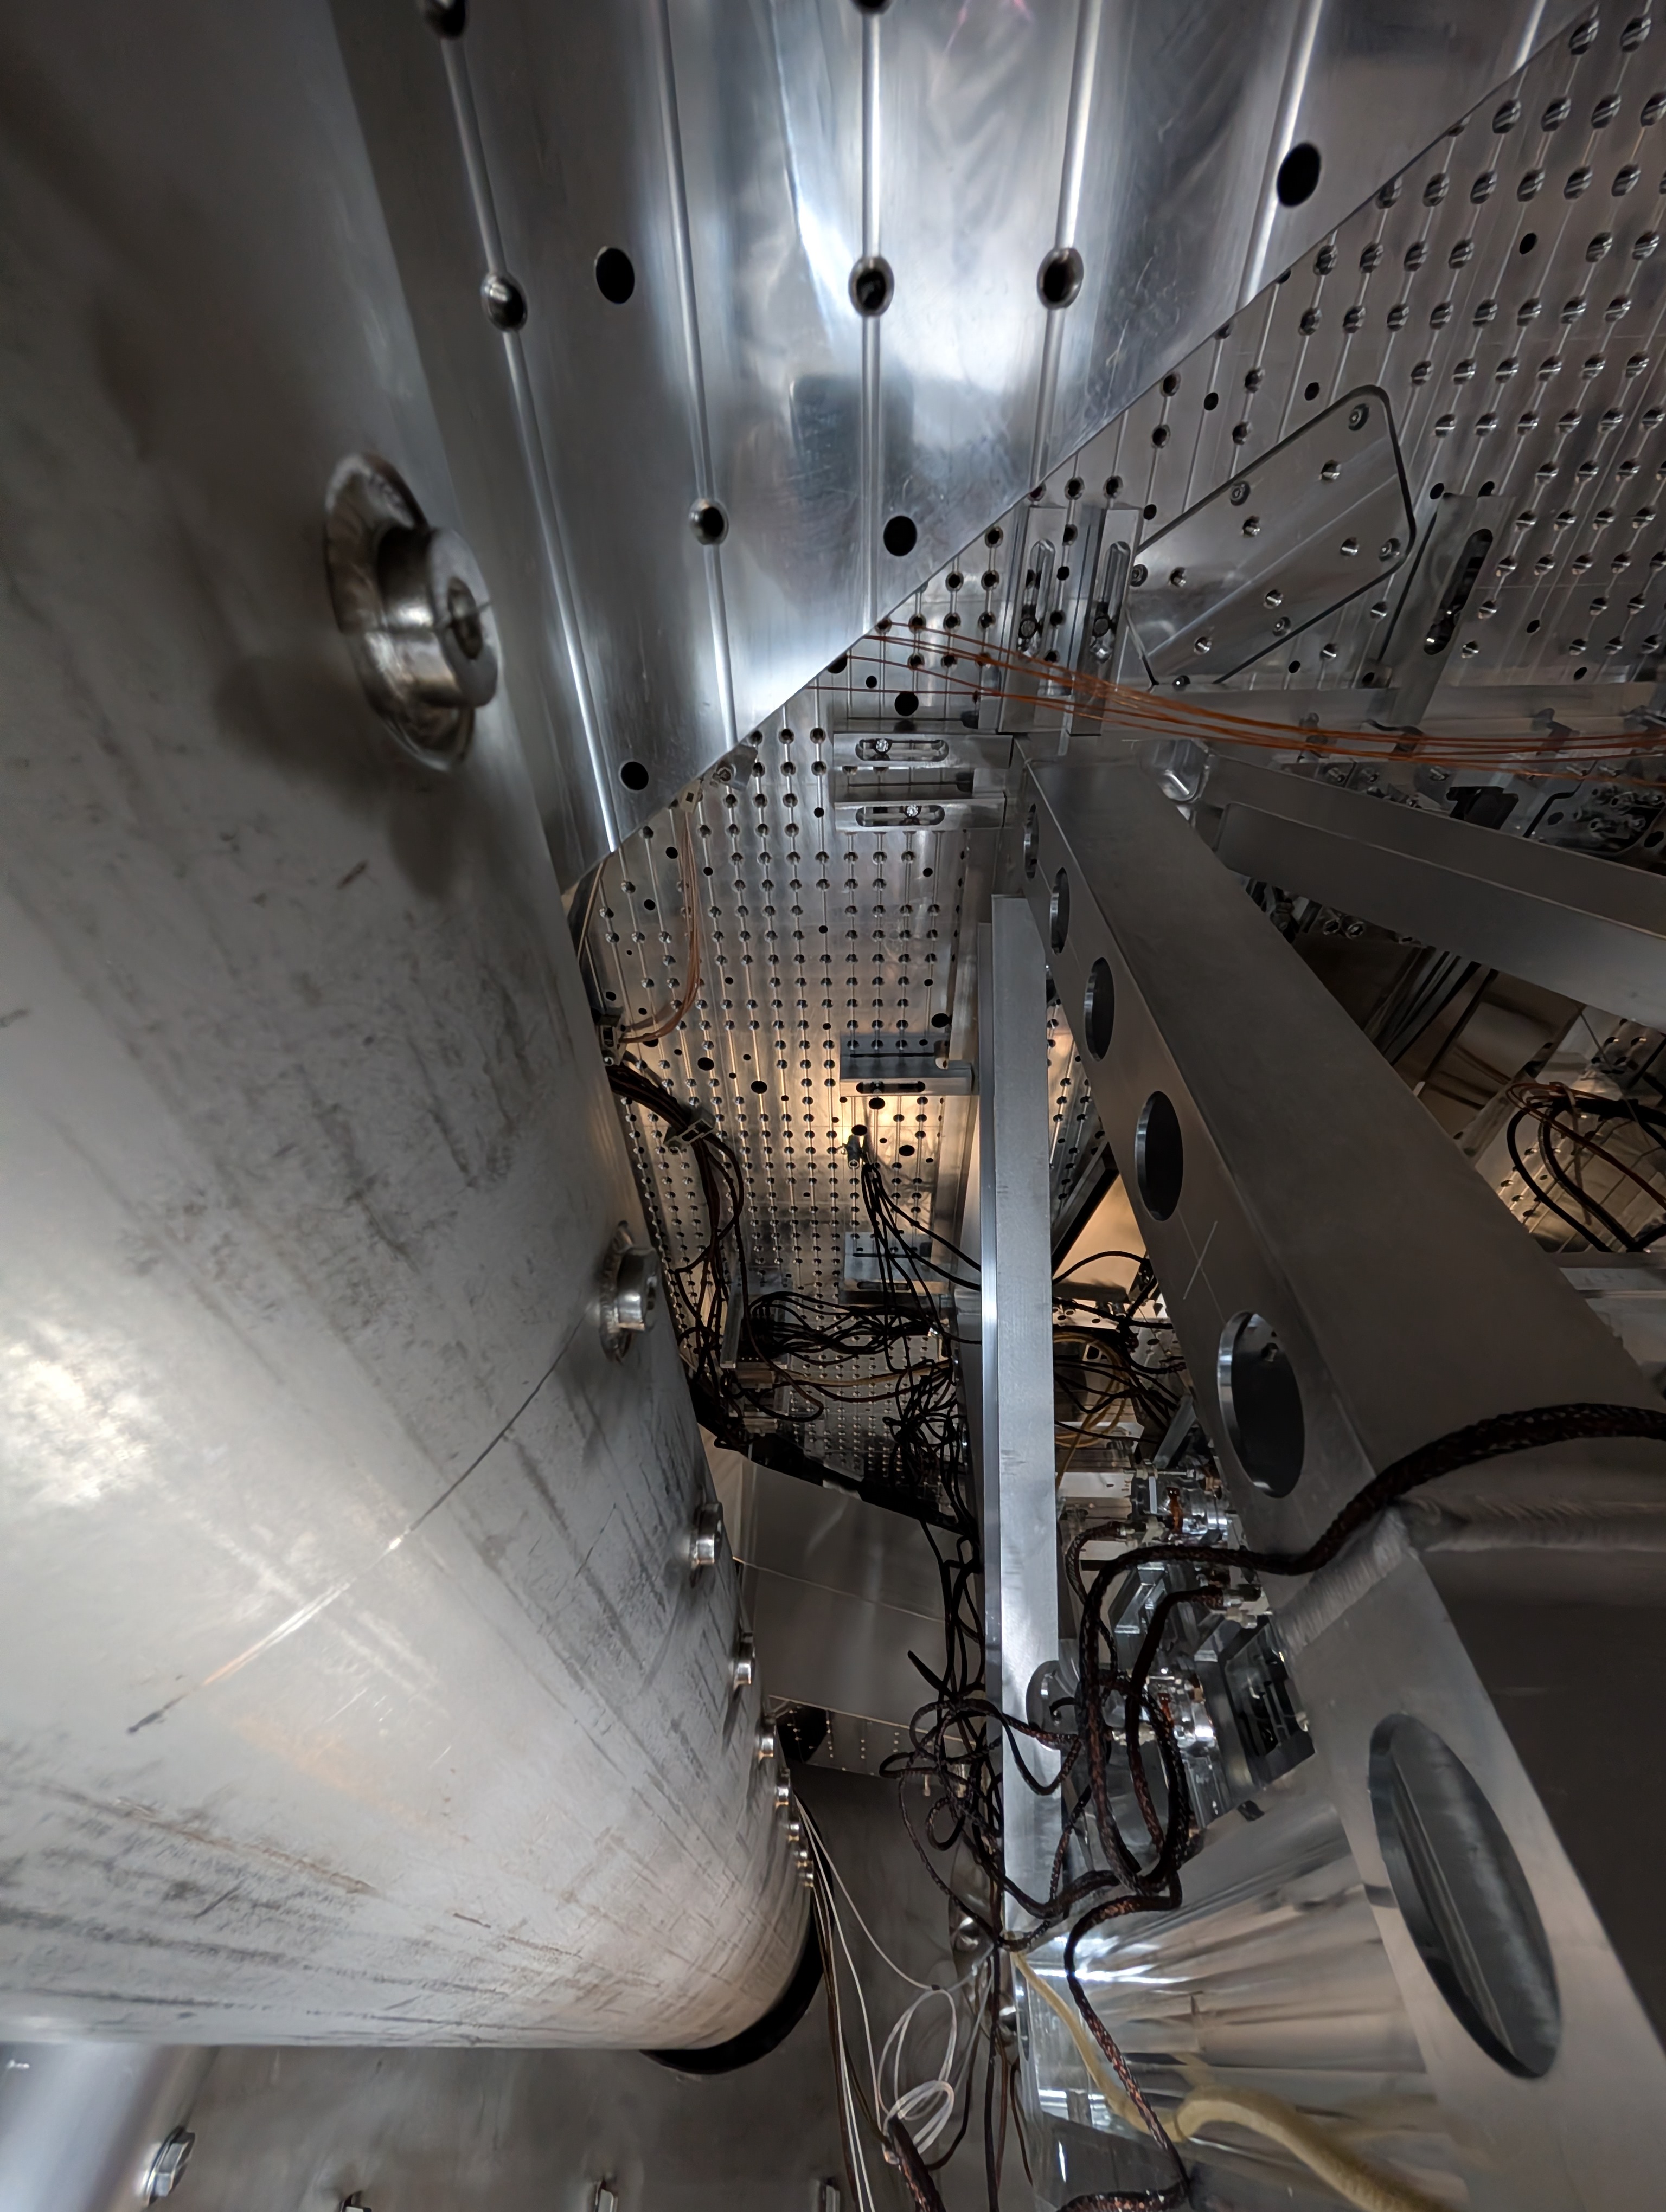
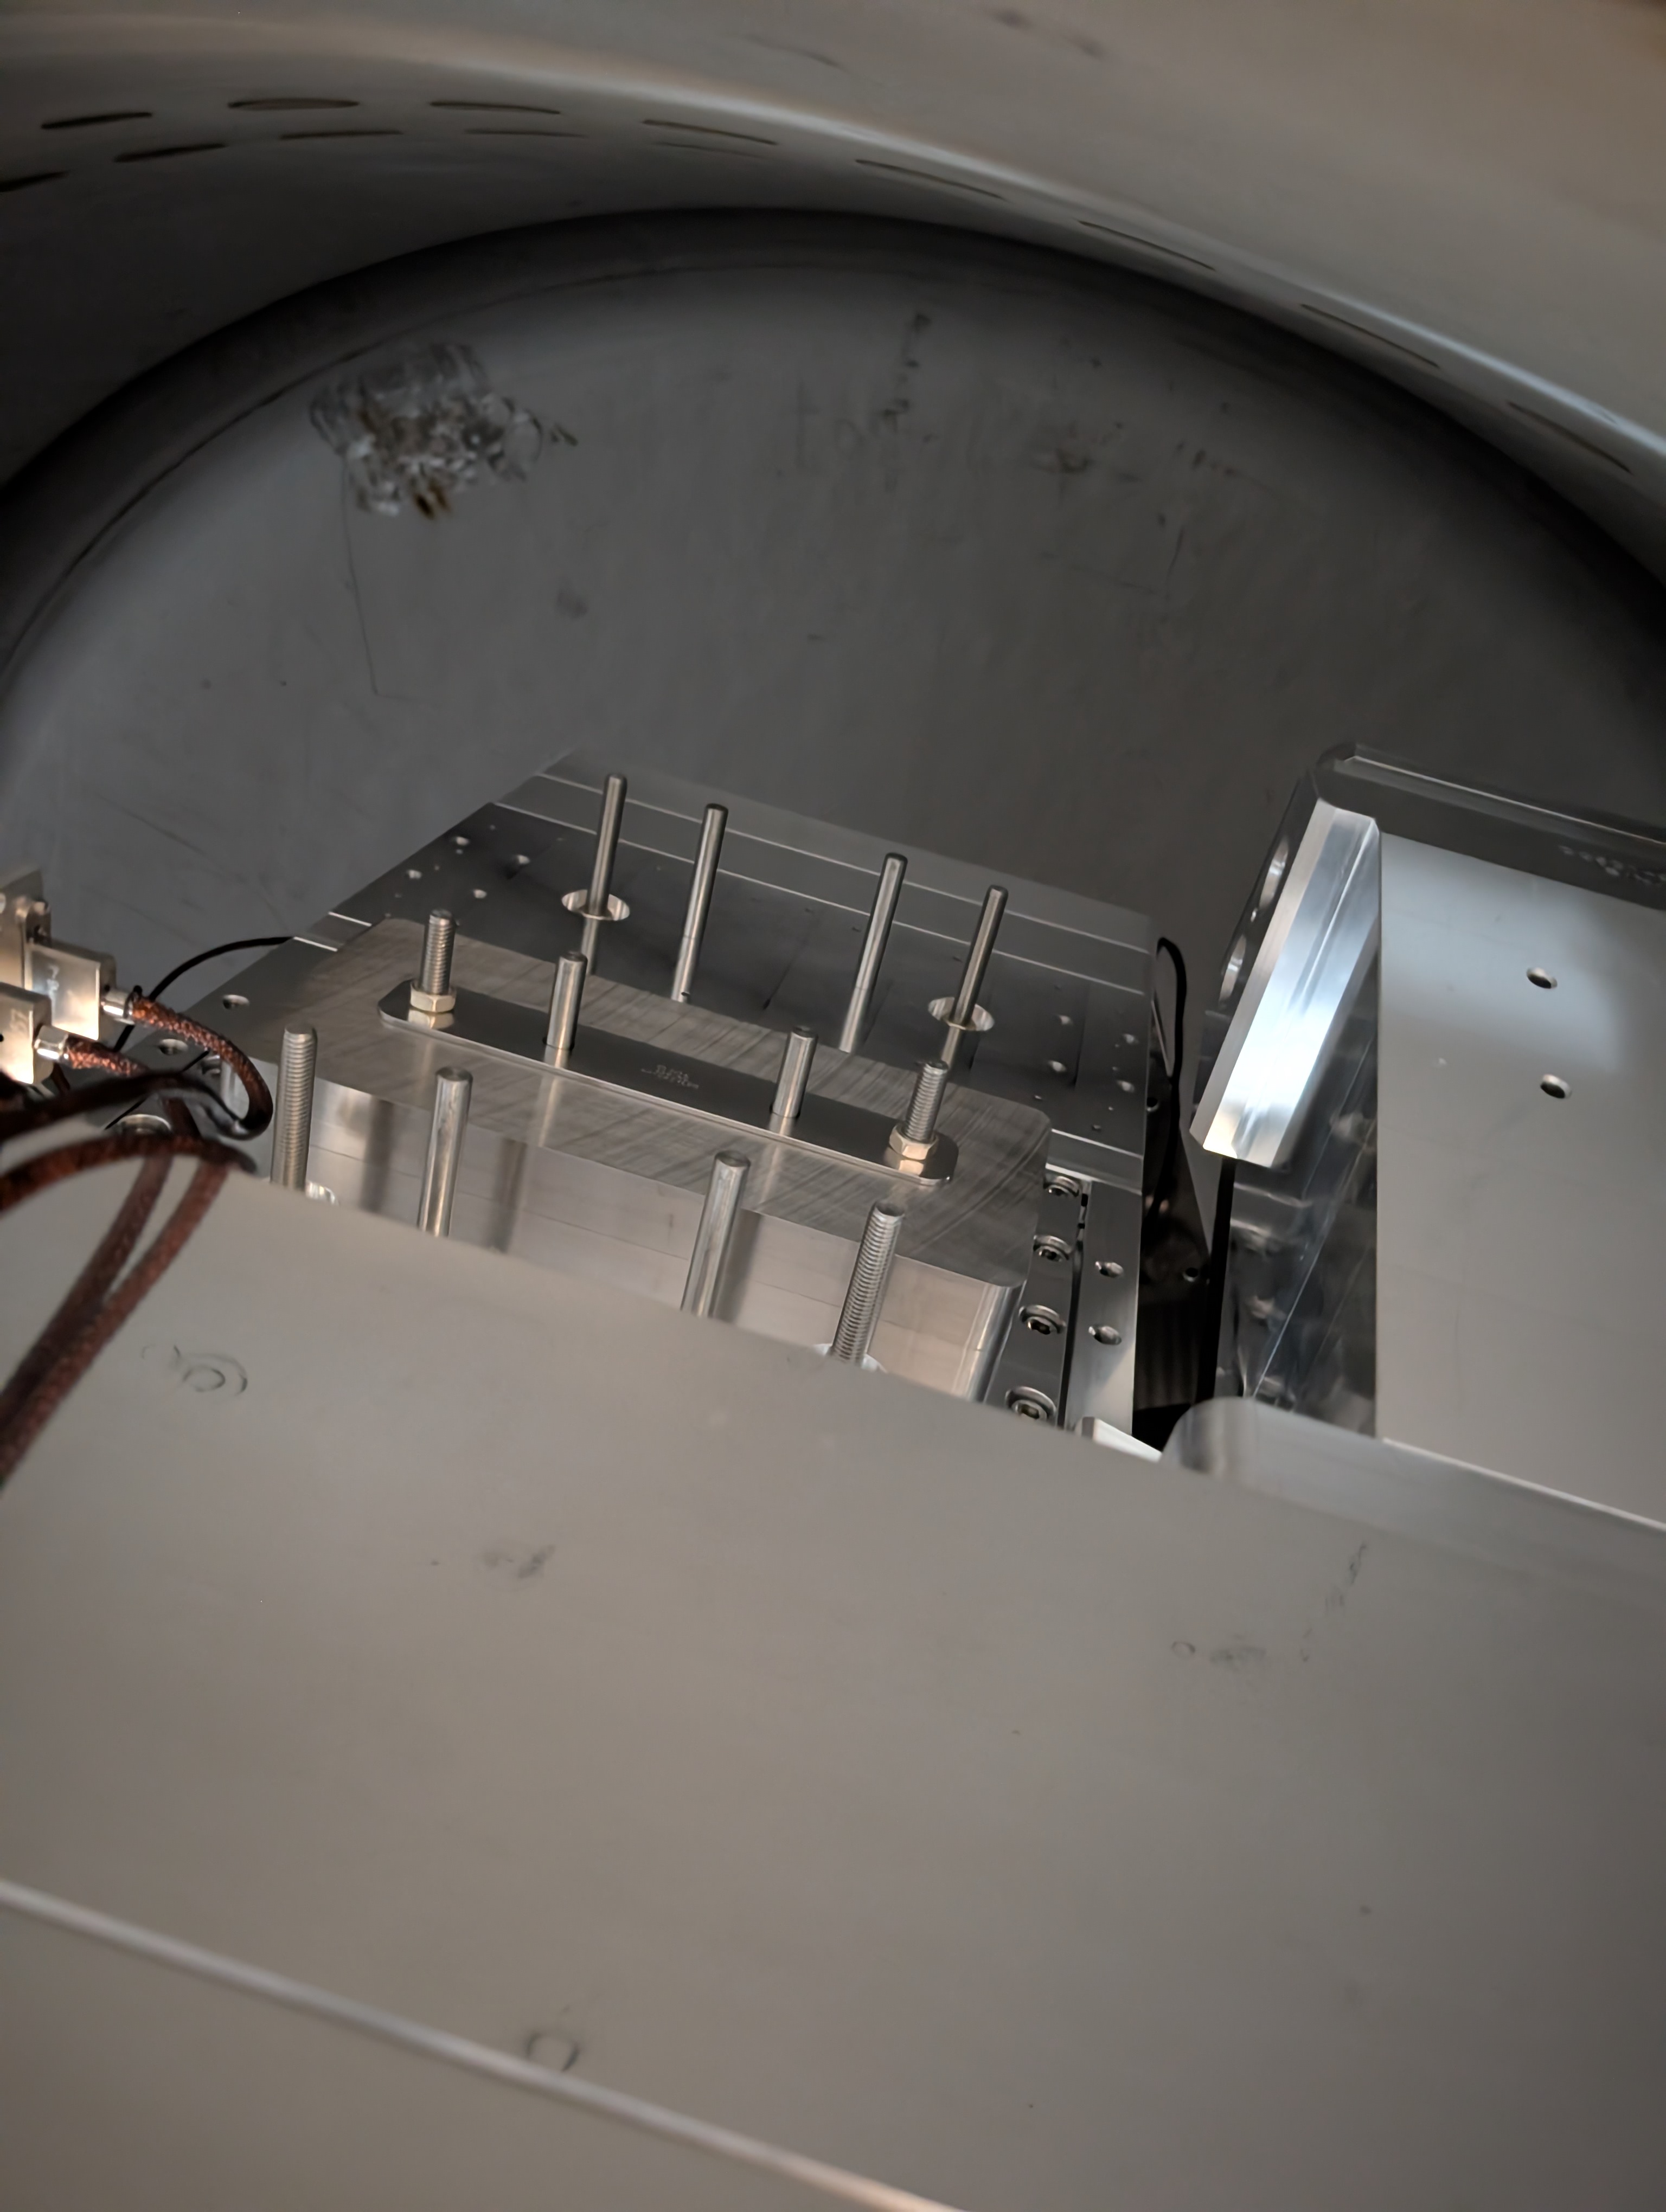
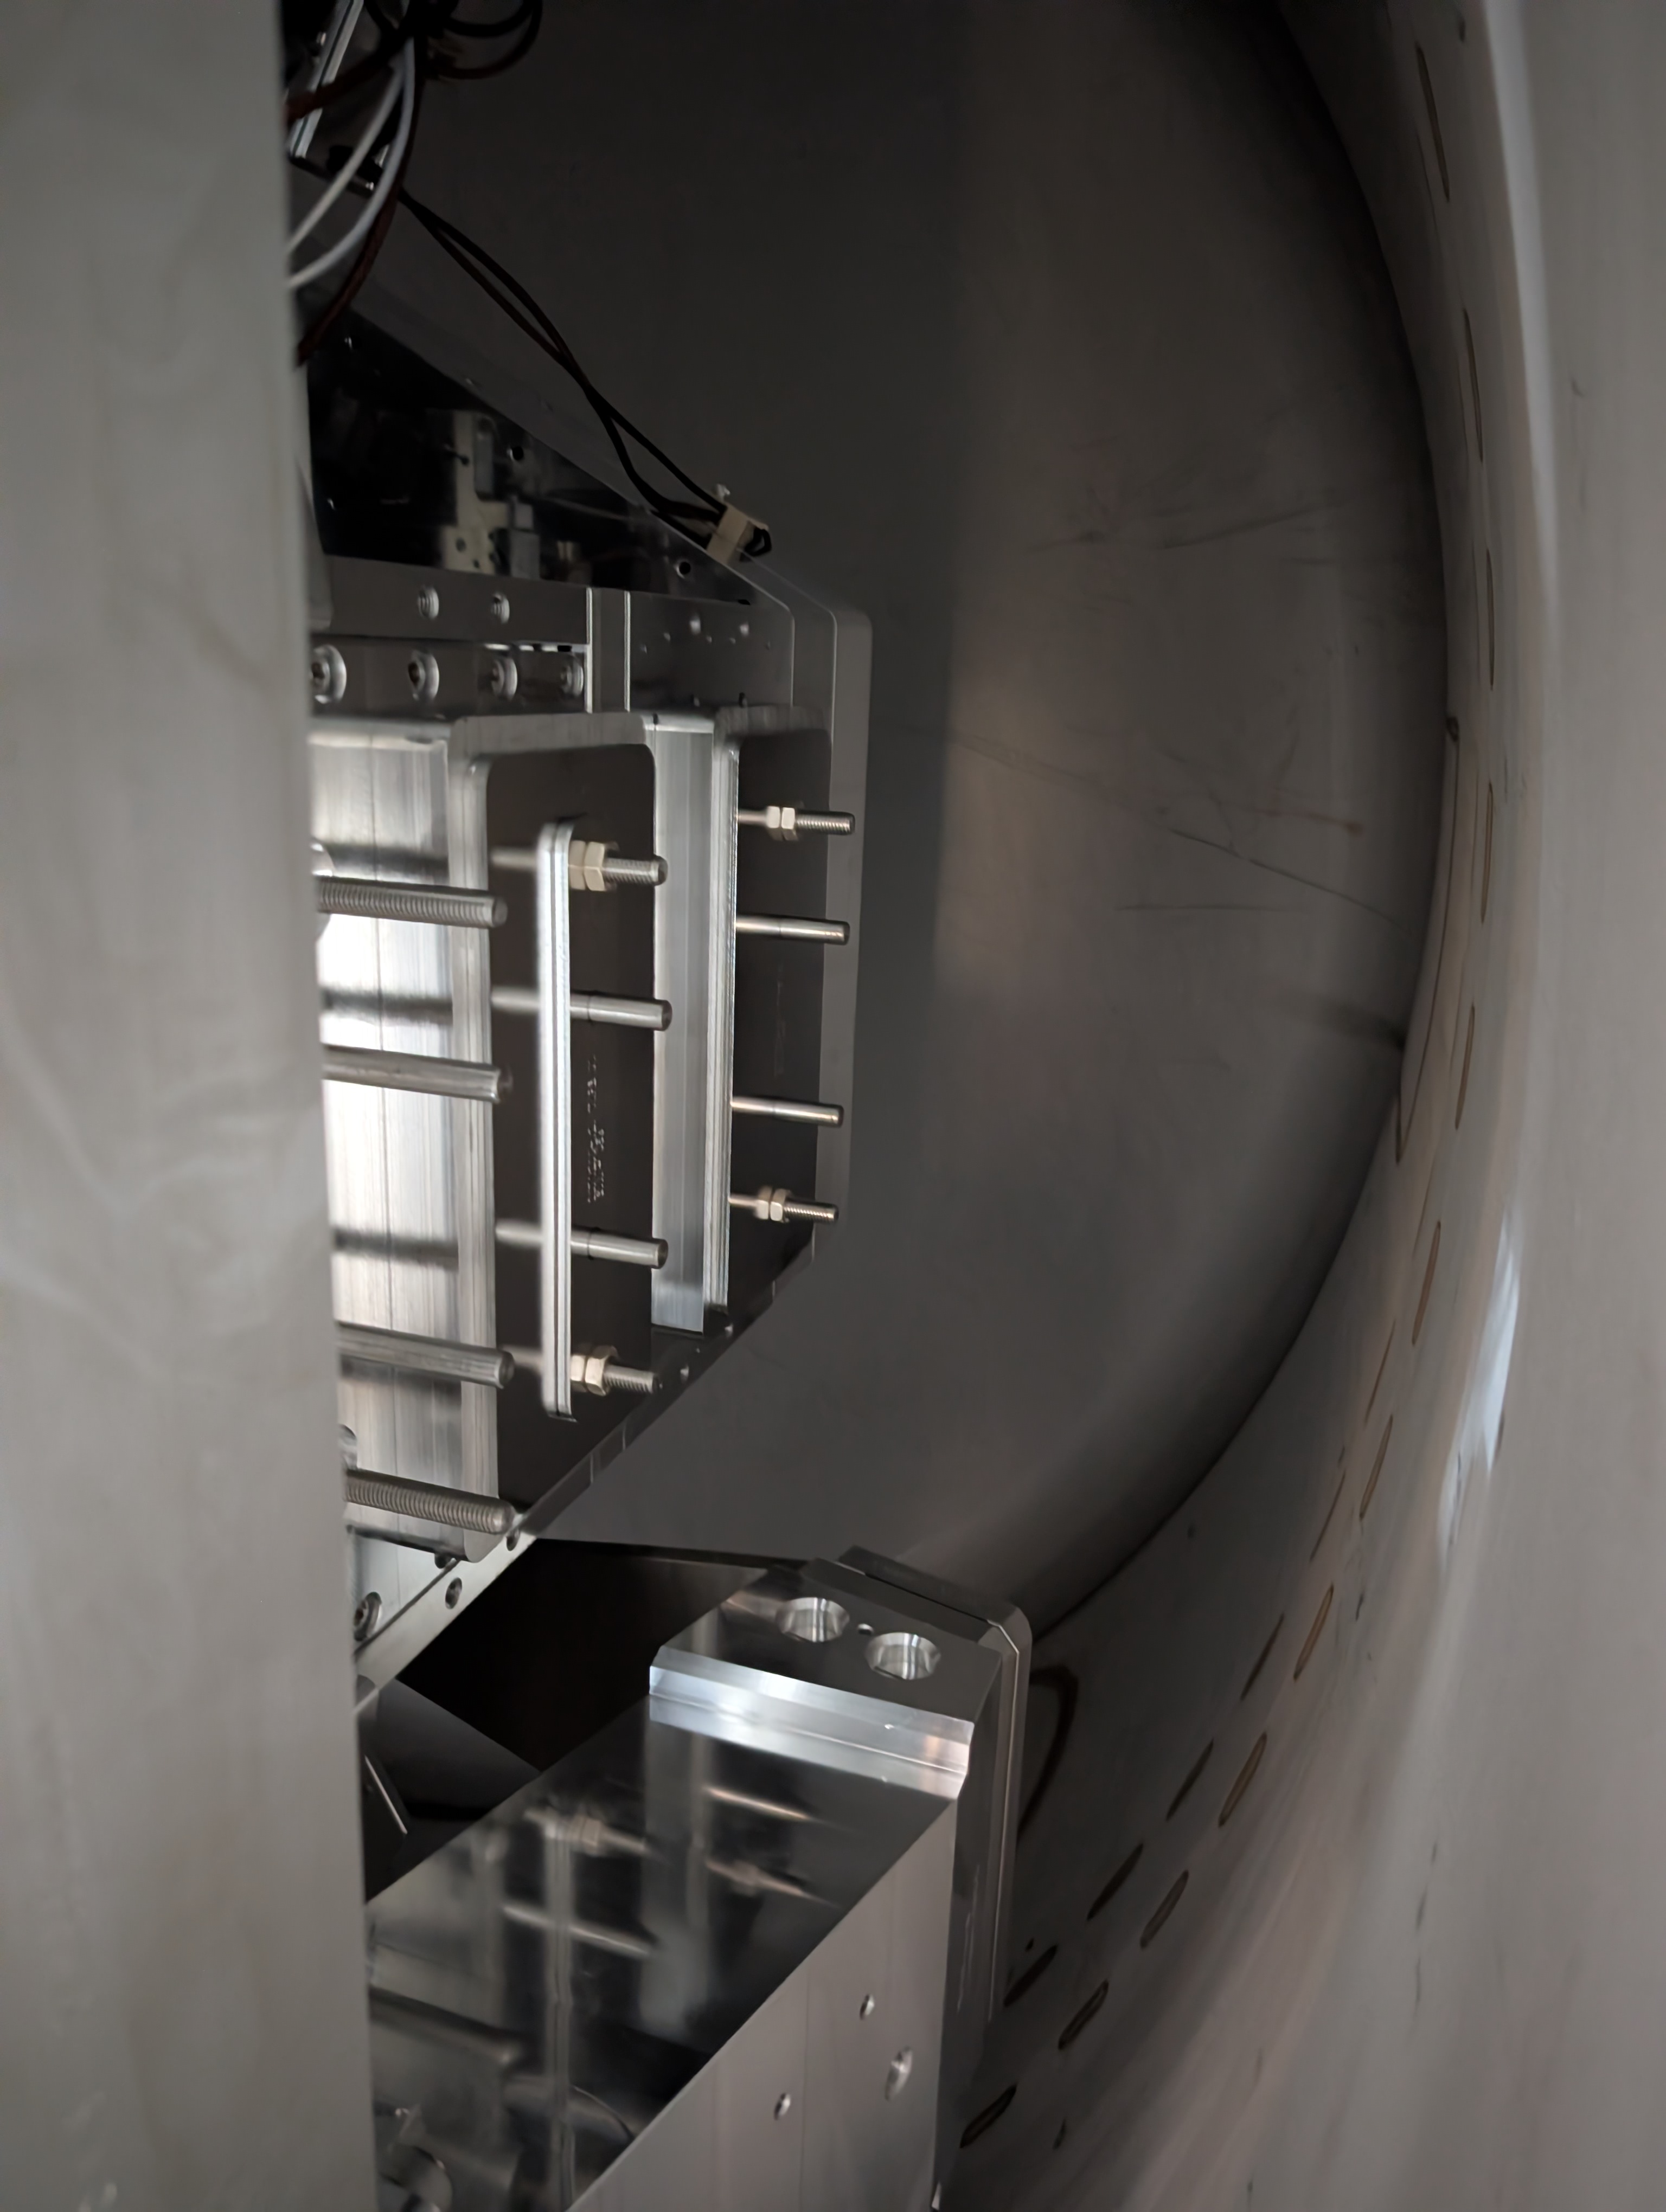
This afternoon, after IAS verified the BBSS had not moved much, Mitch and I went up above and started unlocking the ISI to rebalance. This actually went pretty smoothly. Unlocked st2 after getting a locked reference position for the CPS and loosening the balance mass lock nuts, balanced the ISI, initially using just the raw vertical cps local readout in counts, then looking at the cartesian cps in Z,Rx&RY when the balance was close. When that was done, we pulled the screws holding the st1 balance masses and unlocked st1. Small adjustment on st1, relocked both stages, locked down balance masses again and unlocked one final time to check both stages were still good. Z I left a little high to account for buoyancy, RX and RY residuals were all under 10urad. RZ residuals were higher, I think we swung about 20 urad between locked and unlocked, but I think that measurement is less repeatable between lock and unlock. We re-locked the ISI and have some clean up tomorrrow, we put our removed balance masses on top of st2 under the cover, because we didn't have bags or labels.
Tomorrow we will replace the bad L4C on st1, unlock and do final checks. HEPI seemed to ring up when I tried turning on the loops this morning, I'm hoping that is because the ISI was locked and that was changing the HEPI plant or because of work in chamber, so that needs to verfied in addition to ISI close out tfs.
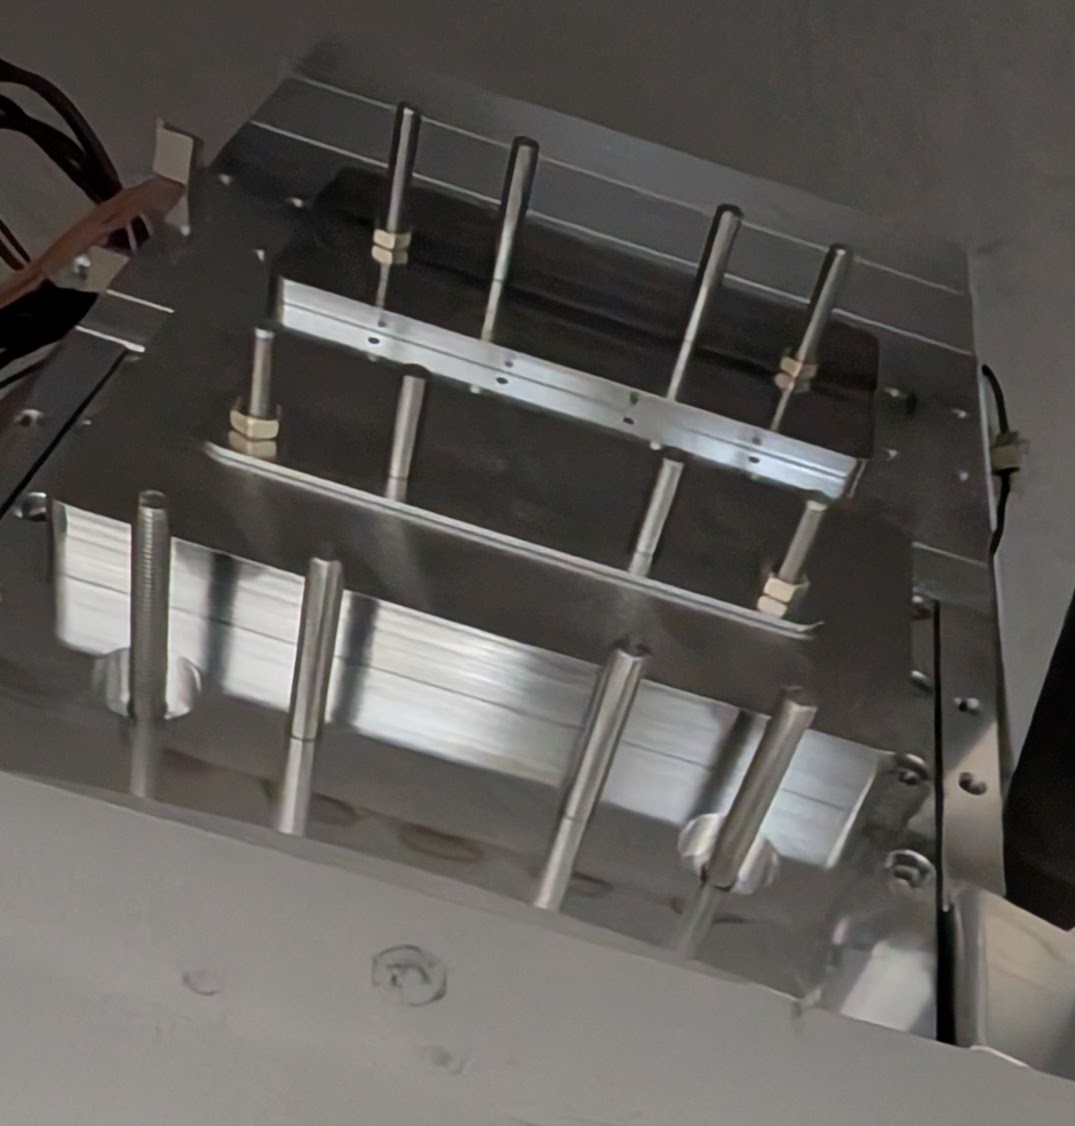
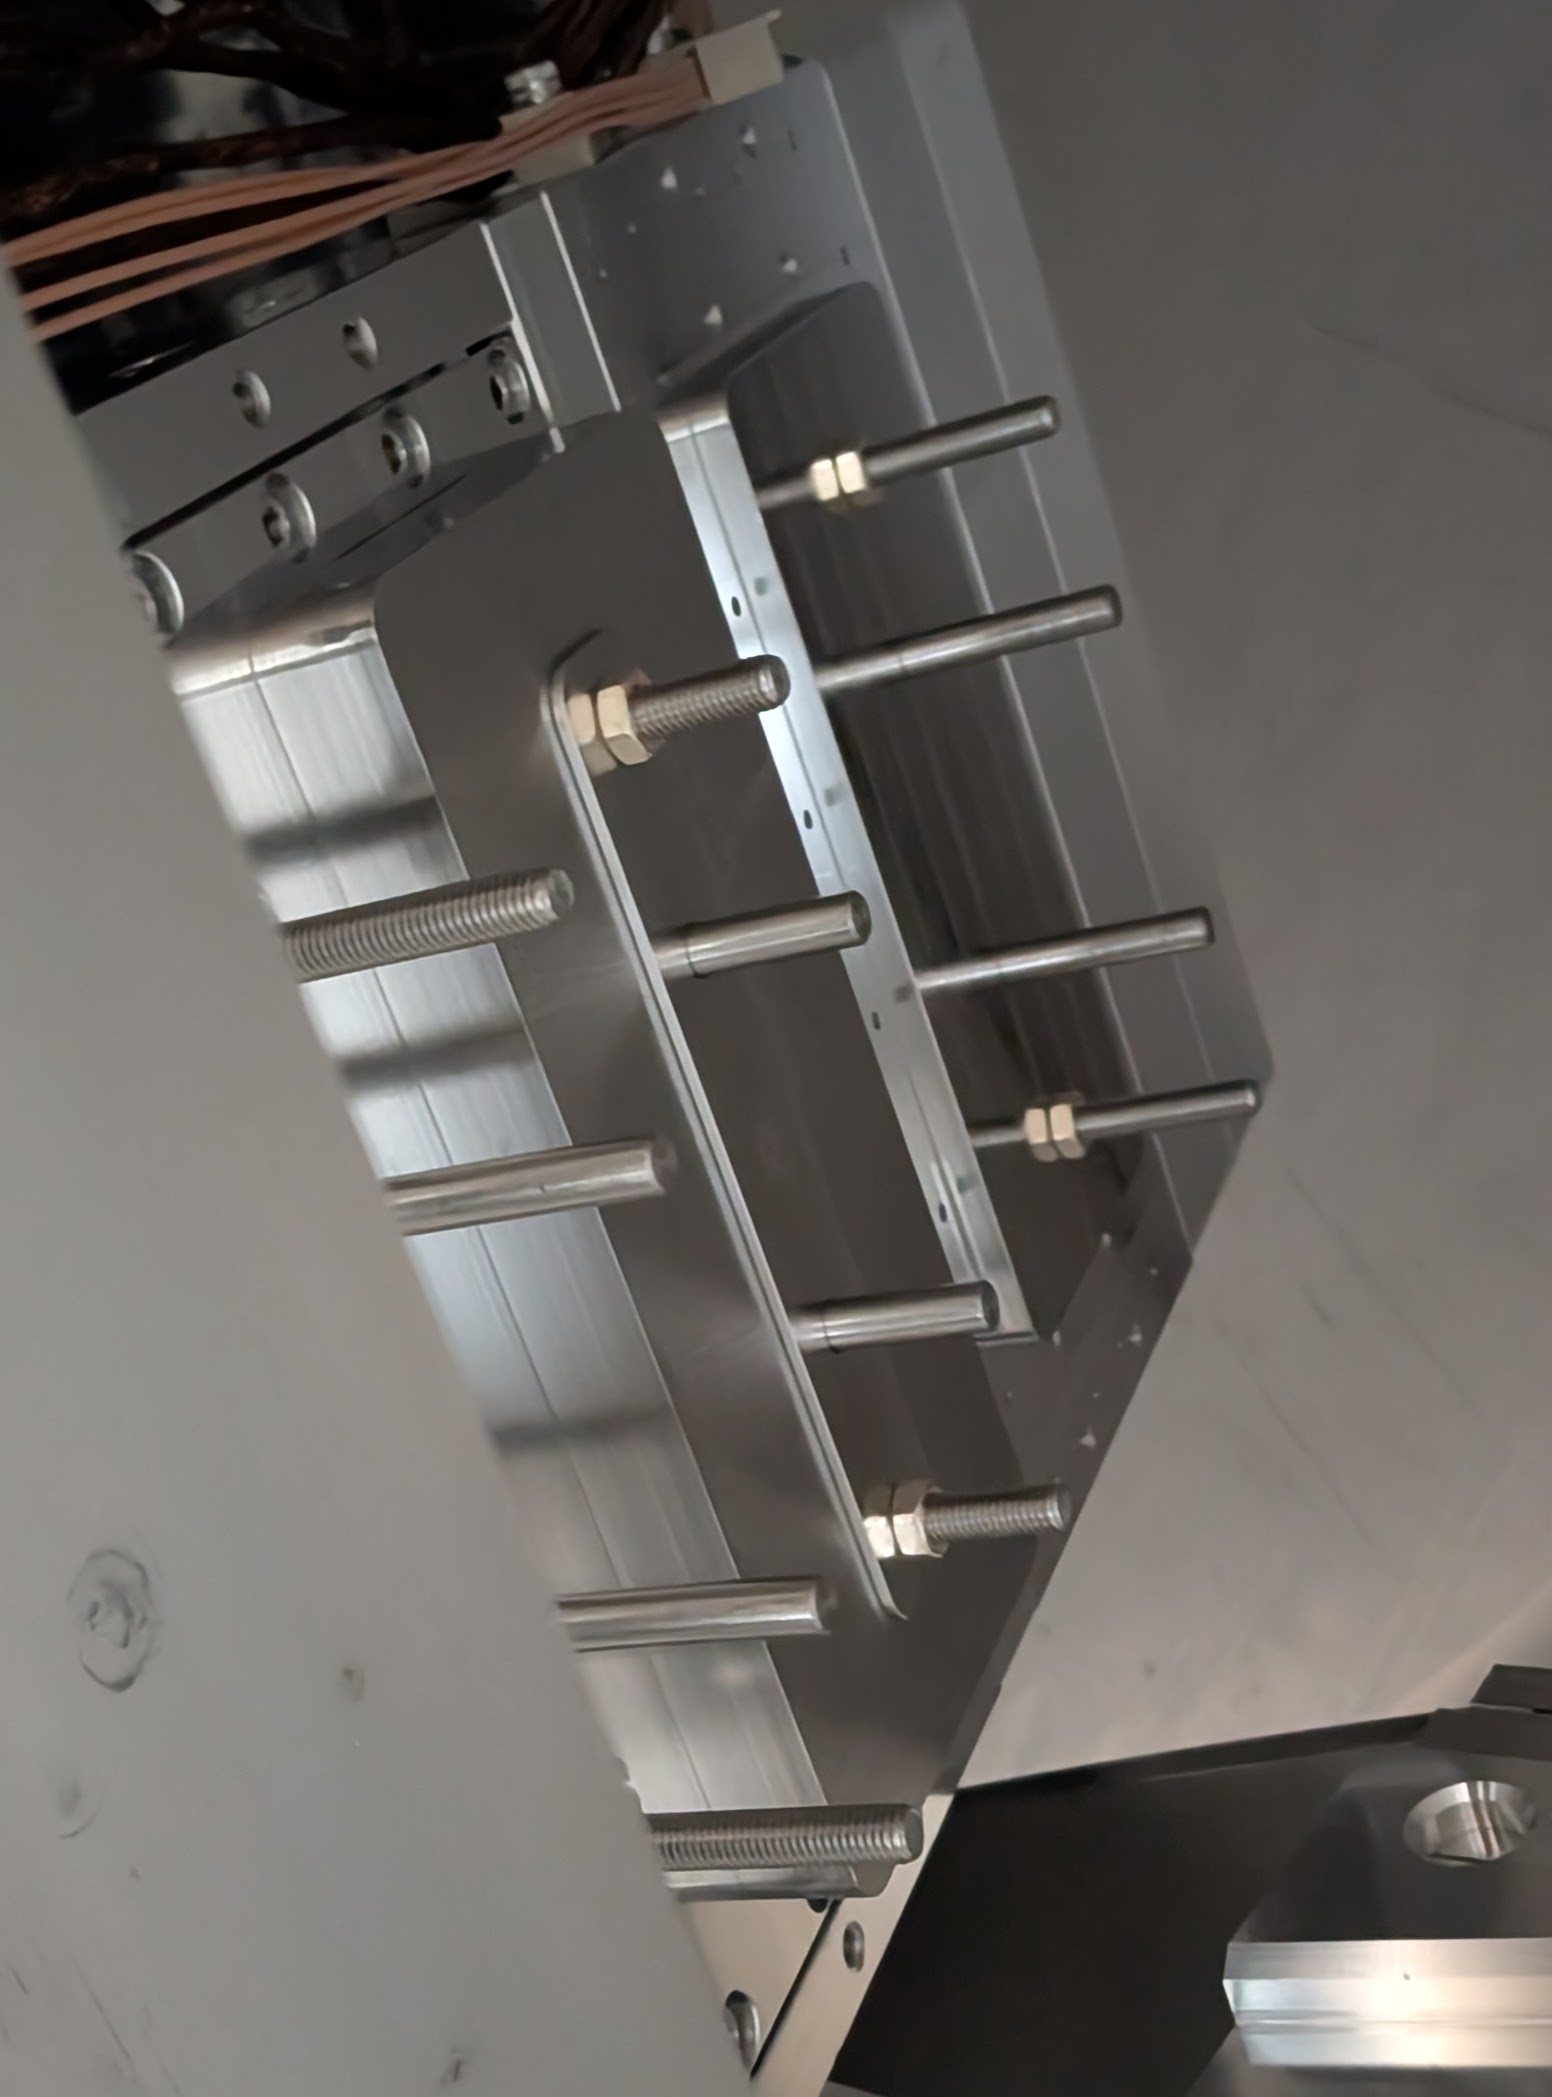
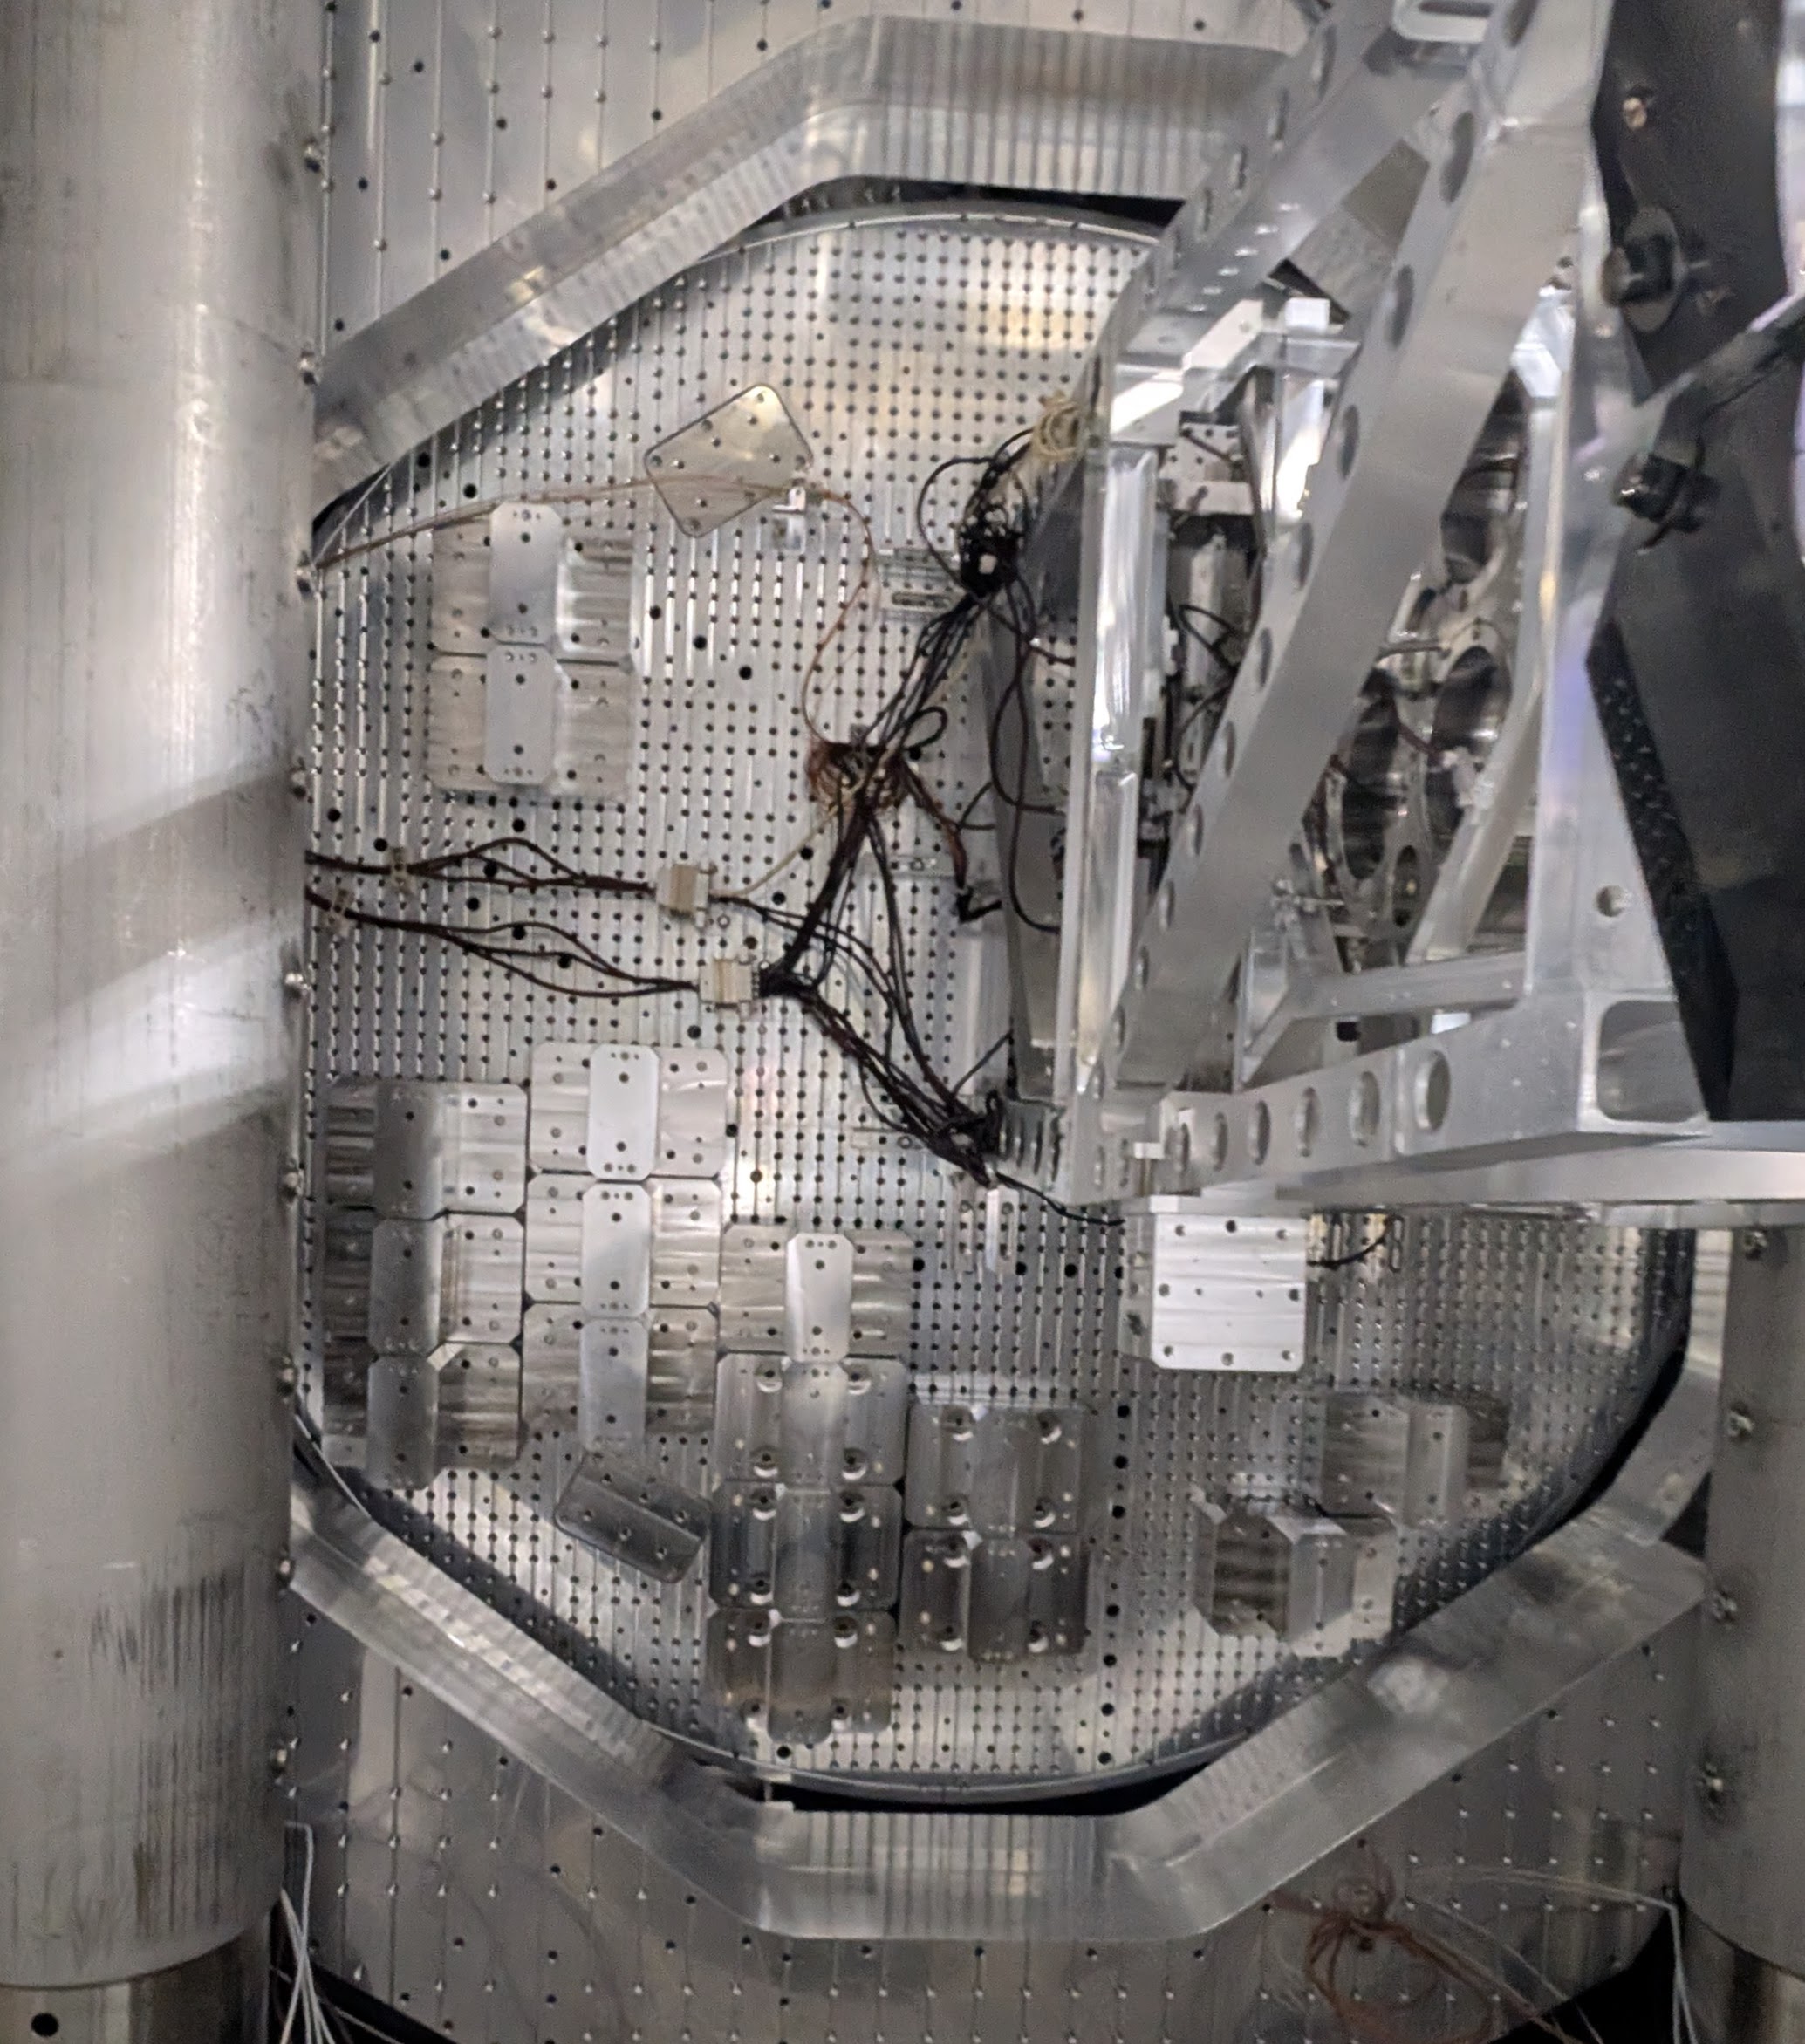
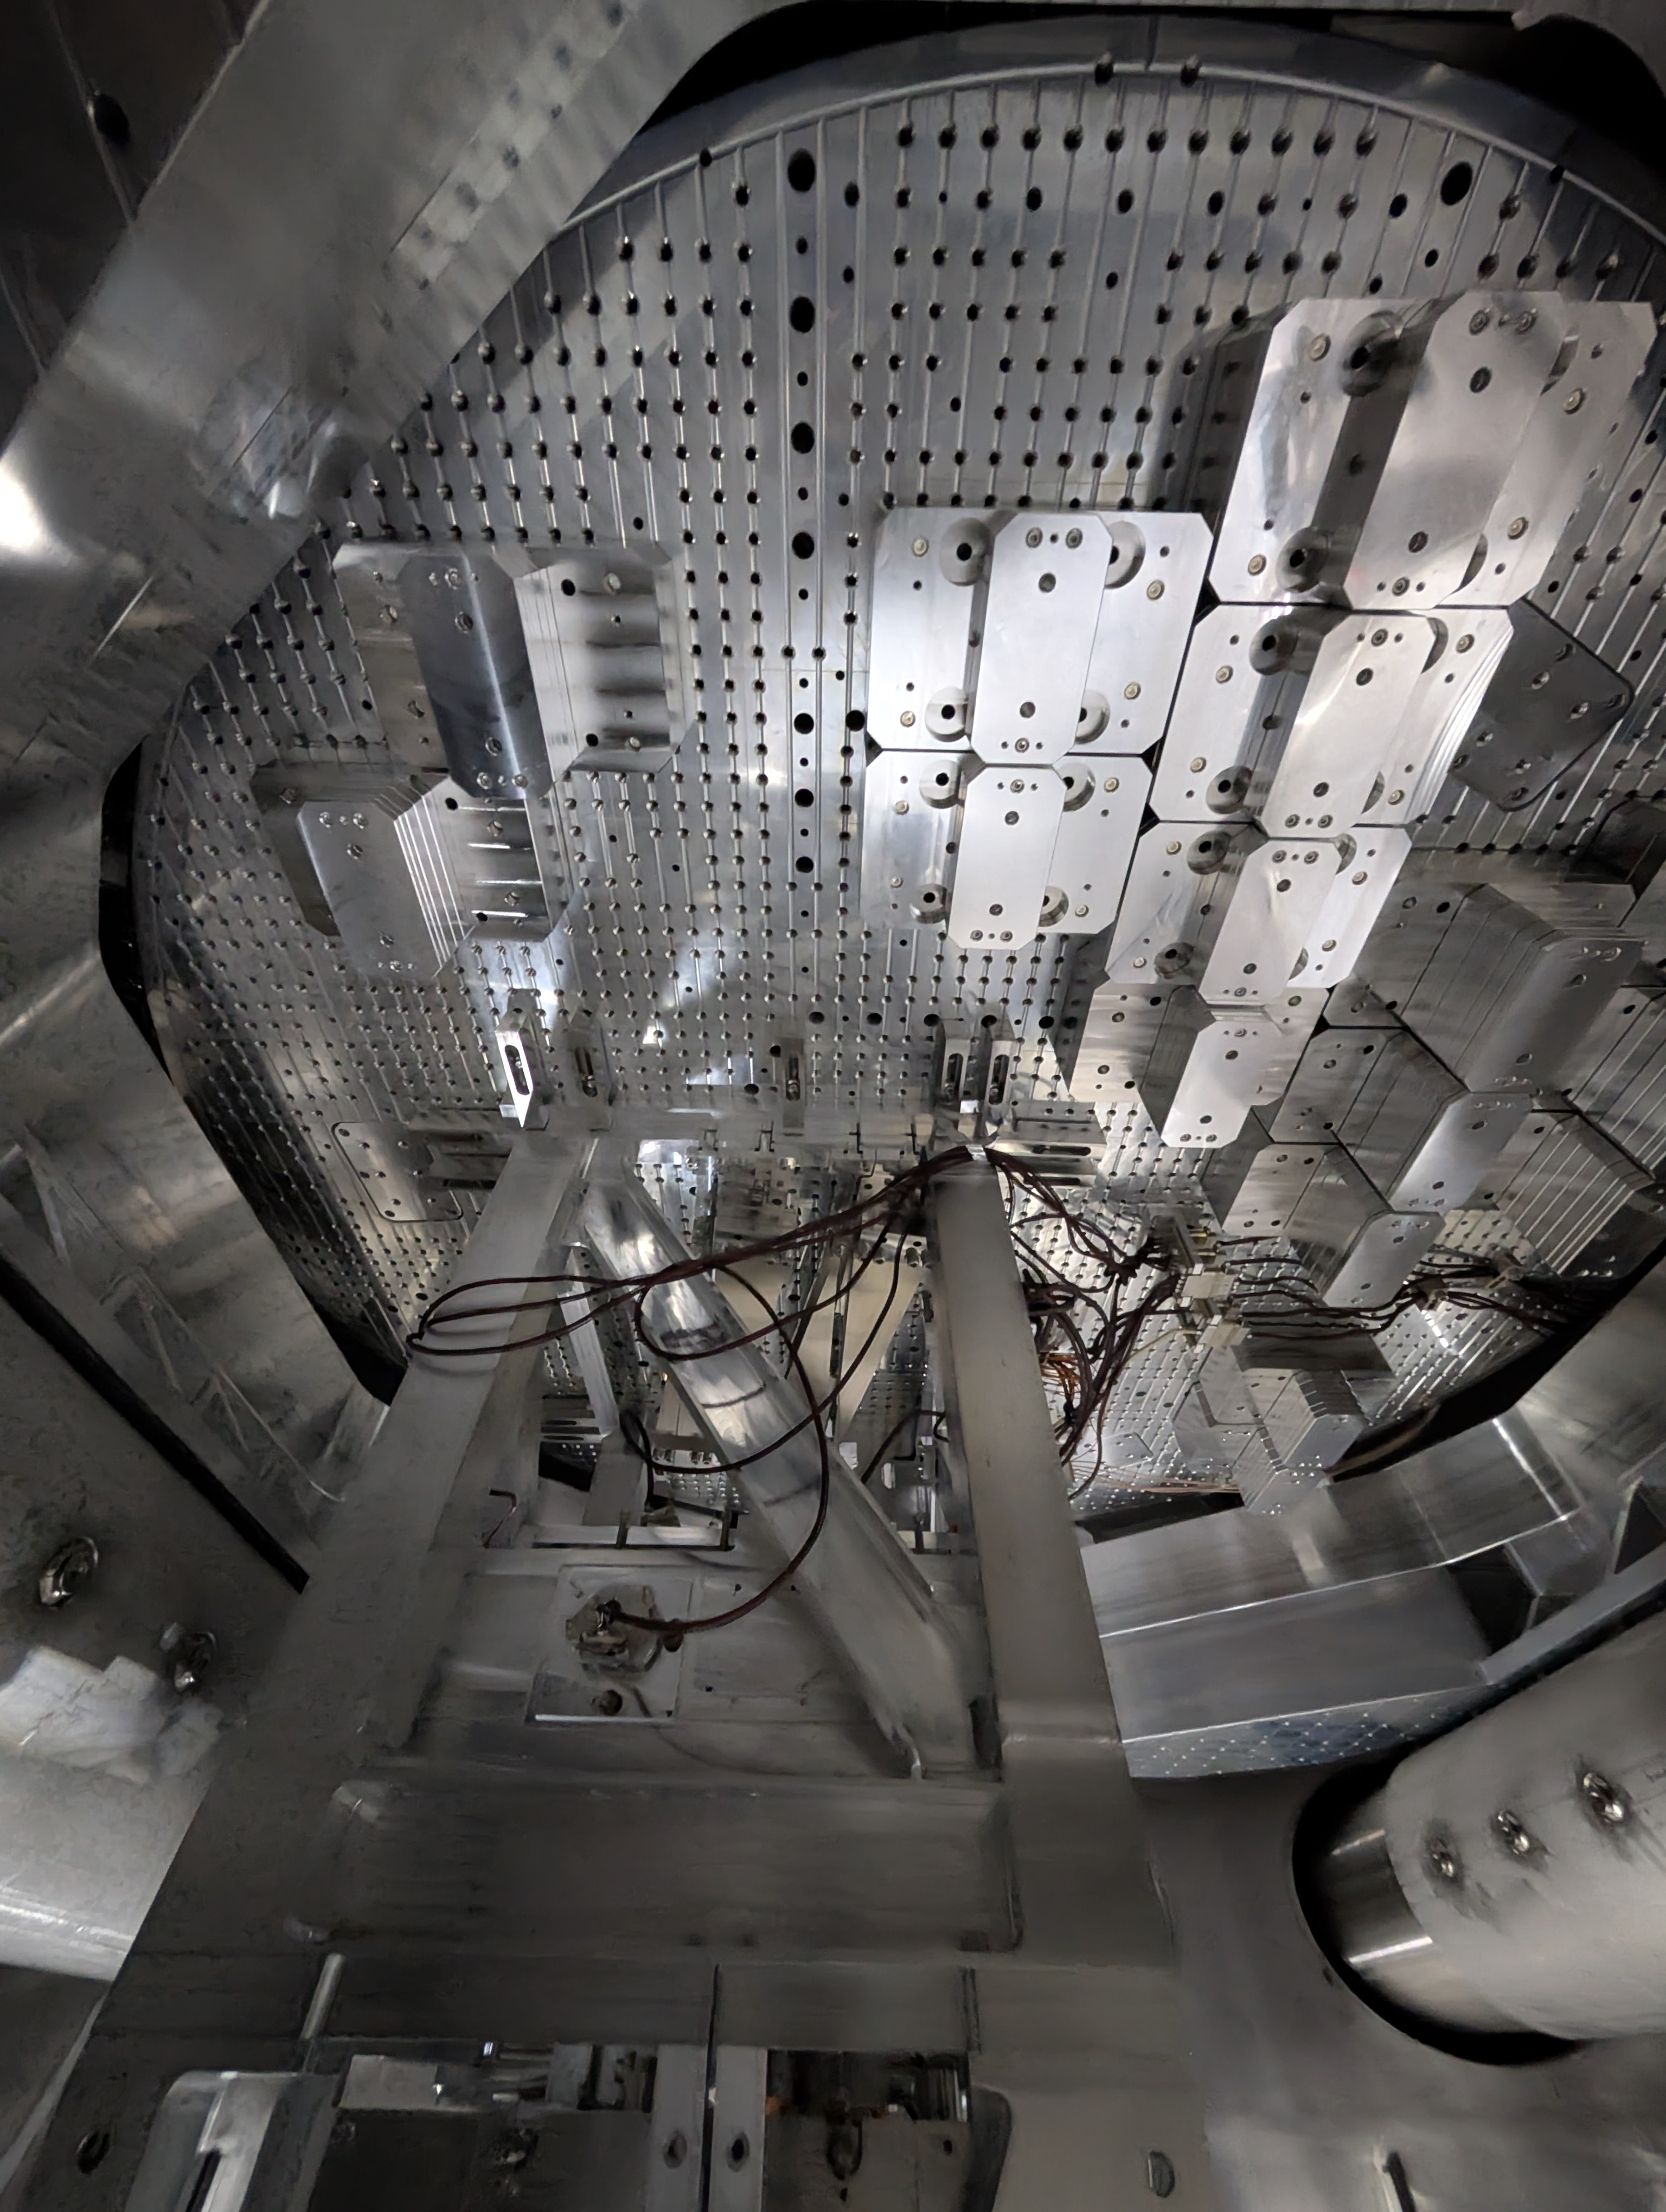
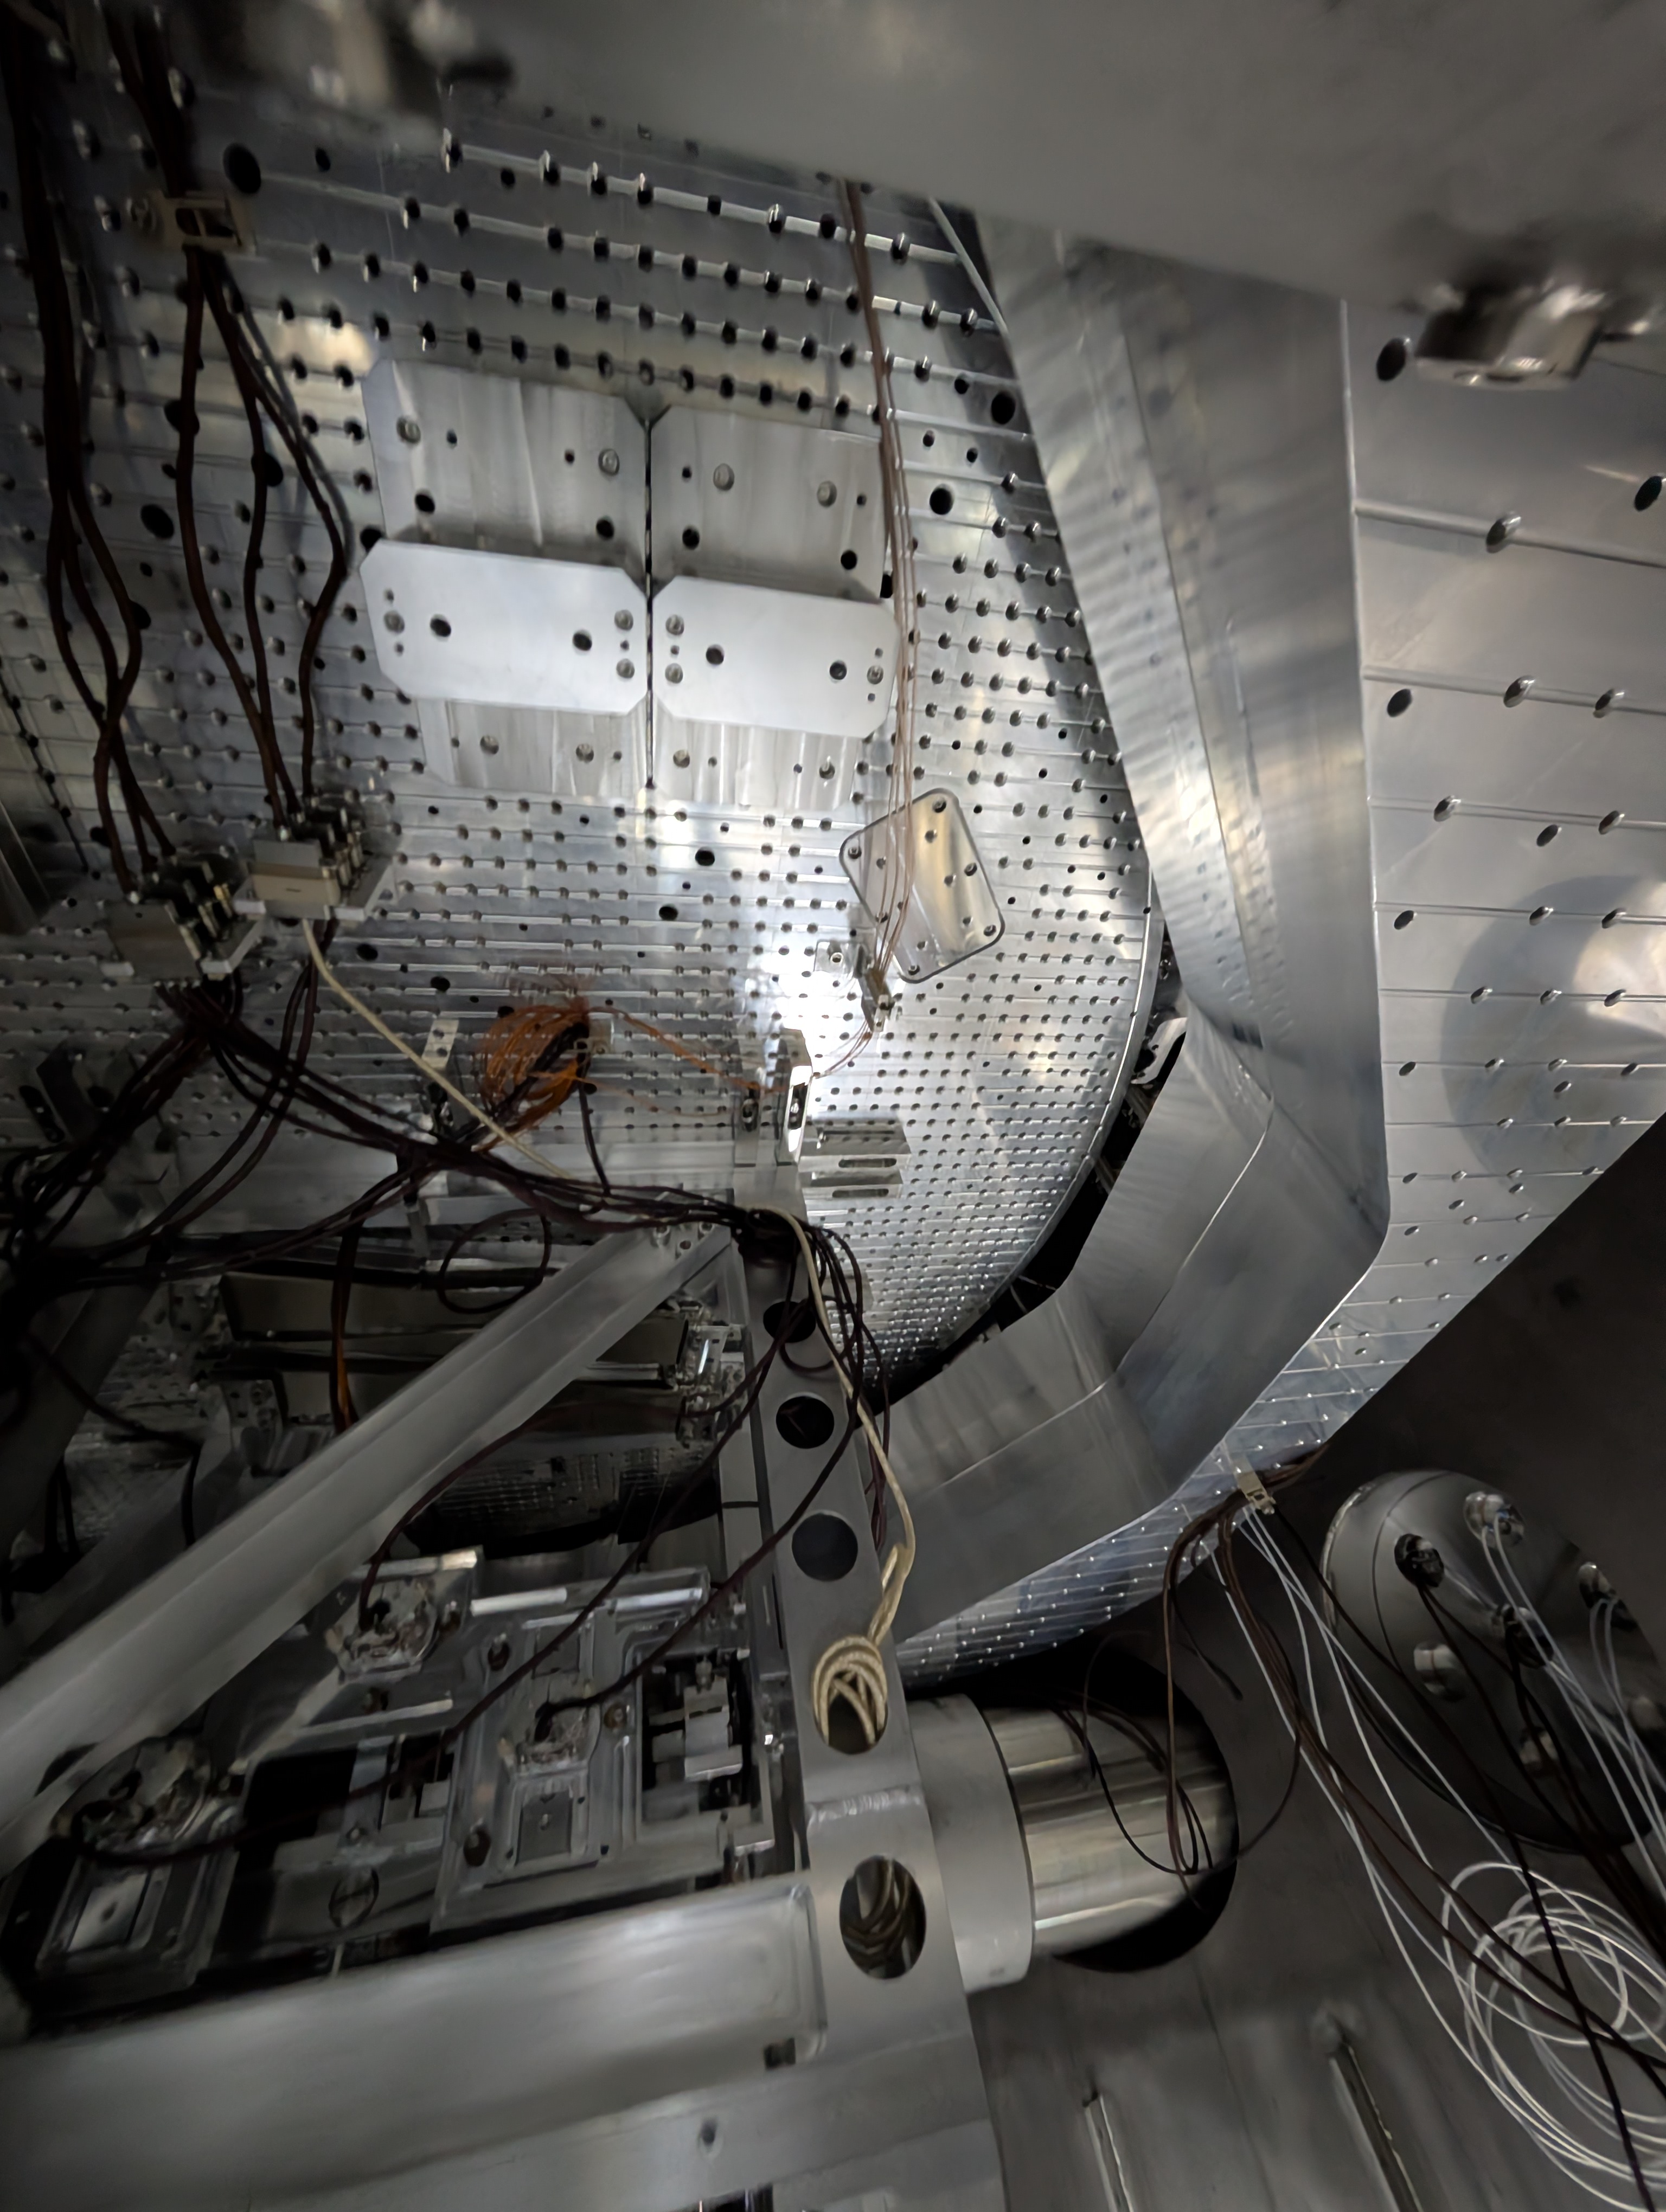
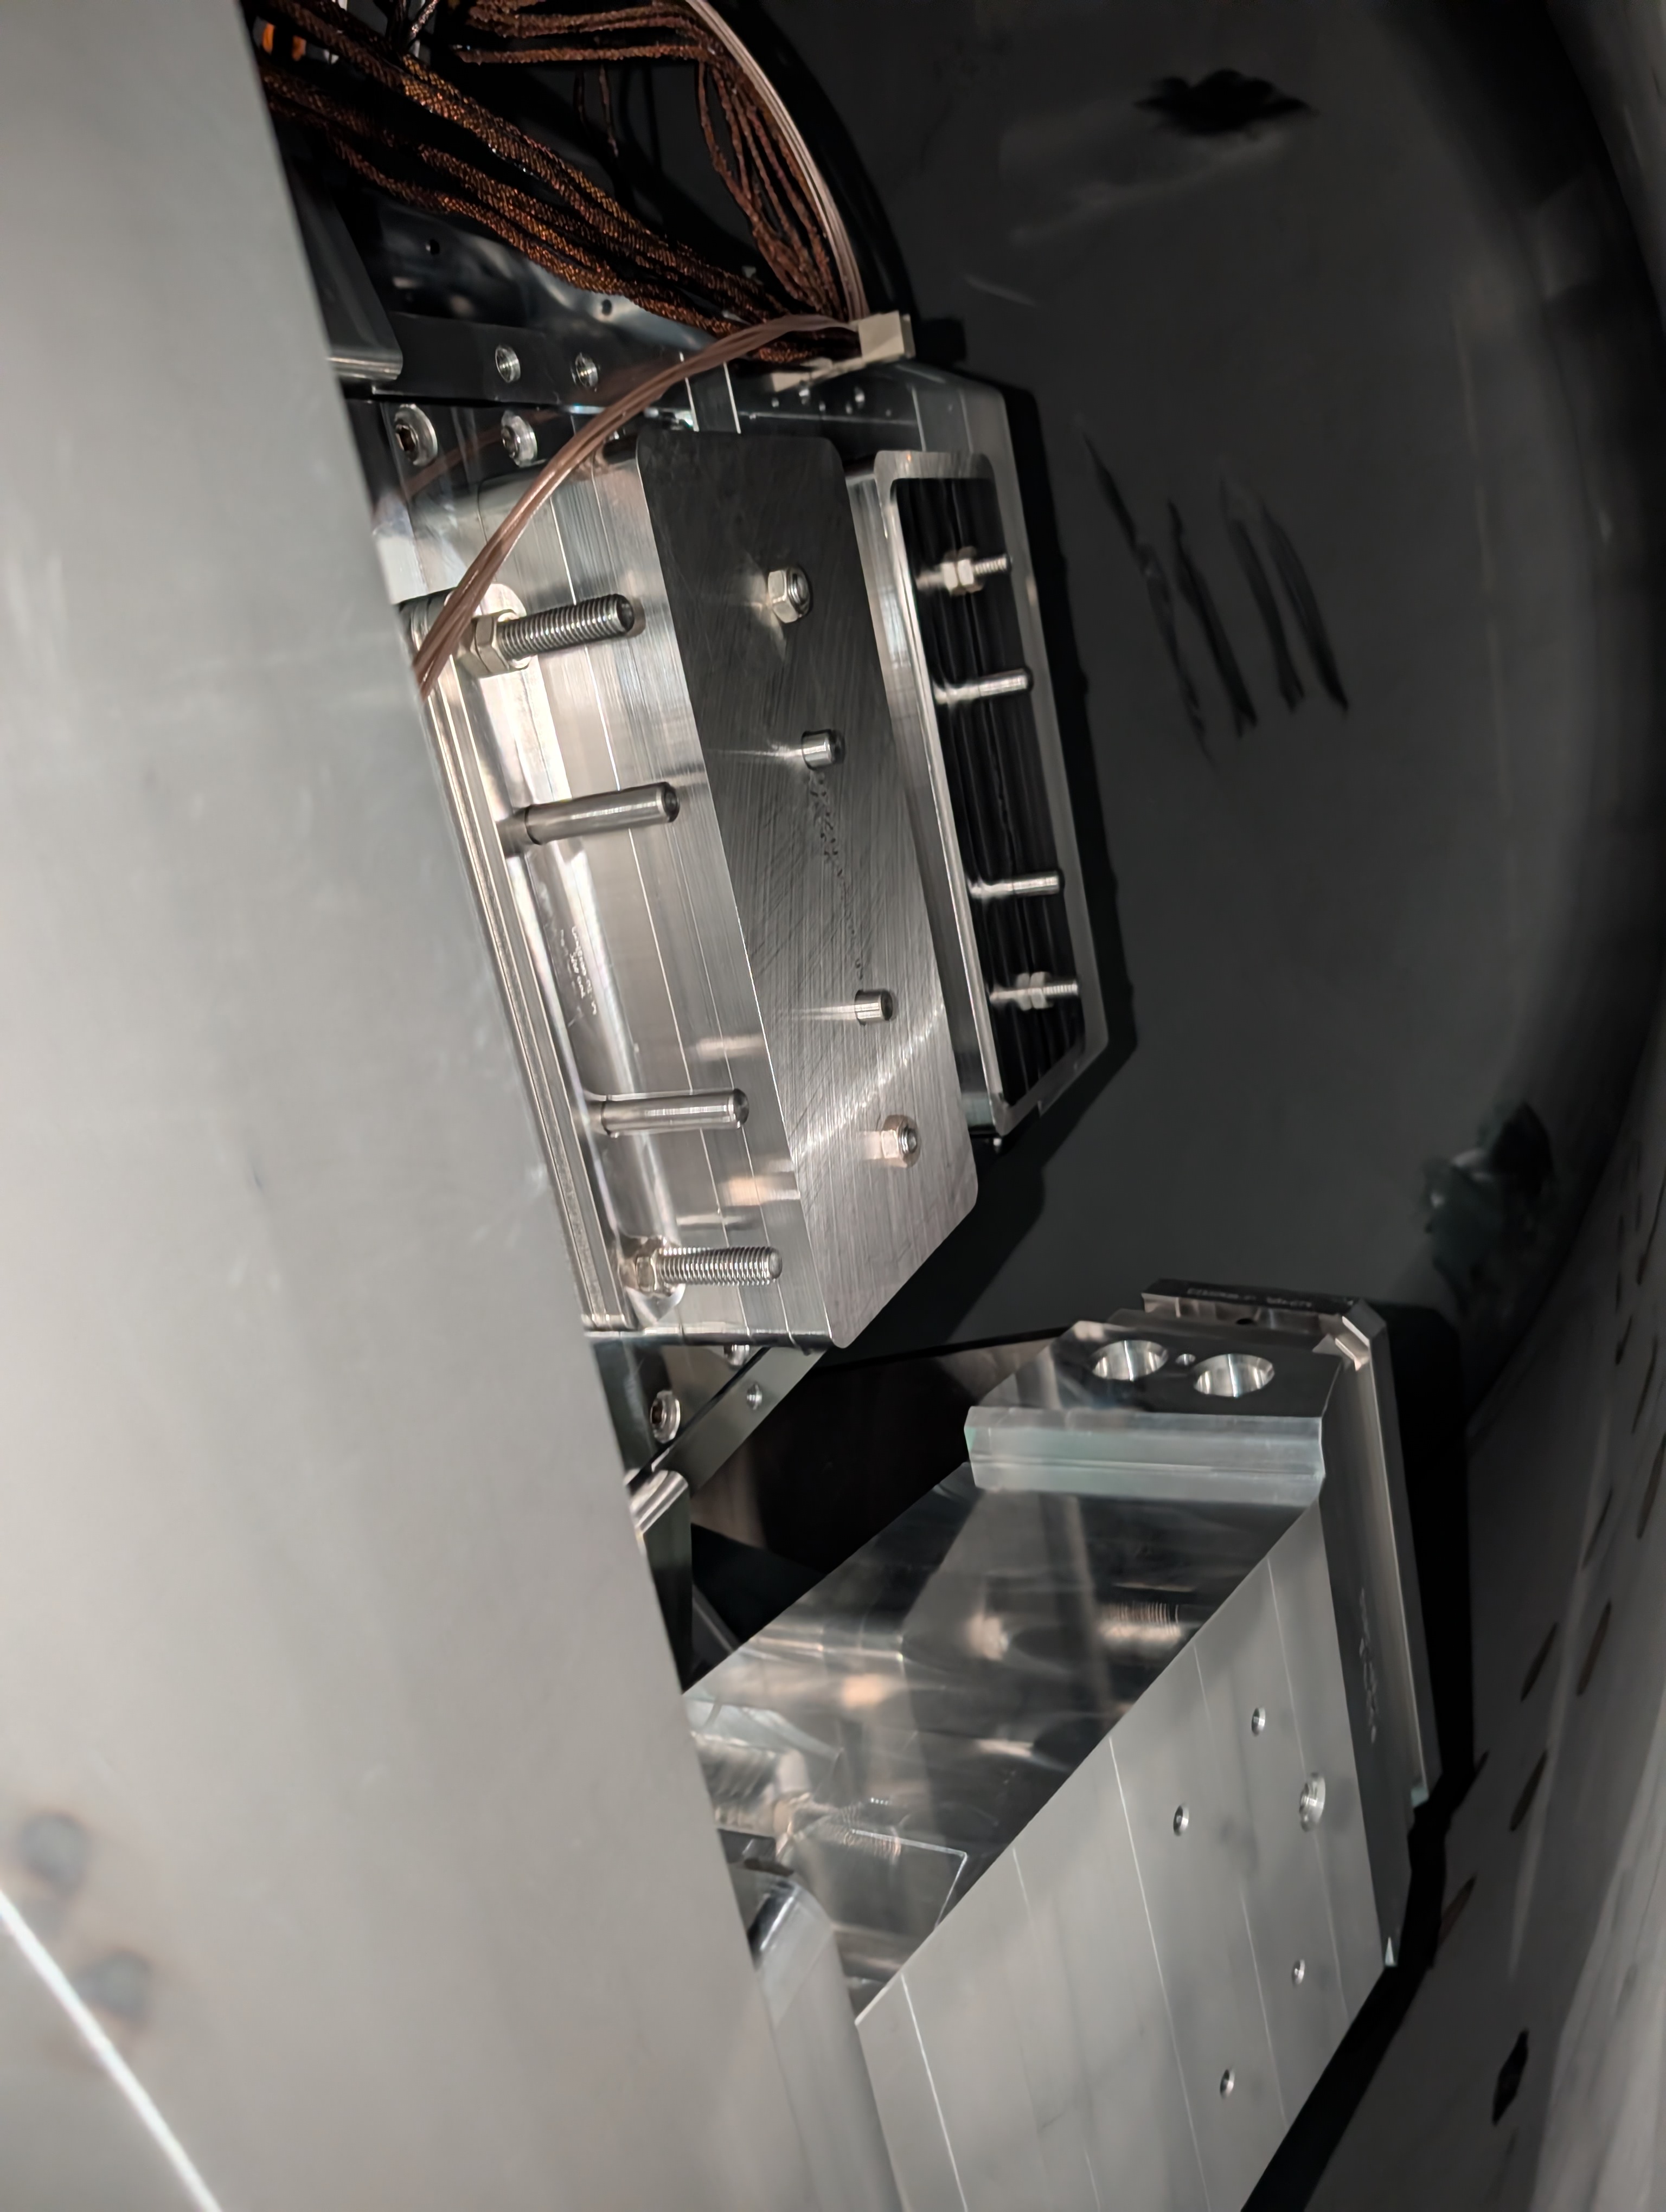
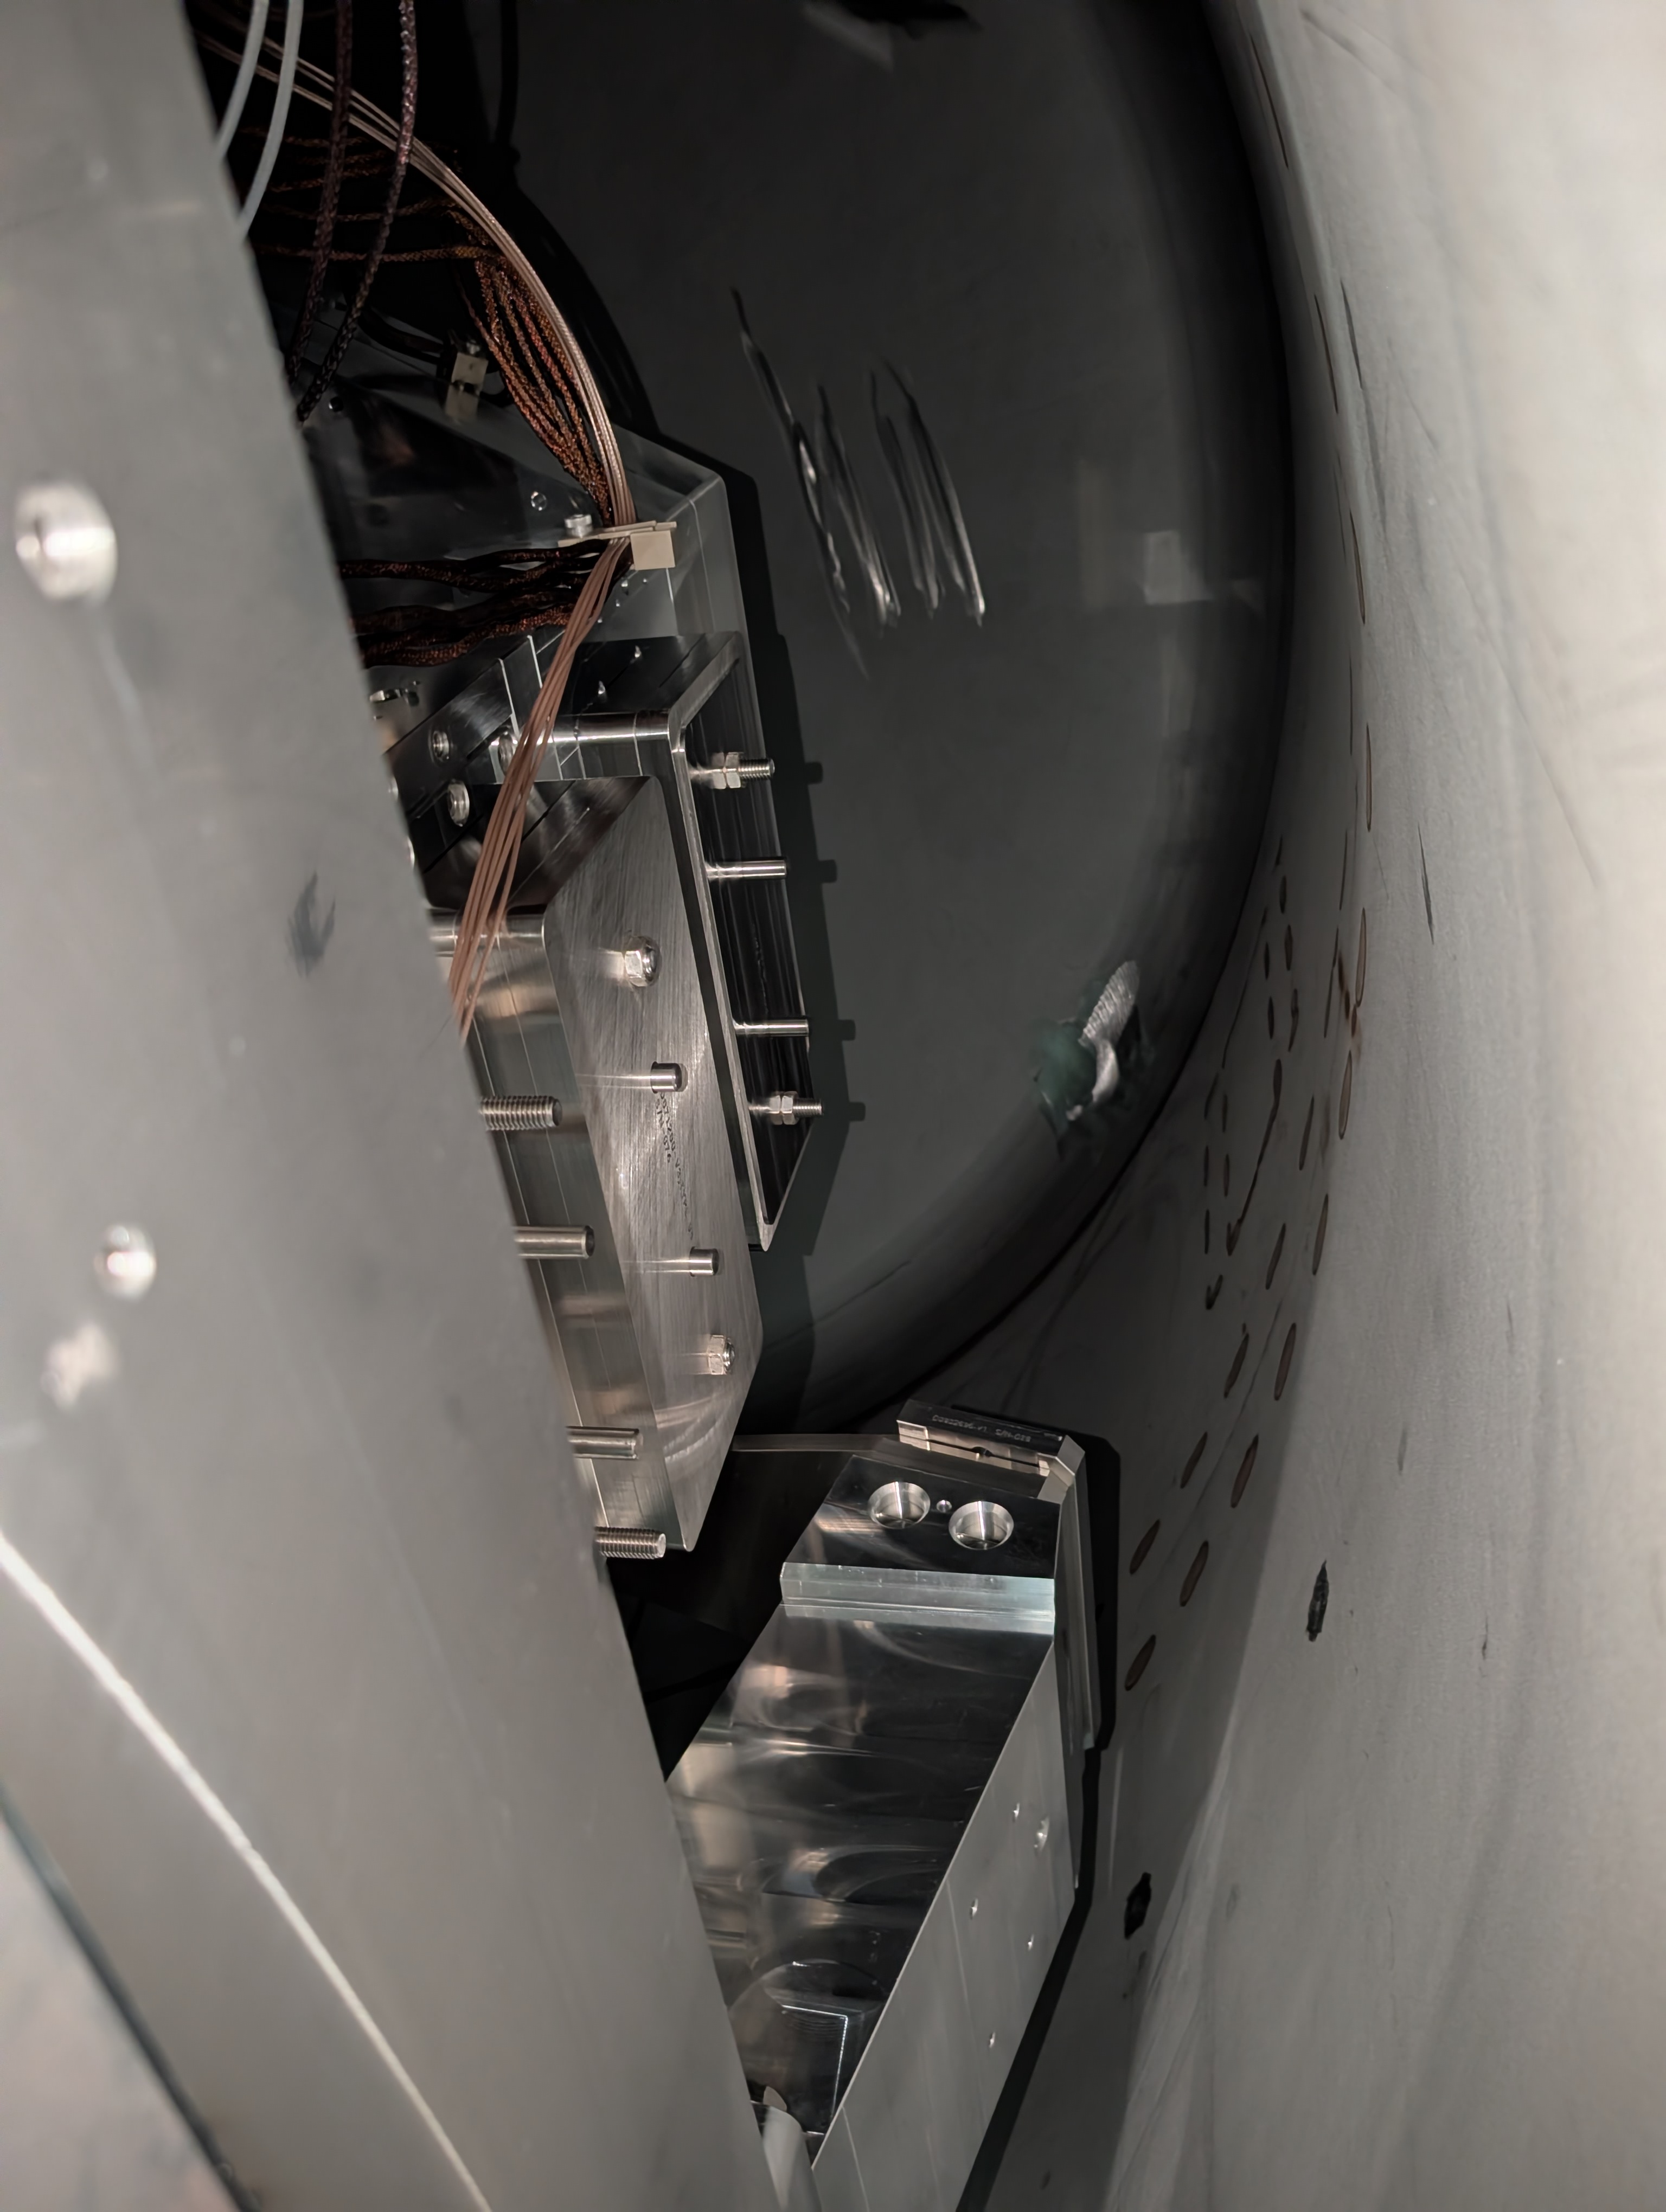
BSC2 balance mass notes and pictures from Jim
TITLE: 06/29 Day Shift: 1430-2330 UTC (0730-1630 PST), all times posted in UTC
STATE of H1: Planned Engineering
INCOMING OPERATOR: None
SHIFT SUMMARY:
BBSS closeout tasks in-chamber, lvea furniture-moving, SQZ work today. ITMy exhibited rung up motion in the afternoon--people in the next chamber over could see ITMy swinging!
LOG:
As wer WP 13361 the awiki OS was upgraded. It is running again.
R. Crouch, J. Oberling
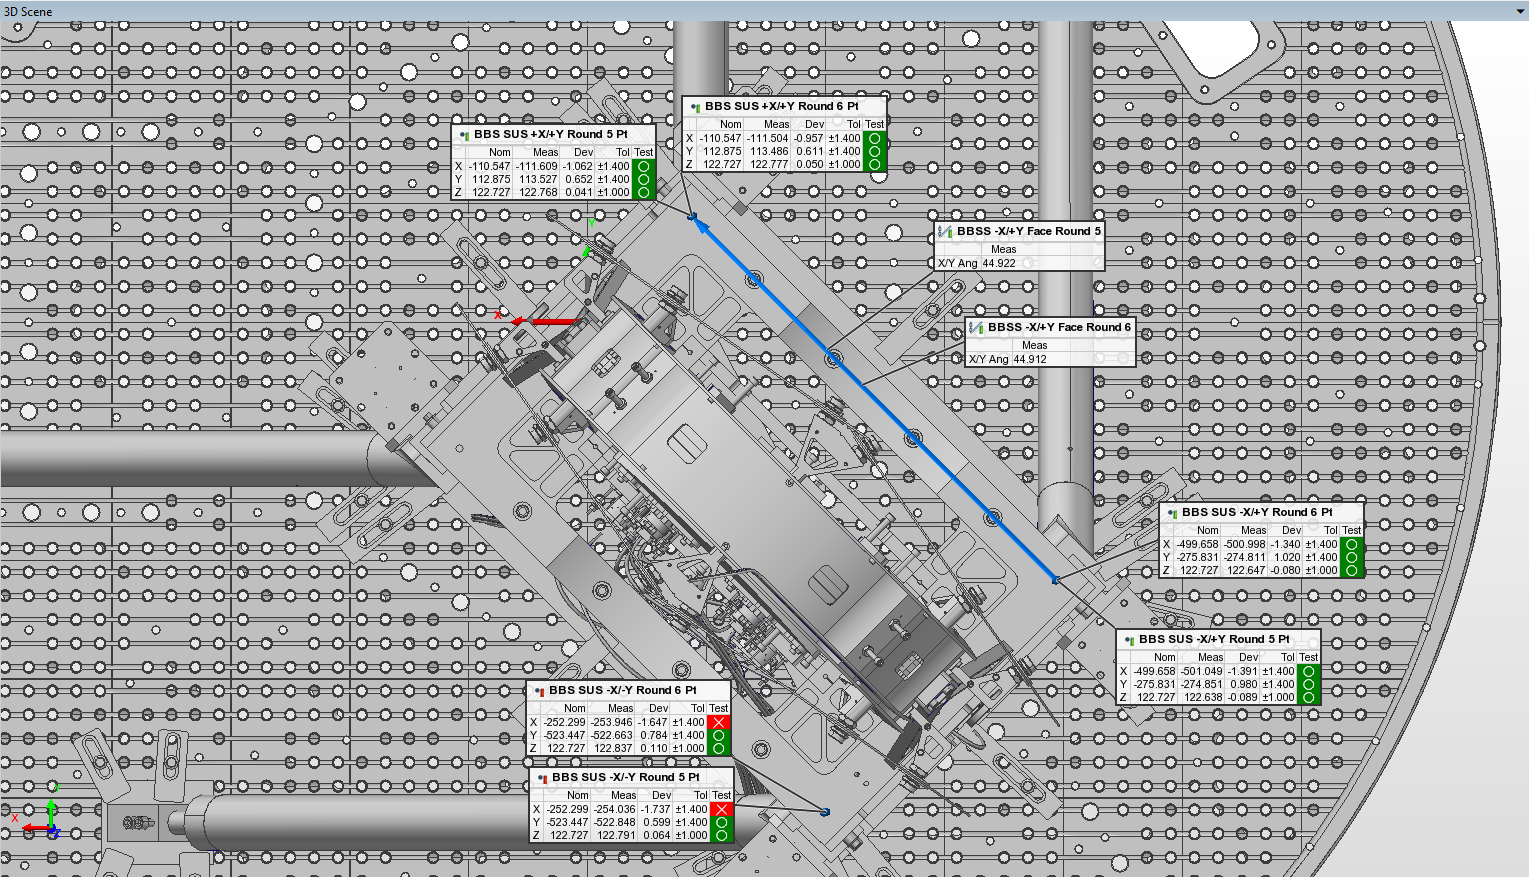
This morning we measured the position of the BBSS after the HEPI actuators were installed to see if/how things moved during actuator installation. Short version: Not much movement overall, but there are a couple spots that moved more than expected; there was a slight CW rotation of the BBSS of at most ~170 µrad.
The attached picture shows the position of our measurement points on the BBSS both before and after HEPI actuator installation; Round 5 is from last Wednesday, before the actuators were installed, and Round 6 is this morning. As the deviations in the picture are all related to the CAD nominal, the table below shows the measured positions from Round 5 and Round 6 and the deviation between these 2 measurements, to give an idea of the amount of movement from actuator install (all units are in mm).
| Measurement Point | Before Actuator Install (Round 5) | After Actuator Install (Round 6) | Deviation | |
| +X/+Y Point | X | -111.609 | -111.504 | 0.105 |
| Y | 113.527 | 113.486 | -0.041 | |
| Z | 122.768 | 122.777 | 0.009 | |
| -X/+Y Point | X | -501.049 | -500.998 | 0.051 |
| Y | -274.851 | -274.811 | 0.040 | |
| Z | 122.638 | 122.647 | 0.009 | |
| -X/-Y Point | X | -254.036 | -253.946 | 0.090 |
| Y | -522.848 | -522.663 | 0.185 | |
| Z | 122.791 | 122.837 | 0.046 | |
So all in all, not much motion, as we anticipate. However, there are a couple points that did move: The +X/+Y point moved +X by 0.105 mm, and the -X/-Y point moved +X by 0.09 mm and +Y by 0.185 mm. Overall this appears to indicate a +X shift and a CW rotation, but I can't really square that large +Y move in the -X/-Y point with anything else, it really stands out and doesn't make much sense to me. I'll think on this some more and post any revelations as a comment, but for now everything is still within our position spec and we rotated a little more in the CW direction (which based on Keita's last alog should help the overall IFO alignment), so onward towards chamber closeout we go.
We suspect this is the final FARO measurement of the BBSS that we'll take, but to be on the safe side we have left the FARO set up outside of WHAM3 for now.
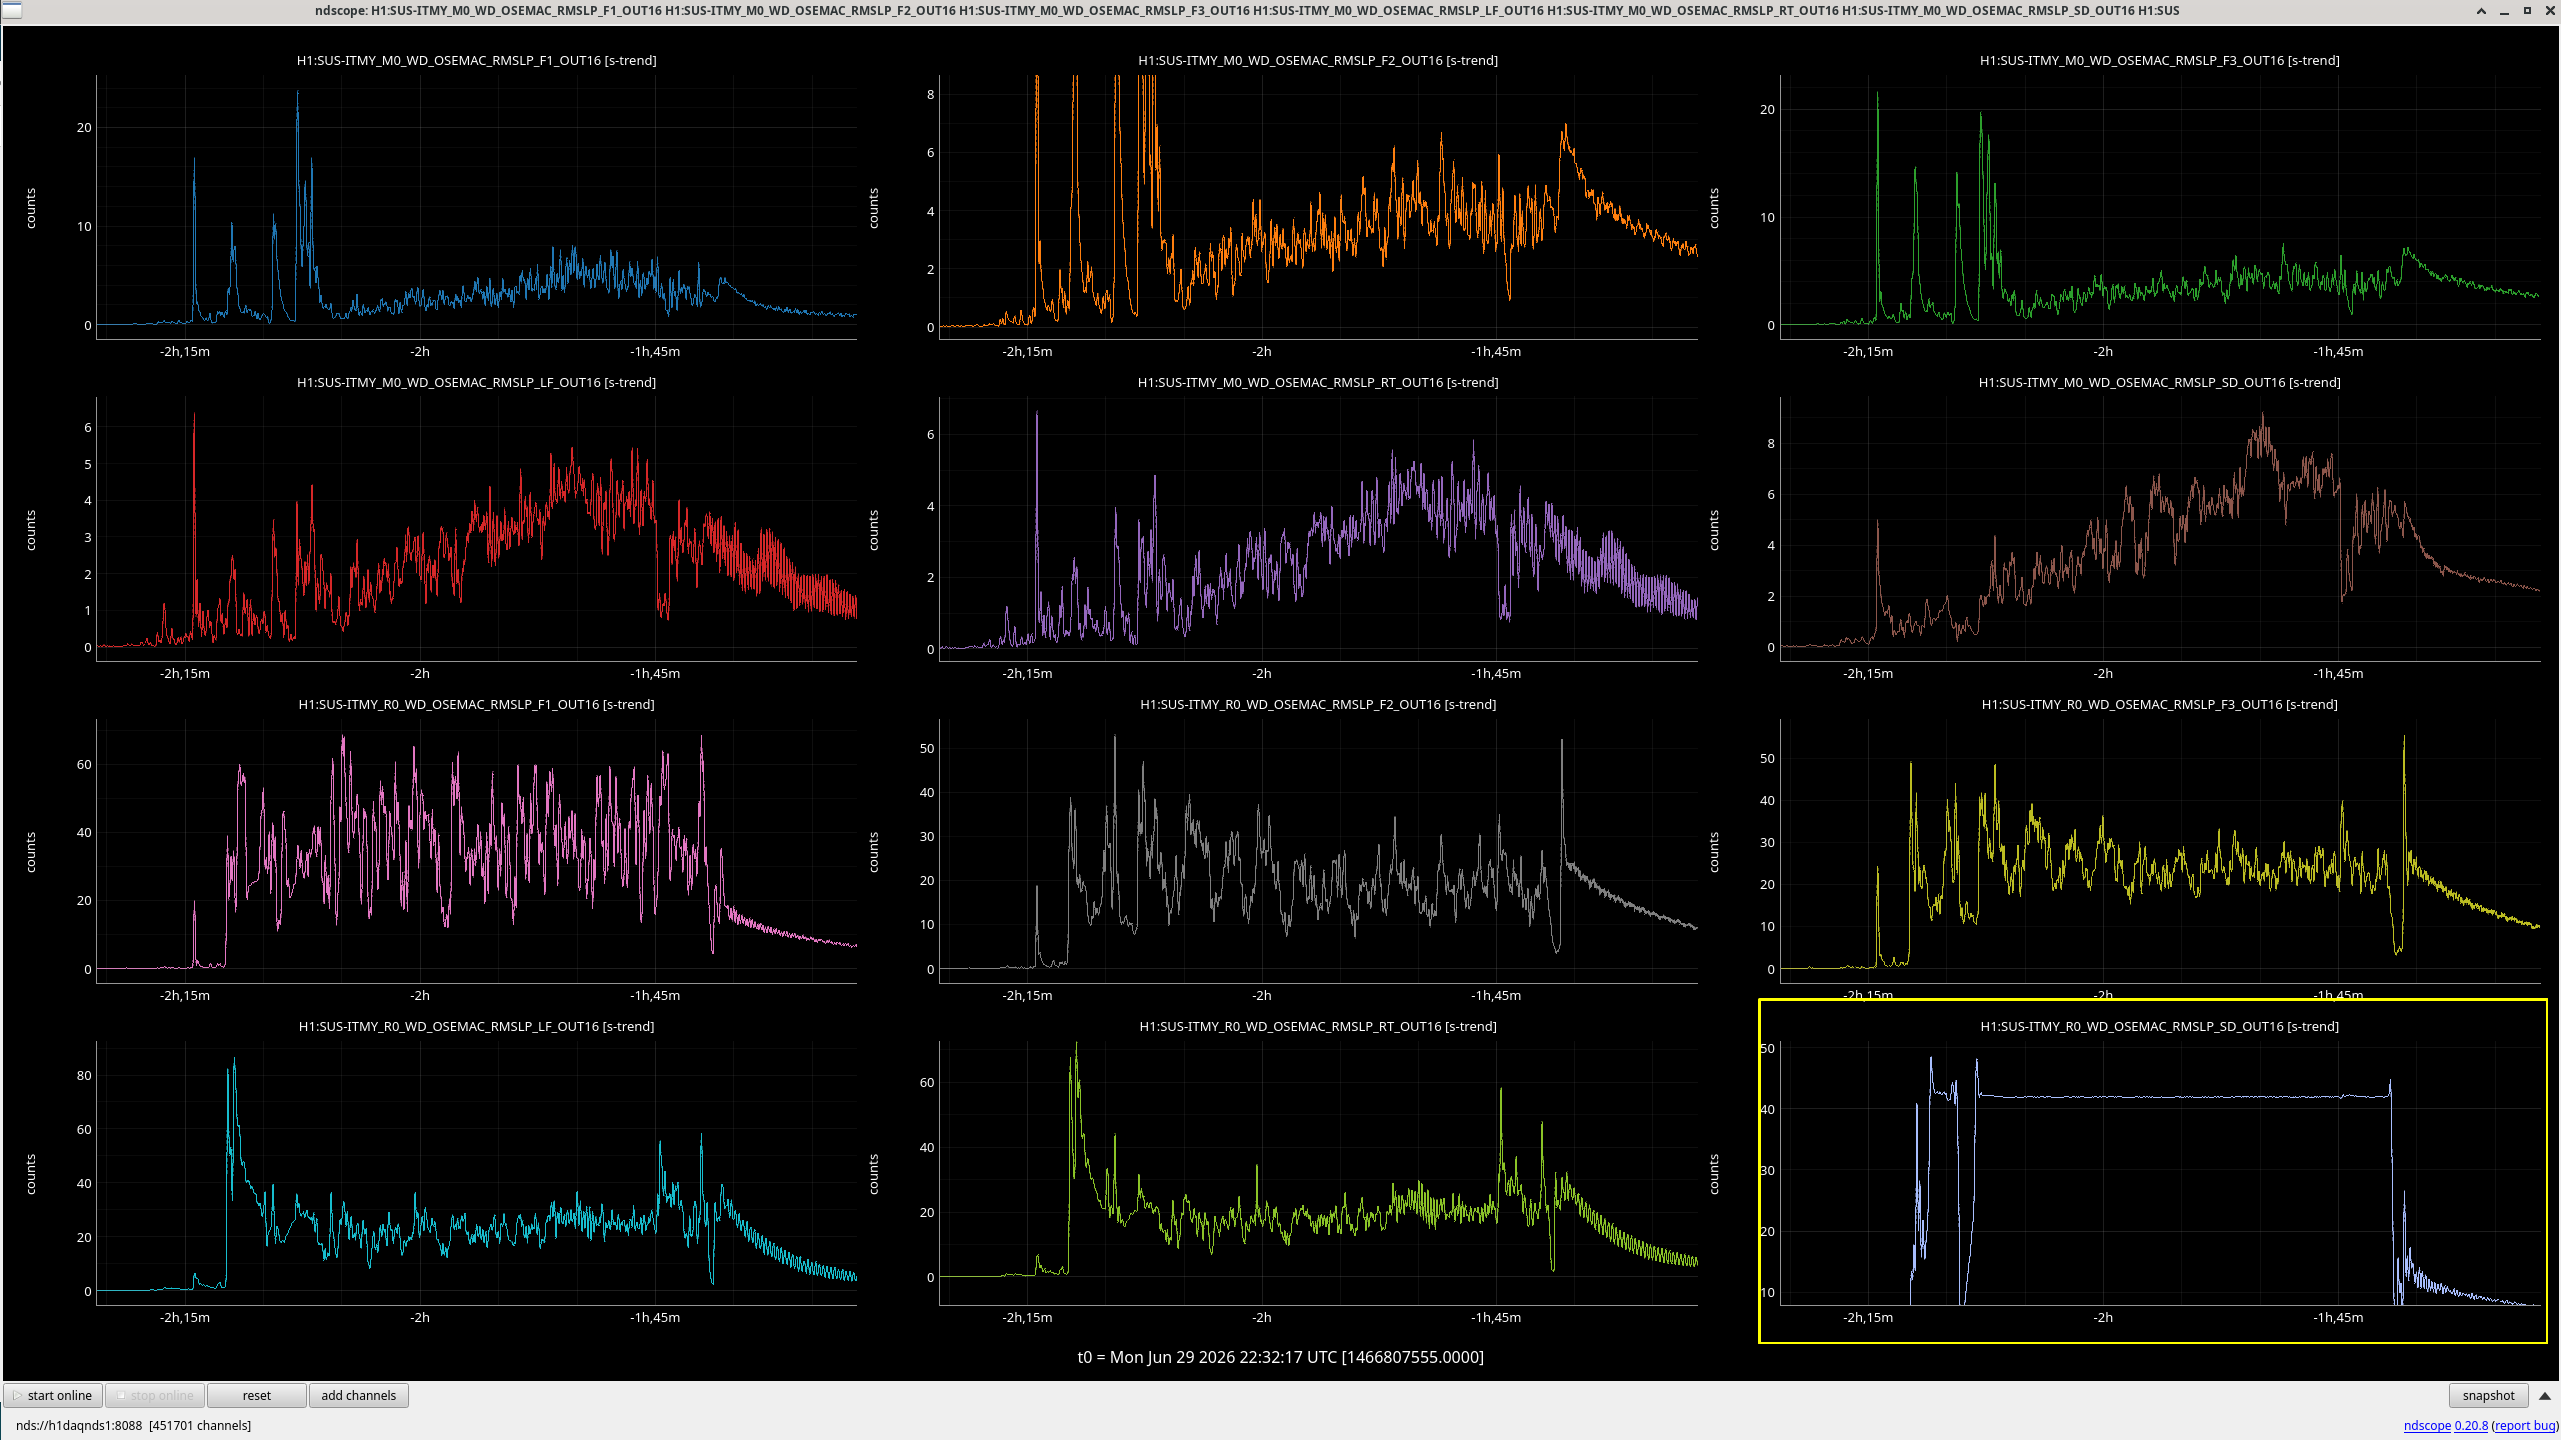
While Betsy, Ibrahim and I were in BSC2 to work on the BBSS, we noticed that ITMY started shaking significantly. To give you a sense of the motion, we could see the UIM moving while sitting on the floor next to the BBSS. Betsy called the control room, and no measurements were happening. This happened a few times until Corey put ITMY in SAFE.
I came out and began to investigate the issue with Oli. I tried putting ITMY back in ALIGNED, which turns on top mass damping and alignment offsets for the main and reaction chain as well as the L2 to R0 wit damping. After a few minutes, we start seeing saturations and large motion. At first I was suspicious of the L2 to R0 damping, so I turned it off, but the problem persisted. I then turned off all R0 damping, still the same problem. We put ITMY back in SAFE and the oseminfs of the main and reaction chain still show oscillation, but it seems to be stable or slowly damping down. There are also small kicks that the osems see. We're wondering if the in-chamber work is causing ITMY to move excessively.
We put ITMY back in aligned again and the excess motion damped down, as expected. However, we're still seeing some random saturation on R0 F3, and we're not sure why. The alignment offsets are the same that they've always been. Trending back to the start of the vent, it looks like ITMY R0 F3 may have always been occasionally saturating.
Whatever the problem was, it has stopped for now. Oli is looking into why the watchdogs didn't trip.
Here's what the watchdogs looked like for the M0 and R0 osems during the first round of being rung up (when they were rung up for ~40 mins before we put them in SAFE the first time). The watchdog value for R0 SD, which was the osem that was moving the most by far, was steady around 43um. The trip threshold for R0 is 200um. The reason why the watchdog value was so low even though it was moving so much is because the flag for SD was completely obscuring the light, as suggested by the OSEMINF OUT values. SD was saturating almost constantly. The light being completely blocked and saturating on SD also messes up the T damping loop, which could've made everything worse. The rest of the R0 osems were also saturating, but not as often, and the M0 osems were barely saturating, if at all.
We have no idea why R0 was pushed so far into the SD coil driver.
We also don't know if the suspension would have tripped if the SD OSEM would've been able to see the movement, but it definitely should have. It would be good to find a way to have the suspension trip if it suddenly can't 'see' the flag (either fully out or in), but that can be hard to do since we don't want the suspension tripping every time an osem saturates for a split second.
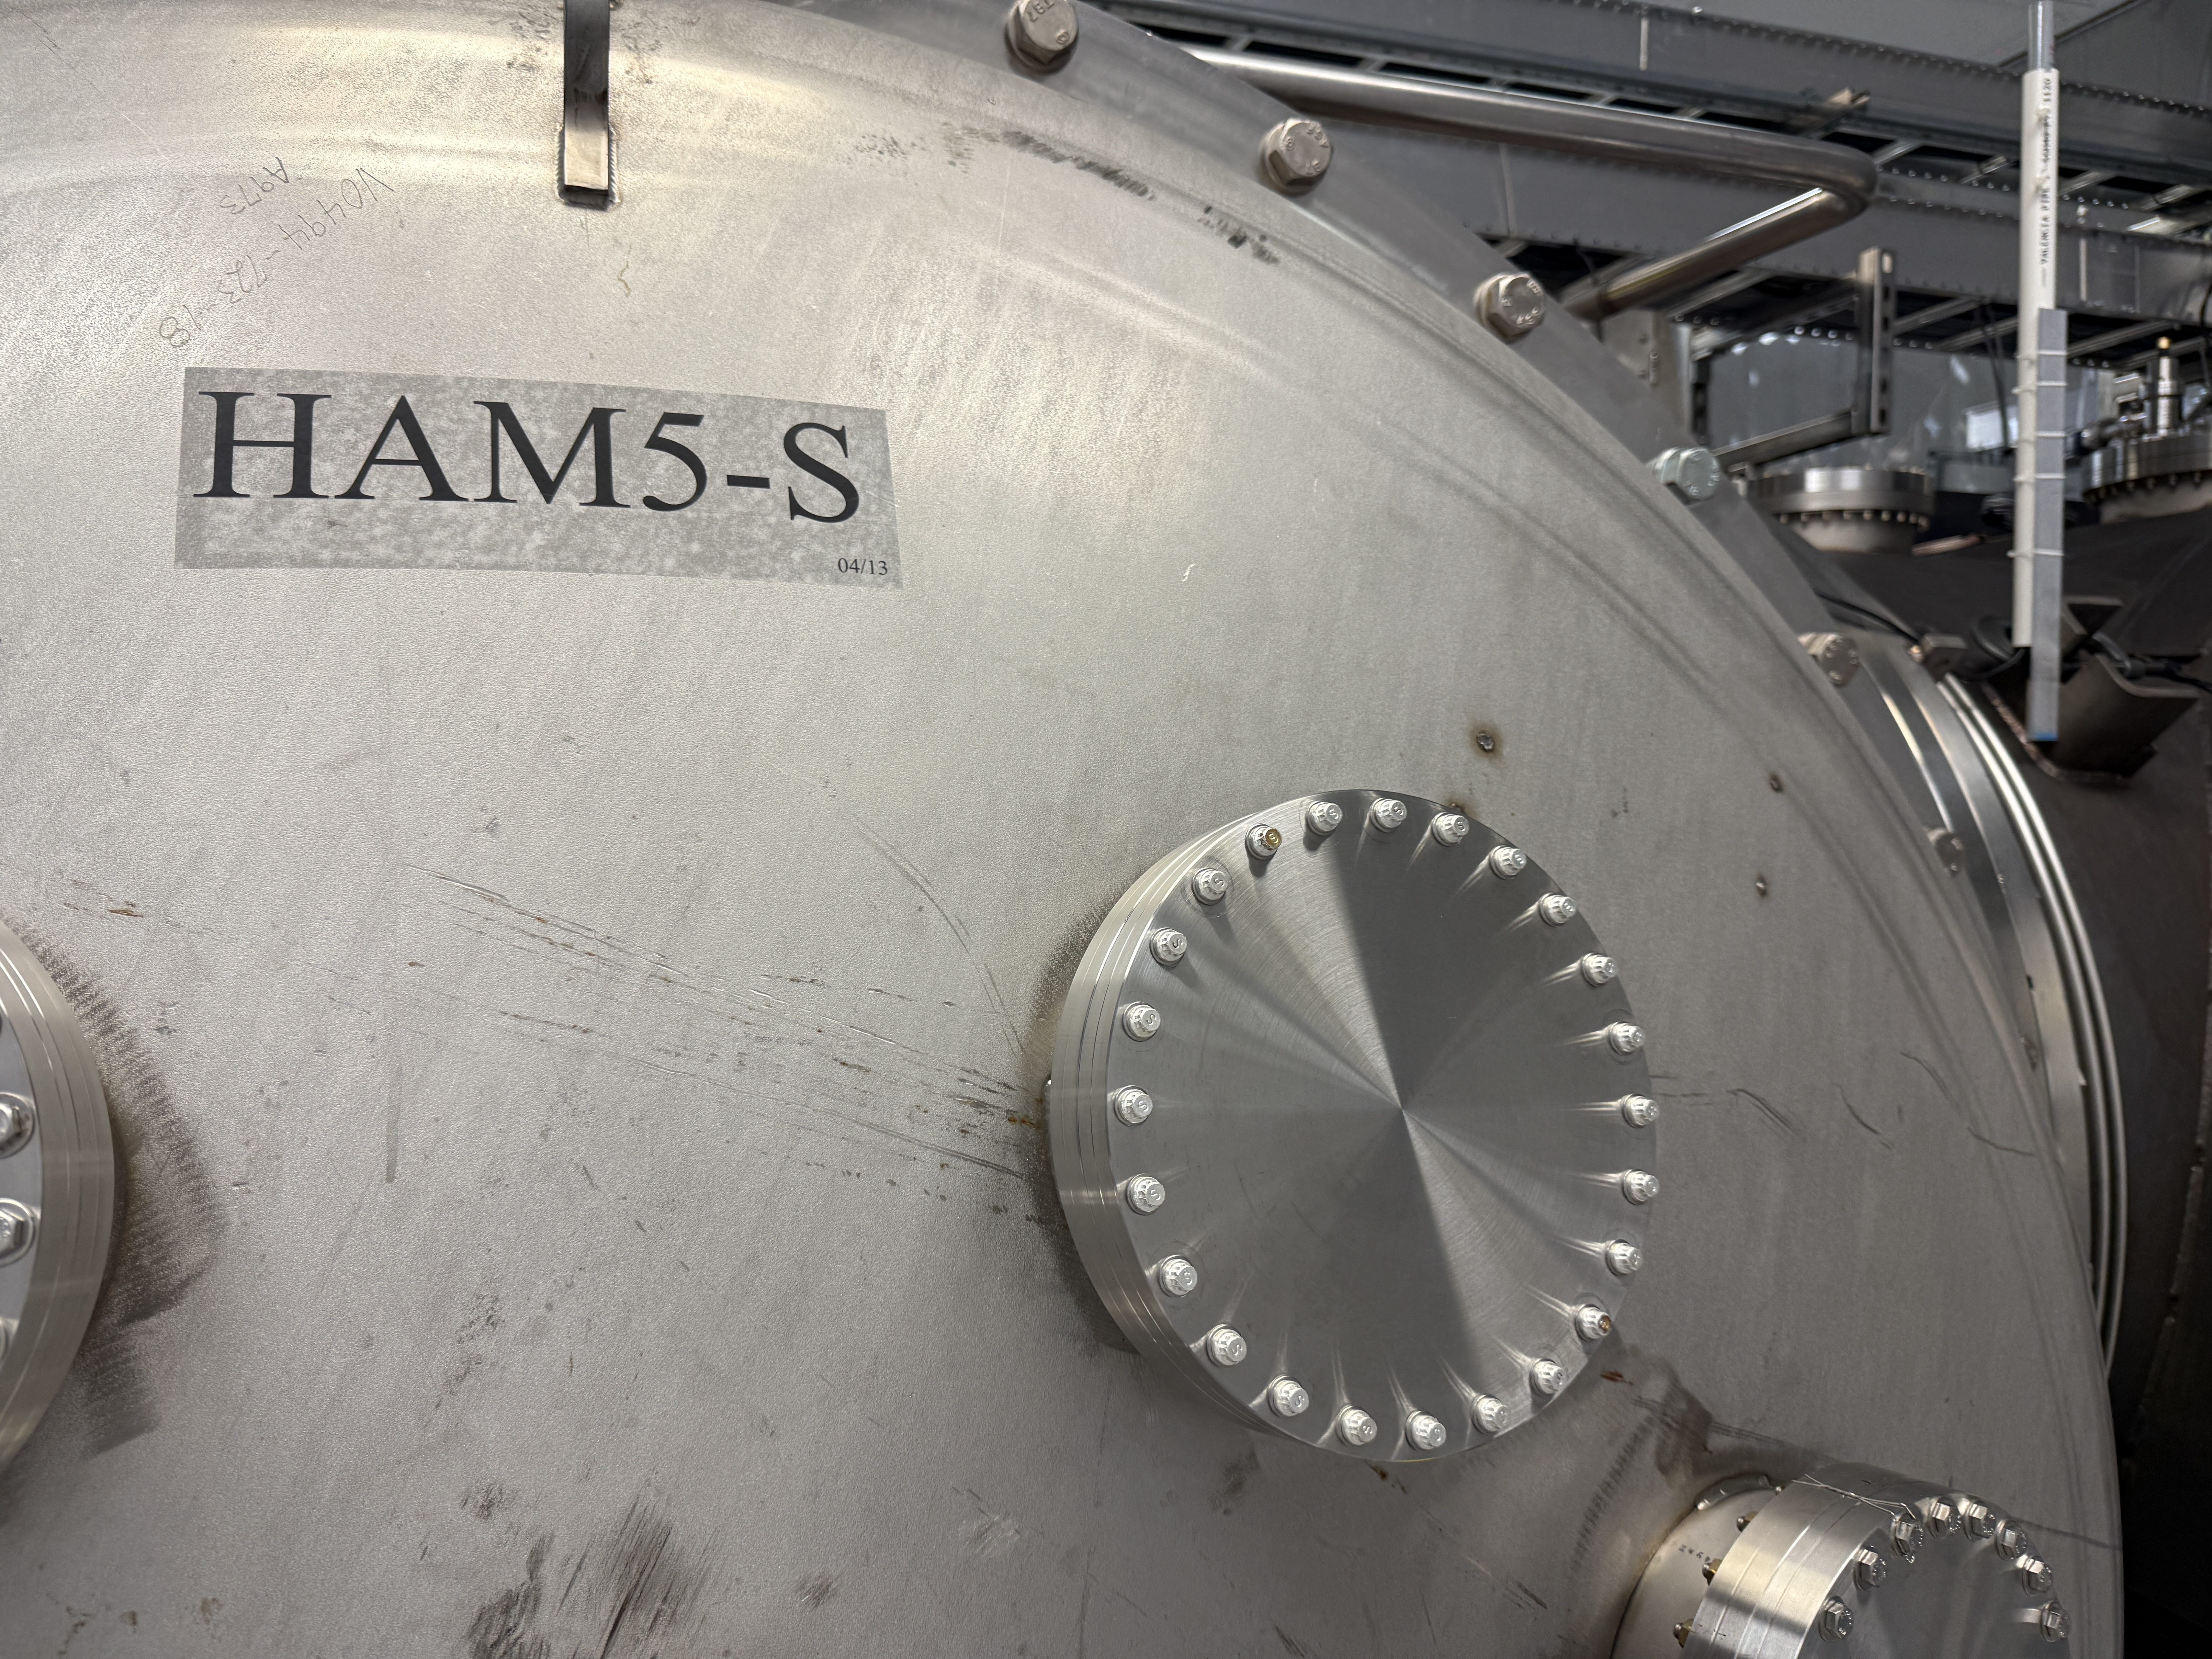
Per FRS 38164, the viewport that was on the A1F2 port (South door) of HAM5 was removed and replaced with a blank. The CF knife edges on both the door flange and the viewport looked good.
There was no sticker on the viewport, but the scribe on the edge of the flange indicate that it is a ZV-800, serial number R140.
Another port to add to the pumpdown leak check list.
Today Ibrahim and I tried water to remove the sleek/spots/scratches on the BBSS AR detailed in alog 90600. I tried to rub a water soaked q-tip on a small ~5mm x 2mm section of one fo the lower areas previously worked on. Once scrubbed I chase wiped it with a methanol alpha swab. I repeated this a few times. No change. We then tried to see if we could see these features from looking at the inside of the AR surface through the barrel which sometimes gives hints at if things are in the optic (often visible to the viewing angle) or on-top of the optic (often invisible to this viewing angle). Unfortunately, we in-fact could see them this way. So, they may be scratches.
J. Kissel This morning, I re-installed the H1SPIH23 pathfinder's photodiode and picomotor cable-table-brackets (CTBs) that had been temporarily moved to upgrade the Corner 1 H1 capacitive position sensor (see LHO:90791), and re-dressed the cabling cable clamps. As mentioned in passing in LHO:90750 the CRS team will now consume the "spare" SPI_HAM3_004 quadrupus leg, that's J2 of the S2500513 instantiation of D2400342, which manifests as CH8 on the TCSY_C02, Controller 10, PICO G picomotor controller driven by the Corner 2 ECAT chassis -- which shows up on the H1SYSCSAUX computer's SDF system. So this has been routed in the +X direction and up in +Z to the table top on the +Y corner. I'll post pictures of all the re-dressing in the comments so I can better caption them.
Routing of the J2 leg of the D2400342 picomotor cable to the +Y corner of the table top.
Big picture images of the ST1 portion of the cable dressing on the Corner 1 sensor/actuator hatch.
Zoom of how the 2x D25 cables are routed with a nice soft s-curve as the cables jump from the ST1 suspended stage to ST0 support stage.
Zoom of Cable Table Bracket 1 (CTB-1), which collects
- (1st Floor) the D25 end of the D2400343 PD concentrator cable SPI_HAM3_[031-034] (hidden from view), and
- (2nd Floor) the D25 end of the D2400342 quadrupus picomotor cable SPI_HAM3_[001-004]
and sends them into
- (1st Floor) the ST1 end of 28 AWG D25 cable SPI_HAM3_014
- (2nd Floor) the ST1 end of 22 AWG D25 cable SPI_HAM3_012
Zoom of Cable Table Bracket 2 (CTB-2), which collects
- (1st floor) IFO MEAS A/B single-element PDs' duopus
- (2nd floor) IFO REF A/B single-element PDs' duopus
and sends them into
- (1st floor) Cable D, i.e. SPI_HAM3_032 of the D2400343 PD concentrator.
- (2nd floor) Cable E, i.e. SPI_HAM3_031 of the D2400343 PD concentrator.
Zoom of Cable Table Bracket 3 (CTB-3), which collects
- (1st floor) OL ISIK QPD B
- (2nd floor) FBR PWR REF/MEAS single-element PDs' duopus
and sends them to
- (1st floor) Cable B, i.e. SPI_HAM3_034 of D2400343 PD concentrator
- (2nd floor) Cable C, i.e. SPI_HAM3_033 of D2400343 PD concentrator
Mitchell, Disha, Robert
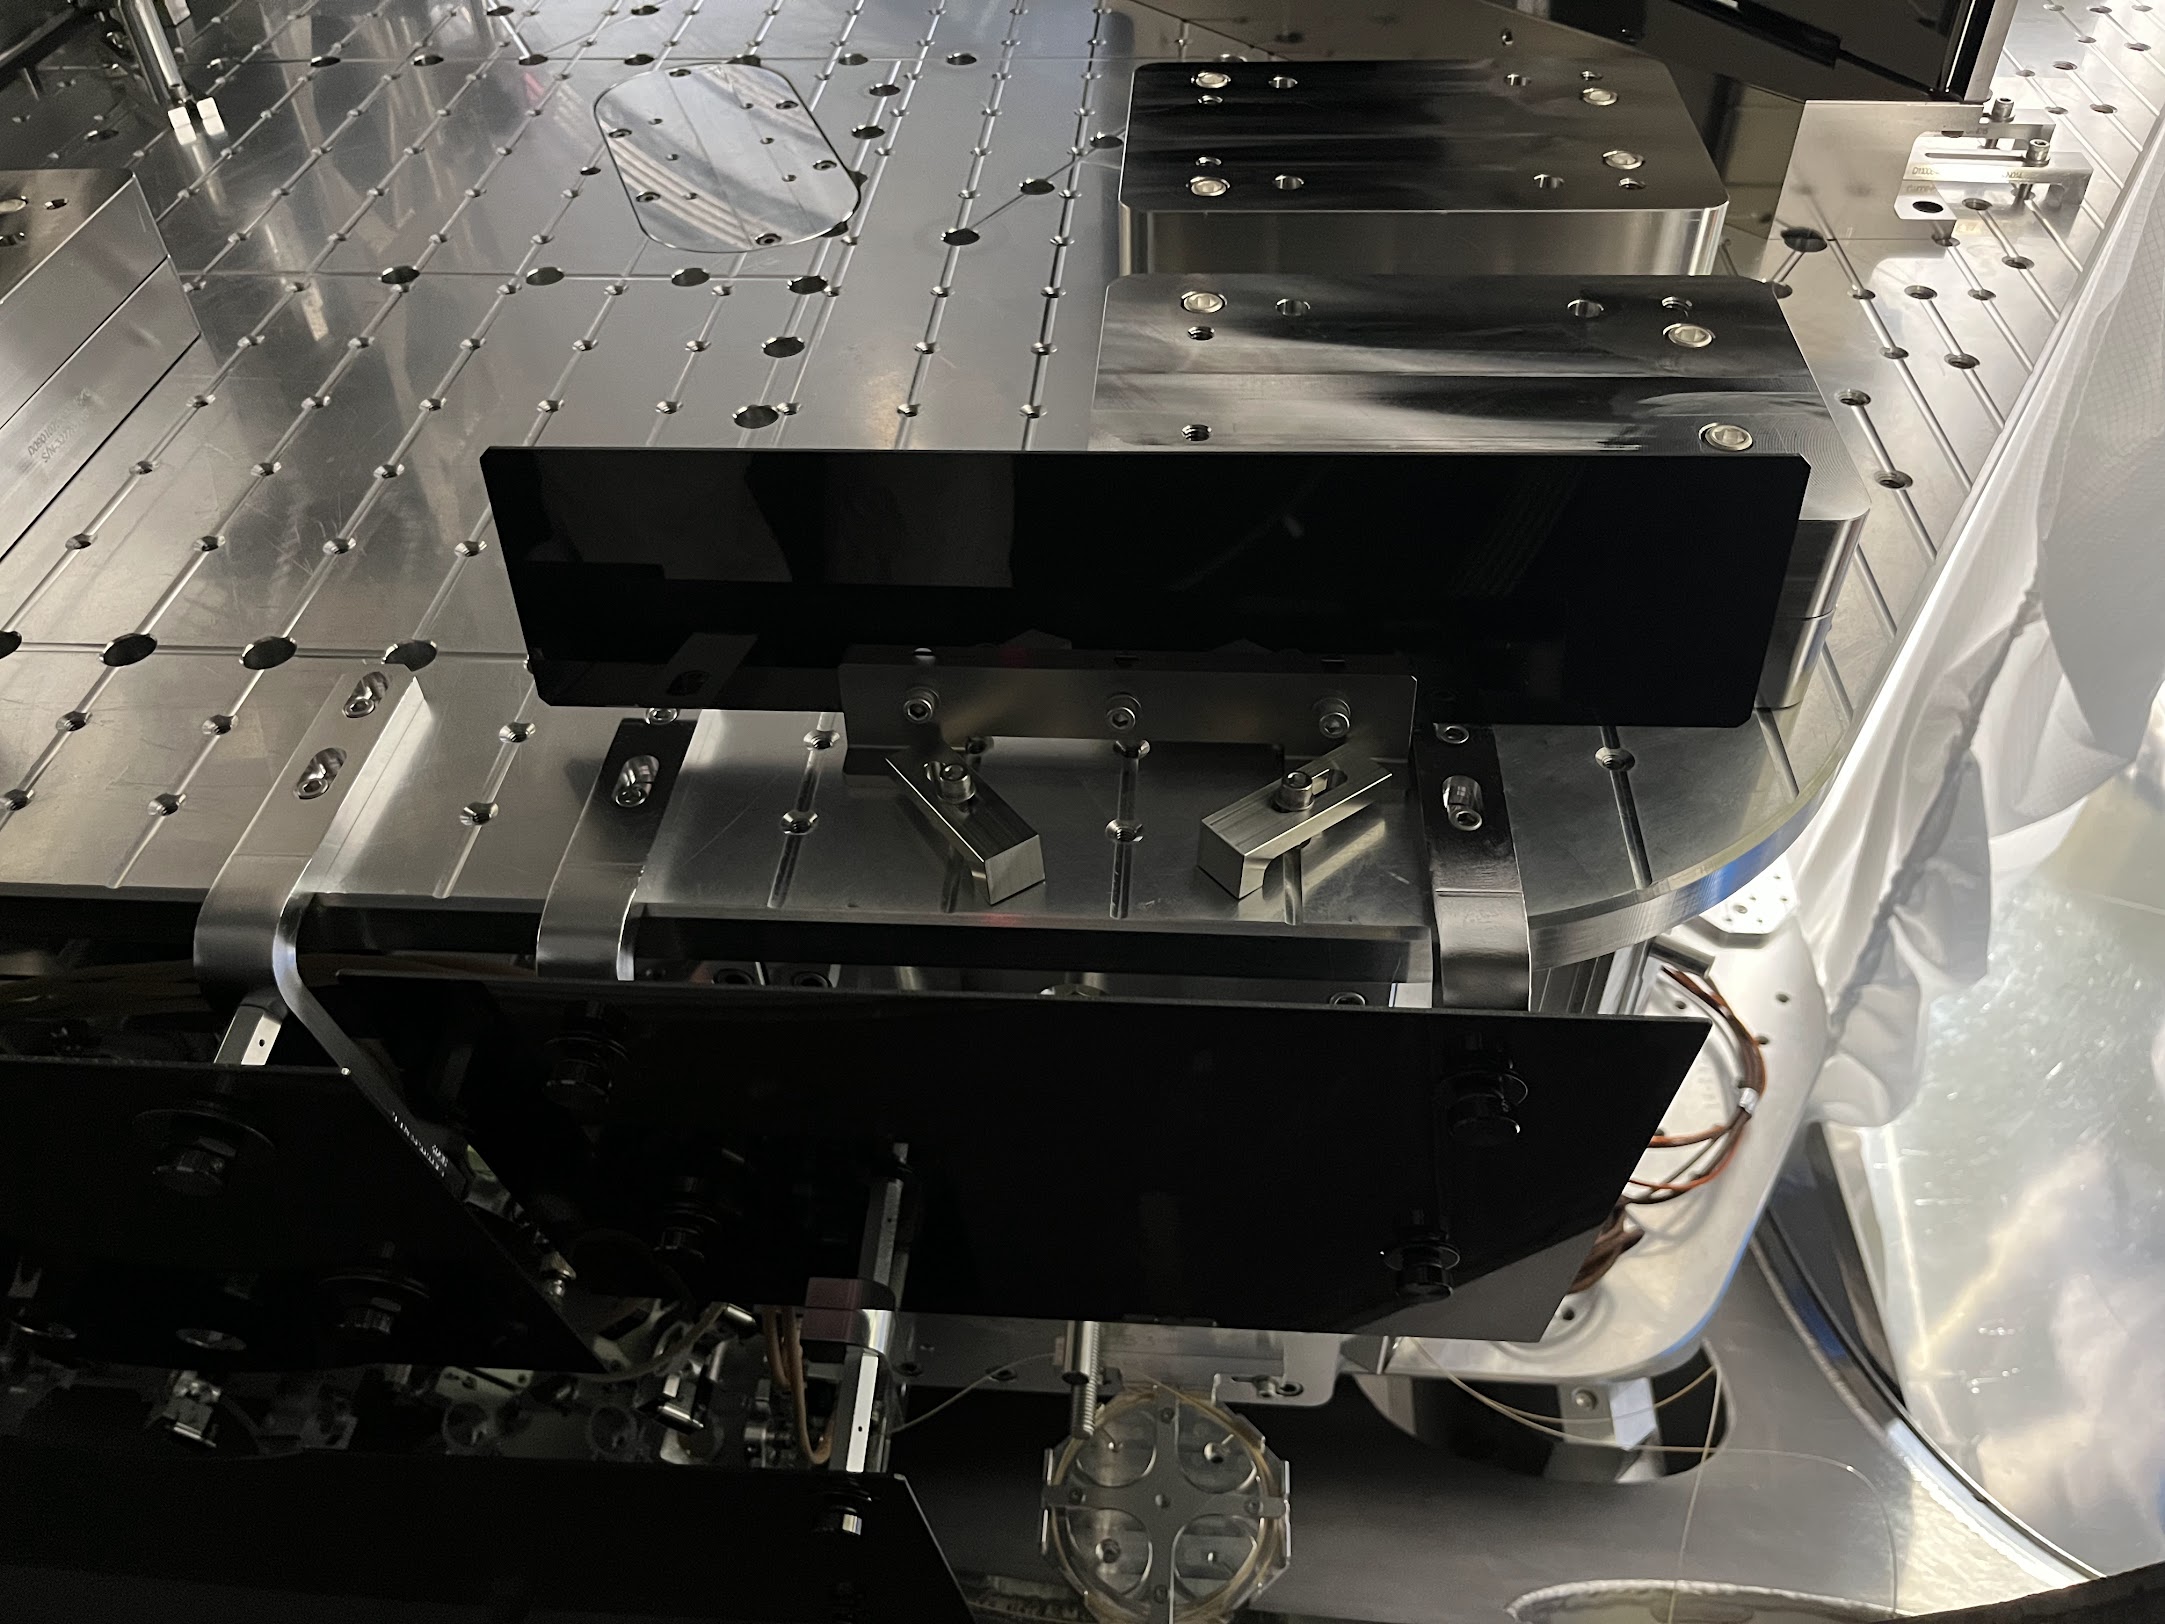
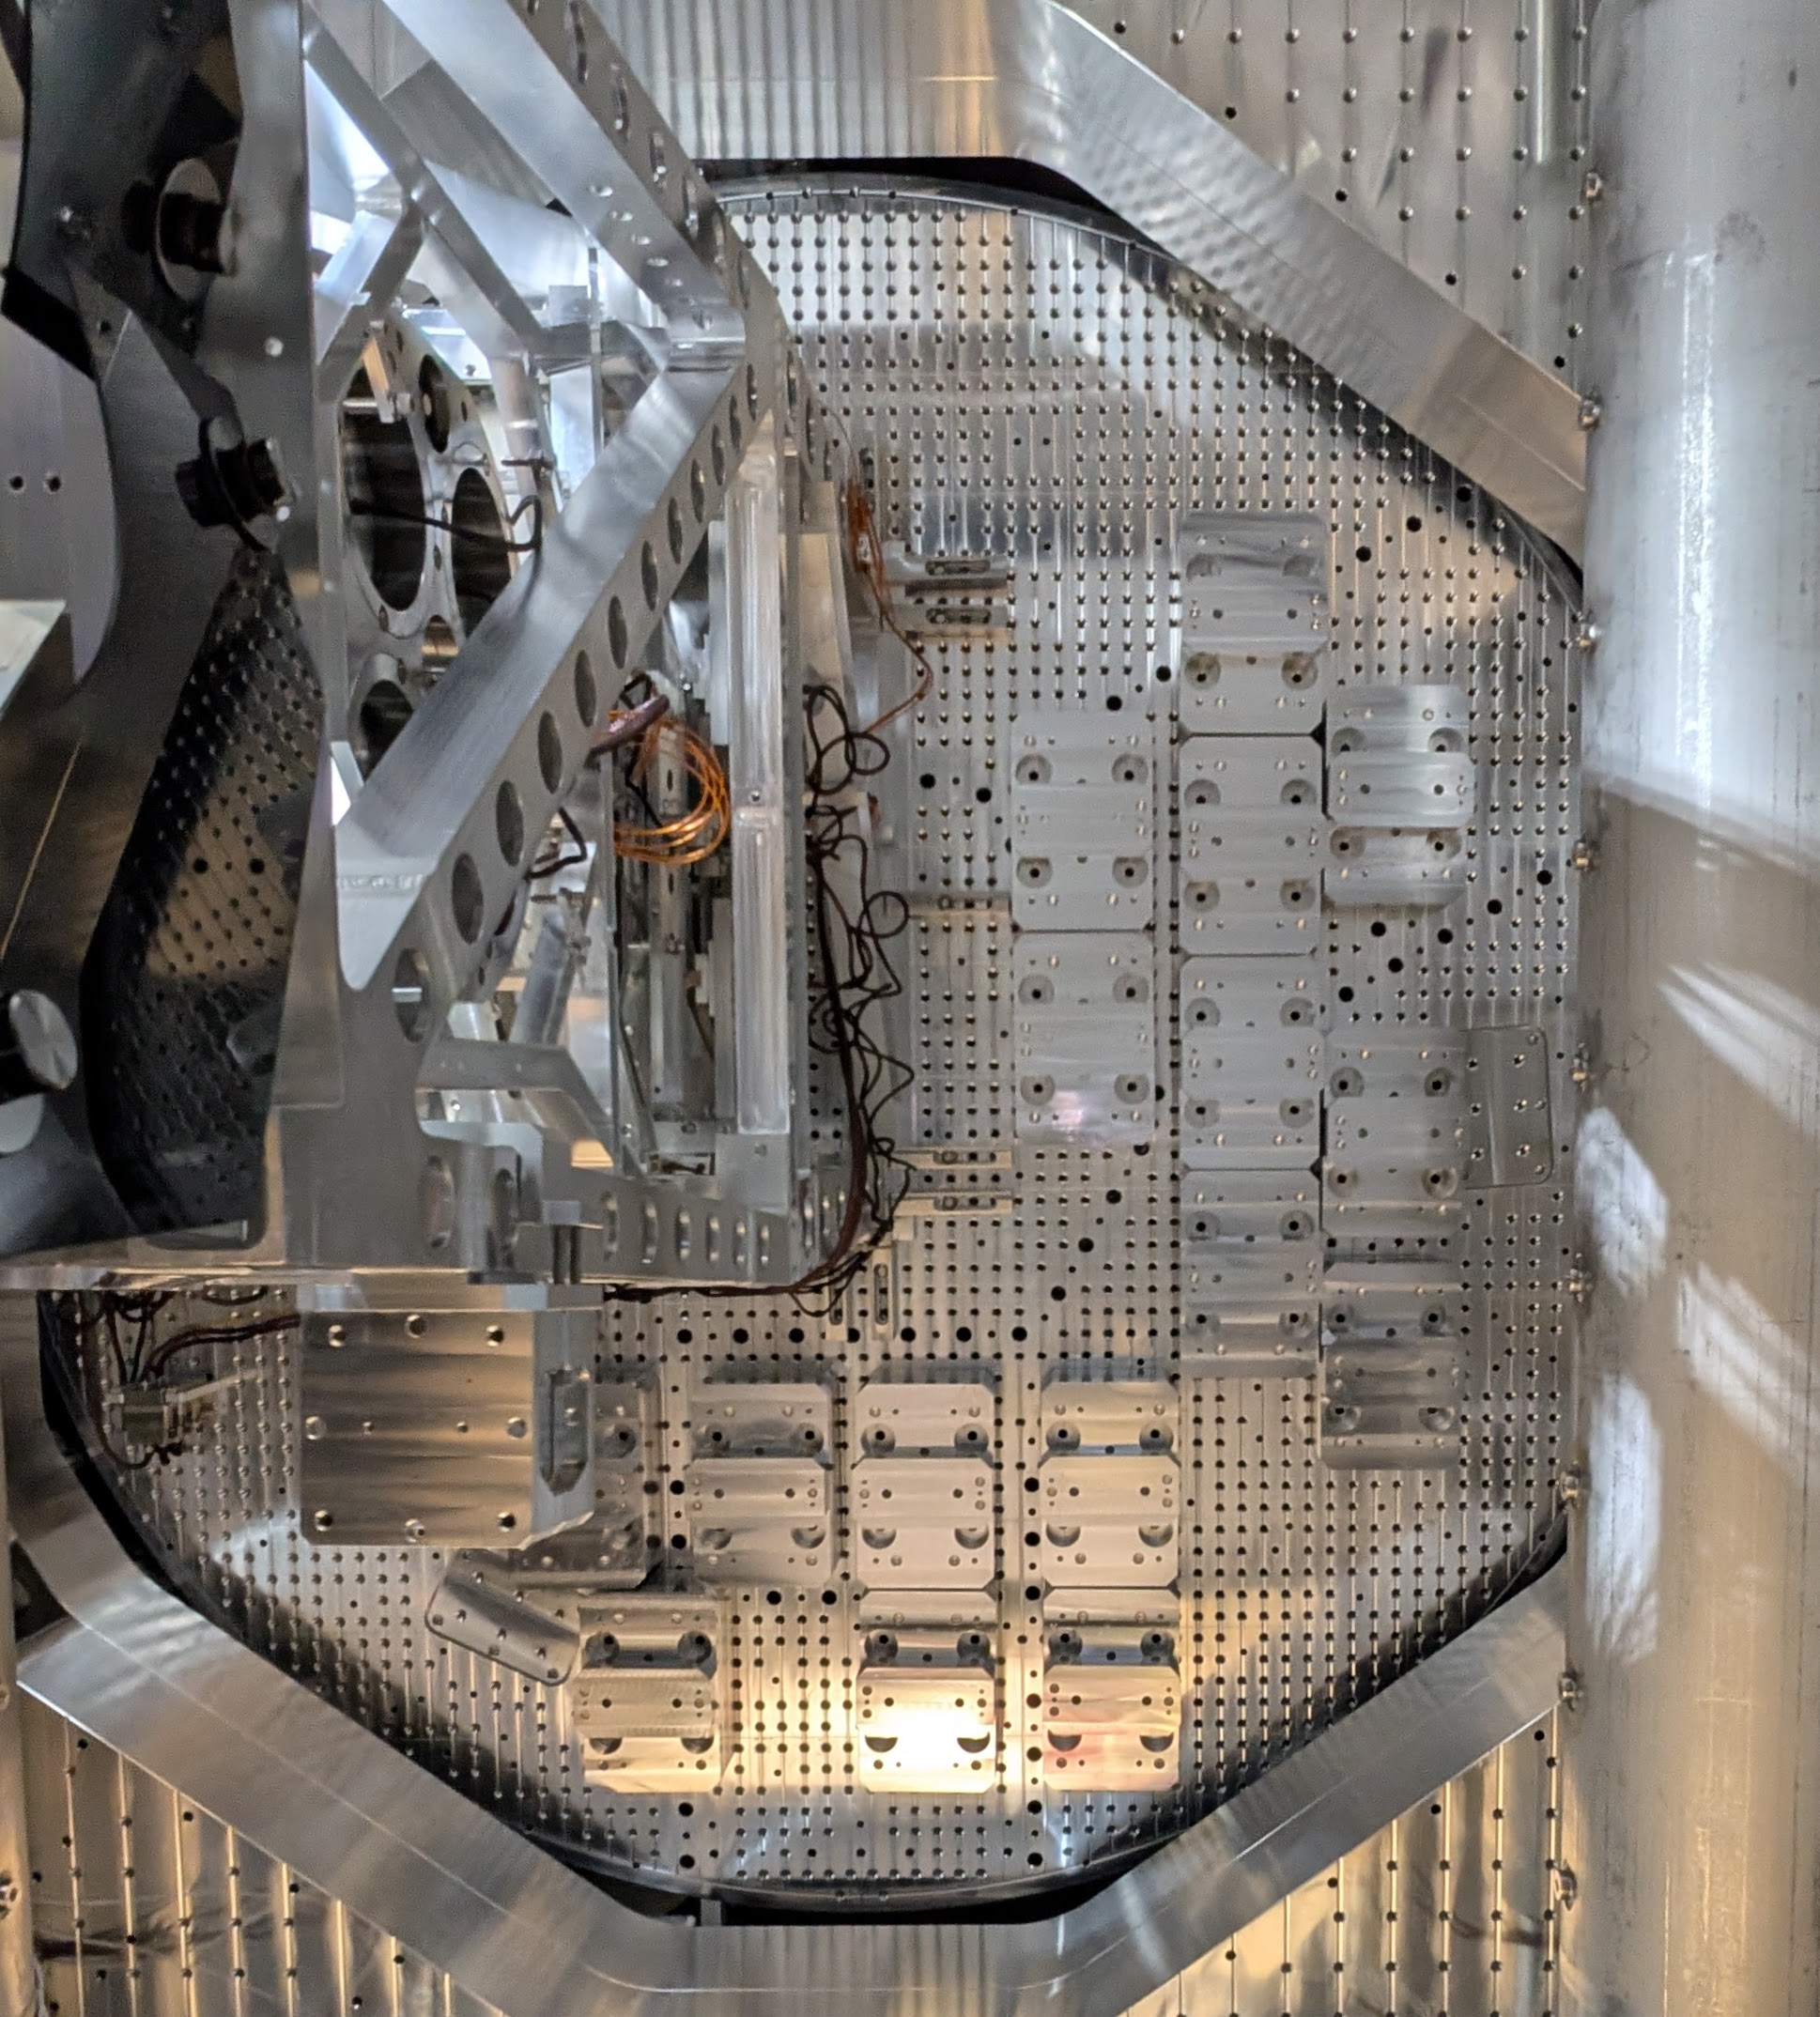
On Friday we finished alignment of the baffles on the +X side of HAM3. This took extra time because we didn’t expect 12 point flange bolts on the PR2 dog clamps that we were moving. Beam spot photos from the BBS showed that we had mitigated retroreflections from the dog clamps and other retro-reflectors that we were worried about, but the brackets for two of the SPI baffles formed strong 2-D corner reflectors with the table top (see figure). We need to hide them with something that is the same height but not normal to the BBS-PR3 beam, and we need to finish aligning the baffles on the –X side. We may also need to treat two of the table baffle brackets on the +X side of HAM3 if they produce retroreflections in PR3 beam spot photos.
Here's some pictures to aide the conversation about "which brackets are SPI bracket retro-reflectors?" These were taken on 2026-06-18 when TJ and I were installing these baffles for the first time (see LHO:90676). Two versions of each photo, one annotated and one not. 2026-06-18_H1SPIH23_ISIK_Baffles_BigPicture_ANNOTATED.jpg shows "looking in the +X direction" big-picture view of the beam splitter from inside the HAM23 mode cleaner tube, and highlights in red which baffles' brackets are the problem. 2026-06-18_H1SPIH23_MinusYSide_Baffles_TopDown_IsometricView_ANNOTATED.png shows a top-down / isometric, "looking in the +X / +Y / -Z direction" view of the -X / -Y corner of the optical table, again calling out the problematic baffle brackets. Saying it out loud -- it's not one baffle's brackets, its both - the -Y bracket of the middle upper panel baffle, and - the +Y bracket of the -Y upper panel baffle. of the ISIK shroud assembly D2400106 Also -- just saying it out loud. Robert shows how shiny these brackets are in the -X view of HAM3 from the beam splitter. "Why aren't these an issue for the -Y view of HAM4 from the beam splitter?" Because HAM4 doesn't have any of these HAM table baffles on its -Y side -- the HAM3 baffles exist because we had to remove the lower panel of the HAM2-HAM3 *mode cleaner tube* baffle on the HAM3 end of the tube (LHO:90138 and LHO:90162) in order to support SPI. But the equivalent panel on the HAM4 end of the HAM4-HAM4 tube baffle is still in place, so these HAM table baffles are not needed.
Eric, Ryan S, Camilla, Sheila
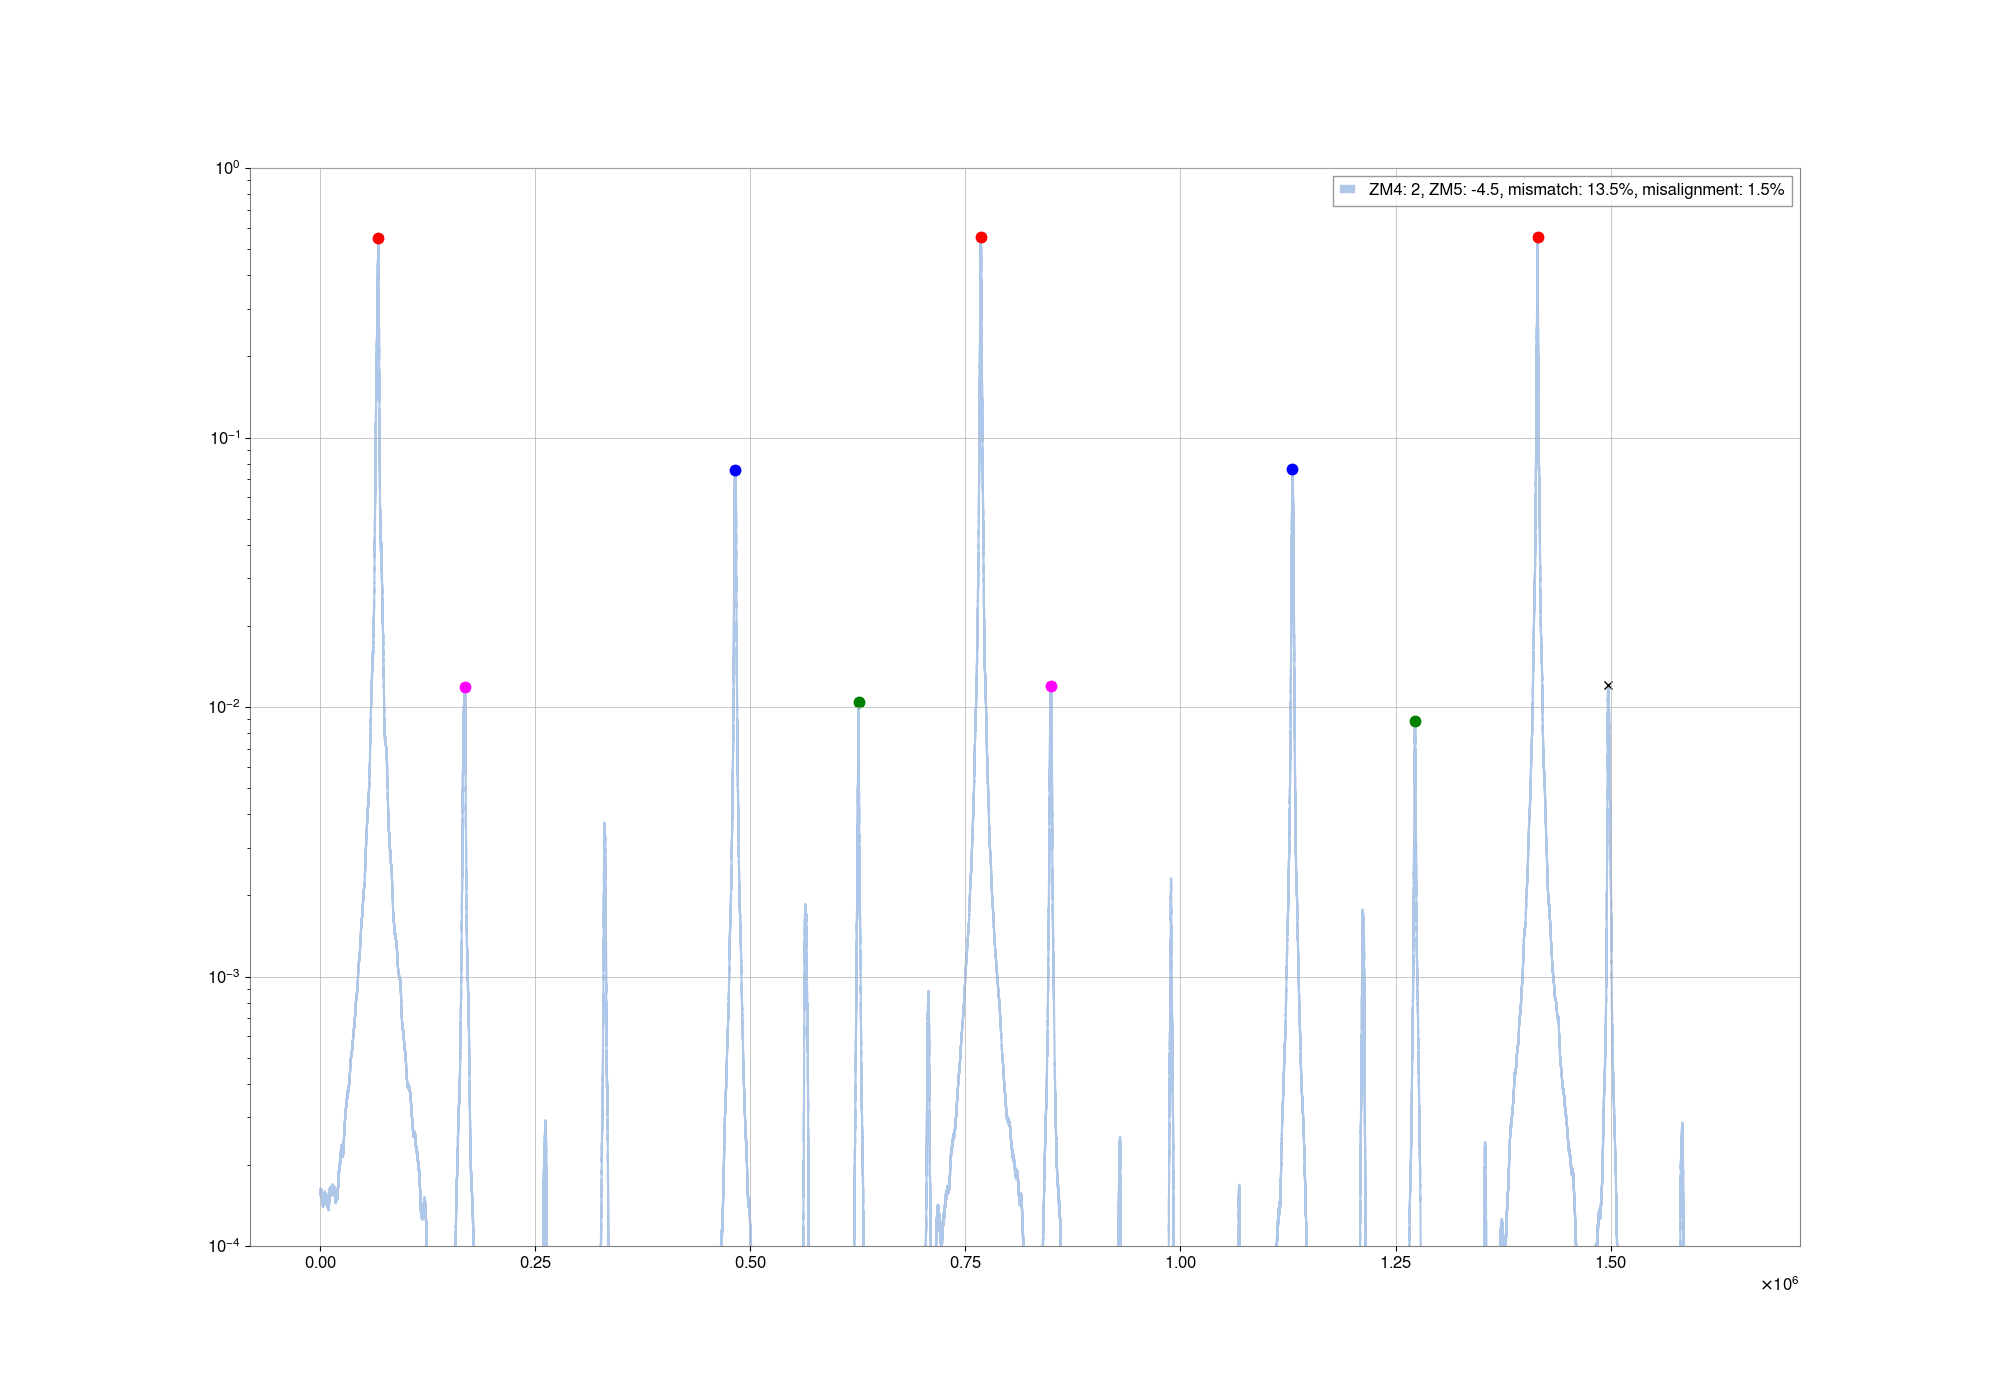
All week we have been working on getting a set of OMC scans and beam profile measurements for different psams. We have both sets of data now, with plots and scripts coming soon next week.
OMC scans
We started with a script that Begum gave us from HAM6 work at LLO. We set up ASC loops to go from ASA and AS B DC signals to ZM4 and ZM5 (as described in 90742). We struggled a while to lock the OMC on the seed beam in air, hampered by 90754. With that noisy OMC lock, yesterday Camilla manually aligned OM3 and the OMC suspension carefully to maximize the 00 transmission. We then added offsets to H1:OMC-ASC_QPD_{A,B}_{PIT,YAW}_OFFSET, which is not the usual location for OMC QPD offsets. We will need to get rid of these offsets before we go back to locking.
OMC A offset: PIT 0.088 YAW: 0.133 OMCB offset: PIT 0.27 YAW: -0.22
We found that we were able to move the psams, whih misaligns the OMC terribly, run the centering loops to the ZMs, then run the OMC QPD loops to bring the 1st order peaks back down to a couple % of the 00 peak repeatedly. We spent some time modifying and then debugging the script that Begum shared with us.
It takes in a list of ZM4 and ZM5 strain gauge values, moves the psams servos target to that point and waits 30 seconds with the ZM centering loops on (it doesn't check the acutal value of the strain gauge, perhaps this would be a good thing to add next time). It then turns on the OMC QPD loops for 20 seconds. It then takes a 100 second ramp of the OMC PZT, and saves the times and ZM strain gauge targets into a yaml file.
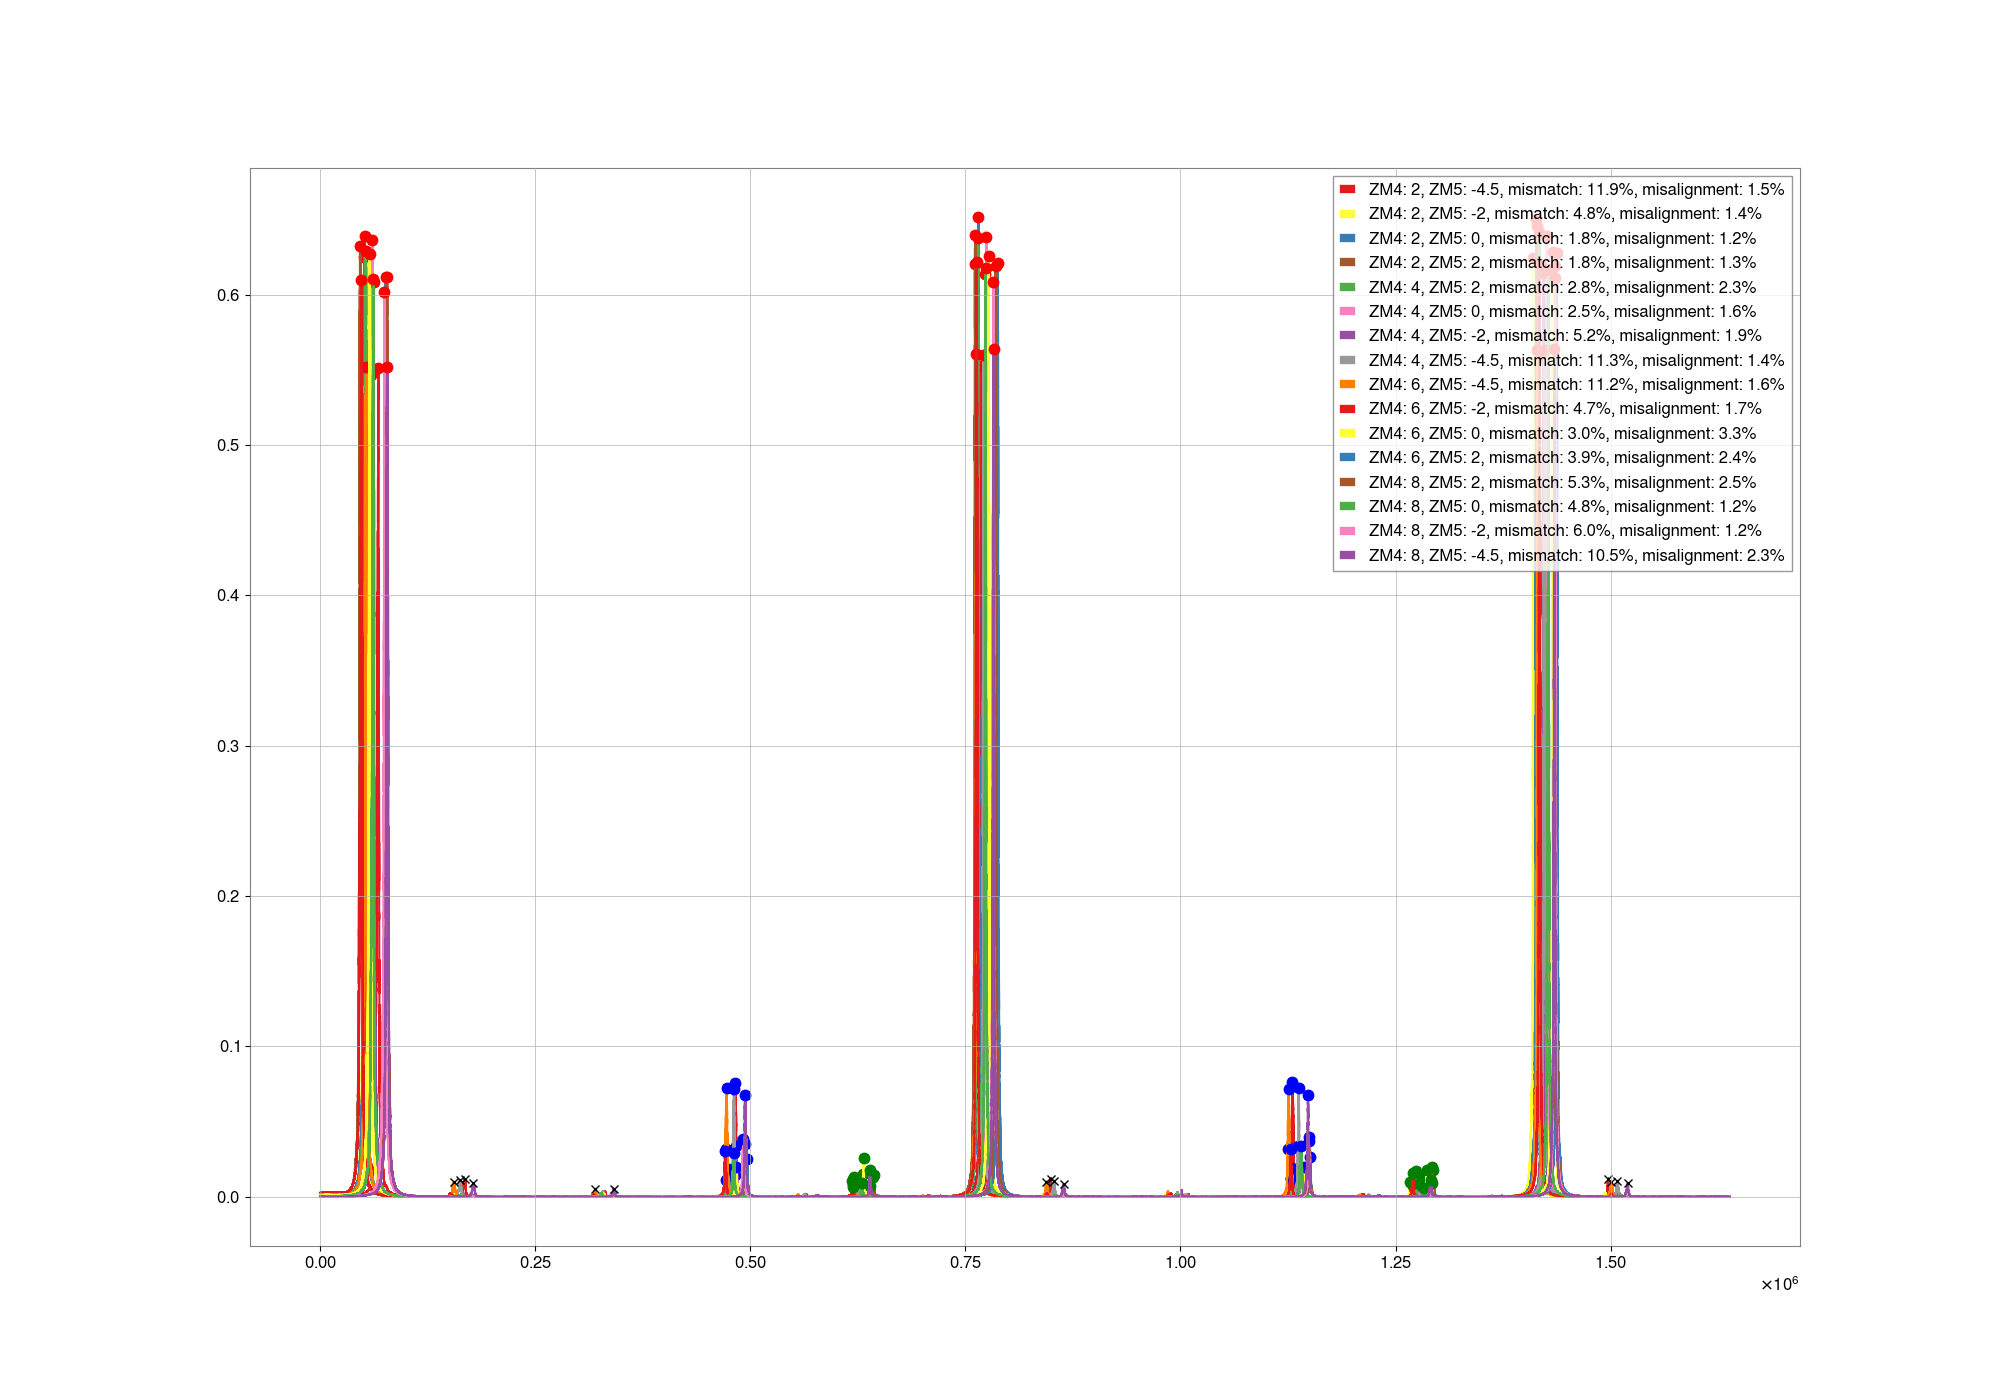
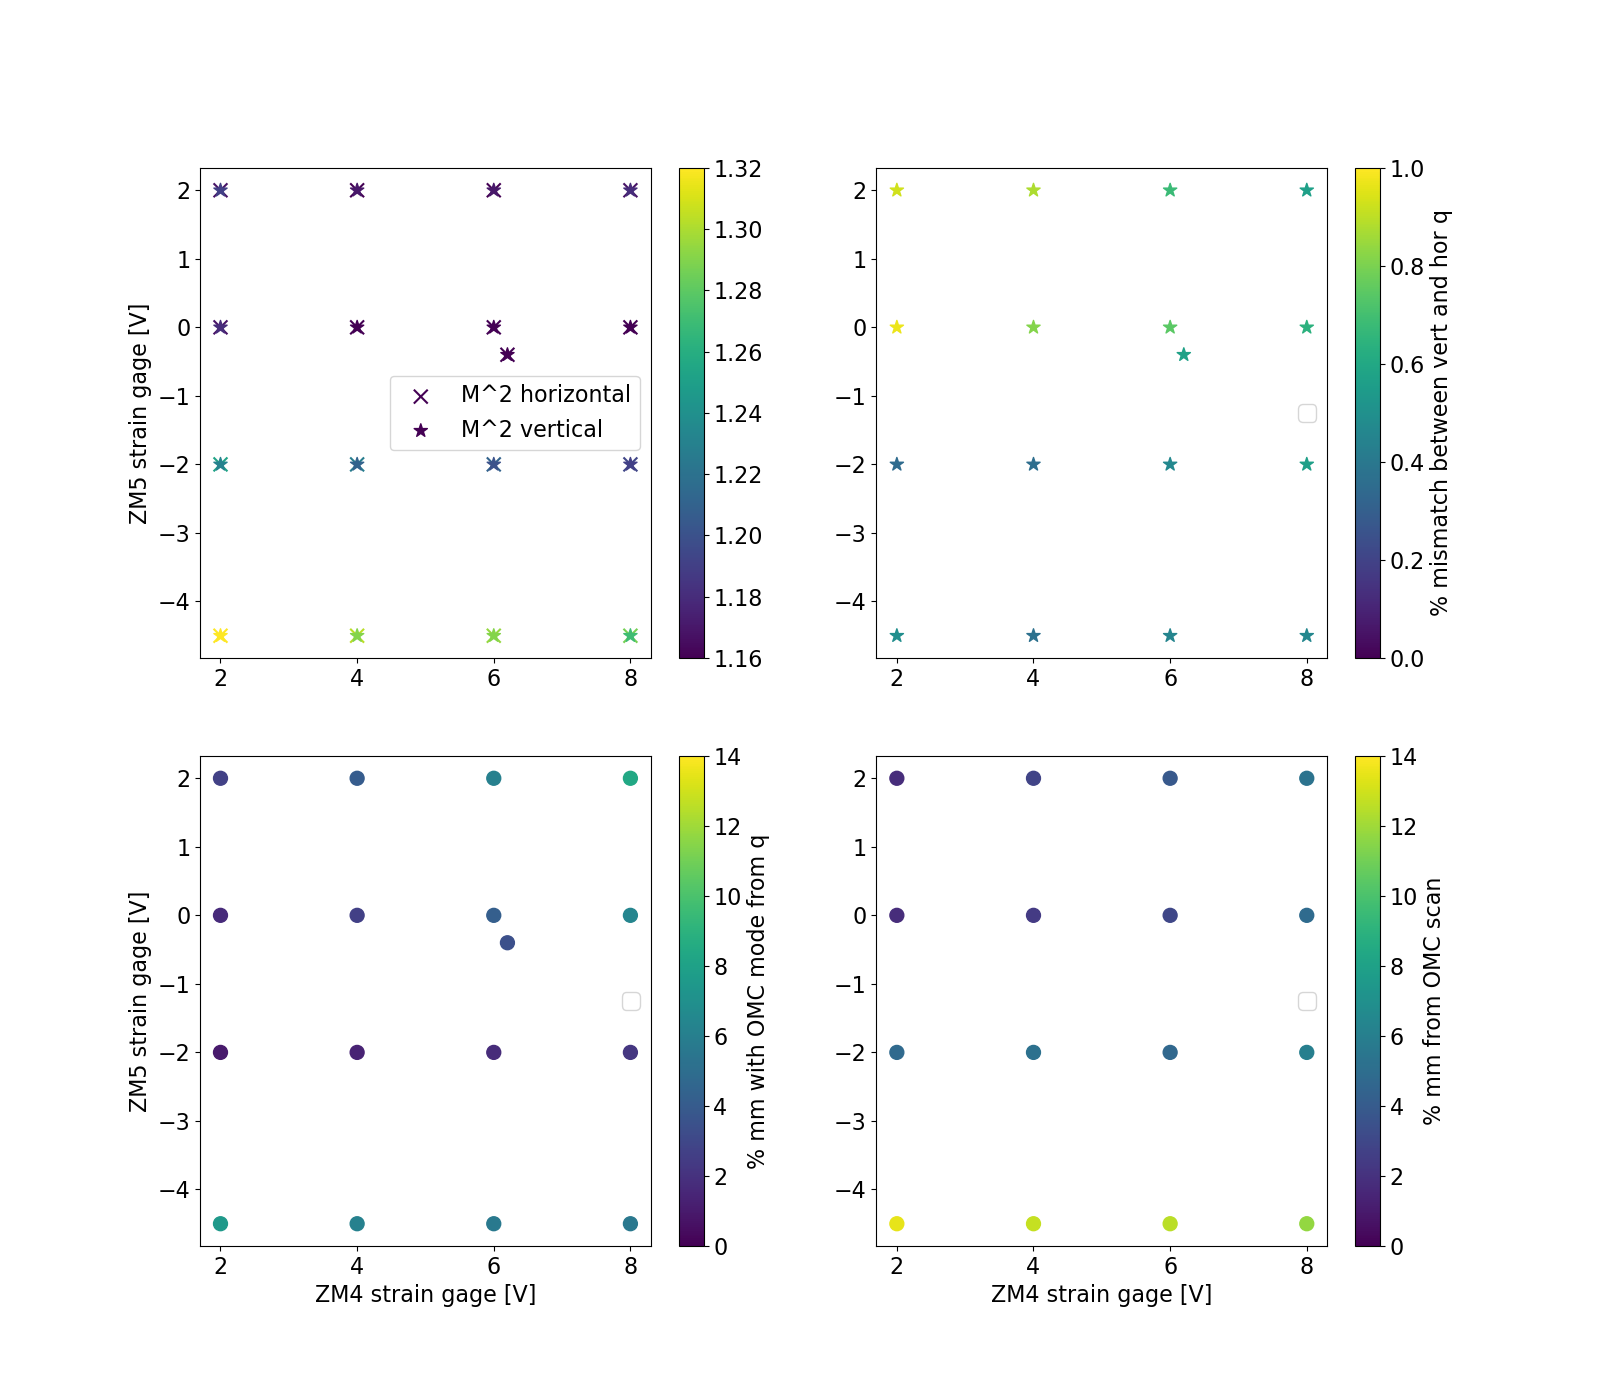
There is a template you can use to watch all this at userapps/sqz/h1/Templates/ndscope/OMC_psams_scans_monitor.yml The script that runs these sweeps is at sqzutils, or /ligo/gitcommon/squeezing/sqzutils/omc_scans_sweep_psams.py There is also a script there that loads the data, identifies the peaks and estimates mode mismatch and misalignment there, analyze_psam_omc_sweeps.py. A preliminary plot is attached (apologies for the color choices and linear y scale here).
M2 profile measurements
Eric and Ryan S took a series of M2 profiler measurements of the beam on SQZT 7 today, doing the alignment procedure at each strain gauage setting (they didn't adjust ZM alignments). Their data is in here, we will post some plots of this next week.
Note about ZM5 strain guage
While Eric and Ryan were making beam profile measurements, they ran into a situation where ZM5 would not go the strain guage setting of 2. I was able to get it to go to 2 manually, but noticed that there were times when the strain gauge voltage dropped to zero, similar to a problem seen at LLO HAM6 recently. We should follow up on this next week.
More on the ZM5 strain gauge issues -
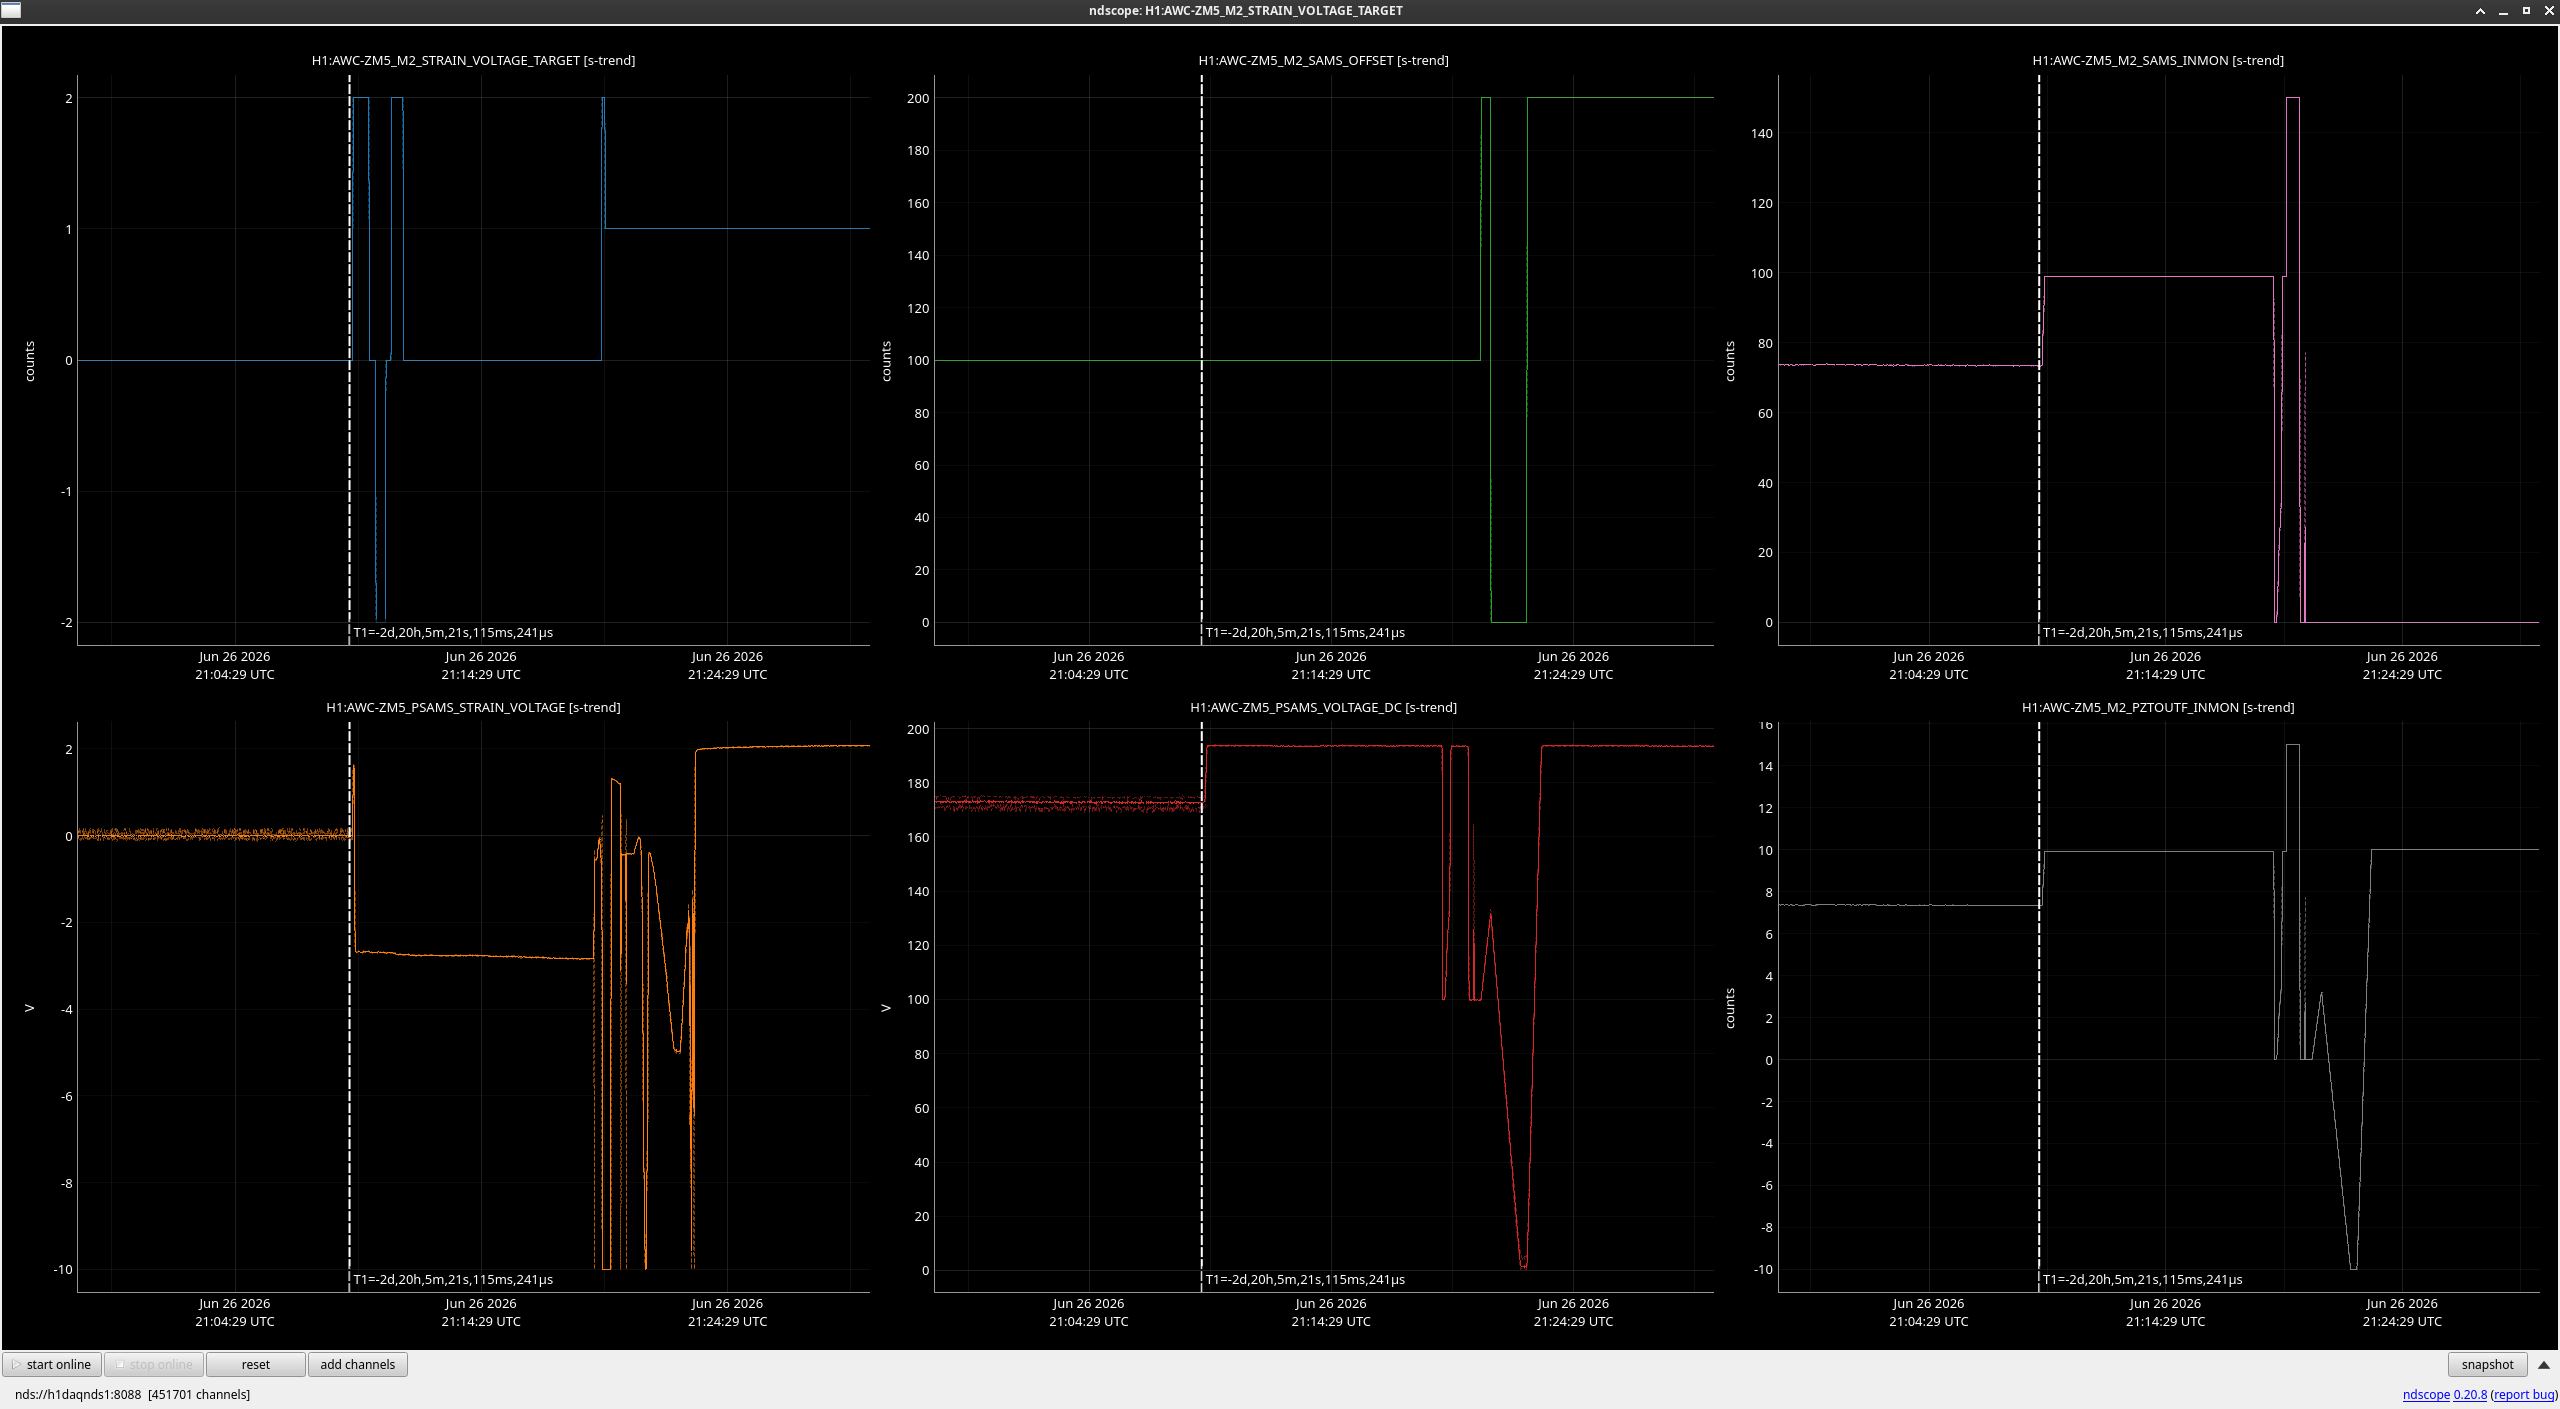
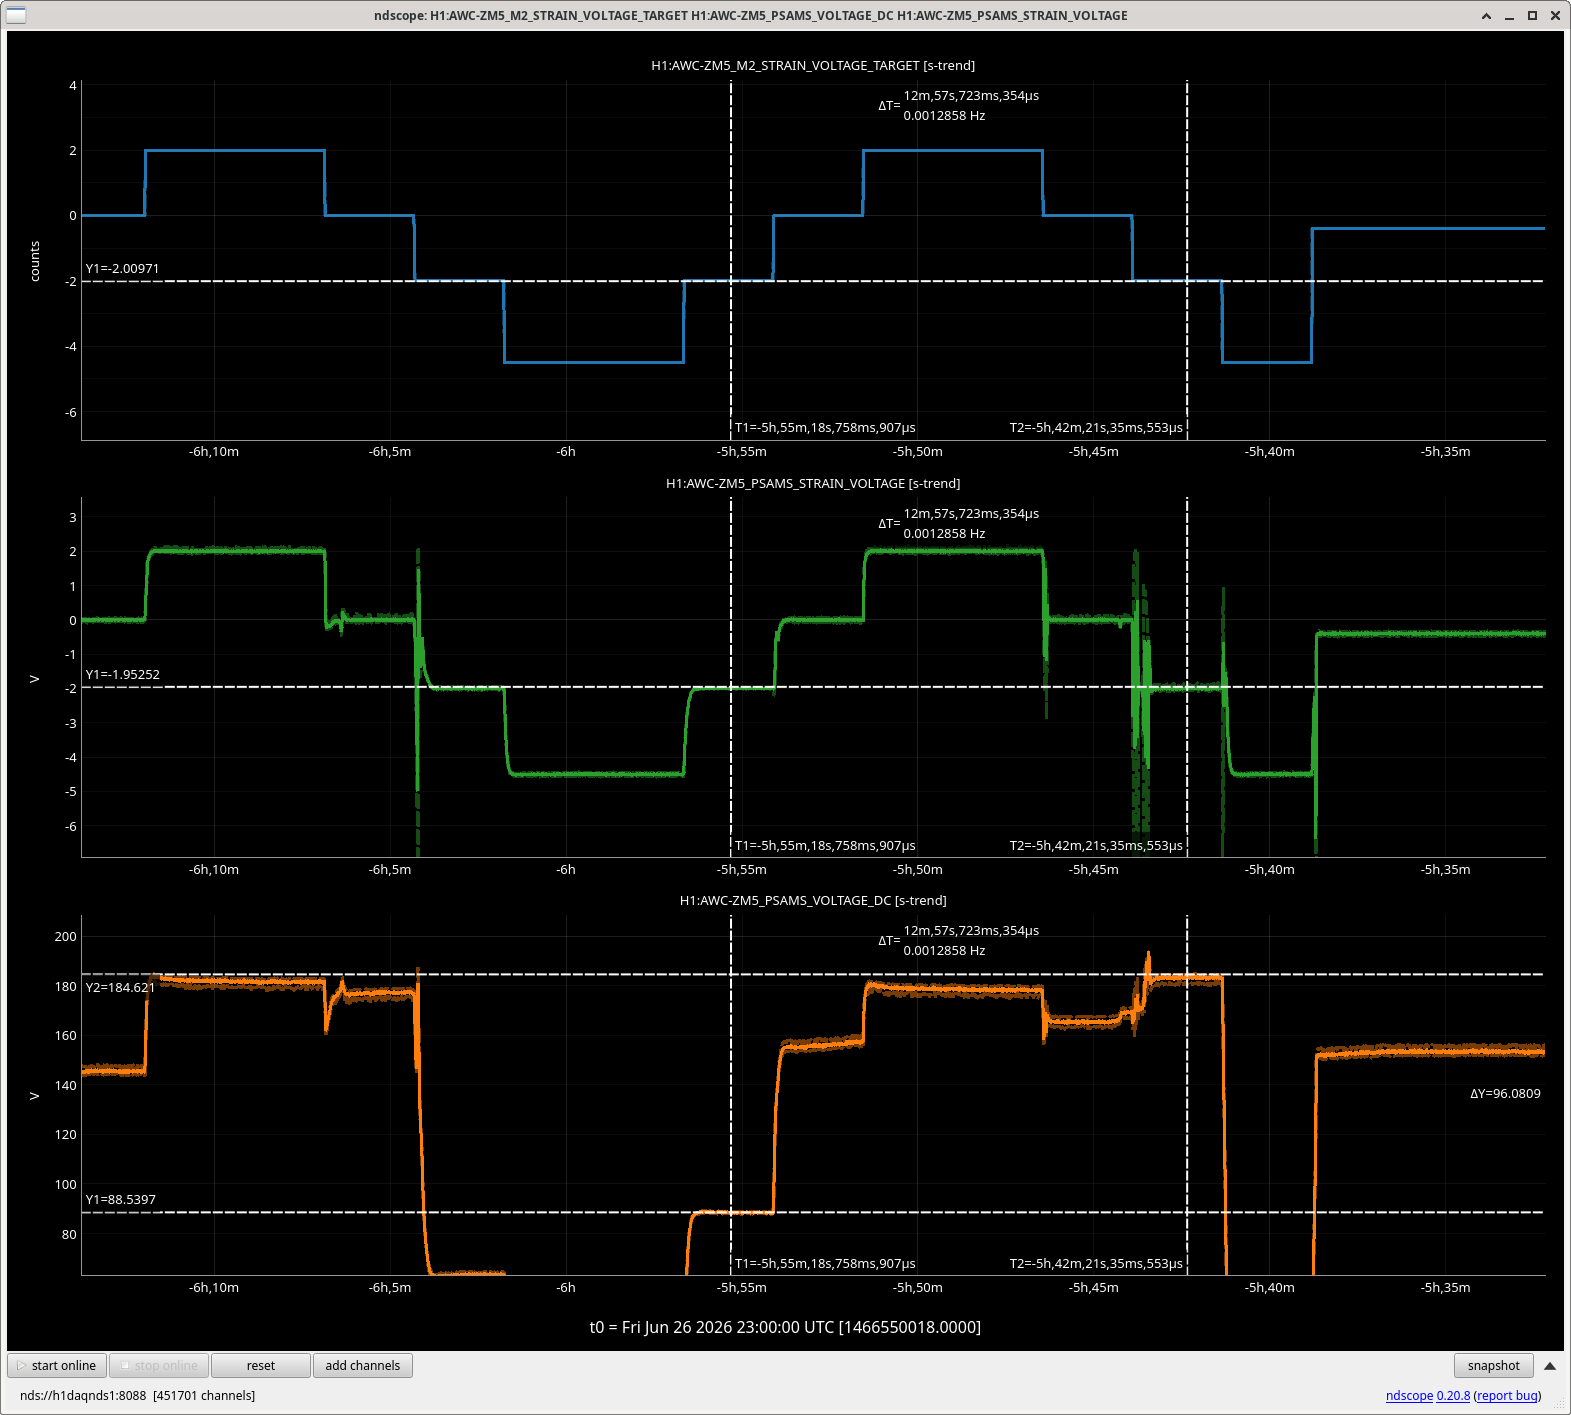
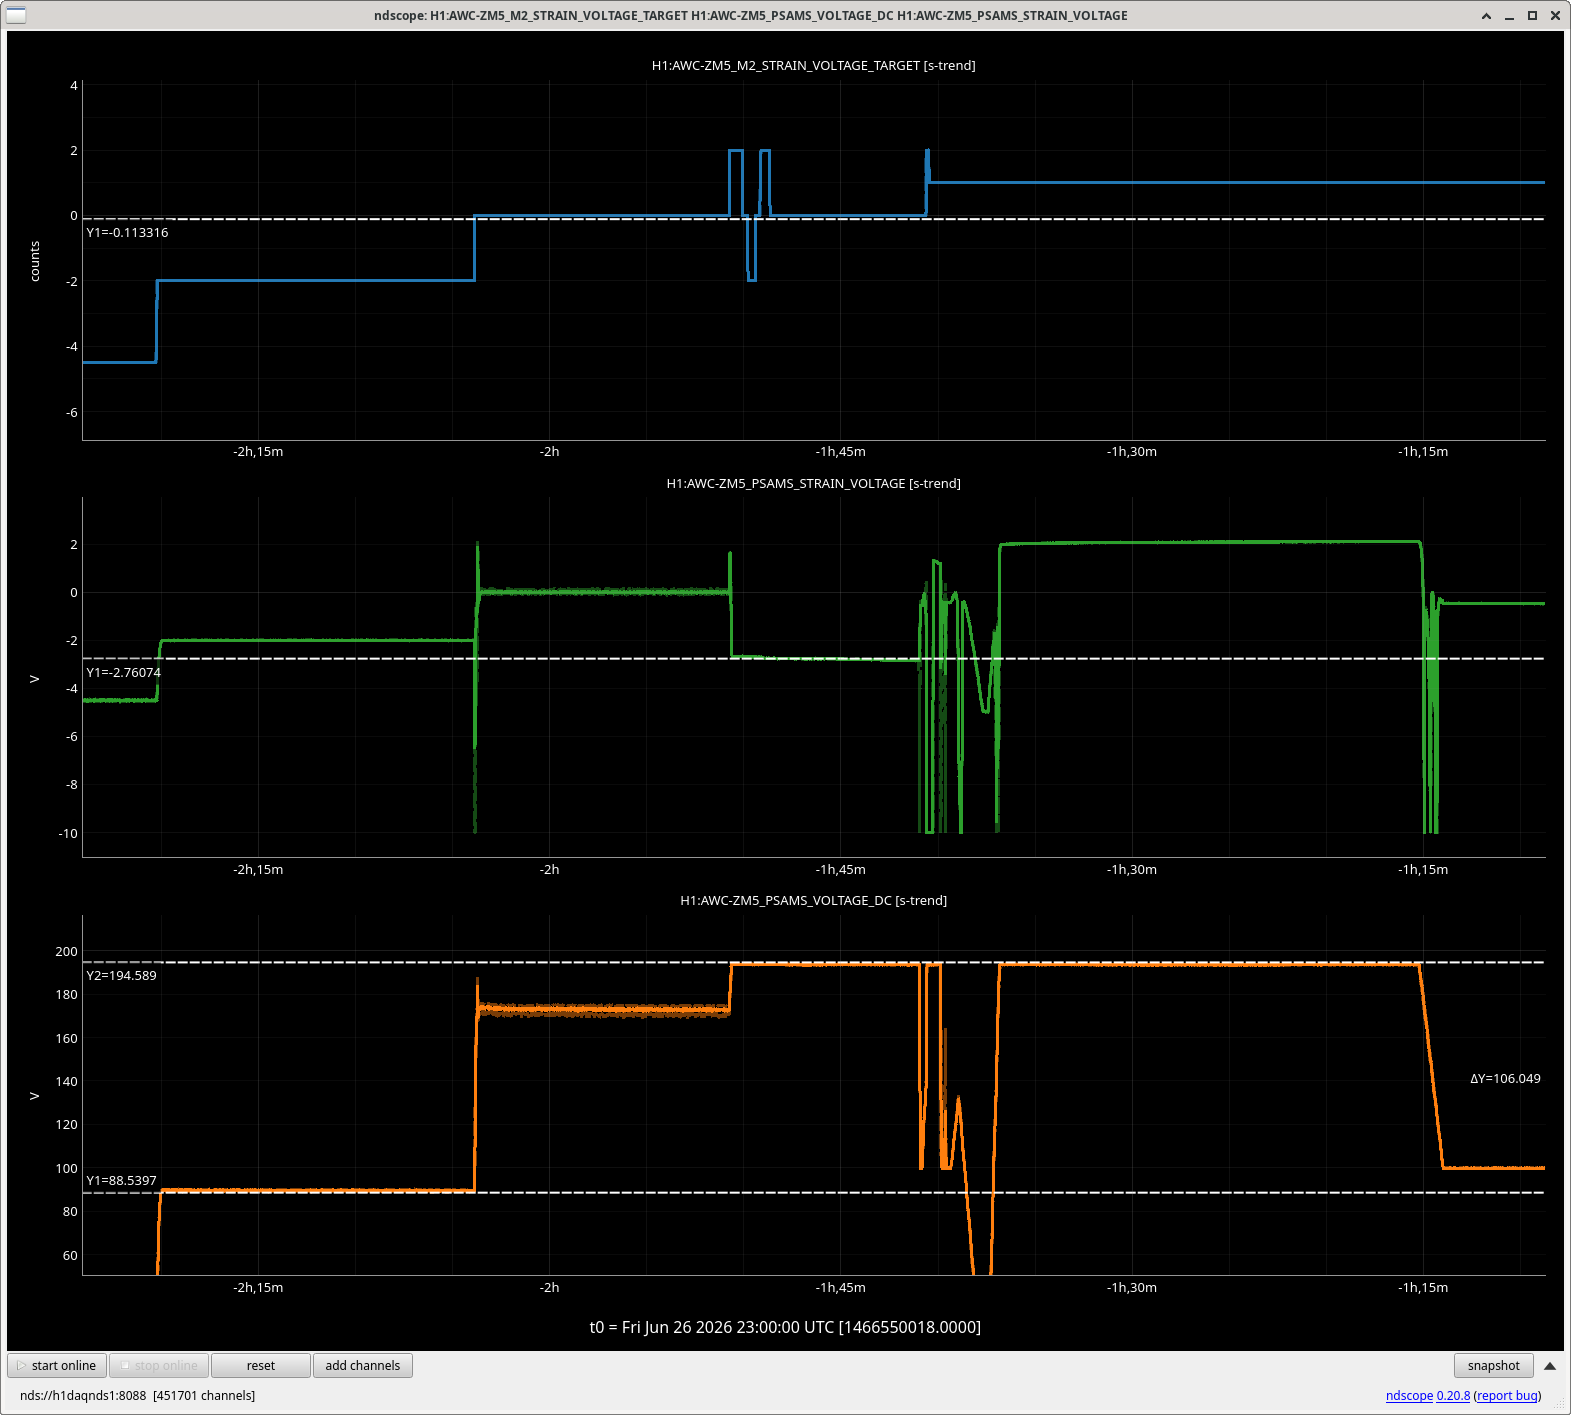
While Eric and I were taking beam profiles and moving to the last step for the ZM5 PSAM (requesting 2V), the strain gauge readback voltage fell to -2.8V and got stuck, shown at the T-cursor in the first attached ndscope. Changing the requested voltage away from 2V did not affect the strain gauge's behavior or the voltage sent to the PZT, which looked to be railed close to 200V. Eventually Sheila was able to unstick the voltage and get the strain gauge back to 2V by stopping the servo and clearing its history.
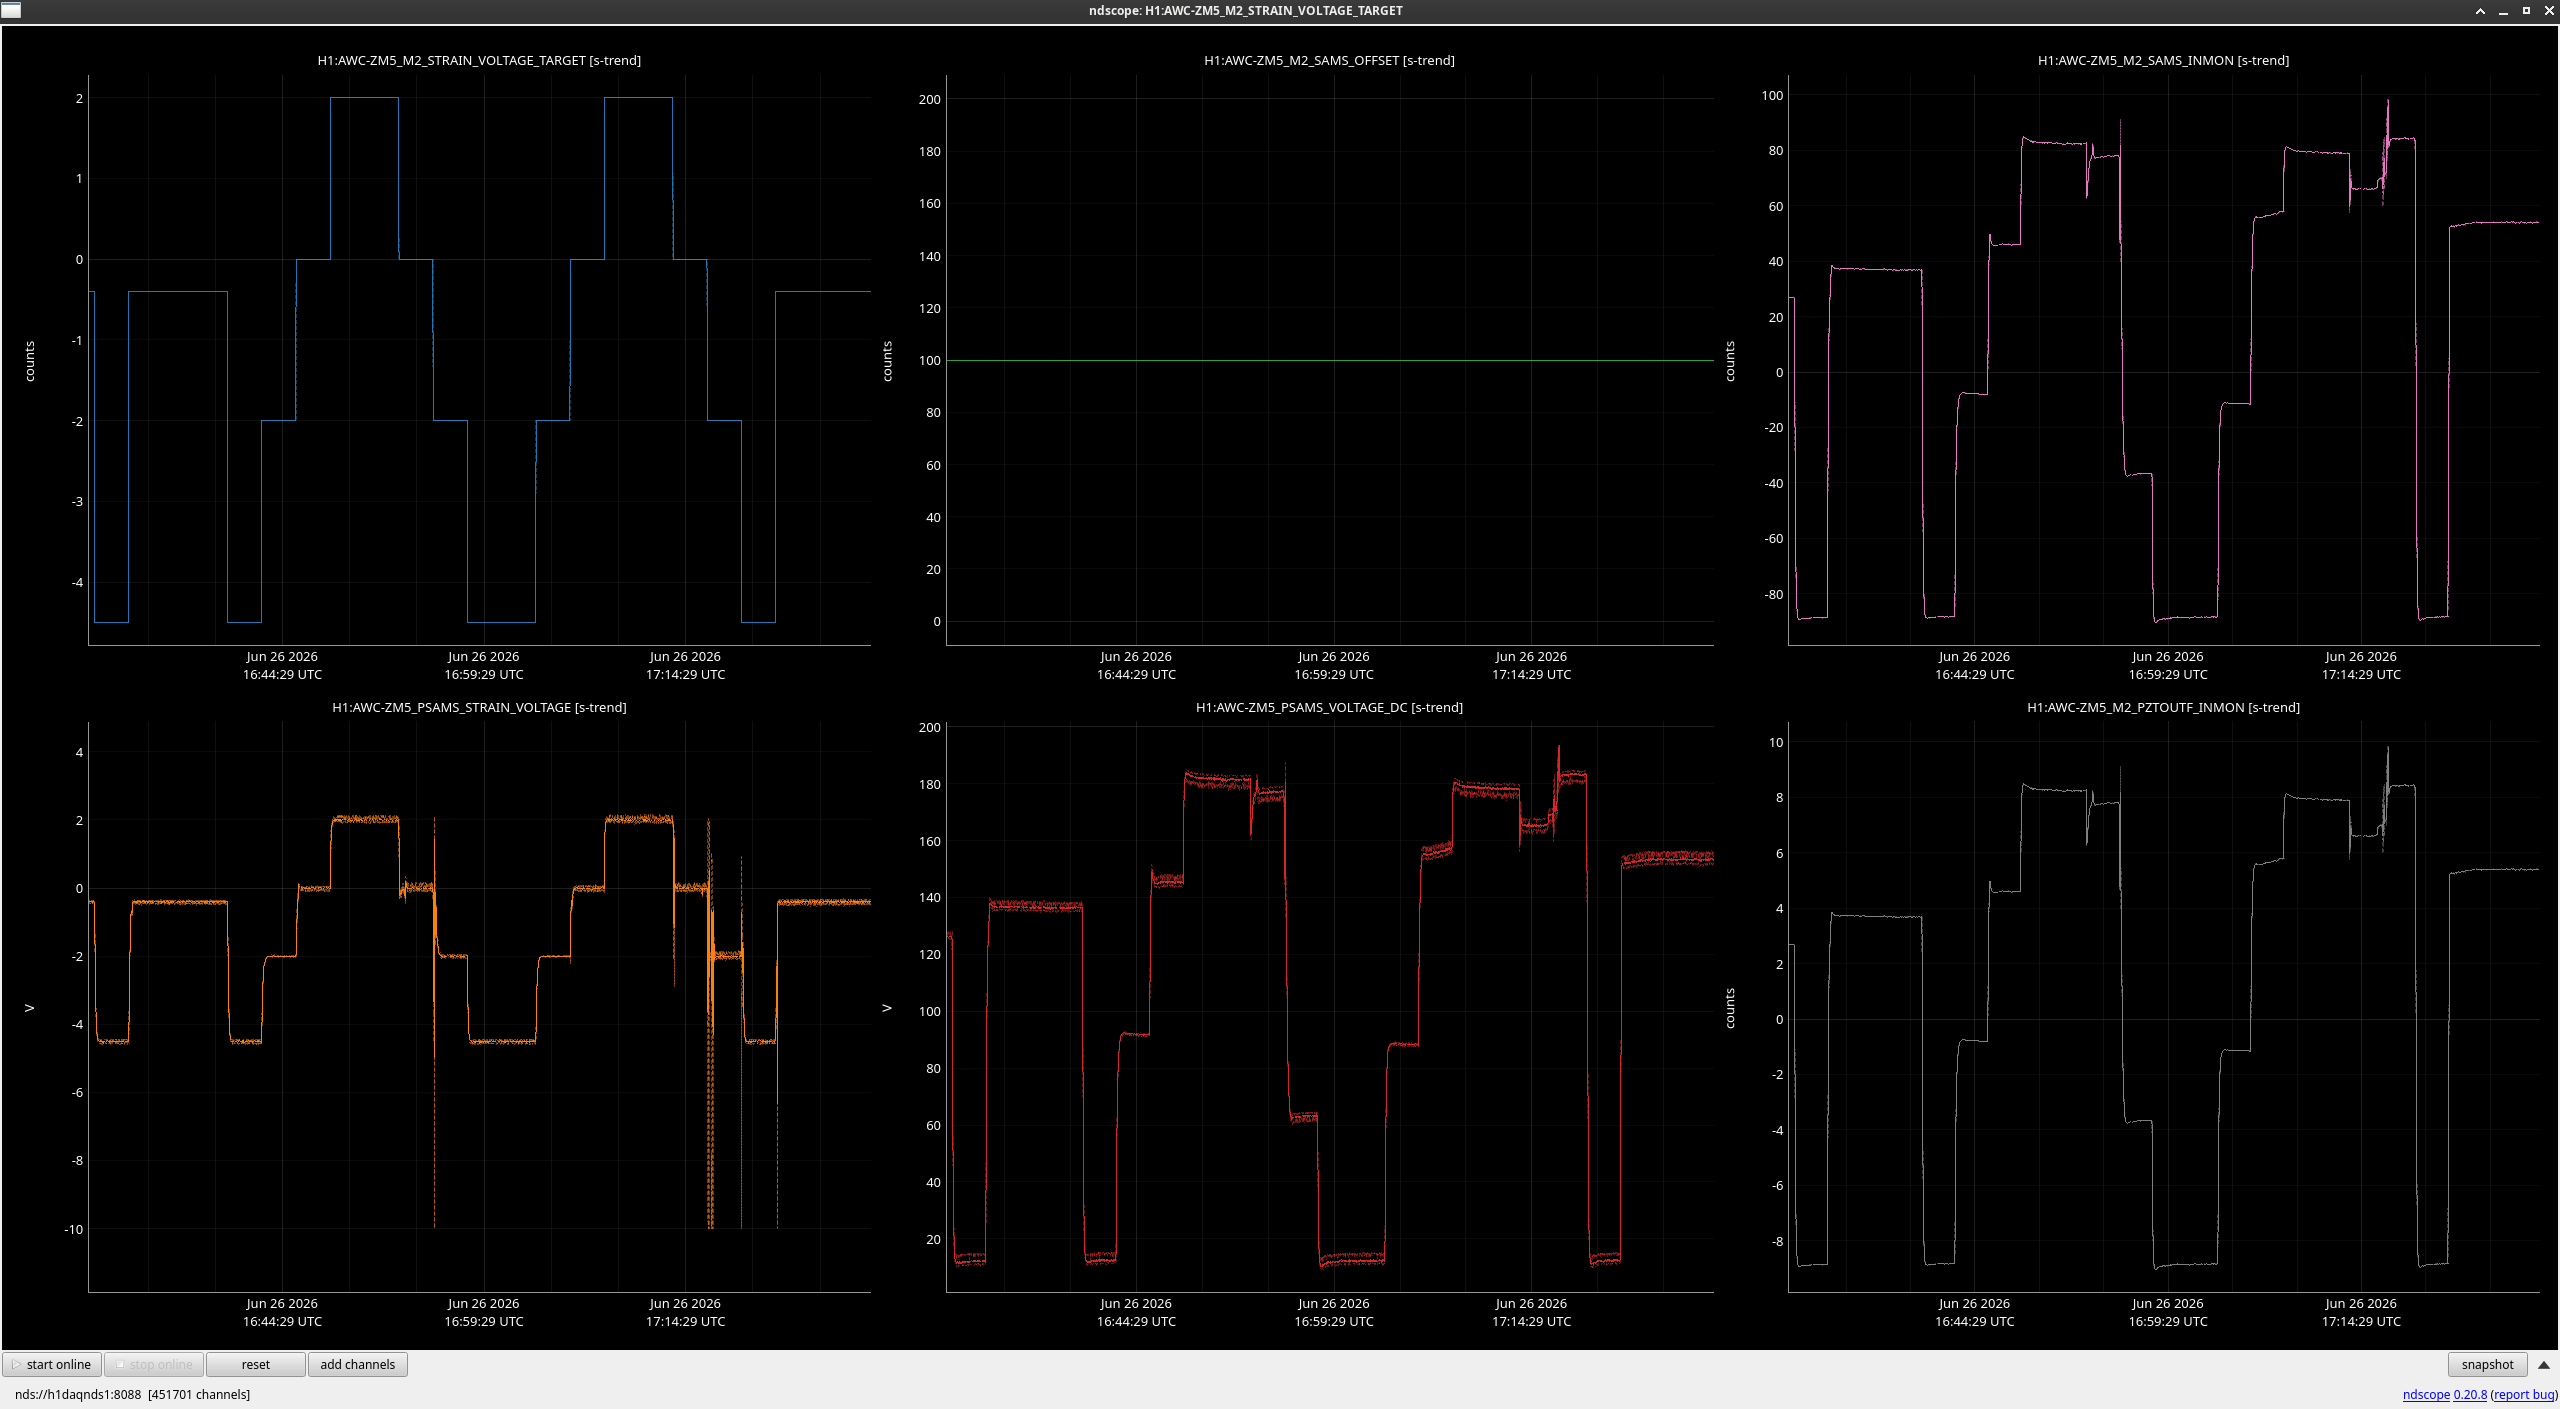
This is reminiscent of behavior seen at LLO with one of their new HAM6 PSAMS, OMA2, where after scanning the PZT to the edge of its range, the strain gauge would show open loop for a few seconds, then return to normal (LLO:alog80740 and FRS 37456). We haven't run the repeated scans with ZM5 like LLO did with their OMA2, but we looked for other times recently when the ZM5 PSAM showed weird behavior and found a time earlier that day during one the the OMC scans; see the second ndscope. It's possible that when this happened to Eric and I on Friday, the strain gauge would have fixed itself after a few seconds like in LLO's case, but the integrators in the servo kept the voltage railed.
LLO's solution for this was to fully swap out the optic and its attached PZT/strain gauge assembly, so while we think about this, we are assessing what spares exist that could potentially be swapped in.
ome information about these data:
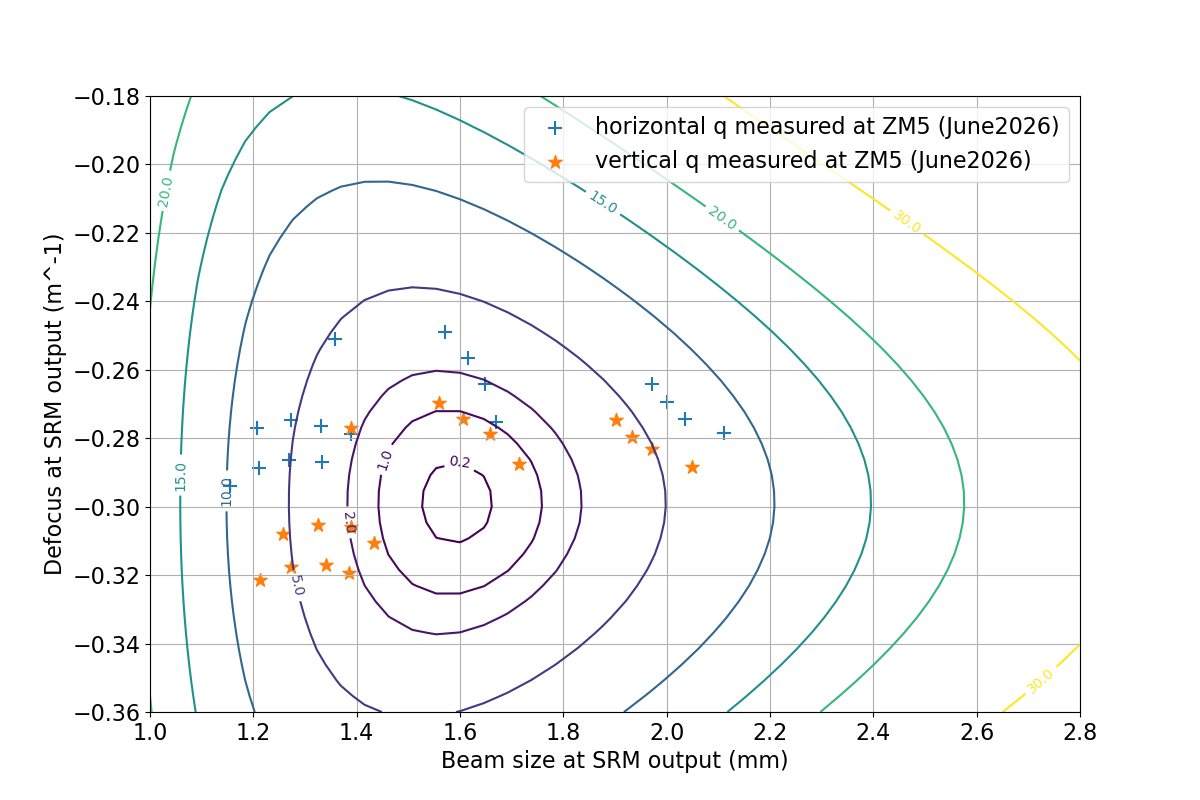
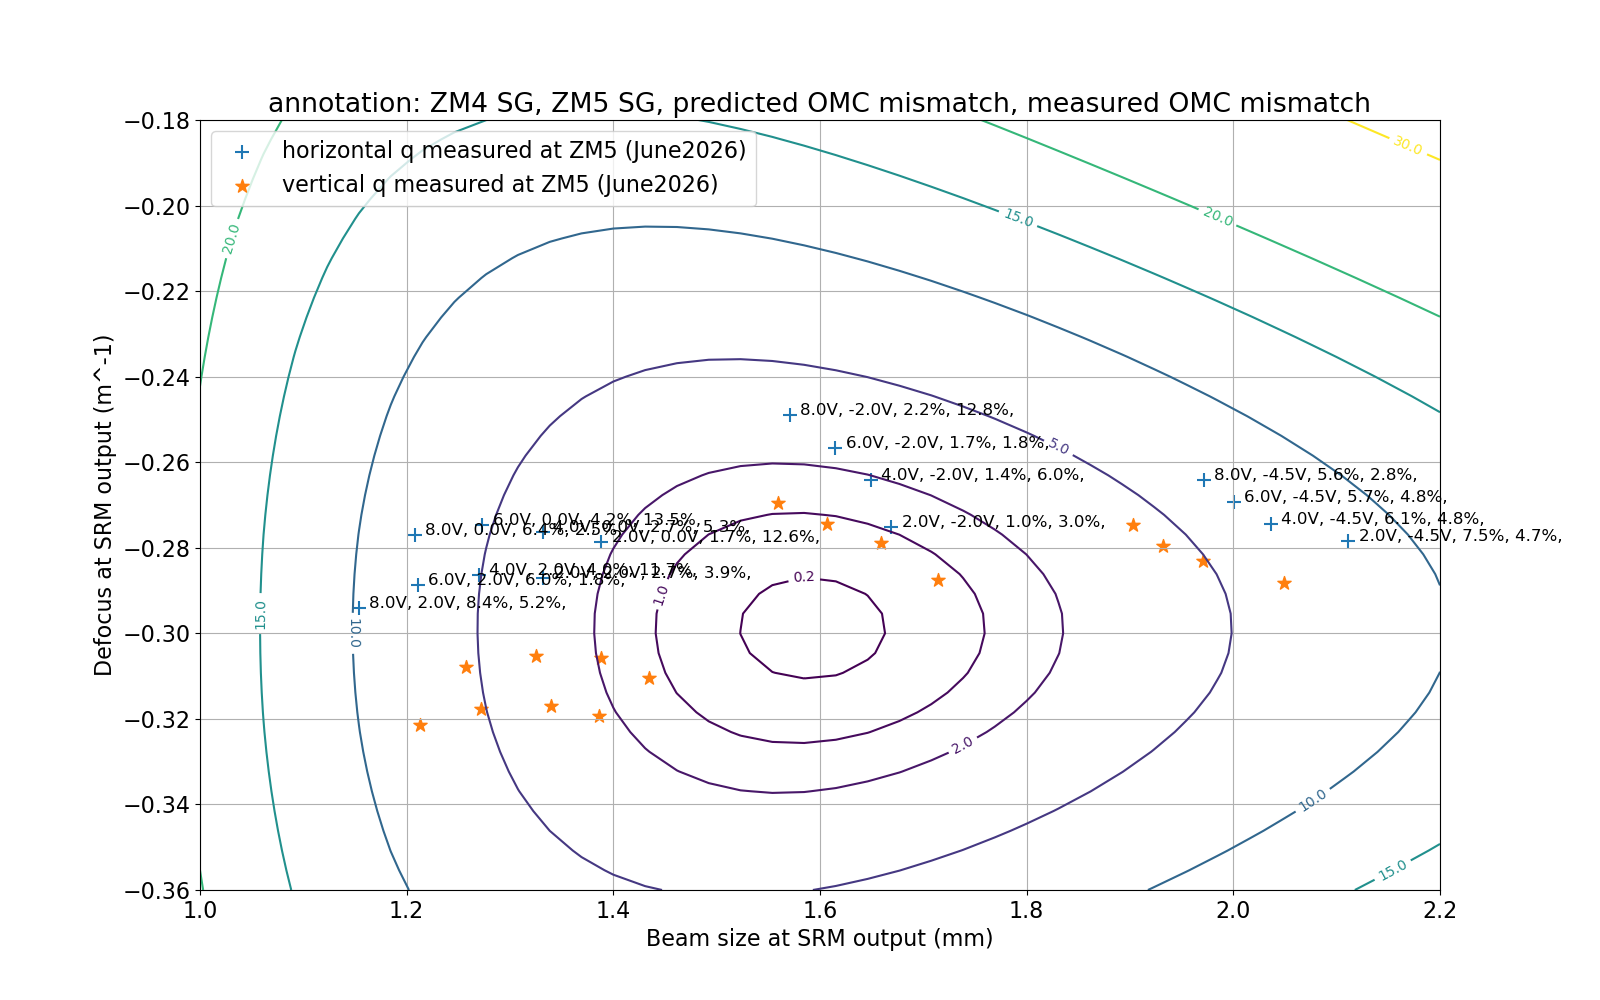
The first attachment shows the beam parameters measured on SQZT7 propagated to the AR side of SRM (after reflecting off SRM), this can be compared to the second attachment to 90345. These results are different from what we had back in May while the chamber was under vacuum and before our realignment.
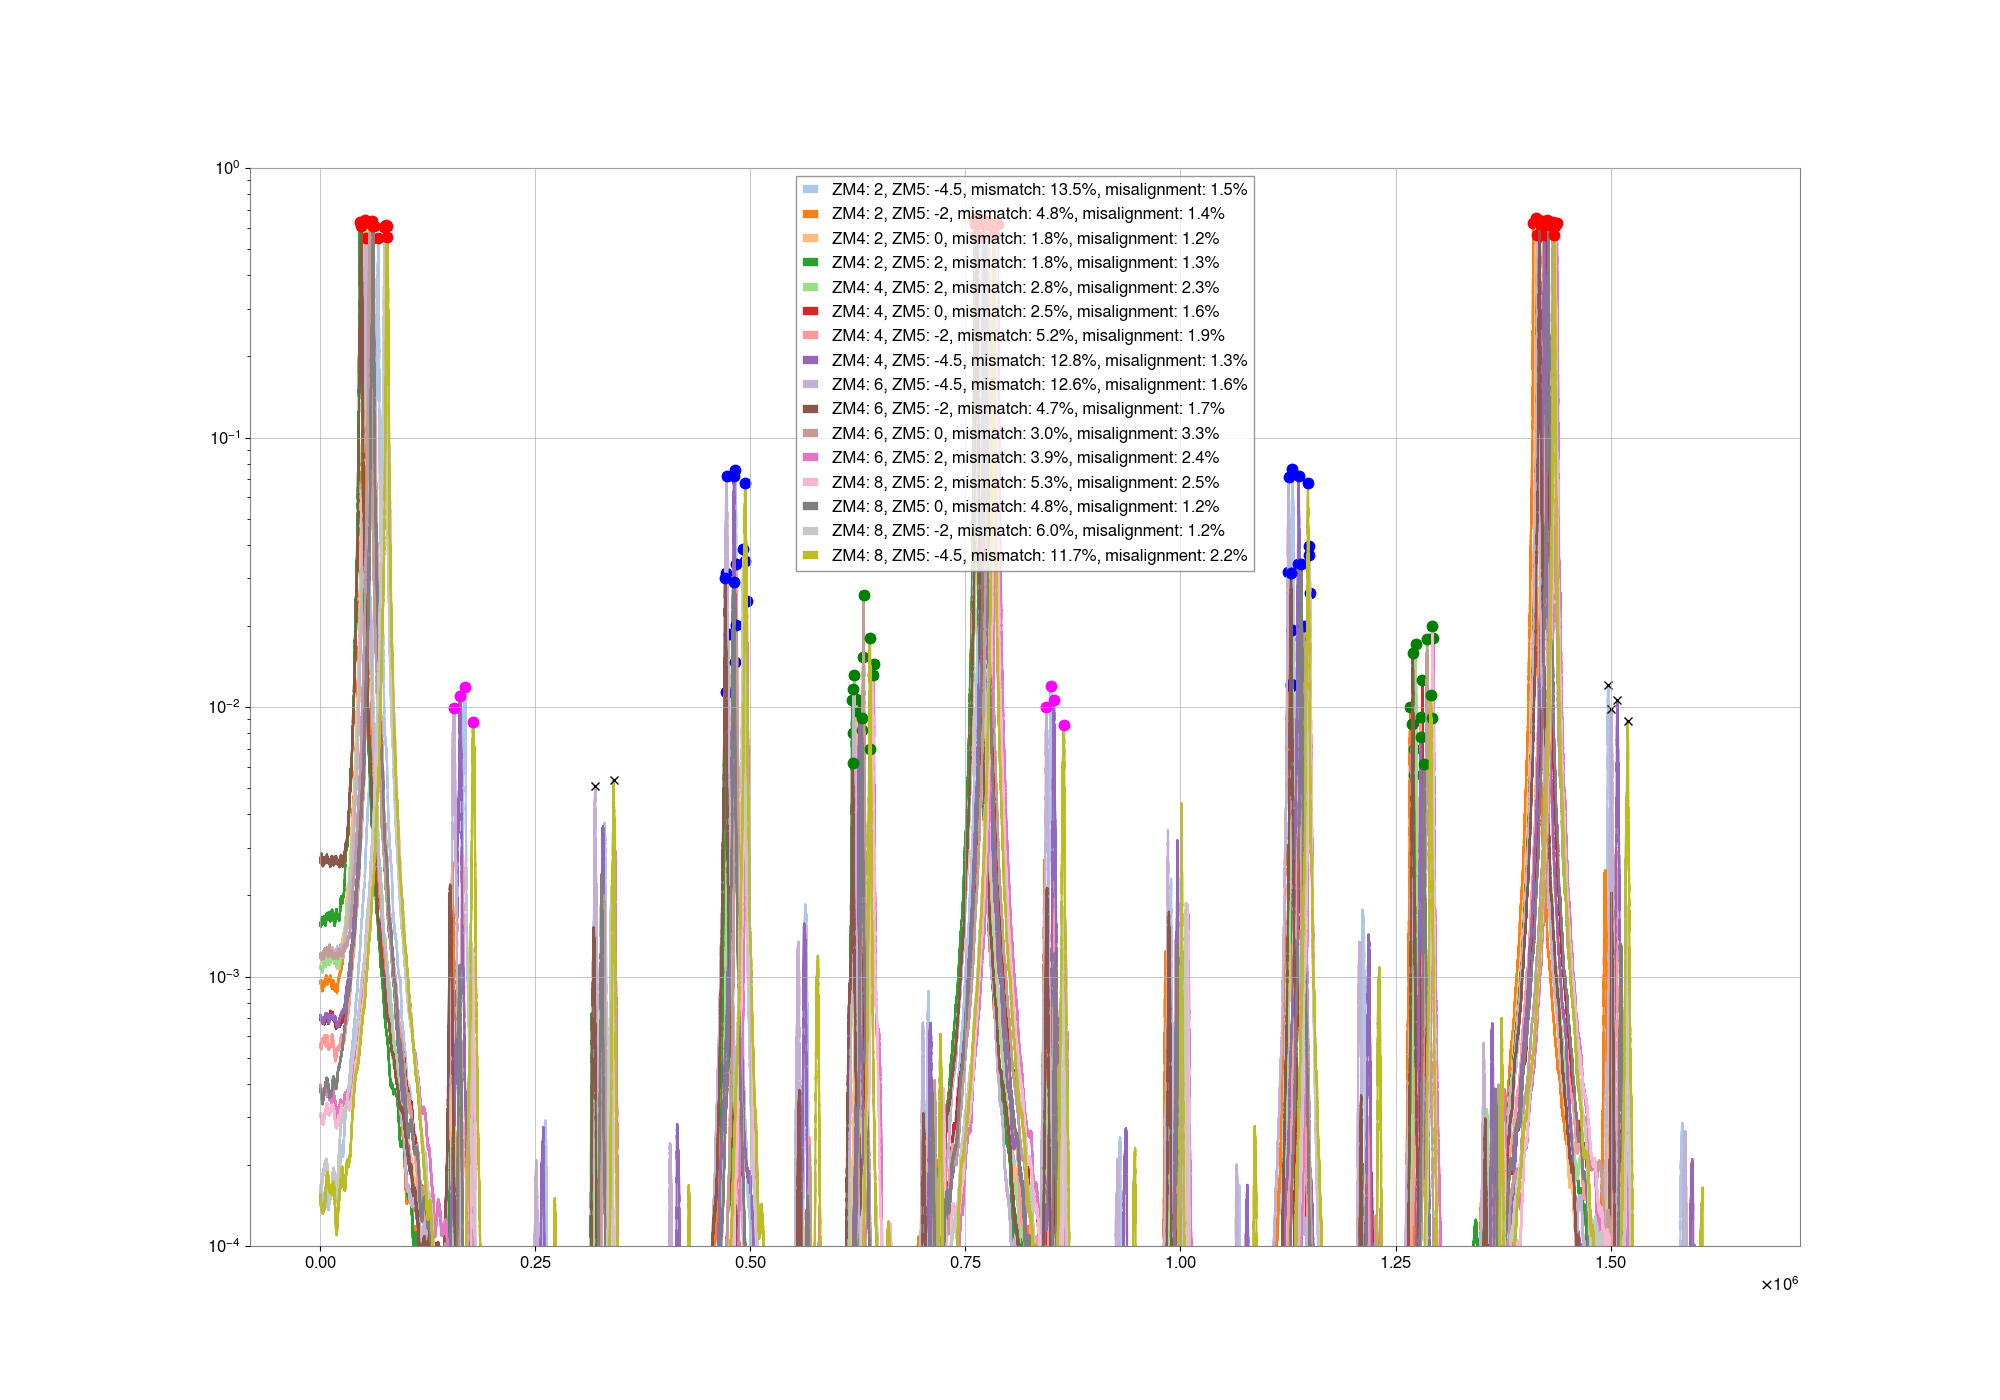
THe next two plots show the measured OMC scans, with the same data as plotted above. In the scans with ZM5 strain gauge at -4.5V the 4th order mode is large, so I've also identified it for those scans where it is above 0.005 mA.I'm estimating the mismatch as ( mean height of 2nd order + mean height of 4th order)/(sum of mean heights of 0, 1, 2, 4 orders) in the legend in this second plot, which makes the mode mismatch worse for the ZM5 -4.5 V plots than what is listed above.
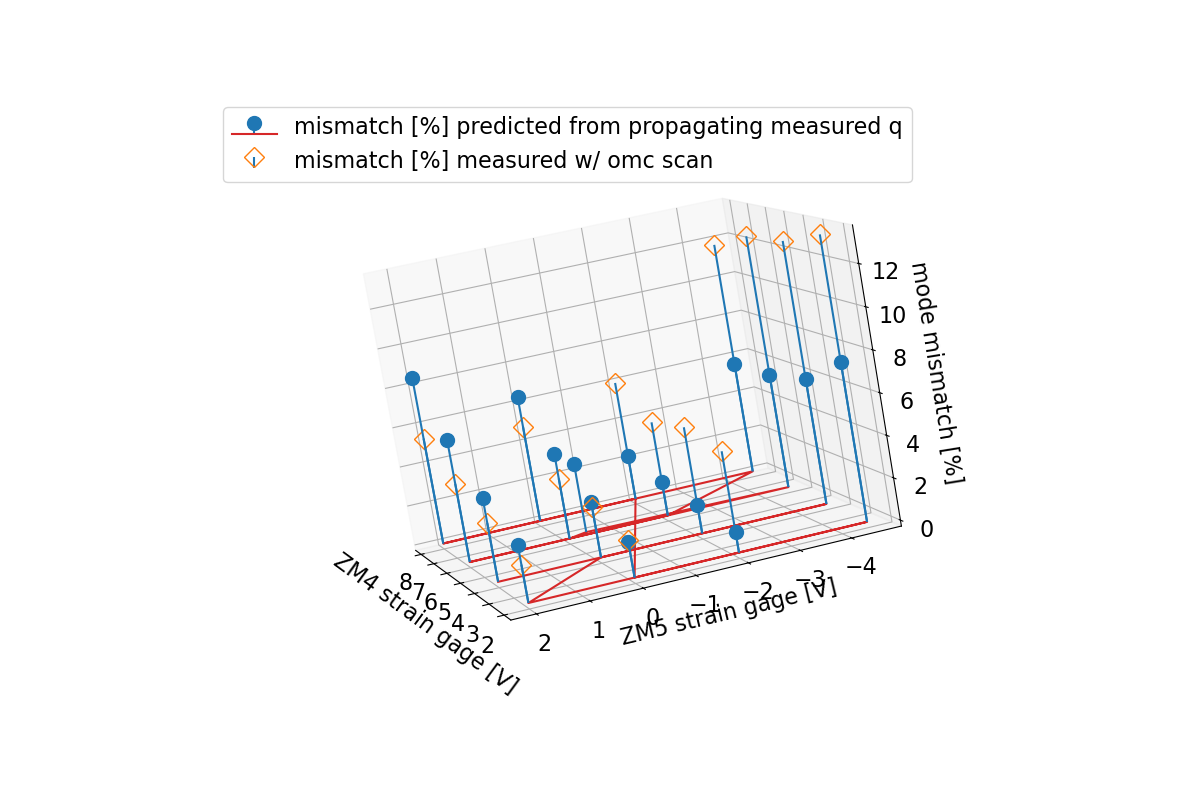
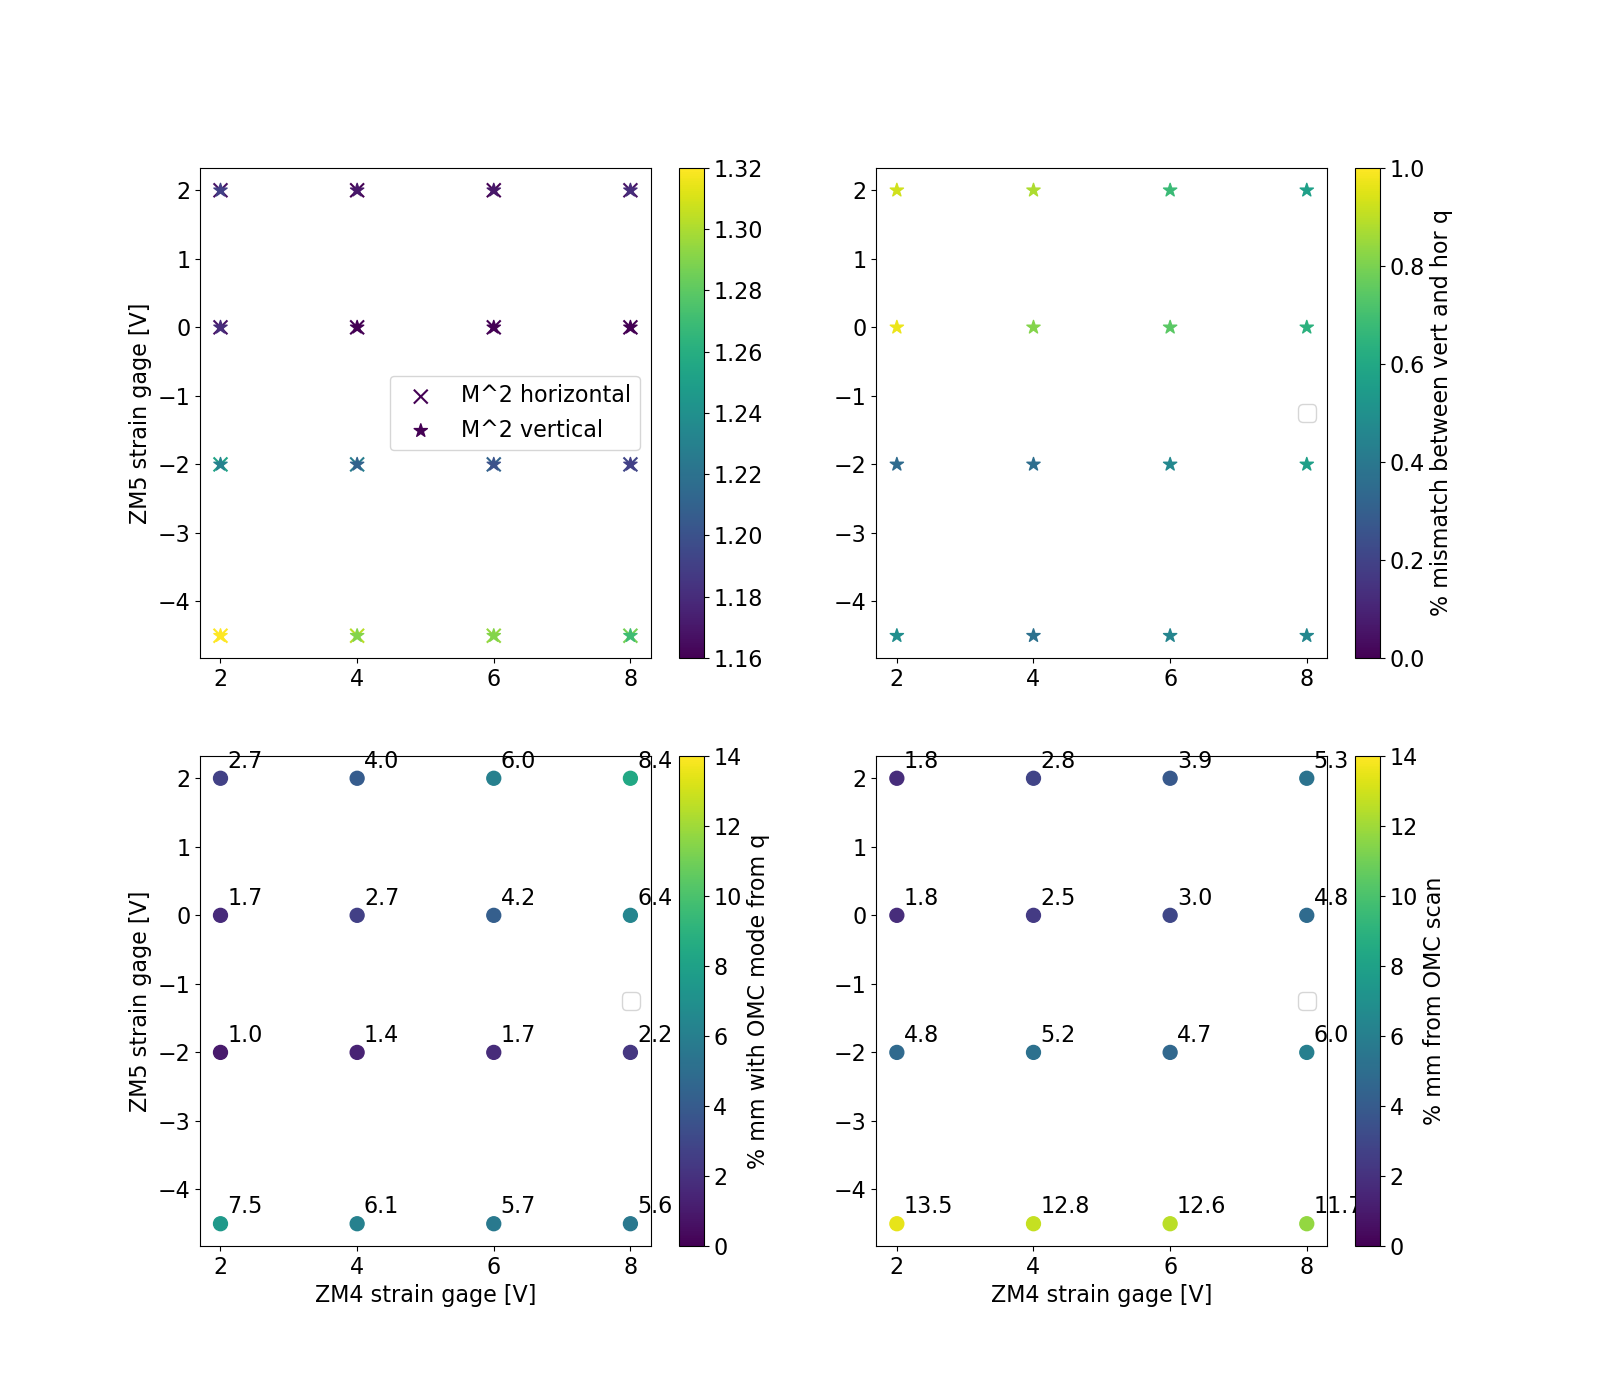
The last attachment is an attempt to summarize this data. The bottom two panels show the same data as in the stem plot. The the left panel shows the M^2 value as a function of strain gauge, this does seem to have a dependence on ZM5, which visually looks correlated with the values for which the propagation model is underestimating the mode mismatch for ZM5. Eric will add some thughts about M^2 and the OMC scans. The top right panel shows the overlap between the vertical and horizontal measured qs. Our worst astigmatisms are in the same region of psams settings as the best mode matchings. If this is 1%, and the overlap in one direction is perfect the overall mode matching would be 100*(1-sqrt(1*0.99))=0.5%.
During this PSAMS strangeness, at two times when the ZM5 strain gauge was reading -2V, the applied PSAMS voltage was 88V and 184V, see attached. This seems to be too big of a difference in applied voltage to be only caused by hysteritis. We are not the sure -2V strain gauge reading while there was 184V applied is reliable. This happened twice, the second time the strain gauge read -2.7 while the applied voltage was 194V, attached.
We then did some ramps: 0-200V over 30s, 200V to 0V over 50s and then 0V to 100V over 50s. In each of these ramps, the ZM5 PSAMS strain gauge seemed to behavior strangely, sometimes in the center of the range. See attached
For anyone interested in another view of this data, here are two more ways to look at it
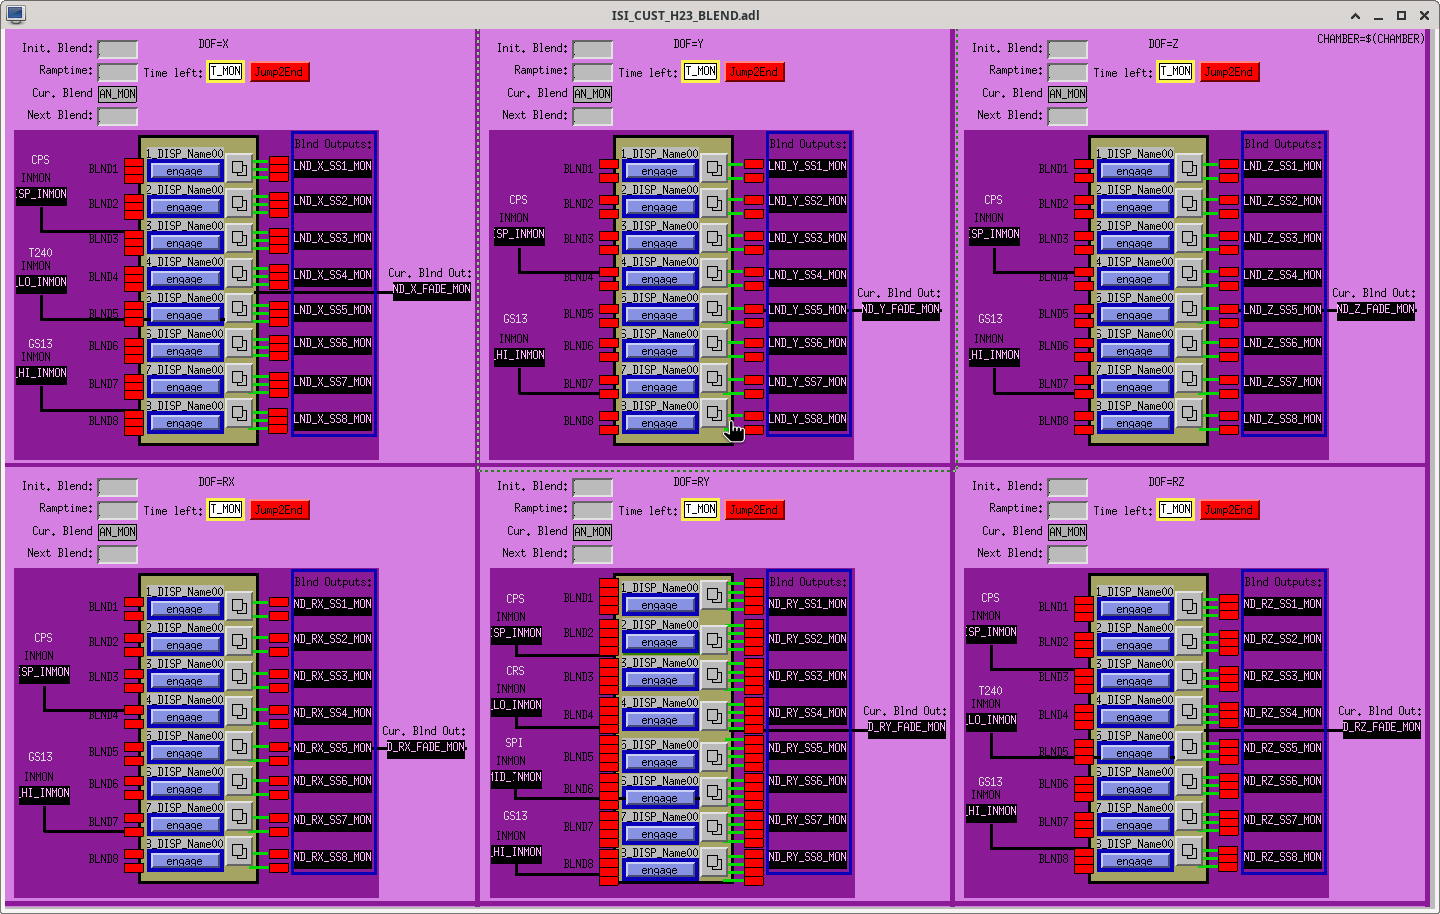
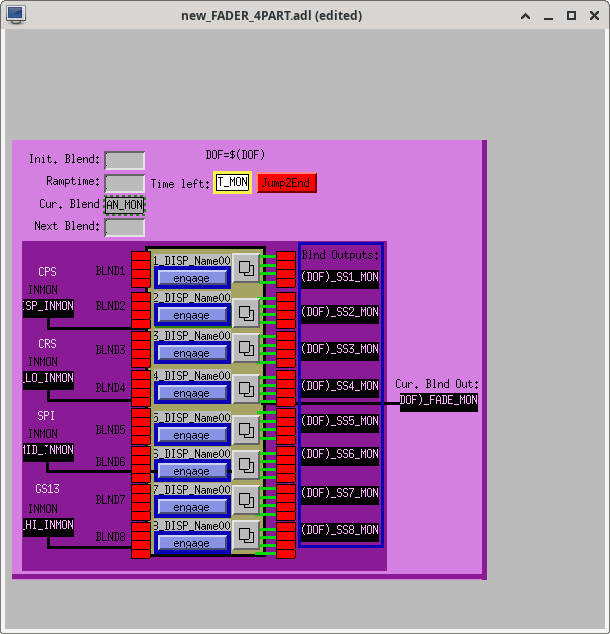
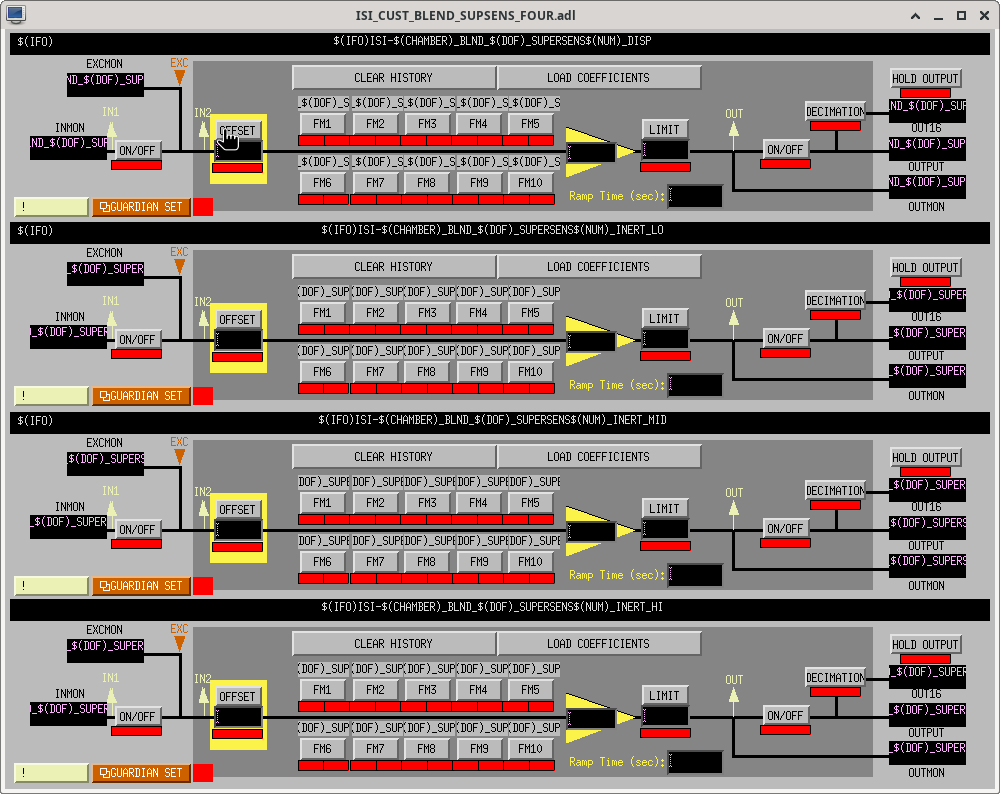
I updated the some of the medms for the blends for HAM2&HAM3 to include the SPI and CRS, added INERT_MID
Blend of four sensors: /opt/rtcds/userapps/release/isi/common/medm/hamisi/ISI_CUST_BLEND_SUPSENS_FOUR.adl
Made new block for a blend with four sensors: opt/rtcds/userapps/release/isi/common/medm/hamisi/new_FADER_4PART.adl
The blocks for 2 sensors and 3 sensors (new_FADER_PART.adl, new_FADER_3PART.adl) currently have T240 labeled instead of SPI, I didn't want to mess with those blocks, as they are used for other chambers and it's still labeled T240 in the model, but for the 4PART I did switch T240 to SPI
Made new blend fade medm screen for HAM2 & HAM3: opt/rtcds/userapps/release/isi/common/medm/hamisi/ISI_CUST_H23_BLEND.adl
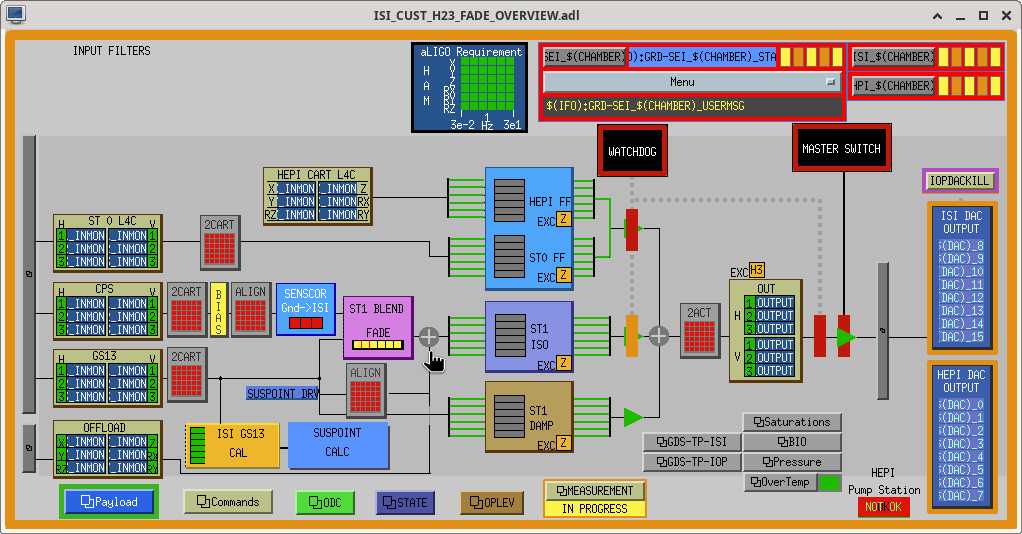
Made overview screen for HAM2&HAM3:opt/rtcds/userapps/release/isi/common/medm/hamisi/ISI_CUST_H23_FADE_OVERVIEW.adl
The only thing changed was to switch which screen the ST1 BLEND FADE button takes you to the new medm.
I added and commited all these to the SVN and updated the sitemap to link the them for HAM2 and HAM3
Continued working on HAM2&3 medm screens
Updated the input filters in opt/rtcds/userapps/release/isi/common/medm/hamisi/ISI_CUST_H23_FADE_OVERVIEW to include input filters for the SPIINF, SPI_FF, and CRSINF, and link to the SPI and CRS overview screens. The buttons link to the userapps/release version of the overview screens.
I made a few new input filter screens:
/opt/rtcds/userapps/release/isi/common/medm/hamisi/ISI_CUST_CHAMBER_SPIINF_ALL.adl
/opt/rtcds/userapps/release/isi/common/medm/hamisi/ISI_CUST_CHAMBER_SPI_FF_ALL.adl
/opt/rtcds/userapps/release/isi/common/medm/hamisi/ISI_CUST_CHAMBER_CRSINF_ALL.adl
and set up the a link to an ndscope of the BLRMS channel (like the CPS), but that can be easily gotten rid of.
I've commited all of the to the svn
(Jordan, Owen, Jake, Gerardo)
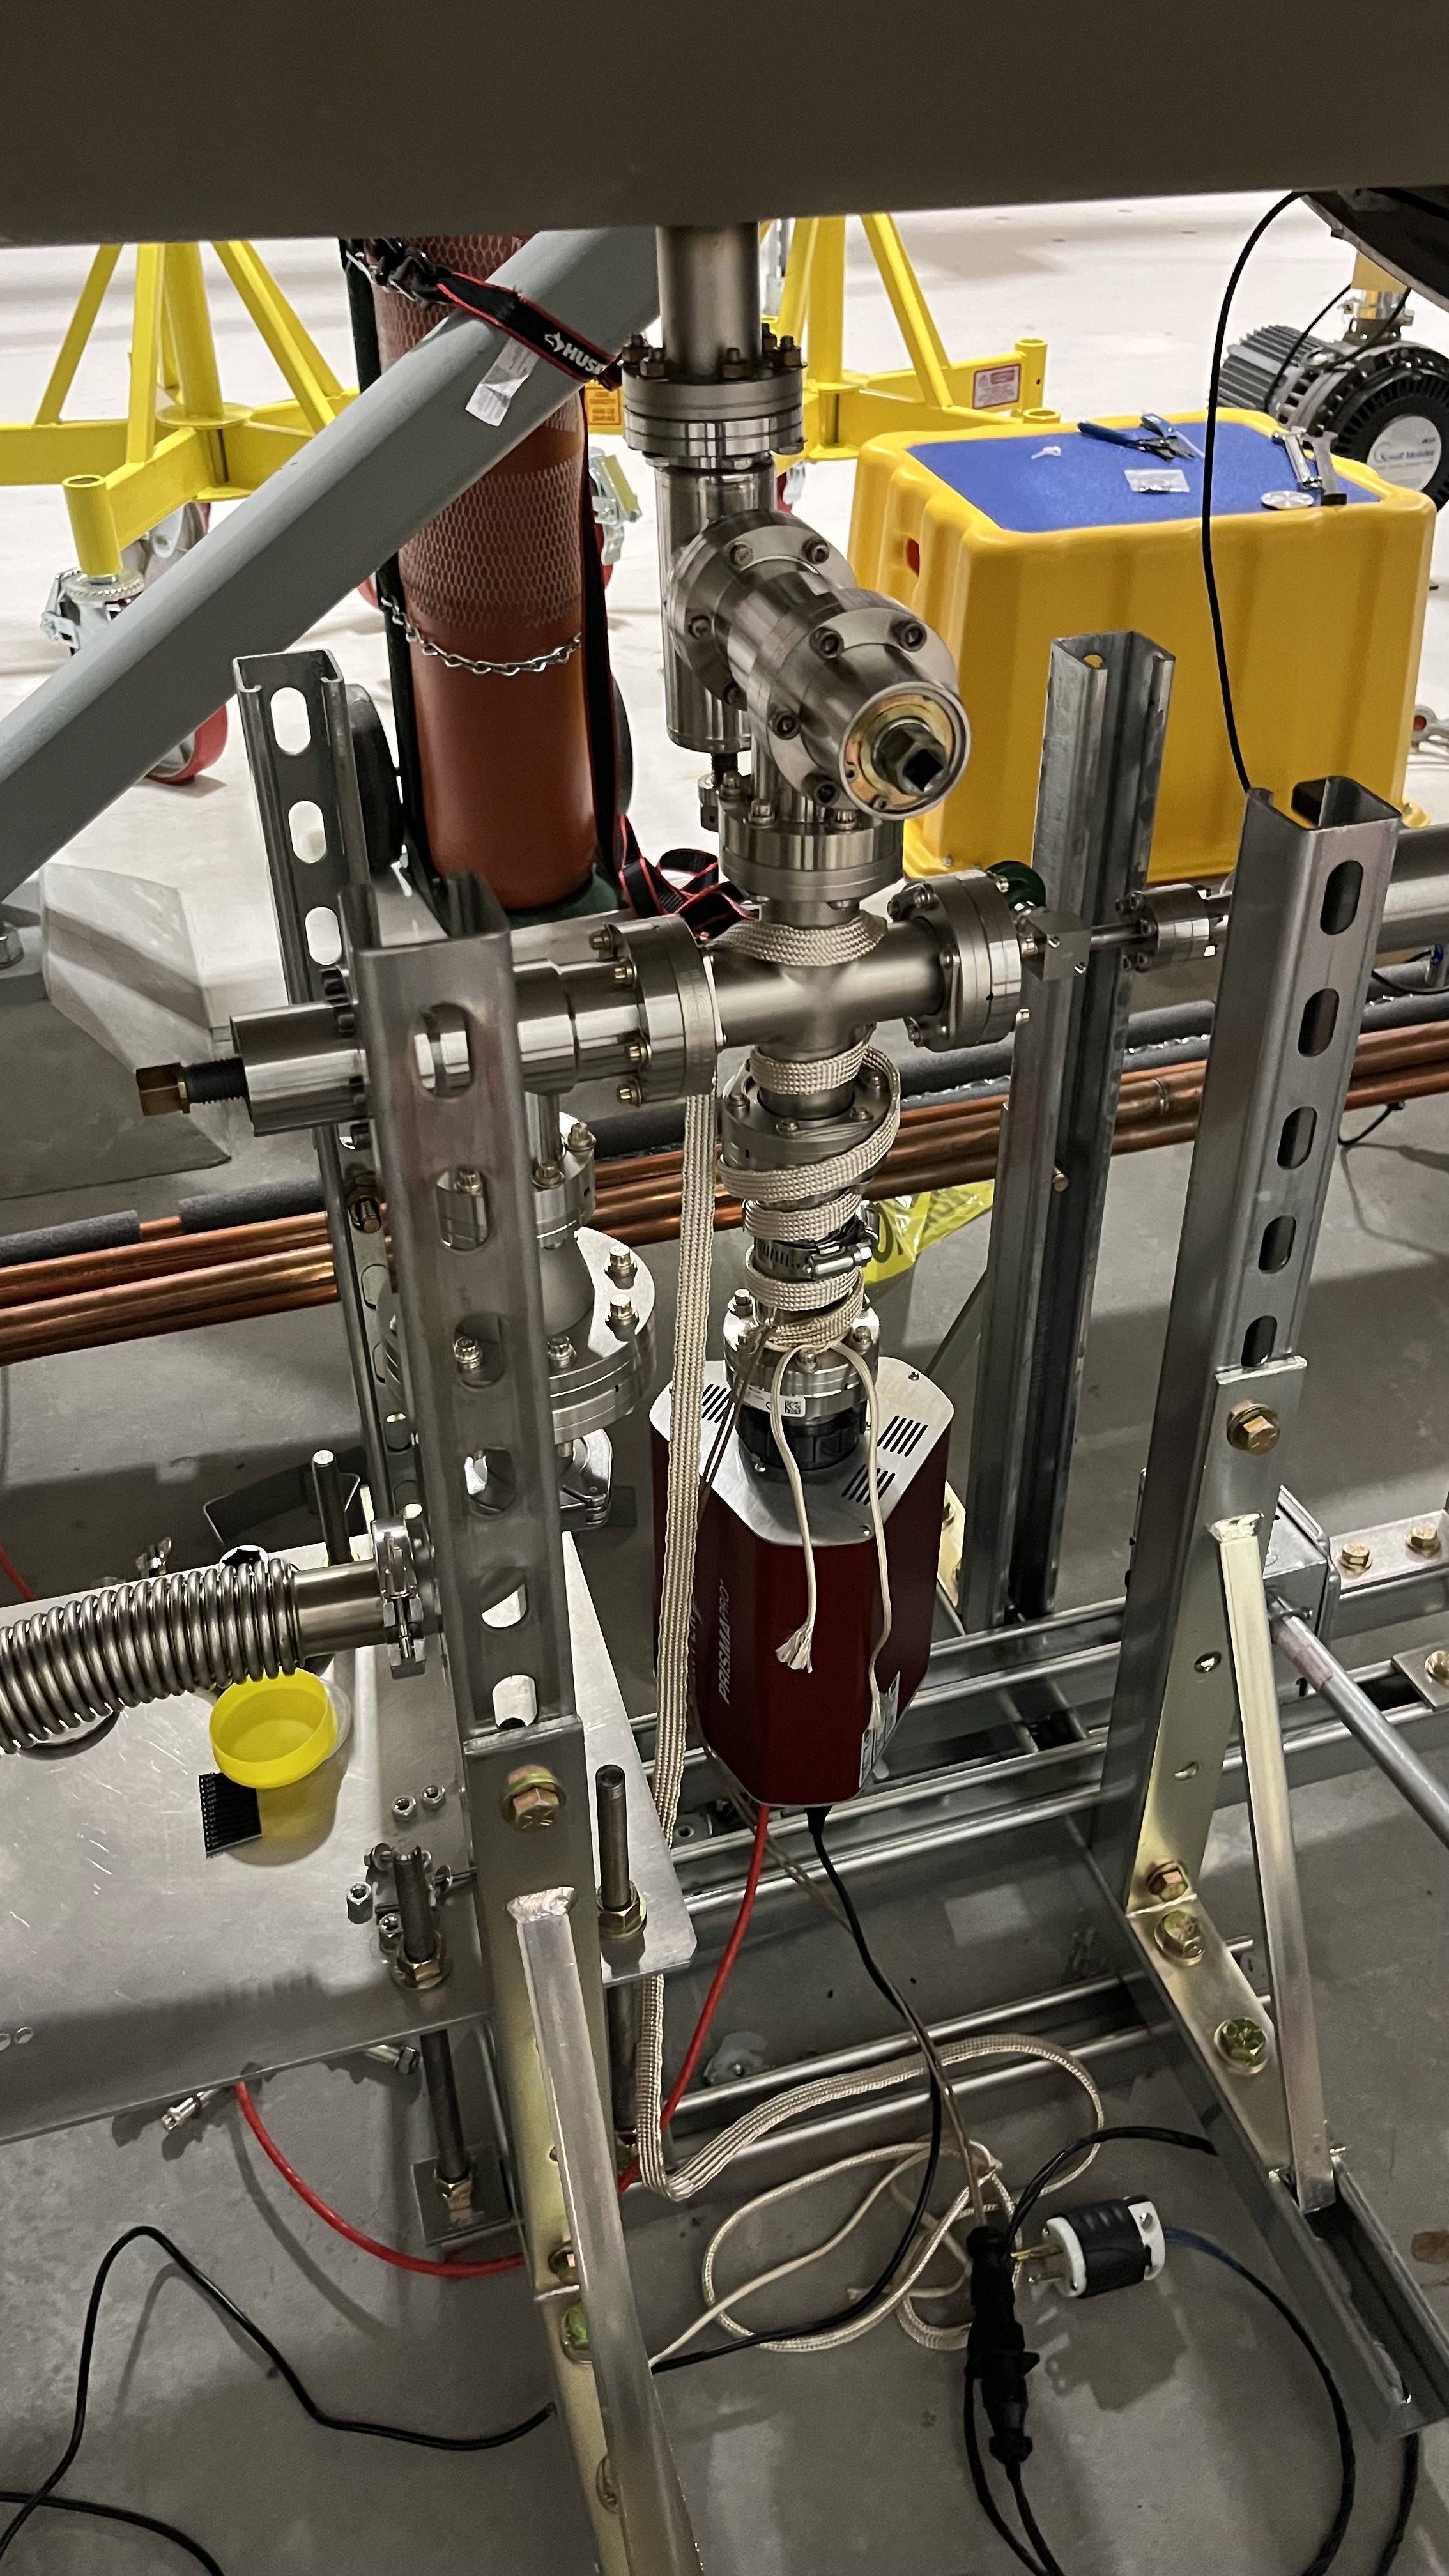
The cryotrap cooldown continues, we continue to pump on the cryotrap volume with a turbo pump, the turbo is backed with a SS500 aux cart.
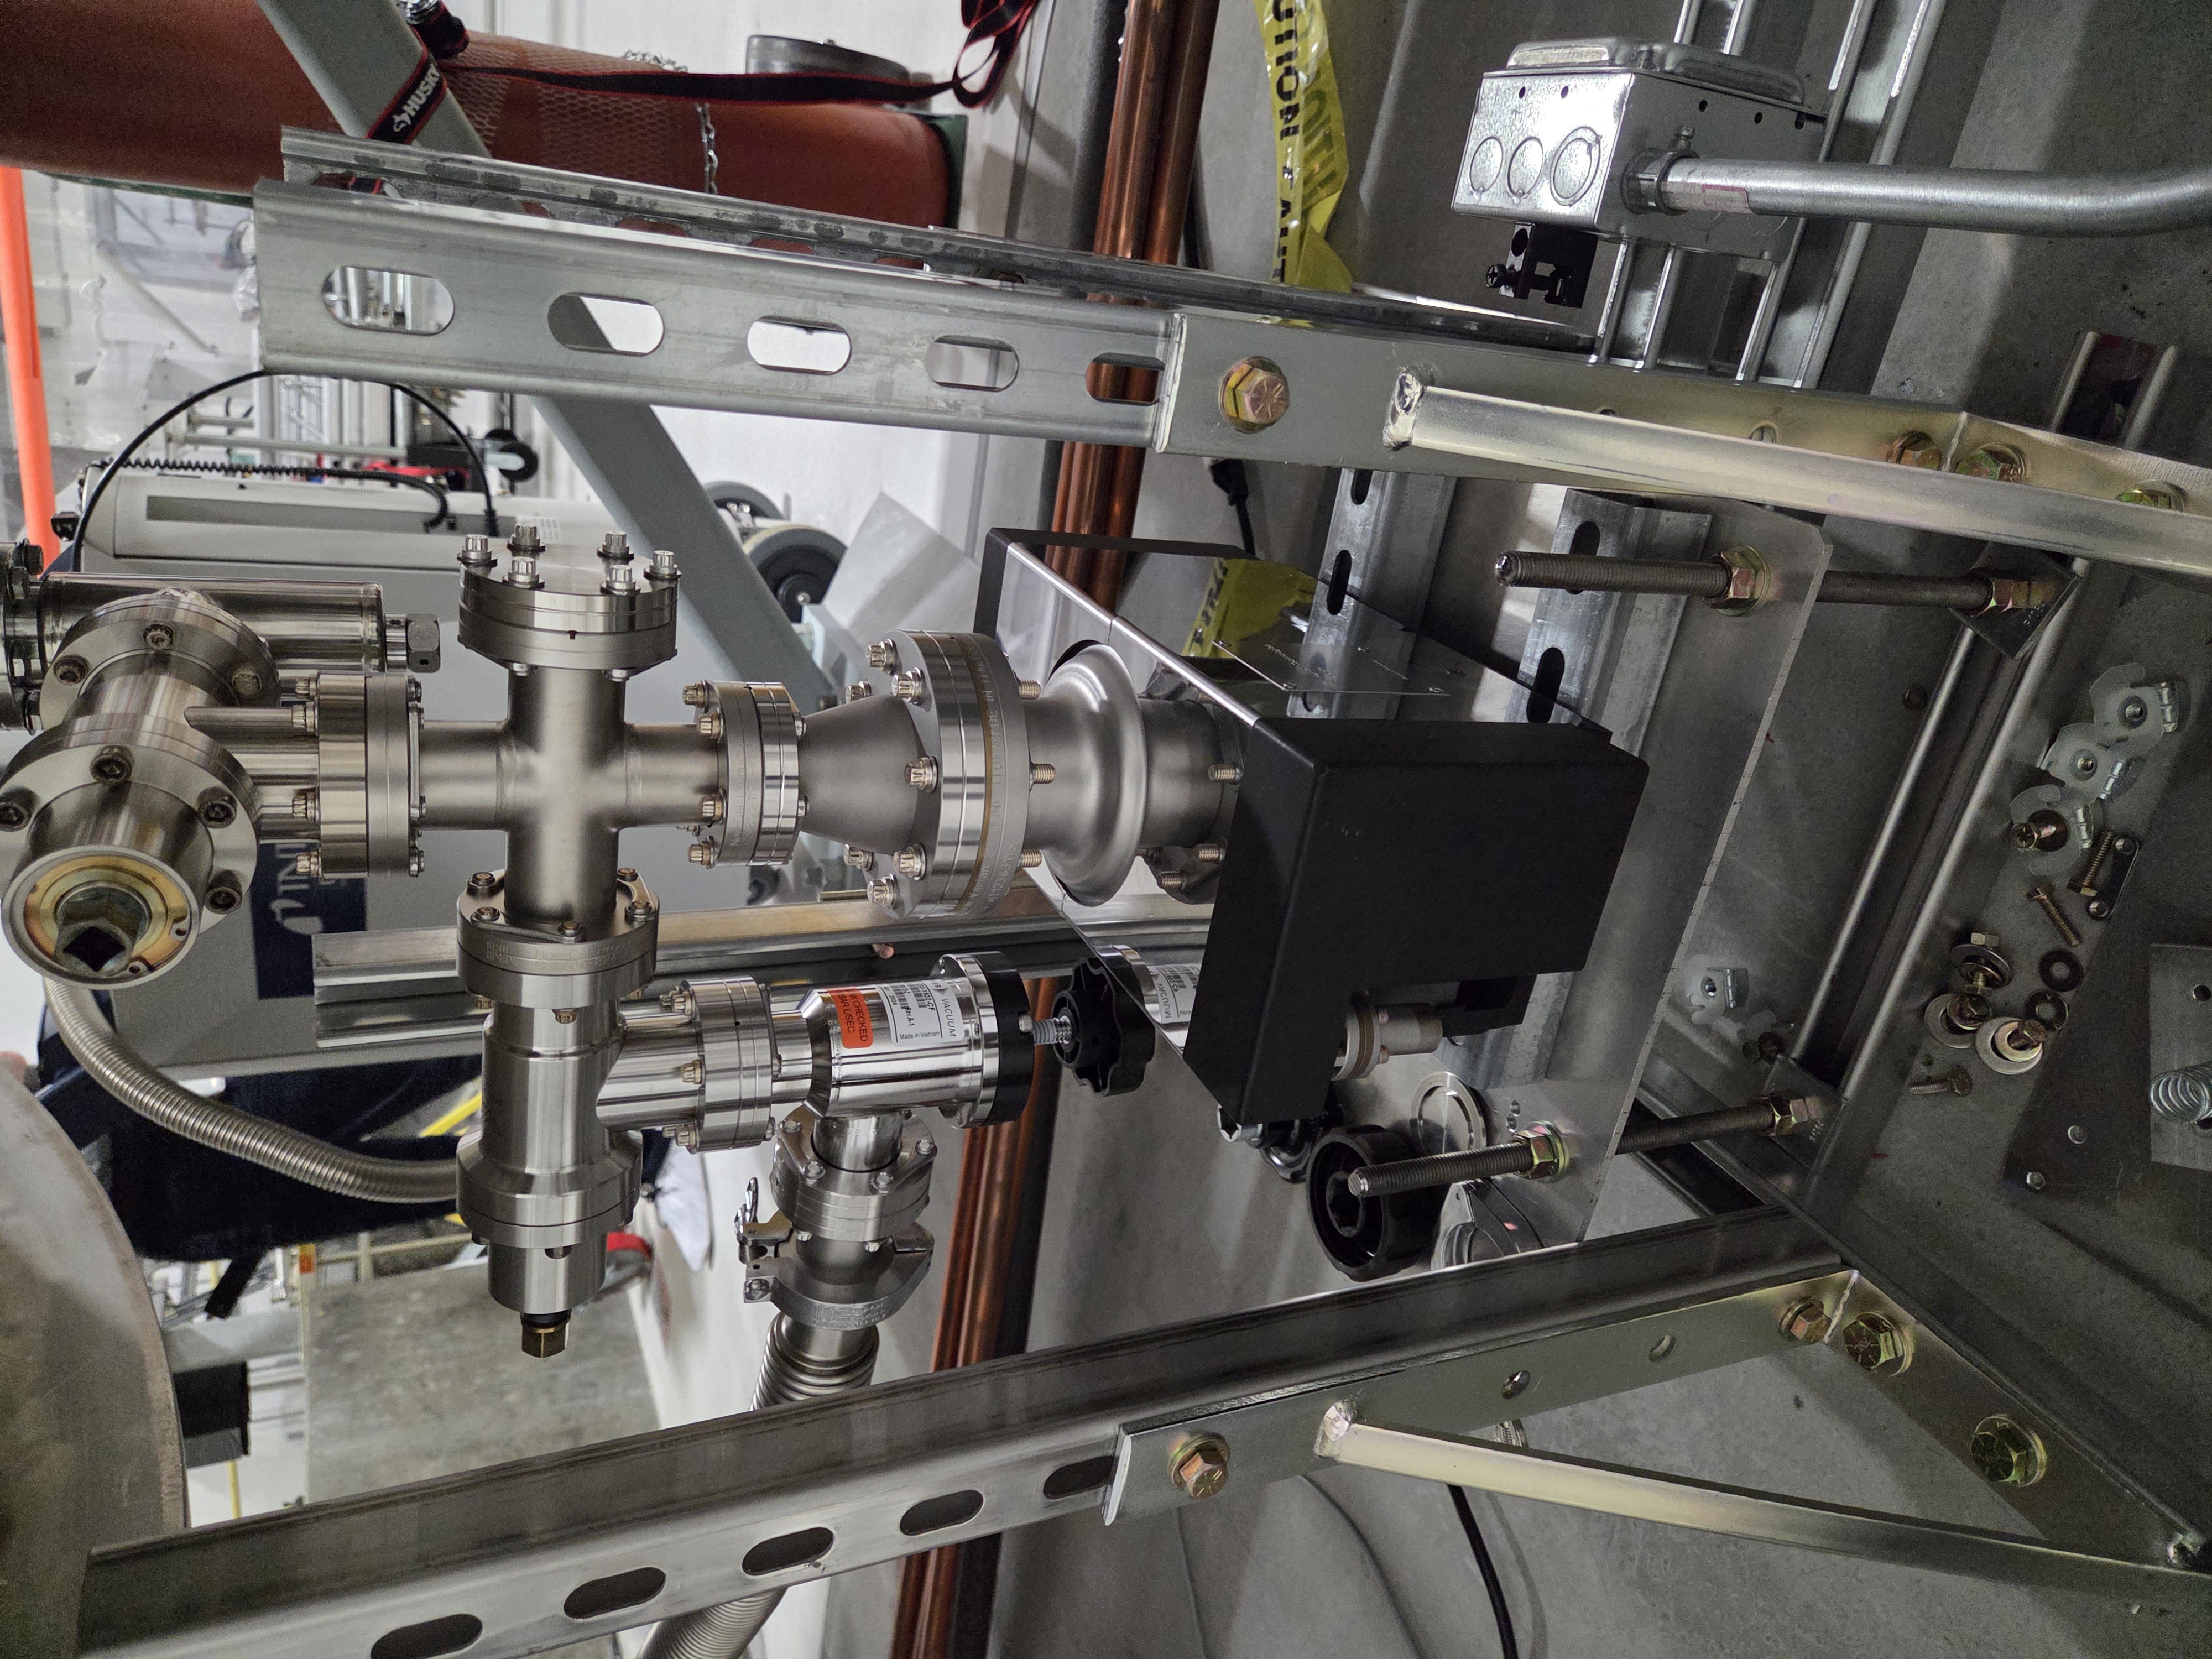
Small changes were the removal of the calibrated leak from the RGA tree, along with the removal of other components in preparation to install an incoming small ion pump next week.
Current pressure in the cryotrap volume is 7.38X10⁻¹⁰ Torr.
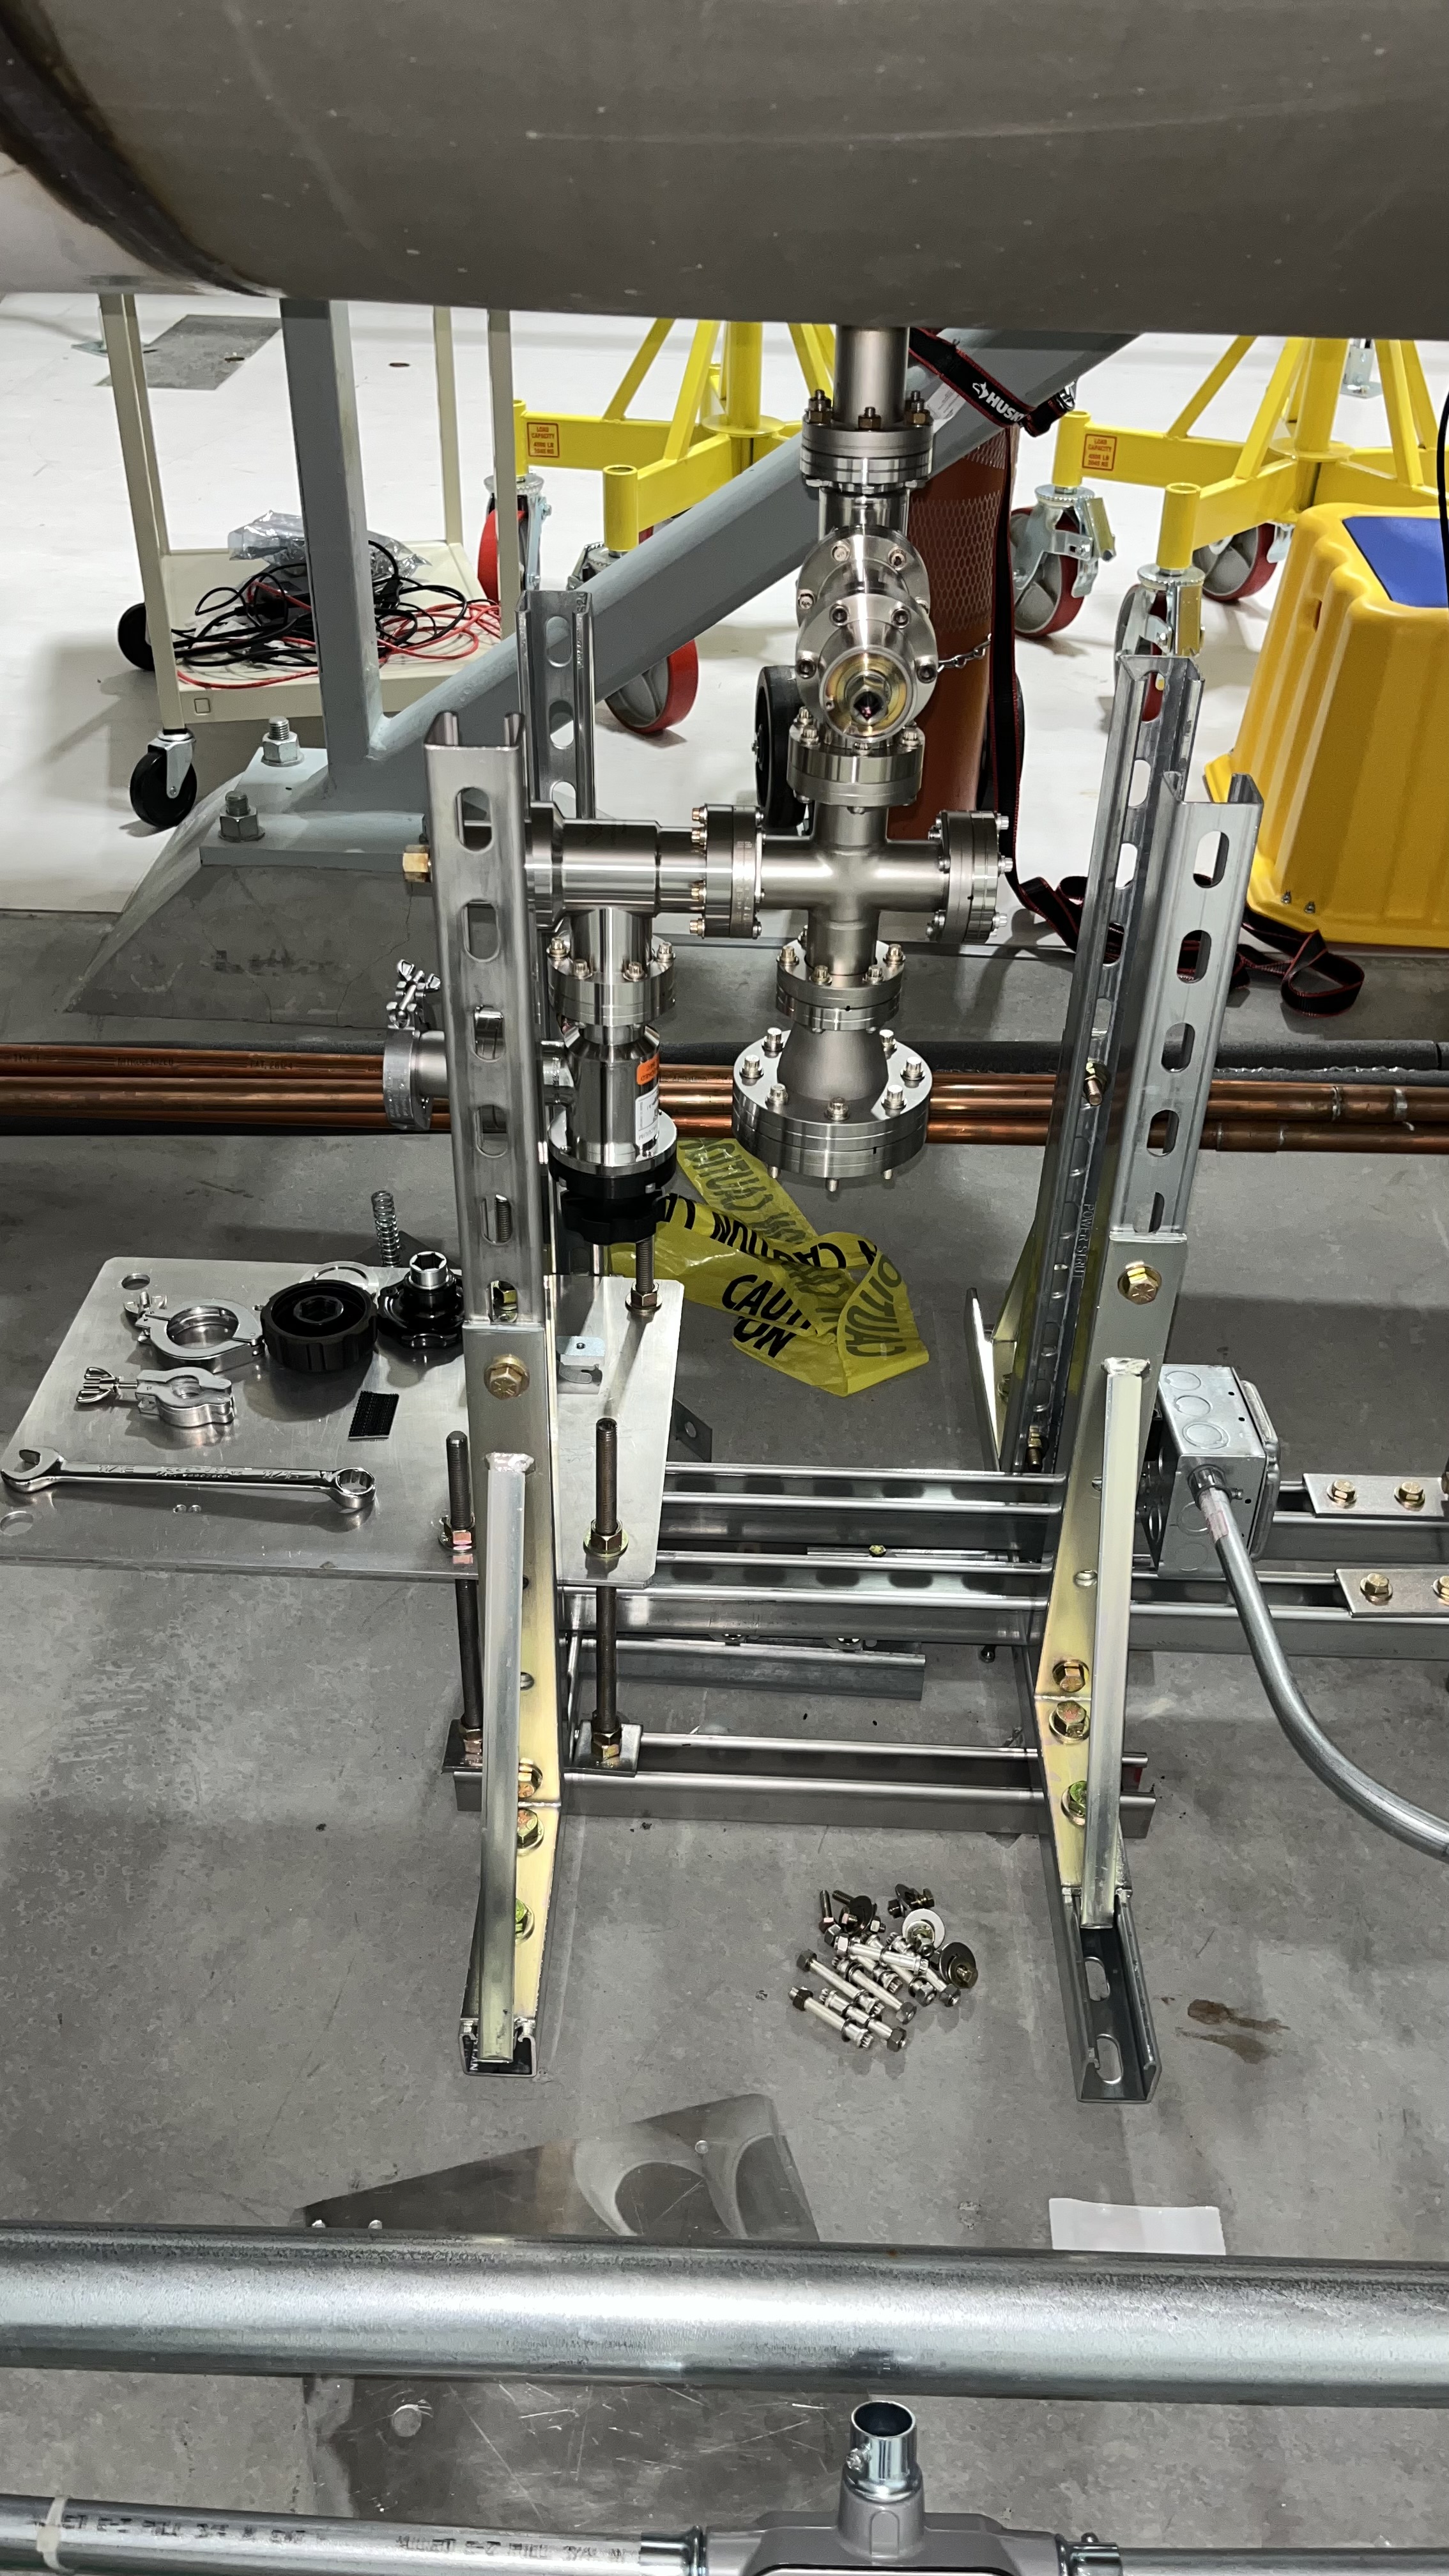
Jordan, Jake, Owen
The RGA tree was removed and replaced with the dedicated 75 l/s Starcell ion pump and a pumpdown port for the pump tree.
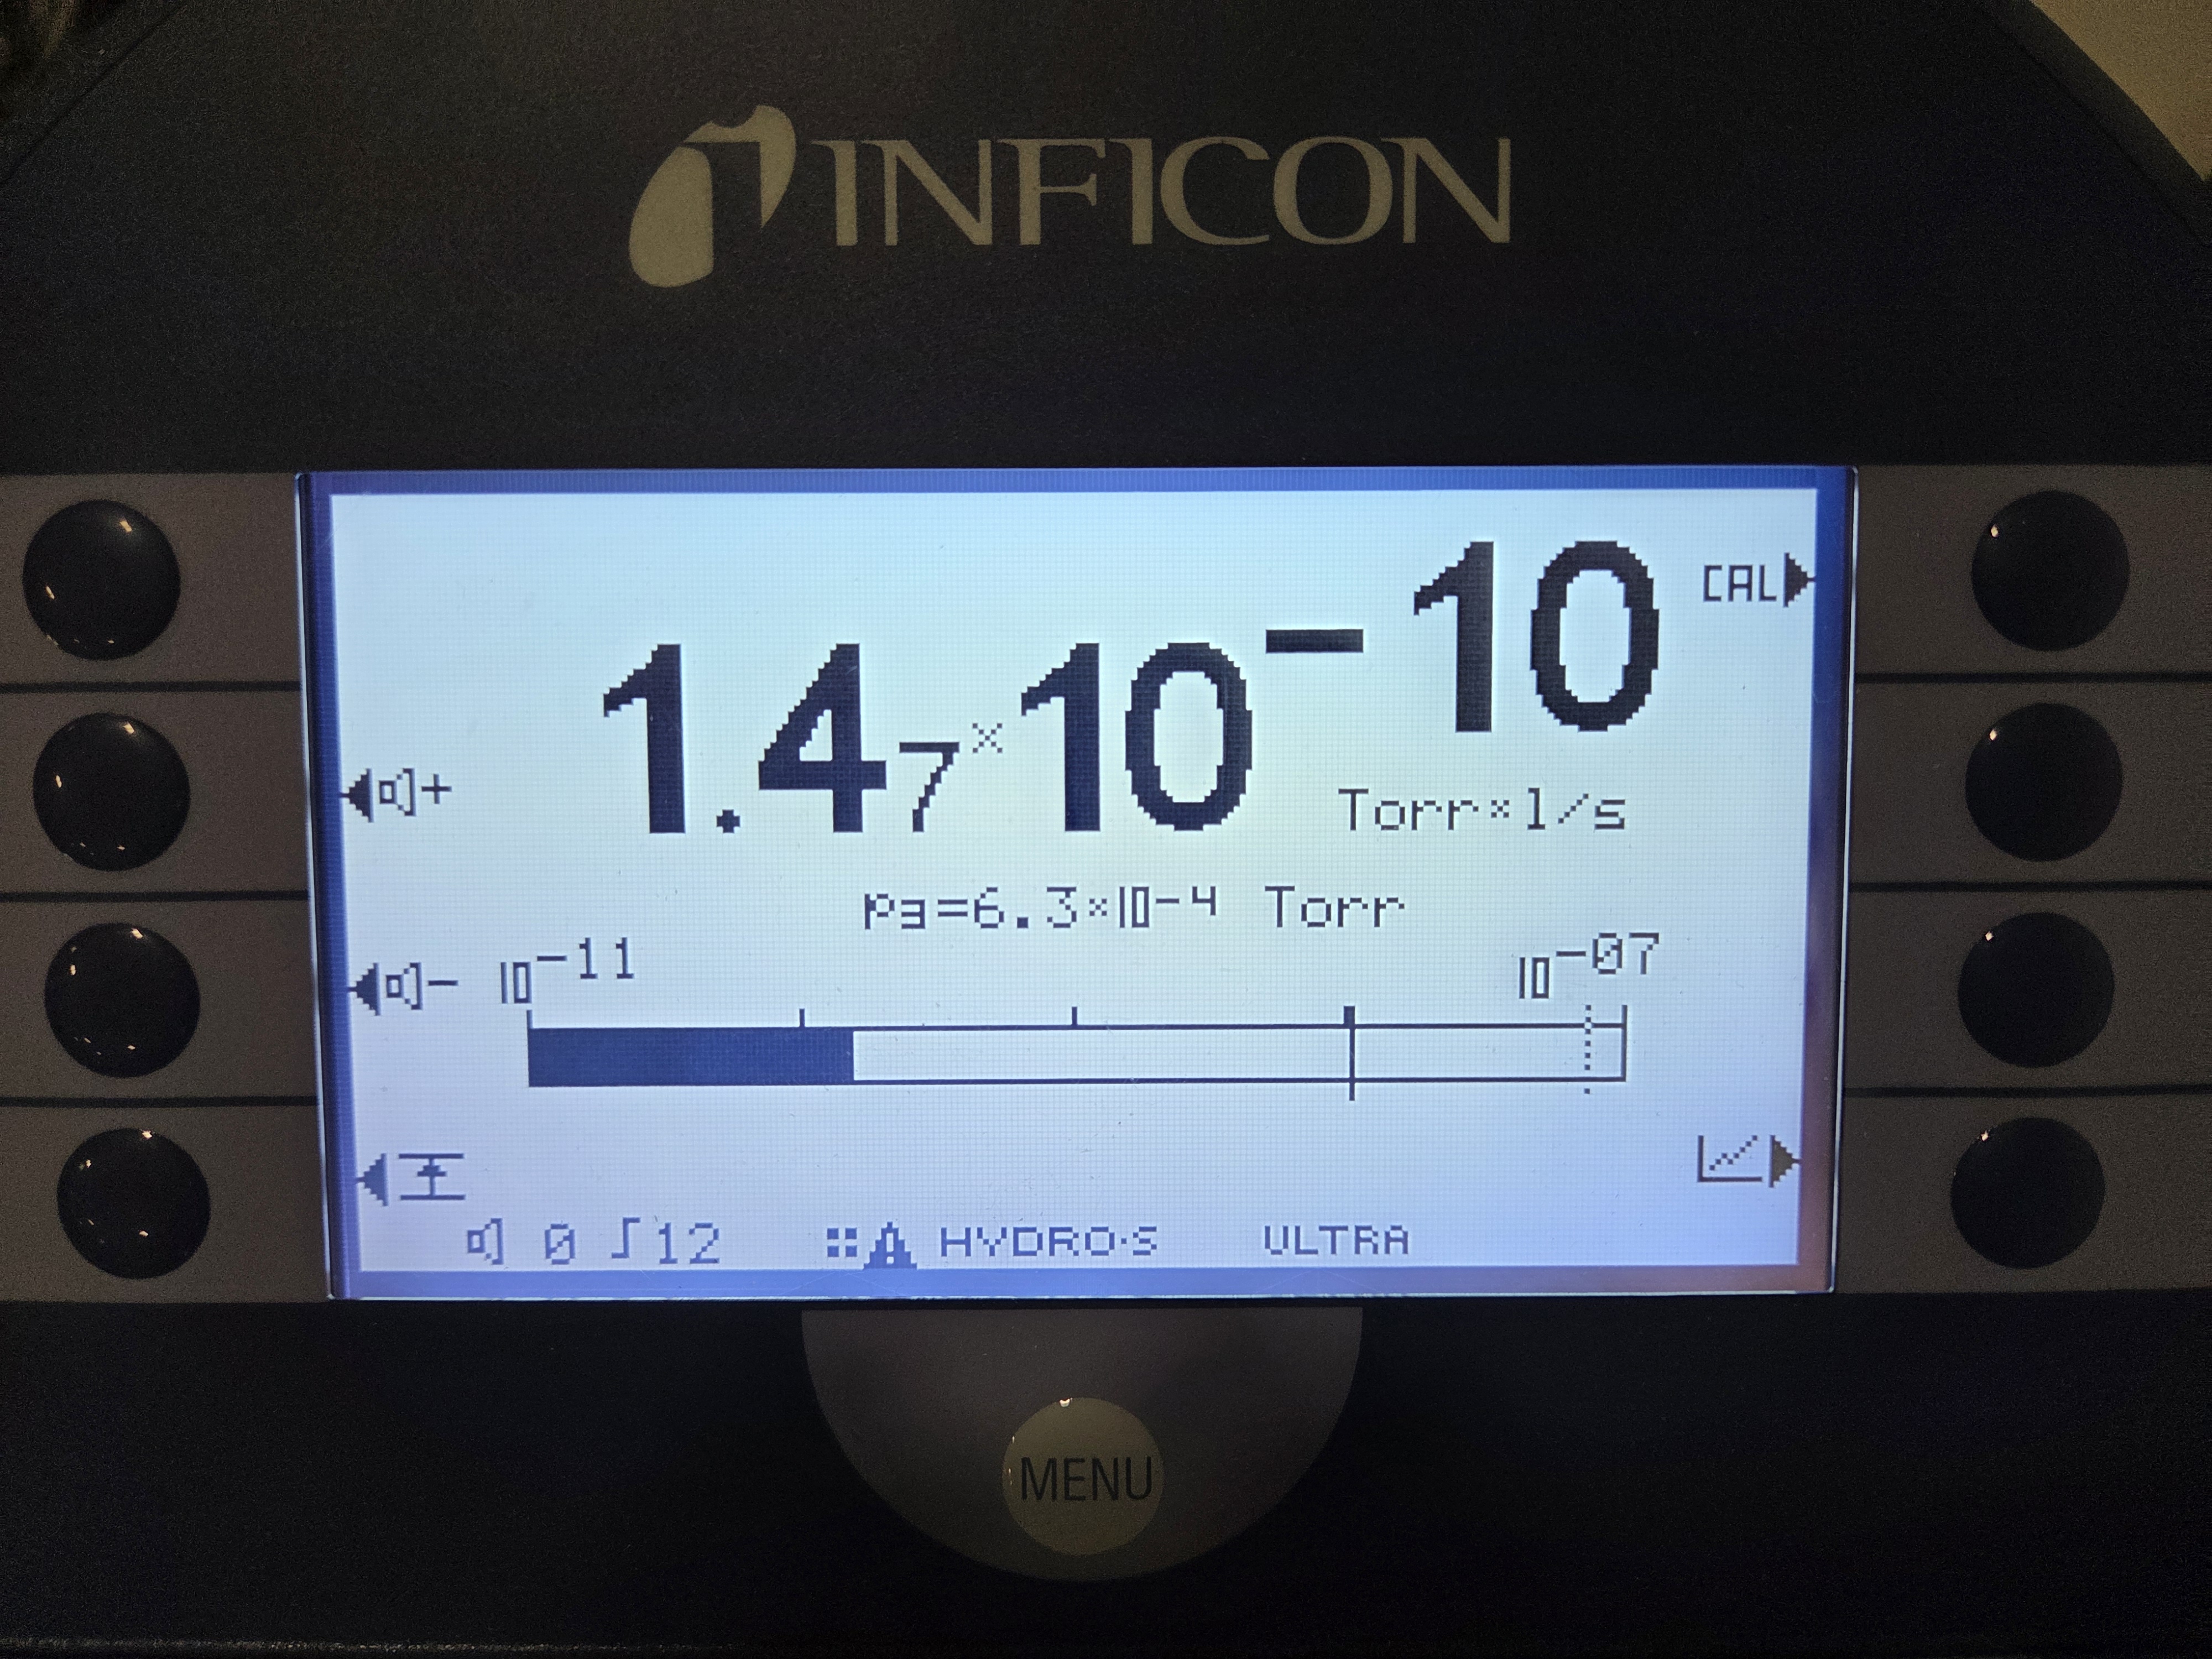
All flanges were helium leak tested, no He signal above the leak detector background were found. (~1.5E-10 Torr-l/s)
Volume is currently being pumped by a small aux cart, and the ion pump will be powered on tomorrow. The volume will then be introduced to the cryopump volume once the pump pressure reaches ~E-9 Torr on ion pump alone.
Update for CP1.
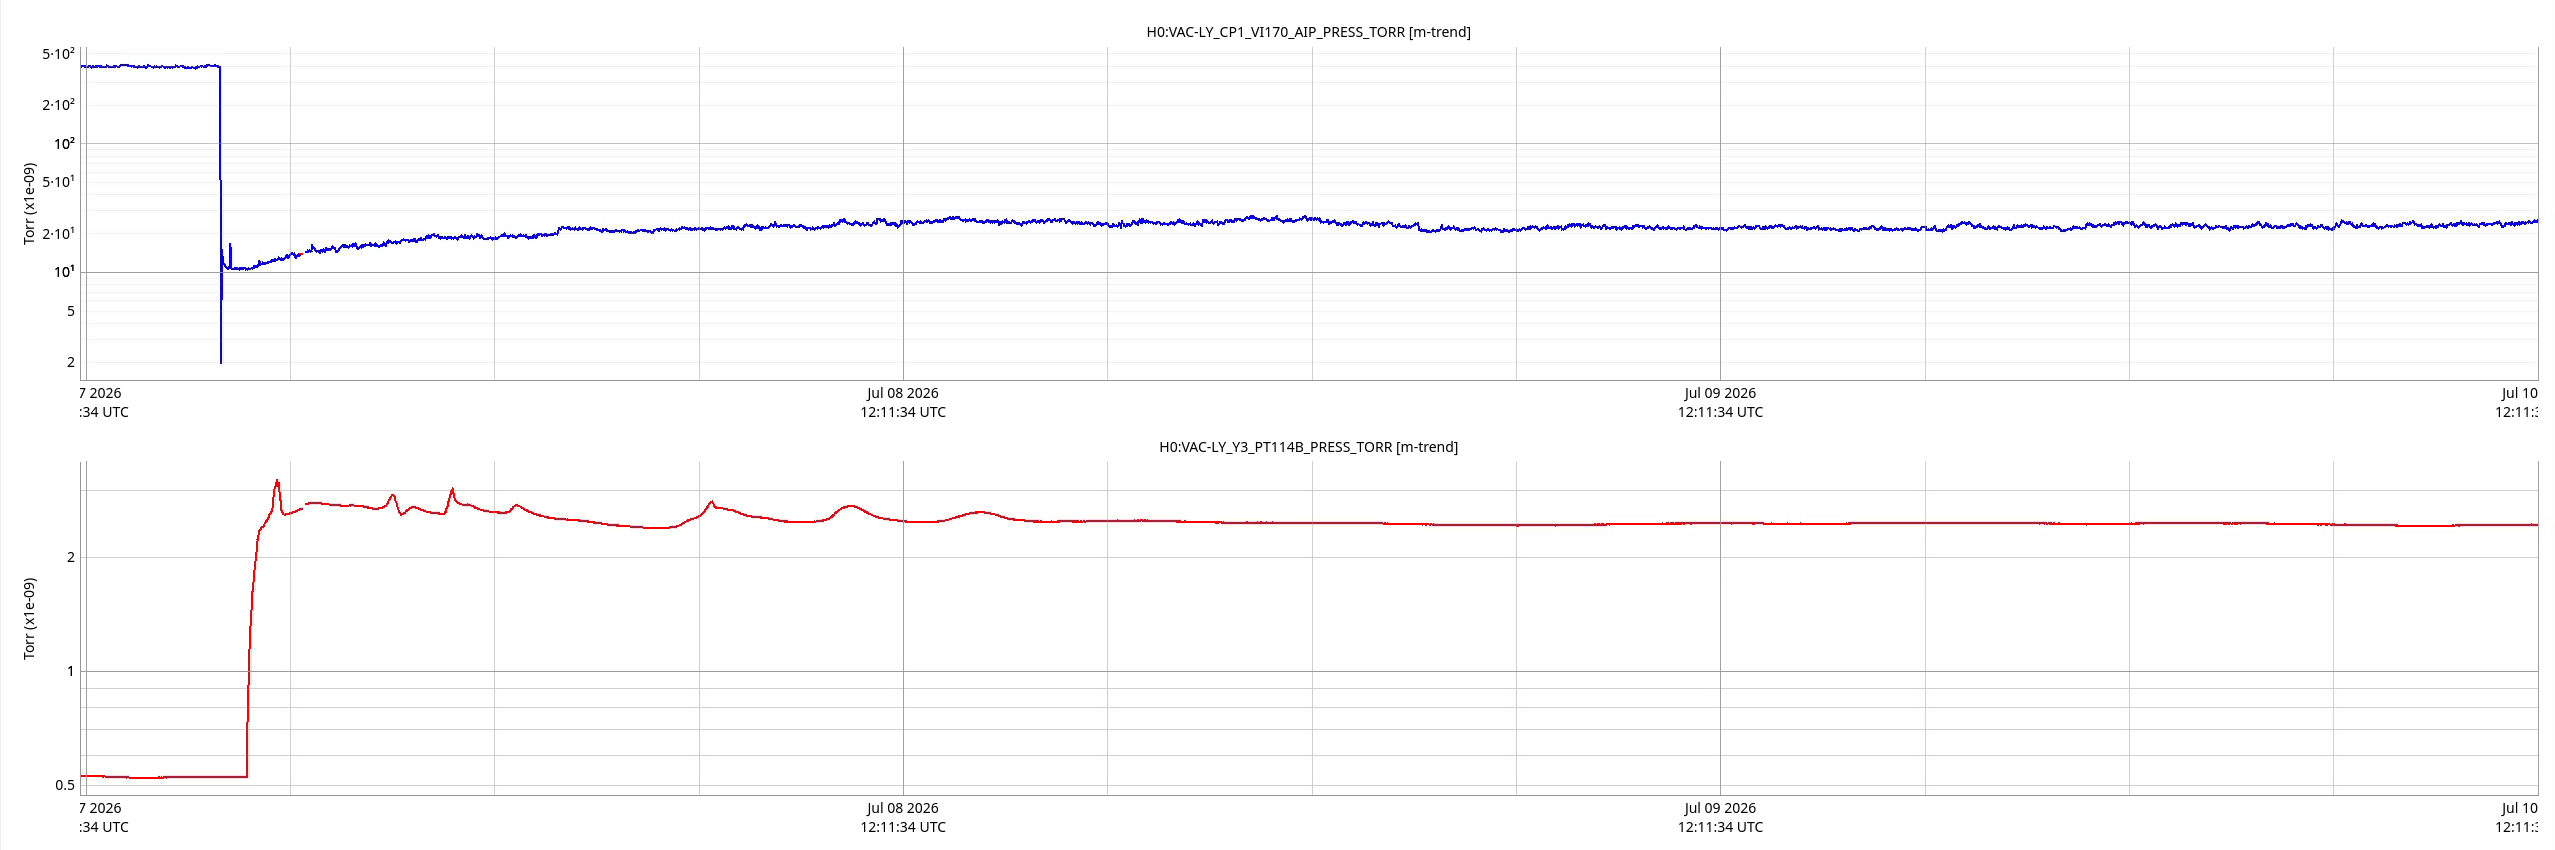
Last Tuesday 7/7/26, Jordan removed the turbo pump and introduced the small ion pump to the CP1 vacuum volume, this closed the warm up of CP1. Attached plot of small ion pump controller and pressure reported by the cold cathode at CP1.
Jeff, Betsy, Arnaud, Oli
Yesterday afternoon we went to the BBSS QOSEM satamp and checked the coil resistance. We did this by putting the BBSS in SAFE and then unplugging the Satamp to Duopus cables one by one. Each of these three cables have the pins for two QOSEMs, split as CH1 + CH2, CH3 + CH4, and CH5 + CH6. Each cable was unplugged and then the pins for each coil probed. Below are the results. These values are all pretty similar.
| Coil Resistance (Satamp to Duopus) | ||||||
| CH1-2 (SUS_BS_81) | CH3-4 (SUS_BS_82) | CH5-6 (SUS_BS_83) | ||||
| Channel | CH1 | CH2 | CH3 | CH4 | CH5 | CH6 |
| CH Coil Pins | 23 -> 10 | 18 -> 5 | 23 -> 10 | 18 -> 5 | 23 -> 10 | 18 -> 5 |
| OSEM Mapping | F1 | F2 | F3 | SD | LF | RT |
| Coil Resistance | 39.1 +/- 0.1 Ohm | 40.0 +/- 0.2 Ohm | 39.0 +/- 0.2 Ohm | 39.7 +/- 0.2 Ohm | 40.0 +/- 1.5 Ohm | 40.5 +/- 0.5 Ohm |
| Notes | Larger than normal variation | |||||
Picture of the setup: (in this instance) the QOSEM CH 3-4 (i.e. F3 and SD) SUS_BS_82 cable is disconnected at the QOSEM satamp in SUS-R2, and its "to chamber" end is connected to a standard D25 breakout board. Clip leads are connected across the pins as described above to gather the coil resistance. These results are as expected: the QOSEMs are up-cycle bodies and coils from BOSEMs, which are known to have resistance of ~40 [Ohm], in this case 40 +/- 2.5%. Note, this is markedly different than the 35 +/- 10% [Ohm] -- 31.5 to 38.5 [Ohm] -- assumed in LHO:90743. Maybe Tom is assuming that this is the coil resistance if measured directly at the coil flexi-circuit terminals, and the "extra" resistance is from the long cable run to the chamber which is what we typically measure. However, the 2.5% spread in coil resistance values between F1, F2, and F3, is NOT enough of an imbalance to explain the worrisome P to Y cross-coupling seen at DC (LHO:90728 and LHO:90739) and in the M1 to M1 transfer functions (LHO:90765).
Indeed, the ~35ohm nominal coil resistance I quoted in LHO:90743 is measured at the QOSEM uDB9, so not including cable or feedthrough resistance.
After assembly I measured the coil reistance of these LHO BBSS QOSEMs to be:
| QOSEM SN | LHO BBSS Channel | Coil Resistance at uDB9 |
| S2600012 | F1 / CH1 |
34.6 |
| S2600009 | F2 / CH2 |
35.6 |
| S2600013 | F3 / CH3 |
35.1 |
| S2600008 | LF / CH5 |
35.7 |
| S2600011 | RT / CH6 |
36.4 |
| S2600010 | SD / CH4 |
35.6 |
Pictures of as-built balance mass of ITMs taken today to compare with drawings in anticipation of rebalancing both ITMs with the added baffle weight
ITMY:
table: pic1, pic2, pic3
corner 1 side wall: pic4
corner 2 side wall: pic5
corner 3 side wall: pic6 and pic7
ITMX:
table: pic8, pic9, pic10
corner 1 side wall: pic11
corner 2 side wall: pic12, pic13
corner 3 side wall: pic14, pic15
The as built configuration (redline) was uploaded to the dcc:
FOM notes: