This morning I turned off the dust monitor at location 8 in the LVEA. It was along the H1 input arm between HAM2 and HAM3. It was not in a clean room. I gave it to Betsy and she swapped it for the suspicious one at end X.
If the beam entering HAM1 has the parameters that Paul calculated it should have, we could optimize the refl telescope by moving RM1 1.6 inches closer to HAM5, and M5 1 inch closer to the PSL. This would give us gouy phase seperations close to 90 for both the tip tilts and the WFS. If we do this, and the beam entering HAM1 is in reality the value we measured yesterday, the gouy phase separations will still be above 70 degrees.
Here are the separation caluclated in both cases:
Paul's beam X | Pauls beam Y | Measured X | Measured Y | |
WFS | -89 | 89 | 74 | 76 |
TT | -89 | -88 | 84 | 77 |
I've attached the a la mode script I used.
Even if we move both RM1 and M5 both 1 cm too far, all the gouy phases (for both the measured and calculated beams) stay above 60 degrees. (same is true if we move them both 1 cm less than we should). So the tolerances on these positions are fairly loose.
HugoP, JimW
Temporary testing report for BSC3 is posted to the DCC, E1100848. Few loose ends to wrap up, but submitted in time for review for SEI telecon tomorrow.
From Patrick:
CP2 being filled
9:40 Richard heading to end Y to help S & K electric with work on electrical circuit for fluorescent lights
9:40 Praxair delivery truck leaving
14:00 Kiwamu: PSL transition from commissioning to science (Paul want to make precise measurements) - delayed, so PSL is in commissioning mode.
EX:
Betsy and crew.
Chris doing electronics.
Disgnosis of odd dust monitor reading from yesterday, but not sure there's an alog yet.
OSB:
Roofers here working.
HAM1 work delayed - purge air is currently off - JohnW working on getting fixed
H1ASC went into alarm on overlow, which was real due to intentional misalignment of the IMC.
Attached are plots of dust counts requested from 4 PM September 27 to 4 PM October 2.
The purge air compressor(Kobelco) is down for the LVEA. This means there is no purge air available. Kyle and John have been informed, we have done some trouble shooting to no avail.
The service tech has been consulted and provided some diagnostic suggestions which I will follow up on tomorrow. If the problem is a failed RTD then we may be able to temporarily bypass it until we can get replacement parts.
john
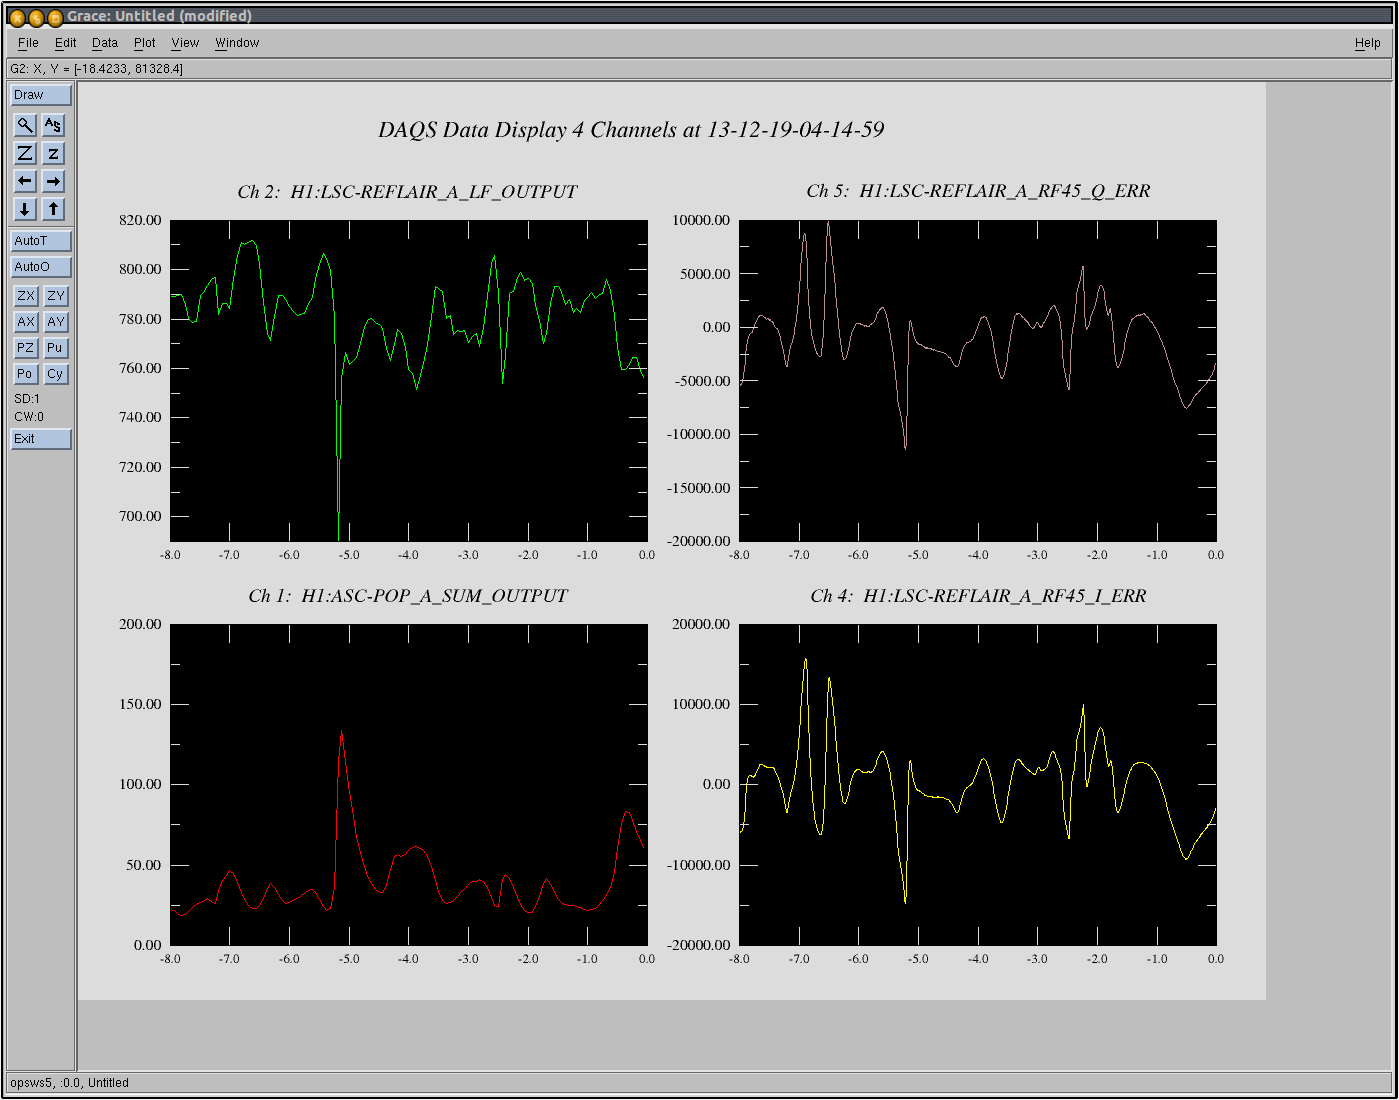
Couple weeks ago before some holiday time I ran some Cartesian DC shifts to confirm my Inductive Position Sensor (IPS) to cartesian input matrix(IPS2CART) numbers. I have Dial Indicators still mounted on HAM6 so it seemed like a good opportunity to really close the loop on the calibrations. Attached are four data viewer trend plots showing the IPS raw count readings and the calculated cartesian moves based on the IPS2CART numbers. The four plots show the vertical drive to Z result, the horizontal to X & Y results, the horizontal to Rz result, and the vertical to Rx & Ry results. The calibration chain is the counts are converted to nm with FM1 in the IPSINF filter bank. The nanometers then go through the IPS2CART matrix to apply the sensor/cartesian angles and moment arms where required to get nm cartesian or nrads for the rotations. The Dial Indicators mounts are very close to the ends of the support tubes and are oriented in the cartesian basis. This compares to the IPS sensors which are mounted out at the piers. The verticals sensors are oriented in Z but the horizontals sensors/actuators are aligned on the tangential rather than X or Y. To me this says the DIs are good for X Y Z Rx & Ry but not so great for Rz. Also, as the the DIS are at the Support Tubes rather than out at the ends of the crossbeam, they are a pretty good indicator of what is actually happening to the platform. The numbers read from the IPS converted to nm and then to cartesian suggest the filter calibration and the IPS2CART numbers do as expected, no surprise there. However, the DIs suggest the platform as seen at the ends of the Support Tubes do not move as much as the IPS readings/calibration theory would suggest: I'll tabulate these as a measured motions (DIs)/calculated motion ratio: Z: 0.83 X: 0.60 Y: 0.35 Rz:0.56 Rx:0.96 Ry:0.70 So why do I observe this? The horizontal numbers, X Y & Rz, are dependent on the theory that the platform is stiff and the actuator sensor/tripod is soft. However, there may be some resistance in the sensor mounts and compliance in the beams that make the theory a bit more complicated in practice. Z: the actuators push and the beam (Crossbeam) bends in response to the Expansion Bellows resistance? X/Y: given the orientation of the Horizontal actuators I would have guessed that the Y response would have been larger than the X response but maybe it is more dependent on which way the bellows are being distorted or maybe it is HAM6 dependent where the bellows are DC positioned and pushes easier one direction than the other. Finally it could be mostly dependent on the orientation of the Crossbeams. At HAM6 in X, the crossbeam has no option to bend whereas in Y it has a lot of freedom to bend. This would be opposite for HAMs 1 2 & 3 (to X & Y.) To calculate Rx & Ry I must apply the rotational moment to the DI mount point and maybe that is sloppy but otherwise I would have believed Rx & Ry are similar given they are just vertical push & pulls. So if any future operators or commissioners wish for these DC positional calibrations to be better, these measurements should be run again, repeated with negative displacements, and also performed on an input HAM to compare.
While investigating the smoke/fire damage to the dry storage cabinet used to store the finished SI fibers I also noticed an excessive amount of soot on most of the fibers caused by overheating the fibers at the end of the pulling process. The amount of soot would likely have render the fibers unusable due the the soot coating the fibers. During the pulling process it is necessary to shut the laser down within 1 second of completing the pulling cycle or a concentrated heat load occurs that emits a white soot that covers the end of the fiber which also rains down the fiber and under cuts the fiber. We use a vacuum system to pull the fumes away during this process that also showed excessive amount of soot in the clear vacuum hose. We need to be more aware of this during the next run. I will reiterate this on the next run and possible automate a laser kill switched. Image 2799 shows the soot from both sources, white from over heated fiber and black from dry cabinet smoke. Image 2806 fiber coated with white soot and ring where the fiber was under cut. Image 2810 ring groove Image 2811 assembly with clamp block, fibers and angle stiffeners. Image 2820 is the dry storage cabinet showing the soot from the fried power supply in the desiccant regenerating box. Cause is under investigation, possible power surge(?)
I have sought comments on the white "soot" on the fibre ends. I quote Angus Bell's response. "I see nothing here that would require any change in procedure. The fibre ends showing the white soot also show the clear line between "soot" and "no soot" as the polish "up" stage removes the soot that accumulates on any part of the fibre that will be used. These white bits are scribed off. The polish stage lasts about 20 mins whereas the pull is 20 seconds and the time when the laser is on after the pull is only a couple of seconds. So any vapour production at each stage will be proportional to that time. The tube that goes to the vacuum will slowly fill with soot - that's what it does." With regard to the time between switching the laser off, Alastair Heptonstall informs me "I would say that the laser is shut down time after the pull is less than one second. There's an audible click when the solenoid brakes are applied to the motors, and I use that as the cue to turn off the laser." In conclusion these fibres would have been usable. It is very unfortunate that we had a problem with the cabinet. This is under investigation.
So the ACB crew can work on a fixed structure, the HEPI was locked with the vertical & outer radial set screws.
Stefan, Alexa, Rich HAM1: 1. All in-air and in-vacuum cabling associated with the ASC detectors, LSC detectors, and Pico motors have been run. The in-air cables still require termination in TNC at the rack. 2. All in-vacuum cabling has been run for the tip-tilts, and the cables have been mated to the tip-tilt stages. 3. Cables for the beam diverter are attached at the flange, but not run to the diverters yet as one connector set was missing the helicoil inserts. 4. Operational check was performed on all 4 pico motors, and all axes are correct HAM6: 1. All in-vacuum RF detector coaxial cabling is attached at the flange, but not yet run to the racks. What's Next: 1. Fix cables requiring helicoils 2. Hook up and test beam diverters 3. Mount all in-vacuum detectors and verify proper operation 4. Clean up in-vacuum cable routing and ensure all is well constrained 5. Terminate all in-air RF cables at their respective racks 6. Install tip/tilt coil driver in the ISC R4 rack and test operation in HAM1 through installed air and vacuum cabling
Update on status:
- Helicoils fixed (Rich).
- Beam diverters hooked up and tested. The beam diverters work, but there is a flip between REFL/POP somewhere in the chain between Beckhoff and the actual BDIVs. The easy option is just to flip the cables attached to the BDIVs; the harder route is to track where the flip happens and fix it (Alexa, Joe, Sheila).
- HAM 1 RF in-air cables have been terminated with TNC. The LSC RF cables have been connected to the proper patch panels; however, ASC RF cable are not. HAM 6 RF in-air cables remain to be terminated (Alexa, Rich).
- In the process of checking RF cable connections; about 1/3 of the cables are not properly connected (Rich, Alexa).
(Alexa, Rich, Stefan, Kiwamu)
We found a swapped wire inside HAM 1; now the beam diverters are properly connected (following the wiring diagrams) and working.
We started later than we hoped and then were informed that Jason was supposed to measure the angle (or position or whatever) of ETMX cage by attaching the corner cube to the cage before we do any balancing. If it turns out to be off, we will need to move the ISI, therefore we didn't want to free up ETM and TMS yet.
Unfortunately Jason couldn't do his stuff as the ACB is blocking the view.
In the mean time we did everything we can at this point, we assembled the main TMS restraint structure and put it in chamber on the floor. We still need some in-situ assembly and adjustment to be done in chamber due to the nature of the restraint design, and we cannot do that before the temporary restraint is removed.
Once Jason is done, we'll need about 3 hours for removing the temporary restraint, freeing up TMS, completing the rest of the assembly and adjustment in situ.
J. Kissel, A. Pele, C. Wipf, S. Dwyer In hopes to further progress towards a speedy recovery from a power failure, we have done the following: (1) Captured and committed the following safe.snap files: ${userapps}/release/sus/h1/burtfiles/h1susmc1_safe.snap ${userapps}/release/sus/h1/burtfiles/h1susmc2_safe.snap ${userapps}/release/sus/h1/burtfiles/h1susmc3_safe.snap ${userapps}/release/sus/h1/burtfiles/h1susim_safe.snap ${userapps}/release/asc/h1/burtfiles/h1ascimc_safe.snap ${userapps}/release/lsc/h1/burtfiles/h1lsc_safe.snap (2) ensured that all relevant safe.snaps in the target directory are soft links to the userapps repo /opt/rtcds/lho/h1/target/h1susmc1/h1susmc1epics/burt/safe.snap -> /opt/rtcds/userapps/release/sus/h1/burtfiles/h1susmc1_safe.snap /opt/rtcds/lho/h1/target/h1susmc2/h1susmc2epics/burt/safe.snap -> /opt/rtcds/userapps/release/sus/h1/burtfiles/h1susmc2_safe.snap /opt/rtcds/lho/h1/target/h1susmc3/h1susmc3epics/burt/safe.snap -> /opt/rtcds/userapps/release/sus/h1/burtfiles/h1susmc3_safe.snap /opt/rtcds/lho/h1/target/h1susim/h1susimepics/burt/safe.snap -> /opt/rtcds/userapps/release/sus/h1/burtfiles/h1susim_safe.snap /opt/rtcds/lho/h1/target/h1ascimc/h1ascimcepics/burt/safe.snap -> /opt/rtcds/userapps/release/asc/h1/burtfiles/h1ascimc_safe.snap ## This one wasn't a soft link before now /opt/rtcds/lho/h1/target/h1lsc/h1lscepics/burt/safe.snap -> /opt/rtcds/userapps/release/lsc/h1/burtfiles/h1lsc_safe.snap (3) edited MClockwatch code to ensure that the ASC outputs on all stages of each IMC optic (H1:SUS-MC[1,2,3]_M[1,2,3]_LOCK_[P,Y]), and the the lowest stage LSC output on MC2 (H1:SUS-MC2_M3_LOCK_L) are turned ON in the "unlocked" portion of /opt/rtcds/userapps/release/ioo/h1/scripts/imc/sballmer/MClockwatch which are now the only LOCK settings that are different between the SAFE state and the READY state. Note, in absence of the transitions between SAFE and READY, the user still has to turn on the MASTERSWITCH (to get to DAMPED) and the OPTICALIGN alignment offsets (to get to ALIGNED) for MC1, MC2, and MC3. Simply starting the MClockwatch script will then transition MC2 to its READY state, and begin to try and lock the mode cleaner. Remember that turning on the ASCIMC control is now triggered by the front end, so as long as its settings are properly restored on startup (which the above three steps should now ensure), the user and MClockwatch script should not have to worry about it.
Captured and commited on the svn MC1 MC2 MC3 and IMs safe snapshot with its most recent alignment offset values.
When restoring those snapshots, the lock filters output switches need to be engaged to lock the cavity.
The process to generate the simulink webview pages for browsing models with web browsers has been repaired to be functional again.
1. The main script became broken when a directory path was changed to a non-existent directory.
2. The simlink directory in which the generated files were to be placed changed ownership such that the controls user could no longer create new files and directories.
The web page to view the models is https://lhocds.ligo-wa.caltech.edu/simulink and new pages have been generated as of 12:00 PDT. New pages are generated 4 times each day at 6 hour intervals.
Low level alarms for mid X instrument air pressure, Kyle R. notified 09:32 Sheila D., Pablo H. and Kiwamu I. entering HAM1 to measure the beam profile of the reflected light from the PRM through the Faraday isolator 09:40 Cheryl V. going to the end X TMS lab 09:57 Safety review tour 10:29 Ace portable toilets onsite for maintenance 10:50 Betsy W. found the dust monitor at end X inside the electronics rack. She set the audible alarm limits and moved it into the clean room over ETMX 10:53 Sheila D., Pablo H. and Kiwamu I. done with the measurement in HAM1 11:26 Safety review tour has left the LVEA 12:37 Betsy W. getting parts from the rack by HAM2 12:43 Large dust spike reported by dust monitor at end X, nobody appeared to be in the VEA (see below) 13:01 Cheryl V. heading back from end X 13:29 Filiberto C. and Aaron S. working on cabling in middle high bay at end Y 13:49 Timing errors for end Y ISC, Aaron S. had powered down the IO chassis 15:47 Dave B. attempting to bring back the SEI, SUS and ISC frontends at end Y 15:53 Thomas V. done working on baffles 15:59 Justin B. transitioned the LVEA to laser safe (WP 4161) Kyle R. replaced the instrument air transducer at end X (WP 4160) Large spike in only > .3 micron particle counts measured in the clean room at end Y from 12:41 - 13:13. (see attached plot) Dust monitor is labeled 'S'. Calibration date: 8/9/13 Calibration due date: 8/9/14. Cause as of yet undetermined.
We placed Mode Master downstream of three-mirror Gouy phase matching telescope comprising two tip-tilts and one fixed mirror that is used for REFL WFS. (See the last picture for layout and distances.)
Note that the measured TT1-TT2 distance is about 1cm shorter than nominal described in Sam Waldman's document (http://dcc.ligo.org/T1000247), TT2-M5 distance is about 14mm longer than nominal, both of which should have been quite acceptable.
Anyway, we made this measurement and the beam was much smaller than what was expected. The first plot as well as the table below show the measured VS the expected mode profile coming out of HAM1 propagated through the telescope with the measured mirror distances.
measured, x | measured, y | expected | |
M^2 | 1.04 | 0.98 | 1-ish |
Waist radius | 1.38 mm | 1.15 mm | 1.92mm |
Waist position (away from MM head into HAM1) | 4.31 m | 4.35 m | 1.78 m |
Mode overlap between measured and expected | 0.872 | 0.753 | 1 |
The total mode overlap between the actual beam and what is expected is somewhere between 0.75 and 0.87 (sort of tedious to do the real calculation so I leave it).
The 2nd plot shows that IF the incoming beam from HAM1 is as expected, in order to explain the measured mode the TT1-TT2 distance labeled as delta1 should be shorter by 4.5cm than was measured for X, or by 5.7cm for Y. This is a huge number, there's no way my distance measurement was that much off.
The 3rd plot shows the Gouy shift between TTs (i.e. actuation orthogonality) and WFSs for the WFS sled (i.e. sensing), and it seems like both are quite poor for the measured mode, 26deg for actuation and 35 for sensing are sad though not a complete disaster.
Anyway, since it's hard to imagine that the ROC of TT1 (+1.7m), TT2 (-0.6m) and M5 (+1.7m) are grossly wrong, and since it's hard to imagine that the distance measurement has a 5 to 6cm error, this should mean either (or some) of the followings:
The third one doesn't sound likely, but neither Sam nor I have thought about this.
One quick thing to do is to measure the beam before it gets to the telescope by inserting M6 upstream of the TT1 to direct the beam to the Mode Master.
Yes, please, measure the beam before the TTs. The original calculations were done by assuming that beam reaching HAM1 was perfectly matched to PRM. I don't think we have reasons to believe that's true.. The "nominal" q of the beam right before the first tip-tilt RM1 is: % REFL in-vacuum path beam propagation, HAM1 drawing v10 % https://dcc.ligo.org/LIGO-D1000313-v10 % LisaBar, August 14, 2013 q_in = 1.03+13.1i; % Beam on HAM1 calculated from CalculatePRM.m % Lisa: we don't have a measurement yet which confirms % this number!
I don't think the table in T1000247 is correct. The beam from PMMT2 goes through the Faraday, hits PMMT1 and is then send to HAM1. This is a) longer than 2.5m and b) adds PMMT1's curvature to it. Did you include this?
Yes, PMMT1 is included, it is just a typo in the note (there are two PMMT2!). Anyway, let's redo the calculations with the as-built parameters, and cross check with the measurements before the REFL telescope.
Kiwamu and Pablo and I measured the mode before the TTs by moving the BS for the RF detector to 16 inches after M2, with the front of the mode master 40 inches from the BS we measured:
x | y | r | |
M^2 | 0.97 | 1.03 | 1.00 |
2Wo (mm) | 3.588 | 3.532 | 3.567 |
Z0 (m) | -2.387 | -3.578 | -3.026 |
The overlap between the mode measured before the Tip tilts and the mode measured after is 93% for X, 87% for Y. I used Lisa's alm mode model attached to D1000313, added Keita's measurements of the distances from RM1 to RM2 and M5, but didn't include the tilt of the optics. From this measurement before the tip tilts (projected through Keita's measurements of distances), the gouy phase separation is a little better than from Keita's measurement, WFS X=65 degrees, WFSY 60 degrees, TT x=56 TT y 50 degrees.
I checked to see how far wrong things in HAM2 would have to be in order to explain the beam waist sizes measured by Sheila before the tip-tilts.
I used the design parameters for IM2 and IM3 Rcs (except where varied), design parameters for HAM2 optics placement as found in E1200616 (except where varied), the measured value of PRM HR Rc of -10.9478m, and the design IMC parameters to get the starting beam parameter. The attached plots show the forward beam waist size (identical to the IMC waist size) and the return from PRM beam waist size, over variations in IM2 and IM3 Rc, and IM2->IM3 and IM4->PRM distance. At the design values (at the x-axis midpoint), the return x-waist size matches the forward waist size.
It looks like things in HAM2 would have to be further off from the design than is probably likely, in order to explain the measured beam waist size before the tip-tilts.
Propagating the IMC transmission beam through the "as-built" IMs, back from the PRM, off the FI rejected beam pick off mirror and onto HAM1 to the location where Sheila measured gives:
axis | parameter | value |
x | w0 | 2.123mm |
y | w0 | 2.101mm |
x | z | -2.469m |
y | z | -2.150m |
x | q | -2.469+13.310i |
y | q | -2.150+13.035i |
x | w | 2.159mm |
y | w | 2.129mm |
x | Rc | -74.21m |
y | Rc | -81.16m |
I did not yet consider the calcite wedge polarizer effect on the beam parameter, and I didn't account for the thickness of the septum viewport.
The overlap of these beam parameters with Sheila's measured parameters are:
x overlap = 0.945
y overlap = 0.934
I'm including the Finesse kat file I used for the calculation, which has a list of all the parameters I used at the top. I also include that list here for convenience:
# H1_IMCtoPRC_matching.kat
# A file for checking the expected beam parameter in direct reflection from the PRM
# as a function of HAM2 optic RCs and placement positions
#
# Mirror curvature parameters taken from the nebula page, except IM2 and IM3 for
# which the design values were taken
#
# Distances taken from E1200616_v7 except where otherwise noted
#
# IMCC Curvature = 27275mm
# MC1->MC2 = 16240.6mm
# MC2->MC3 = 16240.6mm
# MC3->MC1 = 465mmm
# MC3 substrate path length = 84.5mm
# MC3-AR surface to IM1 = 428.2mm
# IM1->IM2 = 1293.8mm
# IM2 Rc = 12800mm
# IM2 AOI = 7deg
# IM2->IM3 = 1170.4mm
# IM3 Rc = -6240mm
# IM3 AOI = 7.1deg
# IM3->IM4 = 1174.5mm
# IM4->PRM-AR surface = 413.5mm
# PRM substrate path length = 73.7mm
# PRM Rc = 10947.8mm (from Rodica's measurement value)
# IM2->FIrejected pick off mirror = 1.012m (From Luke Williams)
# FI rejected pick off mirror->HAM1 mode master location =3.0175m (Estimated from
# Sheila's alog entry, HAM2 drawing, and 27.6" for HAM1 table edge to HAM2 table edge)
#####################################################################################
If anything, my measurement is a bit more suspicious than Sheila's, as mine is downstream of TTs in air and they are moving (mostly in PIT).
axis | parameter | value |
x | w0 | 2.121mm |
y | w0 | 2.101mm |
x | z | -2.583m |
y | z | -2.154m |
x | q | -2.583 + 13.29i |
y | q | -2.154 + 13.04i |
x | w | 2.161mm |
y | w | 2.130mm |
x | Rc | -70.95m |
y | Rc | -81.05 |
Apparently I posted the last comment as Giacomo, sorry about that!
After discussing with Lisa about sign conventions for the beam waist position parameter, I realised that there are errors in some of the parameters I posted above. The mode master gives results as "z0" for waist position relative to the measurement position (z0-z), whereas Finesse gives results as "z" for the measurement position relative to the waist position (z-z0).
I had thought the convention was different, so I flipped my results to match the mode master convention. This was a mistake, because the conventions are the same, they just give different outputs. To get the q-parameter from the mode master results one should use the formula q = -z0 + i*zR. From the Finesse results one should use the formula q = z + i*zR.
This means that the z-values, Rc values and the real part of the q-parameters I posted should all have their signs flipped. Apologies for any confusion I caused here.
Corey G. told me that the dust monitor at location 2 in the end Y VEA had started reading exceptionally high counts at .3 microns, but nothing at .5 microns. I went out to take a look, but didn't find anything obvious to account for it. However, this dust monitor was shoved up against the west side of BSC 10 under the beam tube. I moved it farther southwest out into the VEA. The dust monitor at location 1 was near a table next to the electronics racks and I moved it northwest away from the table. I will post pictures of them before and after the moves once I can get them off my phone.